Rustic bathroom shower design focuses on natural materials, simple structures, and warm textures that create a comfortable and grounded atmosphere. On Pinterest, rustic bathroom inspiration has become increasingly popular because it combines practical functionality with organic visual appeal.
Many homeowners search for creative ideas that transform ordinary bathrooms into relaxing spaces that reflect natural design principles. Rustic showers often use materials such as wood, stone, matte metals, and textured tiles to create an authentic and calming environment.
This article presents ten practical rustic bathroom shower ideas that are suitable for both small renovations and full bathroom remodels. Each idea explains the design concept and provides clear step-by-step guidance for creating the feature using accessible materials and simple planning methods.
Readers will learn how to incorporate rustic textures, how to combine modern design with traditional elements, and how to execute beginner-friendly DIY improvements. These Pinterest ideas emphasize practical setup, aesthetic balance, and budget-friendly planning. The goal is to provide creative project inspiration that helps transform a bathroom shower area into a visually warm and functional space while maintaining clear organization and realistic execution methods.

Why This Idea Is Trending or Useful
Rustic bathroom shower designs are trending on Pinterest because they offer a combination of comfort, simplicity, and visual warmth. Many modern homes use minimalist design, but people increasingly look for ways to introduce natural textures and organic materials into those spaces. Rustic shower designs respond to this demand by combining natural stone surfaces, wood elements, and matte fixtures that soften the appearance of modern bathrooms.
Another reason these Pinterest ideas are popular is their strong DIY appeal. Many rustic shower features can be created using accessible materials such as reclaimed wood panels, river stones, or textured tiles. This makes rustic projects suitable for beginner-friendly home decor improvements that do not require extensive renovation experience. With careful planning and step-by-step tutorials, homeowners can gradually introduce rustic design elements into their bathroom.
Rustic shower ideas are also highly adaptable. They work well in small bathrooms, farmhouse interiors, cabin-style homes, and even modern apartments seeking a warmer aesthetic. The visual simplicity of rustic design makes it easier to mix materials while maintaining a balanced look. As a result, these creative ideas continue to appear frequently in Pinterest inspiration boards focused on home decor, handmade decoration, and budget-friendly DIY renovation projects.
Materials and Preparation
Before starting a rustic bathroom shower project, careful planning helps ensure the design is practical and visually balanced. Rustic showers rely heavily on natural textures, so the first step involves selecting materials that create the desired aesthetic. Common materials include stone tiles, pebble flooring, reclaimed wood panels, matte metal fixtures, ceramic tiles with rough finishes, and natural color palettes. These materials contribute to the authentic rustic appearance while remaining durable in humid environments.

Basic tools often include tile cutters, adhesive mortar, waterproof sealant, level tools, measuring tape, and grout supplies. When using wood elements near moisture, waterproof treatment and sealing products are necessary to prevent long-term damage. Planning should also include the layout of the shower area, water drainage direction, and wall coverage patterns.
Preparation involves measuring the shower walls, determining tile placement, and selecting fixtures that complement rustic design. Matte black, bronze, or brushed metal showerheads often fit well with rustic interiors. It is also useful to prepare the surface by cleaning and leveling the shower walls before installing materials. Careful planning ensures the DIY project remains organized, prevents material waste, and helps maintain consistency throughout the creative project.
MAIN IDEAS SECTION
Idea 1: Natural Stone Walk-In Shower
How to Create
A natural stone walk-in shower is one of the most recognizable rustic bathroom designs. This concept uses stone surfaces to create a strong connection with natural landscapes. The stone texture introduces visual depth while maintaining a neutral color palette that fits both modern design and traditional interiors. Common stone choices include slate, travertine, and textured limestone. These materials provide durability and natural variation that enhances the rustic aesthetic.
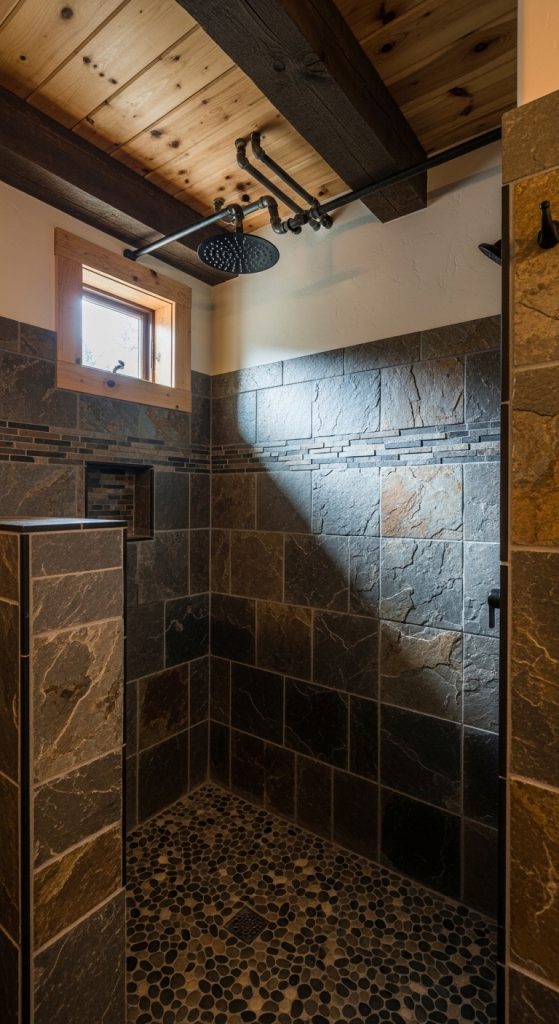
The walk-in design eliminates visual barriers and creates an open shower space. This layout supports minimalist style while allowing natural materials to become the main decorative element. Stone walls can extend from floor to ceiling to produce a continuous surface that emphasizes vertical space. Pairing the stone with matte metal fixtures or simple glass partitions helps maintain balance between rustic and modern design.

Rustic Pinterest inspiration often highlights the calming effect of stone surfaces combined with soft lighting. Earth-tone palettes such as gray, beige, and warm brown contribute to a natural atmosphere. The result is a shower design that feels grounded and comfortable while remaining visually structured.
The practical setup begins by preparing the shower wall with waterproof backing panels. Once the surface is level and sealed, stone tiles can be arranged in a staggered pattern to mimic natural rock formations. Mortar adhesive is applied evenly before placing each stone tile, ensuring strong attachment and consistent spacing.
After installation, grout fills the joints between stones to stabilize the surface and prevent moisture penetration. Applying a protective sealant helps preserve the natural texture while improving water resistance. The shower floor can incorporate pebble tiles or textured stone slabs to maintain visual continuity.
For fixtures, choose a simple wall-mounted showerhead with a matte finish. Avoid overly decorative elements to maintain the natural aesthetic. Proper lighting above the shower area highlights the stone textures and enhances the rustic decoration. This step-by-step process creates a durable and visually balanced rustic shower suitable for a wide range of bathroom sizes.

Idea 2: Reclaimed Wood Accent Shower Wall
How to Create
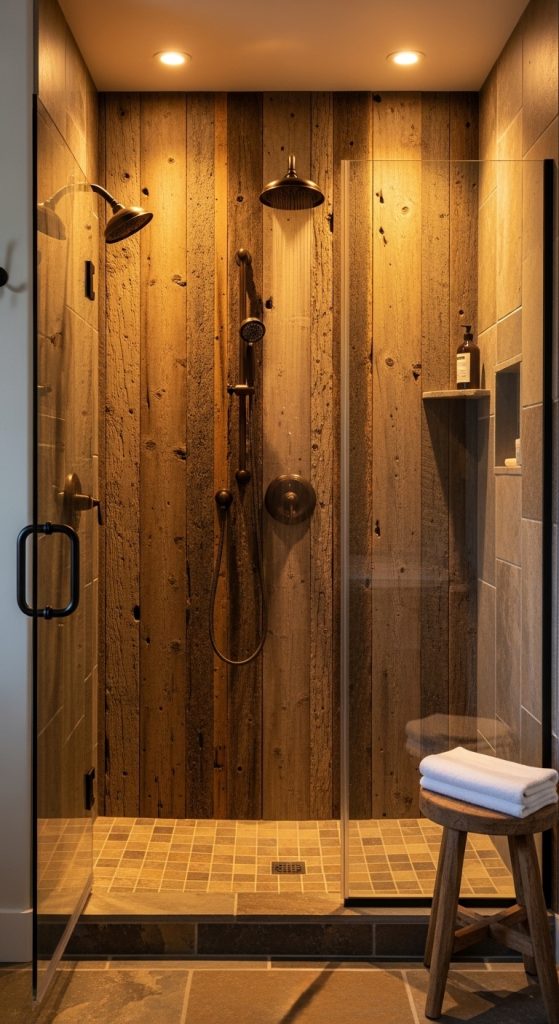
A reclaimed wood accent wall introduces warmth and natural character into a rustic bathroom shower. Wood elements soften the appearance of tile surfaces and create a visually inviting atmosphere. Reclaimed wood is particularly suitable for rustic design because it often contains natural grain patterns, subtle imperfections, and weathered textures. These details enhance the authenticity of the design and contribute to the handmade aesthetic frequently seen in Pinterest ideas.
The accent wall usually covers one side of the shower enclosure while the remaining walls use neutral tiles or stone finishes. This combination prevents the design from appearing overly heavy while still highlighting the wood feature. Rustic interiors often rely on contrast between smooth and textured materials, making wood an effective complement to ceramic tiles.
Color tones such as aged oak, cedar, and walnut create warm visual balance. The wood panels can be arranged horizontally to visually widen the shower space or vertically to emphasize height. Maintaining natural wood tones supports the rustic theme without requiring additional decoration.
To create the accent wall, begin by selecting reclaimed wood planks that are properly dried and structurally stable. Each plank must be sanded lightly to remove rough edges while preserving its natural grain pattern. Before installation, apply waterproof sealant or marine-grade wood treatment to protect the material from moisture exposure.

The wall surface should first be covered with waterproof backing boards. Wood planks can then be attached using construction adhesive combined with hidden fasteners. Maintaining even spacing between planks creates a structured and organized appearance.
After installation, apply an additional protective sealant to reinforce water resistance. To complete the shower setup, combine the wood wall with neutral stone or ceramic floor tiles. This balanced combination ensures durability while maintaining the rustic aesthetic. The result is a beginner-friendly DIY project that introduces warm natural textures into the bathroom.
Idea 3: River Pebble Shower Floor
How to Create
River pebble shower floors are a popular rustic bathroom feature that introduces natural textures directly beneath the shower area. Pebbles provide a tactile surface and create a strong visual connection to outdoor environments. This design is frequently featured in Pinterest inspiration because it offers both aesthetic appeal and practical slip resistance.
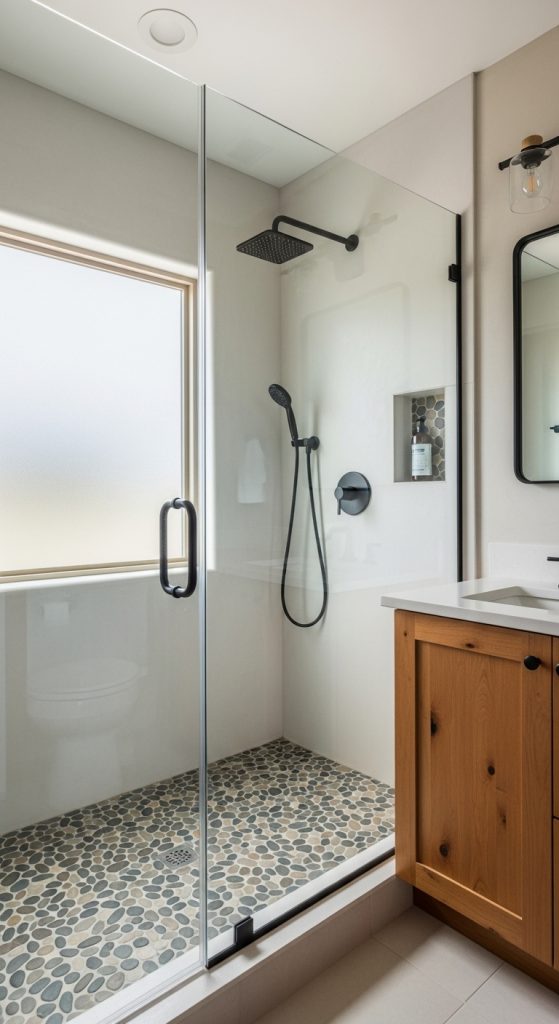
Pebble tiles are typically mounted on mesh sheets, which simplifies installation and helps maintain consistent spacing. The natural variation of pebble shapes creates an organic pattern that complements stone walls or wooden accents. Neutral color palettes such as gray, beige, and soft brown help maintain a calm and minimalist style.

Pebble flooring works especially well in walk-in showers where the floor remains visible. The natural appearance contributes to the rustic atmosphere while maintaining functionality. Many DIY enthusiasts appreciate this idea because it requires relatively simple materials and produces a visually distinctive result.
The installation process begins by preparing the shower floor with a waterproof base and proper drainage slope. Once the surface is ready, adhesive mortar is applied evenly across the area. Pebble mesh sheets are then placed carefully onto the mortar while ensuring alignment between sheets.
After the adhesive sets, grout fills the spaces between pebbles to secure them in place. Choosing a grout color close to the pebble tones creates a seamless appearance. A waterproof sealant is then applied to protect the stones and simplify cleaning.
The final result is a durable and visually engaging rustic shower floor. This step-by-step method allows beginners to achieve a natural design that enhances the overall aesthetic of the bathroom while maintaining safe footing.

Idea 4: Rustic Barn Door Shower Entrance
How to Create
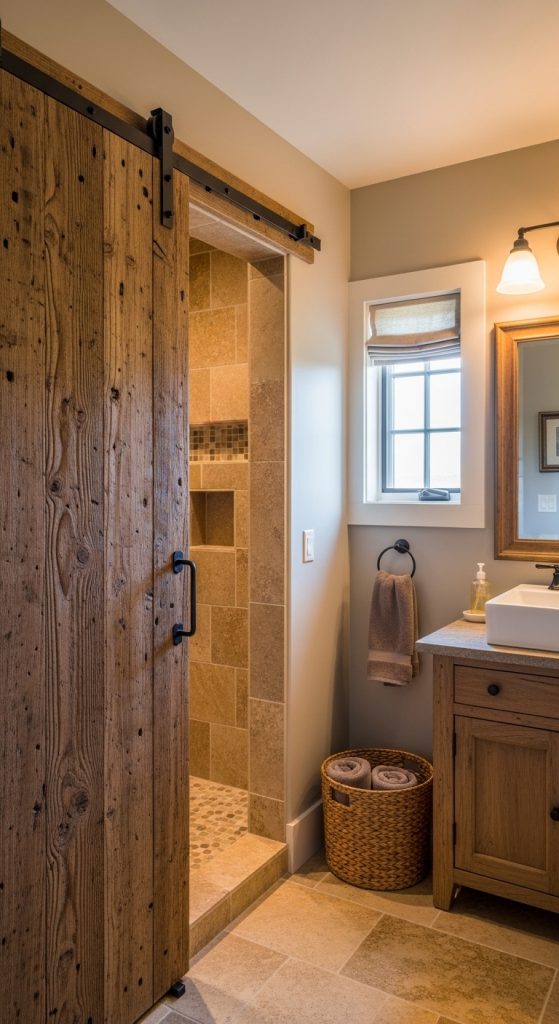
A rustic barn door shower entrance introduces farmhouse character into a bathroom while maintaining practical space management. Barn doors slide along a horizontal rail system, eliminating the need for traditional swinging doors. This design is especially useful in smaller bathrooms where efficient organization is important.
The barn door style often uses wood panels combined with matte metal hardware. The natural wood grain contributes to the rustic aesthetic, while the sliding rail system adds an industrial design element. This combination reflects a modern interpretation of traditional farmhouse interiors.
Barn doors can also incorporate frosted glass panels to maintain privacy while allowing light to pass through. This design detail keeps the shower area visually open and prevents the bathroom from feeling enclosed. Rustic Pinterest inspiration often highlights barn doors as both functional and decorative features.
To create this feature, start by measuring the shower entrance width and selecting a wooden panel that slightly overlaps the opening. The wood should be sealed with waterproof treatment before installation.

Next, install a sturdy metal rail system above the shower entrance using wall anchors designed to support the door weight. The door panel attaches to rolling brackets that glide along the rail. A floor guide ensures the door remains stable during movement.
After installation, confirm that the door slides smoothly and seals the shower opening effectively. This step-by-step setup produces a distinctive rustic design element that also improves bathroom organization.
Idea 5: Exposed Copper Shower Fixtures
How to Create
Exposed copper fixtures bring a warm metallic accent to rustic bathroom showers. Copper surfaces naturally develop a patina over time, which enhances the aged appearance associated with rustic interiors. This material introduces visual warmth while remaining highly durable in humid environments.
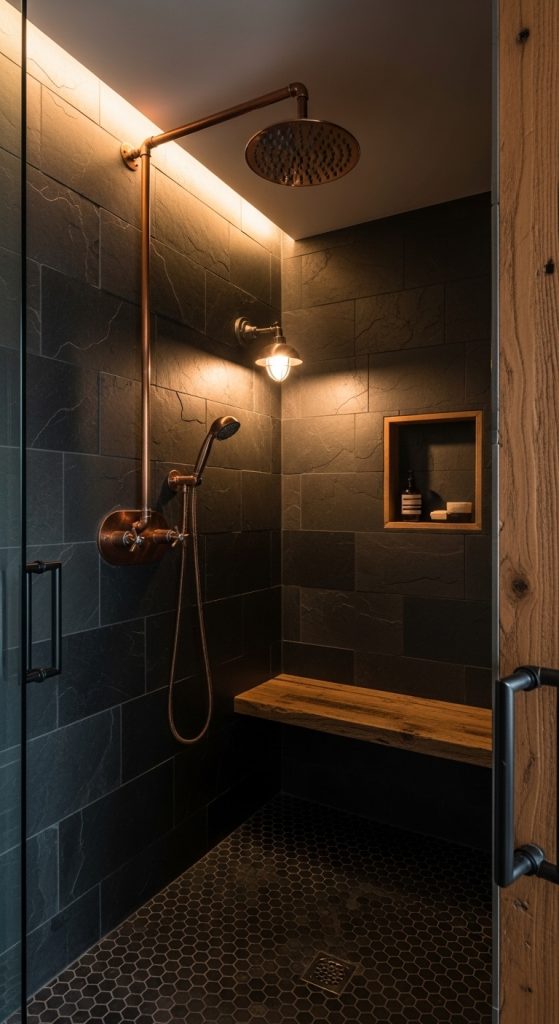
Copper pipes and showerheads can be left partially visible to emphasize the handmade aesthetic. The contrast between natural metal tones and stone or tile surfaces creates visual interest. This design concept aligns with minimalist style while still maintaining decorative appeal.
Rustic Pinterest ideas often highlight copper fixtures because they add character without requiring complex installation. Their warm tone pairs well with neutral materials such as wood, stone, and ceramic tile.
To implement this idea, begin by selecting copper pipes and fittings designed for plumbing use. Ensure all components are compatible with the existing water system.
Install the copper pipes along the shower wall using secure mounting brackets. The showerhead and valve controls connect directly to the pipe system. Applying a protective sealant slows oxidation while preserving the natural metal color.
The exposed fixture design creates a practical and visually distinctive rustic feature. With proper installation, copper elements become both functional and decorative within the shower area.

Idea 6: Rustic Wood Beam Shower Ceiling
How to Create
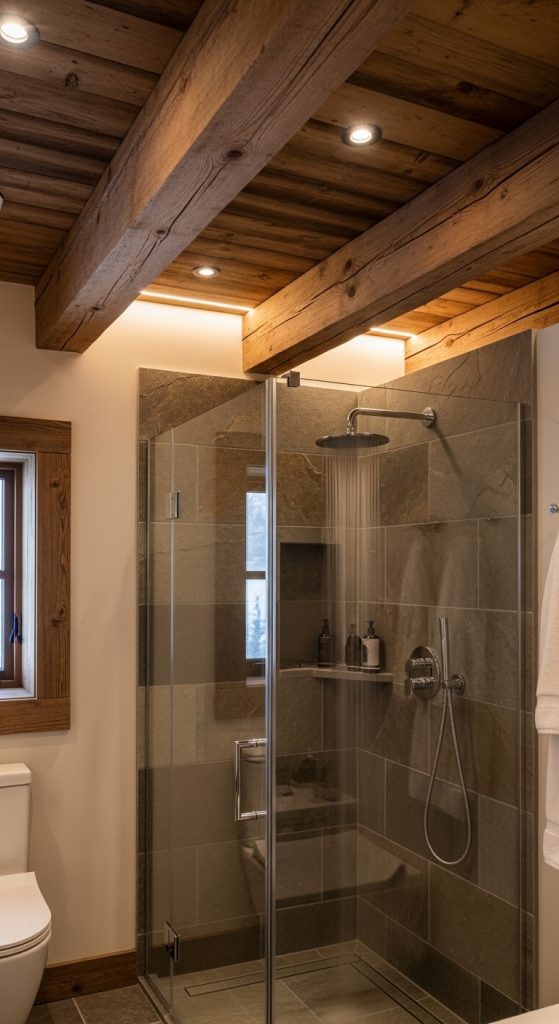
Wood ceiling beams introduce architectural depth to a rustic bathroom shower. This design element draws attention upward and creates a cabin-inspired atmosphere. Exposed beams are commonly used in rustic interiors because they emphasize natural materials and structural simplicity.
Beams can be constructed from reclaimed wood or lightweight decorative panels that replicate traditional timber. The natural grain patterns contribute to a warm aesthetic that complements stone and tile surfaces within the shower space.
Pinterest inspiration frequently showcases beam ceilings combined with soft lighting to create a relaxing environment. The design works well in bathrooms with higher ceilings where vertical space can be emphasized.
The installation process begins by measuring the ceiling width and planning beam spacing. Lightweight beams are typically attached to ceiling joists using concealed brackets.

Before installation, the wood must be sealed with moisture-resistant treatment. After securing the beams, recessed lighting can be added between them to highlight the wood texture.
This setup method provides a distinctive rustic design feature while maintaining structural safety and durability in humid conditions.
Idea 7: Rustic Brick Shower Wall
How to Create
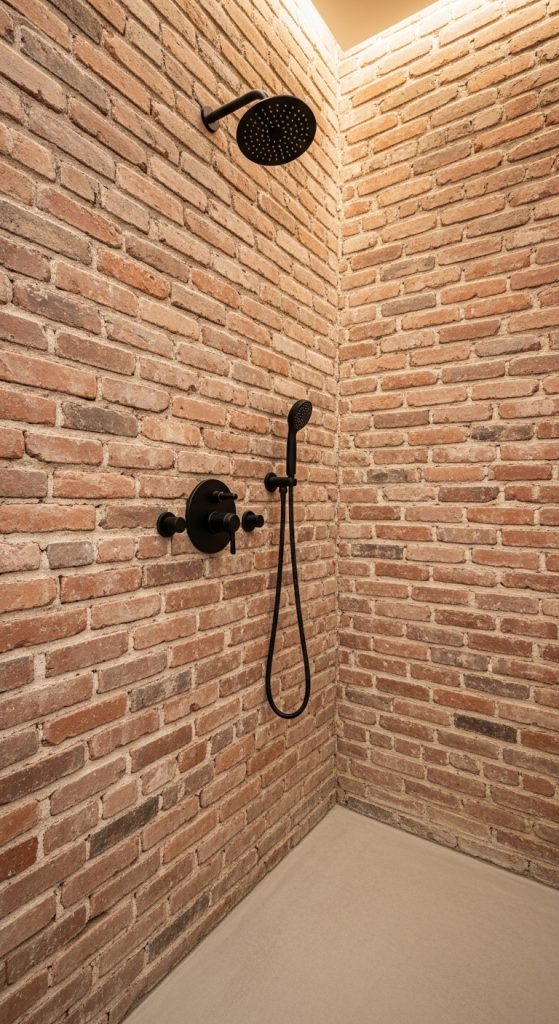
A brick shower wall introduces a textured surface that reflects traditional building materials. Brick patterns add visual depth and create a warm rustic aesthetic that pairs well with wood and metal accents. The earthy color tones of brick contribute to a balanced and natural bathroom design.
Rustic Pinterest ideas often feature brick walls because they provide strong visual character without excessive decoration. The rough surface contrasts effectively with smooth ceramic floors and glass partitions.

To create a brick shower wall, begin by installing moisture-resistant backing boards. Brick veneer panels or thin brick tiles can then be attached using tile adhesive.
After installation, grout fills the gaps between bricks, and a waterproof sealant protects the surface from moisture damage. This step-by-step process allows homeowners to replicate the appearance of traditional brick construction within a bathroom environment.
Idea 8: Rustic Ladder Towel Storage in Shower Area
How to Create
A wooden ladder used for towel storage introduces both organization and decoration into a rustic bathroom shower space. Ladder storage is frequently featured in Pinterest home decor boards because it combines practical use with aesthetic simplicity.
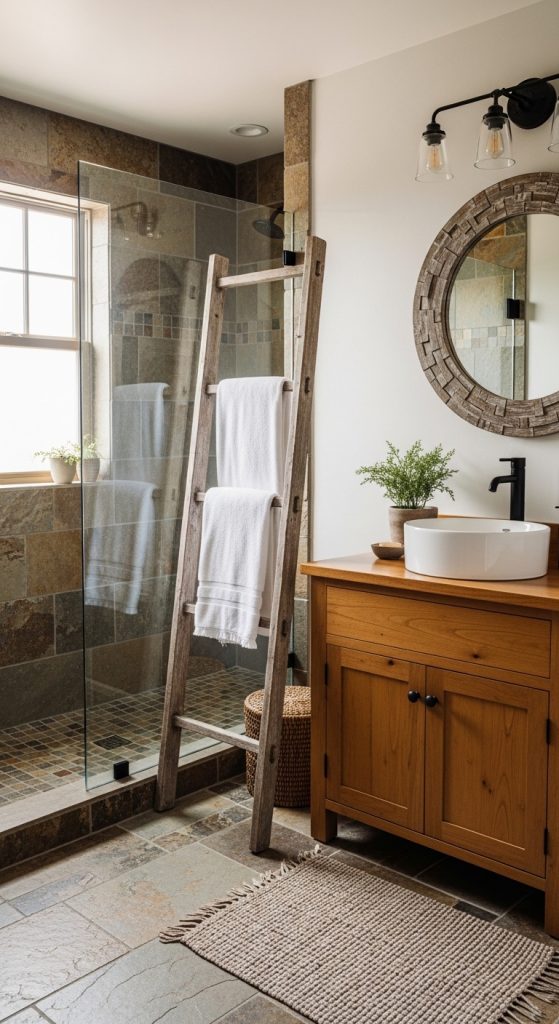
The ladder structure allows towels to dry efficiently while maintaining easy accessibility near the shower. Natural wood finishes complement rustic bathroom materials such as stone, tile, and metal fixtures.

To create this feature, select a wooden ladder with stable construction. Sand the surface lightly and apply waterproof sealant to protect the wood from humidity.
Position the ladder against the wall near the shower entrance, ensuring it remains stable. Towels can then be folded or draped across the rungs. This simple DIY project adds organization while reinforcing the rustic design theme.
Idea 9: Rustic Stone Niche Shower Shelves
How to Create
Stone niches provide practical storage within rustic shower walls while maintaining a cohesive design. These recessed shelves allow storage of soap, bottles, and shower tools without adding external racks or holders.
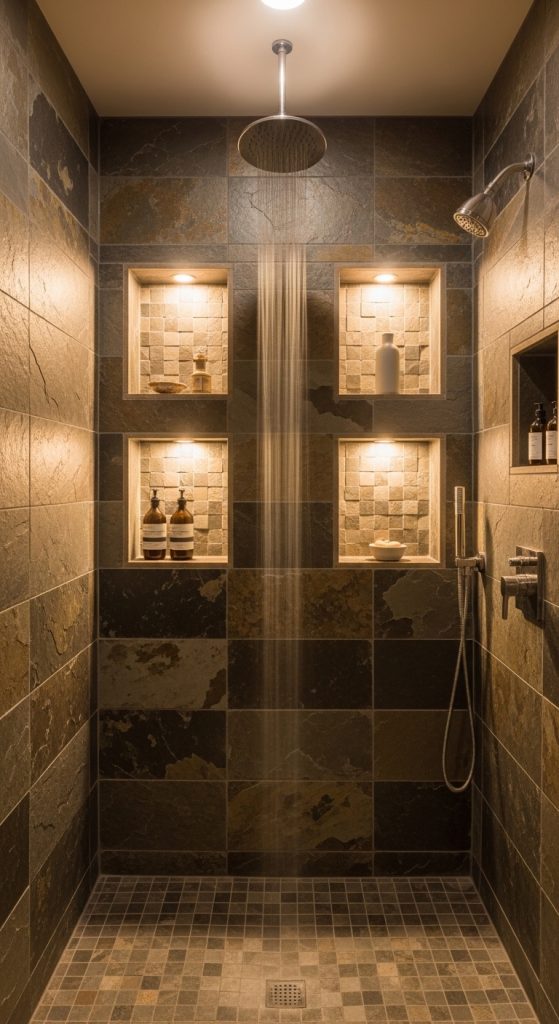
Stone niches blend seamlessly with stone or tile walls, creating a natural extension of the shower structure. Pinterest inspiration often highlights niches because they improve organization while preserving minimalist style.

To build a niche, first cut a rectangular opening in the shower wall framing. Install waterproof backing boards and slope the base slightly for drainage.
Stone tiles are then installed along the niche interior to match the surrounding wall. Grout and waterproof sealant complete the installation. The finished niche provides durable storage while enhancing the rustic aesthetic.
Idea 10: Rustic Lantern Shower Lighting
How to Create
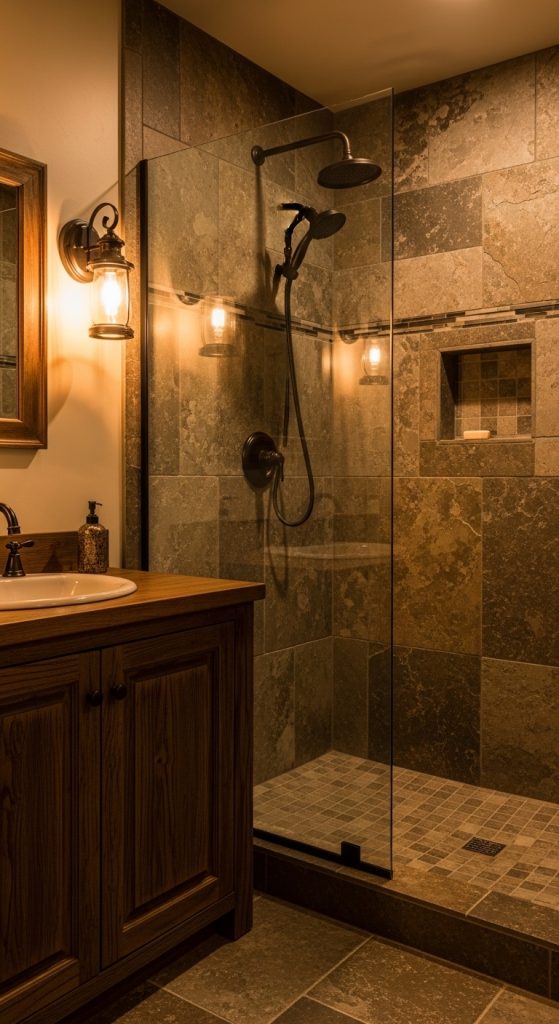
Lantern lighting introduces soft illumination that complements rustic bathroom design. Lantern fixtures often use metal frames and frosted glass panels, which diffuse light evenly across the shower area. This design creates a calm atmosphere while highlighting natural materials.
Rustic Pinterest ideas frequently include lantern lighting because it adds decorative character without overwhelming the space. The warm glow enhances stone textures and wood surfaces.

To install lantern lighting, choose fixtures designed for damp environments. Mount the fixture above the shower entrance or on an adjacent wall.
Connect the fixture to existing wiring while following electrical safety guidelines. Once installed, the lantern provides balanced lighting that enhances the rustic atmosphere.
Common Beginner Mistakes and How to Avoid Them
One common mistake in rustic shower design is mixing too many materials without maintaining visual balance. Combining stone, wood, brick, and metal in one small space can create a cluttered appearance. A more effective approach involves selecting two or three primary materials and repeating them throughout the design. Another frequent error involves insufficient waterproofing. Rustic materials such as wood and natural stone require proper sealing to prevent moisture damage. Applying waterproof treatments before installation ensures long-term durability. Incorrect tile alignment is another issue that affects the final aesthetic. Careful measurement and layout planning prevent uneven spacing and misaligned surfaces.
Practical Tips for Better Results
Accurate measurements and careful surface preparation improve the overall quality of a rustic shower project. Before installing tiles or panels, ensure the wall surfaces are level and clean. Using spacers during tile installation helps maintain consistent spacing and improves visual organization. Lighting also plays a critical role in rustic bathroom design. Soft, warm lighting enhances natural materials and creates a relaxing atmosphere. Additionally, maintaining a neutral color palette allows rustic textures to remain the focal point of the design.

Styling, Presentation, or Organization Ideas
Styling a rustic shower space involves maintaining simplicity while emphasizing natural textures. Woven baskets, wooden trays, and stone soap dishes complement rustic materials without introducing unnecessary decoration. Neutral towels and linen fabrics maintain visual consistency. Open shelving or ladder storage helps organize bathroom items while reinforcing the handmade aesthetic often associated with Pinterest home decor inspiration.
Budget or Time Planning
Budget planning helps ensure the project remains manageable. Natural stone and reclaimed materials can vary in cost, so comparing material options before purchasing is important. Many rustic features can be completed gradually, allowing homeowners to upgrade their bathroom step by step. Allocating time for preparation, installation, and sealing ensures the project remains organized and prevents rushed construction.
Creative Expansion and Advanced Inspiration
Rustic shower projects can be expanded through additional creative ideas such as combining stone floors with wood ceilings or integrating built-in seating. Advanced designs may include rainfall showerheads, textured mosaic tiles, or glass partitions that highlight rustic wall materials. These variations allow homeowners to adapt rustic Pinterest inspiration into more personalized bathroom designs while maintaining the same natural aesthetic principles.