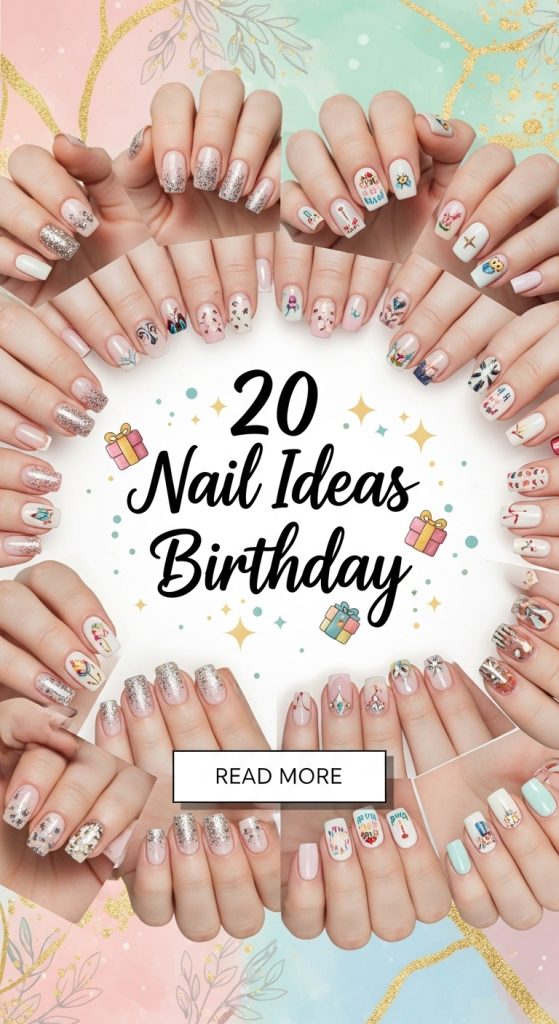
20 nail ideas birthday
Birthday nail ideas are all about celebration, self-expression, and feeling extra special. Unlike everyday manicures, birthday nails give you full permission to go bold, glamorous, playful, or luxurious—whatever best reflects your personality and the mood of your celebration. Whether you’re planning a big birthday party, a dinner date, a vacation, or a cozy self-care day, your nails become a statement accessory that completes your entire look.
Pinterest users love birthday nail inspiration because birthdays are highly visual moments. Outfits, makeup, hair, and nails are all part of creating a cohesive aesthetic, and nails often serve as the finishing touch. Birthday nails are photographed, shared, and remembered long after the celebration ends. That’s why designs that feel unique, intentional, and photo-ready perform so well on Pinterest boards.
One of the best things about birthday nail ideas is their versatility. There are no strict rules. You can choose soft and elegant designs like nude glitter nails, or go all out with rhinestones, chrome finishes, bold colors, and artistic nail art. Birthday nails can be customized to match your age milestone, outfit color, party theme, or even your zodiac vibe. This freedom makes birthday nails exciting and deeply personal.
Another reason birthday nail ideas are so popular is that they allow experimentation. Many people try styles for their birthday that they wouldn’t normally wear day to day—longer lengths, brighter colors, extra sparkle, or intricate designs. Since birthdays are special occasions, the manicure feels justified as a form of self-celebration and confidence boosting.
This article explores 20 birthday nail ideas, designed to inspire glamorous, trendy, and Pinterest-worthy manicures. Each idea is explained in detail with clear steps and material lists, making it easy to recreate at home or communicate clearly with a nail technician. Whether you prefer subtle elegance or full glam, these birthday nail ideas will help you choose a manicure that feels unforgettable.
Below is Part 1, featuring the first 10 birthday nail ideas explained in depth. After all 20 ideas are completed, I will pause and wait. When you later say “Give me 20 image prompts”, I will generate ultra-detailed Pinterest-optimized image prompts for this same title.
Idea 1: Glitter Birthday Nails
Introduction
Glitter birthday nails are a timeless choice for celebrations. This idea focuses on sparkle and shine that instantly elevates your manicure and makes it party-ready. Glitter nails catch the light beautifully, making them perfect for birthday photos, dancing, and special moments.
Explanation

Glitter can be used subtly or boldly depending on your preference. Full glitter nails feel glamorous, while glitter accents keep the look balanced and elegant.
Step-by-Step How-To
- Shape and file nails evenly
- Apply a strengthening base coat
- Apply a base color of your choice
- Layer glitter polish or glitter gel evenly
- Cure or dry thoroughly
- Seal with a glossy top coat
Materials Used
- Nail file
- Base coat
- Glitter nail polish or glitter gel
- Top coat
- Cuticle oil
Idea 2: Birthday French Tip Nails

Introduction
Birthday French tip nails put a celebratory twist on a classic design. Instead of traditional white tips, this idea uses sparkle, color, or metallic accents to create a festive look.
Explanation
This design maintains elegance while adding personality. It’s perfect for those who want birthday glam without going over the top.
Step-by-Step How-To
- Apply nude or sheer base color
- Paint tips using glitter, chrome, or bright polish
- Clean edges for precision
- Allow polish to dry
- Finish with glossy top coat
Materials Used
- Nude base polish
- Glitter or colored polish
- Thin nail brush
- Top coat
- Nail tape (optional)
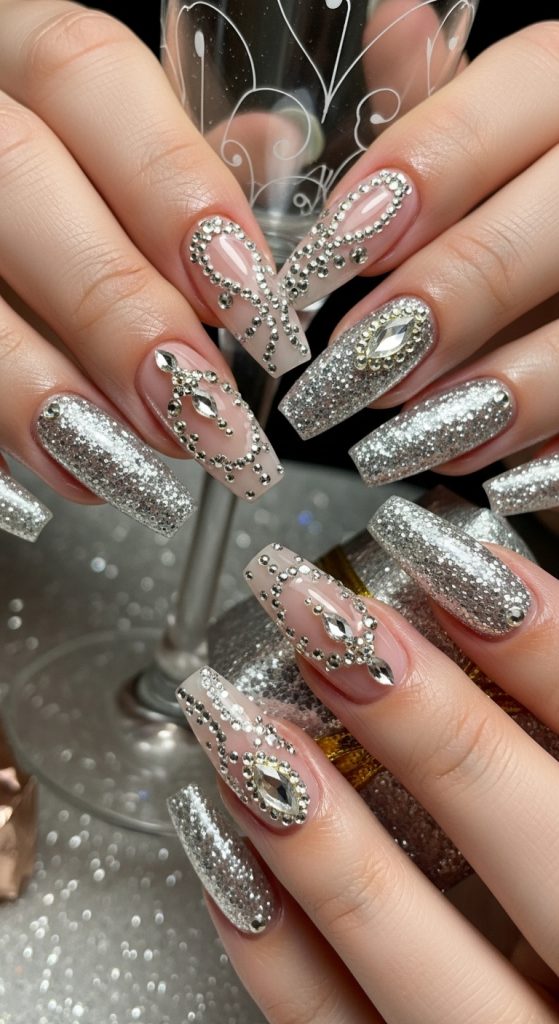
Idea 3: Rhinestone Birthday Nails
Introduction

Rhinestone birthday nails are bold, glamorous, and eye-catching. This idea is perfect if you want your nails to stand out and feel luxurious.
Explanation
Rhinestones add texture and sparkle. When placed strategically, they elevate the manicure without making it feel heavy.
Step-by-Step How-To
- Apply base color and let dry
- Use nail glue to place rhinestones
- Press gently to secure
- Allow glue to set
- Seal carefully with top coat
Materials Used
- Nail polish
- Rhinestones
- Nail glue
- Tweezers
- Top coat
Idea 4: Chrome Birthday Nails

Introduction
Chrome birthday nails deliver a futuristic, high-shine effect that feels ultra-glam. This design is perfect for milestone birthdays or night celebrations.
Explanation
Chrome finishes reflect light beautifully and create a statement look that photographs exceptionally well.
Step-by-Step How-To
- Apply gel base color
- Cure under UV lamp
- Rub chrome powder onto nails
- Seal with top coat
- Cure again if needed
Materials Used
- Gel polish
- Chrome powder
- UV lamp
- Top coat
- Applicator sponge
Idea 5: Pink Birthday Nails

Introduction
Pink birthday nails are feminine, playful, and celebratory. This idea works well for all ages and styles, from soft baby pink to hot pink glam.
Explanation
Pink symbolizes joy and confidence, making it a popular birthday choice. It can be styled simply or dressed up with accents.
Step-by-Step How-To
- Prep and shape nails
- Apply base coat
- Apply two coats of pink polish
- Add optional accents
- Seal with top coat
Materials Used
- Pink nail polish
- Base coat
- Top coat
- Nail file
- Cuticle oil
Idea 6: Nude Birthday Nails with Sparkle
Introduction
Nude birthday nails with sparkle offer elegance with a hint of celebration. This idea is ideal for those who want classy yet festive nails.
Explanation

The nude base keeps the look sophisticated, while sparkle adds a birthday-ready touch.
Step-by-Step How-To
- Apply nude base color
- Add glitter to accent nails or tips
- Blend softly
- Let dry
- Seal with glossy top coat
Materials Used
- Nude polish
- Glitter polish
- Base coat
- Top coat
- Nail art brush
Idea 7: Birthday Acrylic Nails
Introduction
Birthday acrylic nails allow you to go bold with length, shape, and design. This idea is perfect if you want dramatic, show-stopping nails.
Explanation

Acrylics provide a strong base for creative designs like glitter, rhinestones, and nail art.
Step-by-Step How-To
- Prep natural nails
- Apply acrylic extensions
- Shape and file nails
- Apply color or design
- Seal with top coat
Materials Used
- Acrylic powder and liquid
- Nail tips
- Nail file
- Nail polish
- Top coat
Idea 8: Birthday Nail Art with Numbers
Introduction

Birthday nails with numbers highlight your age or milestone. This idea makes the manicure personal and memorable.
Explanation
Adding numbers creates a fun, customized look that’s perfect for photos and celebrations.
Step-by-Step How-To
- Apply base color
- Use nail art brush to paint numbers
- Keep design clean and centered
- Allow to dry
- Seal with top coat
Materials Used
- Nail polish
- Nail art brush
- Base coat
- Top coat
- Nail cleanser
Idea 9: Bold Color Birthday Nails
Introduction
Bold color birthday nails are confident and vibrant. This idea uses bright or deep shades to create a striking manicure.
Explanation

Bold colors reflect celebration and energy, making them perfect for birthdays.
Step-by-Step How-To
- Choose bold nail color
- Apply base coat
- Apply two coats of color
- Let dry fully
- Seal with top coat
Materials Used
- Bold color nail polish
- Base coat
- Top coat
- Nail file
- Cuticle oil
Idea 10: Coffin Birthday Nails
Introduction
Coffin birthday nails are trendy, bold, and stylish. This shape adds drama and elegance to any birthday manicure.
Explanation
The coffin shape elongates the fingers and provides space for creative designs.
Step-by-Step How-To
- Shape nails into coffin style
- Apply base coat
- Apply chosen color or design
- Let dry fully
- Finish with top coat
Materials Used
- Nail file
- Base coat
- Nail polish
- Top coat
- Cuticle oil
Idea 11: Birthday Nails with Confetti Design
Introduction
Confetti birthday nails perfectly capture the playful and joyful spirit of a birthday celebration. This design uses tiny dots, shapes, or speckles in various colors to resemble confetti scattered across the nails. It’s fun, youthful, and instantly celebratory, making it ideal for anyone who wants their nails to reflect pure birthday energy.
Explanation
Confetti designs can be colorful or subtle depending on the base color and accent shades you choose. A neutral base with multicolored dots feels festive but wearable, while bright bases with bold confetti create a party-ready look.

Step-by-Step How-To
- Apply a neutral or pastel base color
- Use a dotting tool to add small dots in different colors
- Randomize placement for a natural confetti look
- Allow dots to dry fully
- Seal with a glossy top coat
Materials Used
- Base color nail polish
- Assorted colored polishes
- Dotting tool
- Top coat
- Nail cleanser
Idea 12: Birthday Nails with Heart Accents
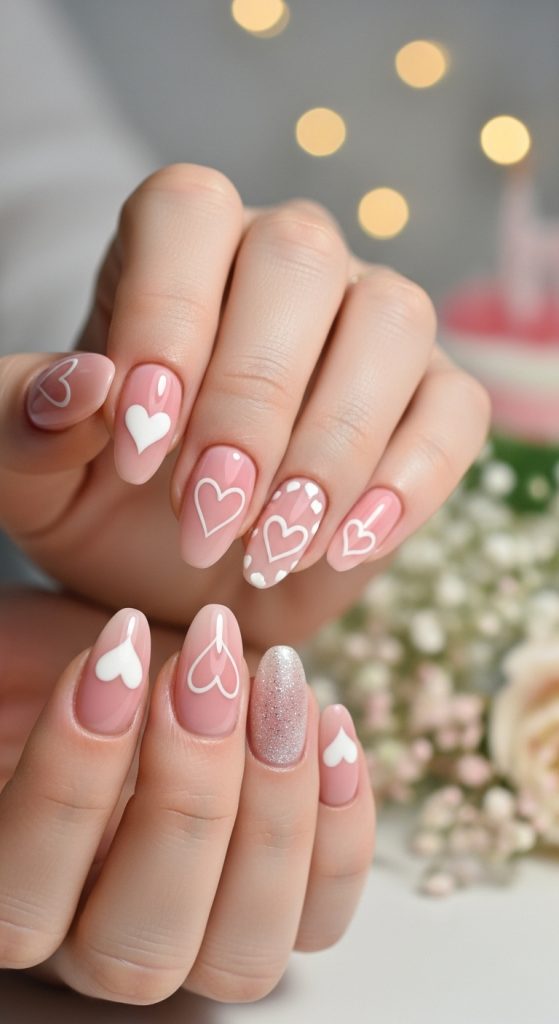
Introduction
Heart-accent birthday nails add a romantic and cute touch to your celebration manicure. This idea works beautifully for anyone who wants something sweet, stylish, and photo-ready.
Explanation
Hearts can be drawn, stamped, or added as decals. Keeping them minimal—such as on one or two accent nails—maintains balance and elegance.
Step-by-Step How-To
- Apply base color and let dry
- Draw or place heart shapes on accent nails
- Keep heart size consistent
- Allow design to set
- Finish with glossy top coat
Materials Used
- Nail polish
- Nail art brush or decals
- Base coat
- Top coat
- Tweezers
Idea 13: Luxury Gold Birthday Nails

Introduction
Luxury gold birthday nails feel rich, glamorous, and high-end. This idea is perfect for milestone birthdays or evening celebrations where elegance is key.
Explanation
Gold elements such as foil, chrome, or metallic polish instantly elevate the manicure and pair well with neutral or deep base colors.
Step-by-Step How-To
- Apply neutral or dark base color
- Add gold foil or metallic polish accents
- Press gently to secure
- Let dry fully
- Seal with top coat
Materials Used
- Base color polish
- Gold foil or metallic polish
- Tweezers
- Base coat
- Top coat
Idea 14: Birthday Nails with Glitter Ombre
Introduction

Glitter ombre birthday nails blend sparkle with softness for a stunning gradient effect. This design feels glamorous without overwhelming the nails.
Explanation
The ombre technique creates a smooth transition from solid color to glitter, making it elegant and eye-catching.
Step-by-Step How-To
- Apply base color
- Dab glitter polish at tips using sponge
- Blend gently downward
- Repeat until desired intensity
- Seal with top coat
Materials Used
- Base color polish
- Glitter polish
- Makeup sponge
- Base coat
- Top coat
Idea 15: Birthday Nails with Butterfly Art
Introduction
Butterfly birthday nails symbolize transformation and celebration. This design is soft, feminine, and perfect for spring or summer birthdays.
Explanation
Butterflies can be hand-painted or applied as decals. Keeping them delicate ensures the look remains elegant.
Step-by-Step How-To

- Apply pastel or nude base color
- Place butterfly decals or paint design
- Secure edges carefully
- Allow to dry
- Finish with glossy top coat
Materials Used
- Base polish
- Butterfly decals or nail art brush
- Tweezers
- Top coat
- Nail cleanser
Idea 16: Birthday Nails with Star Details
Introduction

Star-themed birthday nails feel whimsical and magical. This idea is great for nighttime celebrations or party-themed birthdays.
Explanation
Stars add sparkle and personality while keeping the design playful and unique.
Step-by-Step How-To
- Apply base color
- Add star decals or hand-painted stars
- Keep placement balanced
- Let design dry
- Seal with top coat
Materials Used
- Nail polish
- Star decals
- Nail art brush
- Top coat
- Tweezers
Idea 17: Birthday Nails with Pastel Colors
Introduction

Pastel birthday nails are soft, trendy, and youthful. This idea works beautifully for daytime parties or casual celebrations.
Explanation
Pastel shades feel light and cheerful while still looking stylish and intentional.
Step-by-Step How-To
- Choose 2–3 pastel shades
- Apply different color to each nail or alternate
- Keep application smooth
- Let dry fully
- Finish with top coat
Materials Used
- Pastel nail polishes
- Base coat
- Top coat
- Nail file
- Cuticle oil
Idea 18: Birthday Nails with 3D Elements

Introduction
3D birthday nails are bold and eye-catching. This idea is perfect if you want your manicure to stand out and feel extra special.
Explanation
3D charms, pearls, or gems add texture and dimension, making the nails feel luxurious.
Step-by-Step How-To
- Apply base color and let dry
- Attach 3D elements with nail glue
- Press gently to secure
- Allow to set
- Seal carefully around elements
Materials Used
- Nail polish
- 3D nail charms
- Nail glue
- Tweezers
- Top coat
Idea 19: Birthday Nails with Color Block Design
Introduction
Color block birthday nails are modern, bold, and artistic. This design uses clean sections of contrasting colors for a stylish finish.
Explanation
Color blocking allows creativity while keeping the design structured and photo-ready.
Step-by-Step How-To

- Apply base coat
- Use nail tape to section nails
- Apply different colors in sections
- Remove tape carefully
- Seal with top coat
Materials Used
- Multiple nail polish colors
- Nail tape
- Base coat
- Top coat
- Nail brush
Idea 20: Birthday Nails with Personal Theme
Introduction
Personal-themed birthday nails are the ultimate way to customize your manicure. This idea reflects your personality, interests, or party theme.
Explanation
Whether it’s zodiac signs, initials, favorite colors, or symbols, personalized nails make your birthday manicure unforgettable.
Step-by-Step How-To
- Choose a personal theme
- Apply base color
- Add themed designs or decals
- Refine details carefully
- Seal with top coat

Materials Used
- Nail polish
- Nail art tools or decals
- Base coat
- Top coat
- Nail cleanser