
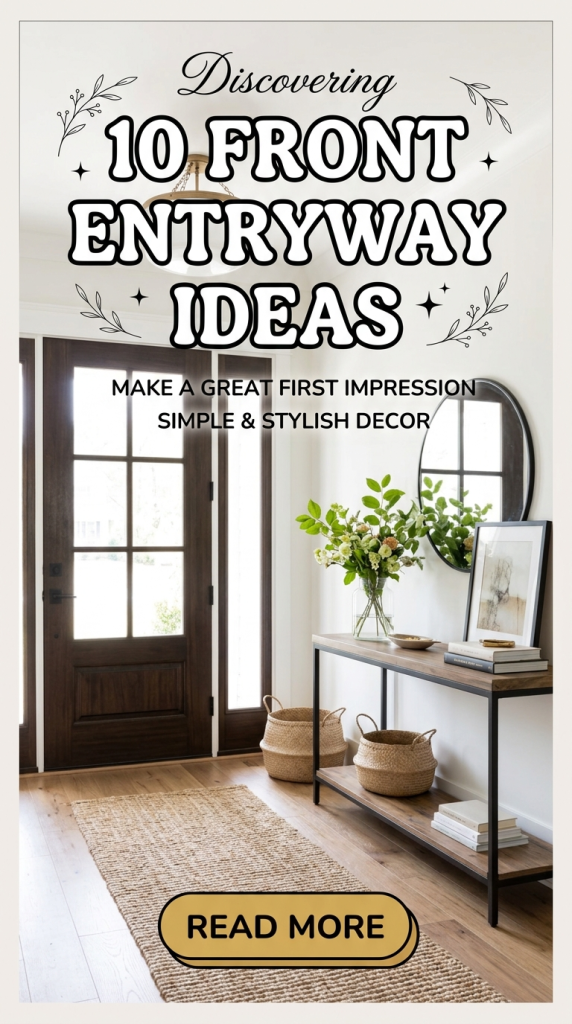
A front entryway serves as the transition between the outside environment and the interior of a home. This area introduces visitors to the overall design style while also supporting daily routines such as removing shoes, storing coats, and organizing personal items. Because of its dual role in design and functionality, entryways frequently appear in Pinterest ideas focused on home decor and interior organization. A thoughtfully arranged front entryway improves visual presentation while also creating a practical system for everyday use.
This article explores ten front entryway ideas that combine aesthetic design with efficient organization. Readers will learn how to create structured entry spaces using accessible materials, clear planning strategies, and beginner friendly approaches. Each idea includes practical explanations and step by step guidance so the concepts can be applied in real homes. These creative ideas focus on achievable DIY solutions that enhance storage, improve spatial flow, and strengthen the overall visual identity of the entrance.
Entryway projects are popular because they require relatively small adjustments while producing noticeable design improvements. By applying the ideas presented in this guide, readers can transform a simple doorway area into a welcoming, organized space that reflects modern design principles and functional home decor planning.
Why This Idea Is Trending or Useful
Front entryway design has become a popular topic in Pinterest inspiration because homeowners increasingly focus on improving functional spaces within their homes. Entryways are frequently used areas that experience daily activity. Shoes, bags, coats, and keys are often stored here, making organization an important part of maintaining order. Pinterest users frequently search for creative ideas that help manage these everyday items while also improving the appearance of the entrance.

Another reason these ideas are trending is the growing interest in practical DIY home decor projects. Entryway upgrades often require minimal materials and simple tools. Many improvements can be completed in a short amount of time, making them accessible for beginners who want to try an easy project without undertaking a full renovation.
Design relevance also contributes to the popularity of entryway inspiration. The entrance of a home establishes the visual tone for the interior. Organized storage furniture, decorative lighting, mirrors, and wall accents help create a cohesive design impression. Modern design trends often emphasize minimalist style and clear spatial organization, both of which are easily applied to entryway spaces.
Because entryway upgrades combine functionality with decoration, they remain a consistent feature in Pinterest boards that focus on practical home improvement ideas.
Materials and Preparation
Before beginning a front entryway improvement project, preparation helps ensure the space functions efficiently while maintaining a clean design appearance. The first step involves evaluating the size and layout of the entryway area. Some homes feature large foyers with room for furniture, while others have narrow doorways that require compact storage solutions. Measuring the available space helps determine which ideas will fit comfortably without restricting movement.

Basic materials used in many entryway DIY projects include wall hooks, storage baskets, small benches, mirrors, shelving units, and decorative wall panels. Tools commonly required include a drill, screwdriver, level, measuring tape, and wall anchors. Preparing these tools in advance allows installation to proceed smoothly.
Planning the organization of the entryway is equally important. Consider the types of items frequently used when entering or leaving the home. Coats, shoes, umbrellas, and keys often require accessible storage areas. Designing the entryway with these items in mind helps create a structured system that prevents clutter.
Lighting and wall decor should also be considered during the planning stage. Proper lighting improves visibility while decorative elements reinforce the overall aesthetic of the space. With thoughtful preparation, entryway projects can be completed efficiently while maintaining both functionality and visual appeal.
MAIN IDEAS
Idea 1: Console Table Entryway Setup
How to Create
A console table provides a central organizational feature for a front entryway. This furniture piece typically has a narrow profile that allows it to fit comfortably against a wall without obstructing the pathway. On Pinterest, console tables frequently appear in entryway inspiration because they combine storage functionality with decorative presentation. The flat surface of the table can hold everyday items such as keys, mail, or small decorative objects, while the space beneath the table may accommodate baskets or shoe storage.


From a design perspective, the console table also helps define the entryway as a structured zone within the home. By placing the table directly opposite the front door or along a side wall, the entry area gains a clear focal point. Decorative elements placed on the table, such as mirrors, small plants, or framed artwork, help establish visual balance.
Console tables also support organization by providing a dedicated drop zone for commonly used items. This reduces the likelihood of clutter spreading into other parts of the home. Because console tables are available in many shapes and materials, they adapt well to modern design, minimalist style, and other popular interior themes often featured in Pinterest ideas.
Step-by-Step Guide
Begin by selecting a console table that fits the width of the entryway wall without restricting movement. Measure the wall space to ensure the table leaves enough walking clearance around the doorway. Gather necessary materials such as wall anchors if the table will be secured for stability.
Position the console table against the wall and use a level to ensure it sits evenly. If the table includes shelves or drawers, assemble these components according to the design structure. Place storage baskets or containers beneath the table to organize shoes, scarves, or other frequently used items.

Next, arrange decorative elements on the tabletop. A mirror positioned above the table can reflect light and increase the sense of space in the entryway. Small decorative objects such as bowls or trays provide organized storage for keys and personal items.
Ensure the layout remains balanced and uncluttered. Leave open surface areas to maintain a clean appearance. This arrangement transforms the entryway into a functional and visually organized space while supporting daily routines.
Idea 2: Wall Hook Organization Station

How to Create
Wall hooks create a simple yet effective organization system for entryways. These fixtures allow coats, bags, and hats to be stored vertically along the wall, conserving floor space while keeping frequently used items accessible. On Pinterest, wall hook arrangements appear often in beginner friendly DIY tutorials because installation requires minimal materials and planning.
Vertical storage plays an important role in maintaining order in small entryways. By placing hooks at a comfortable height near the entrance door, residents can easily hang items immediately after entering the home. This prevents clutter from accumulating on furniture or the floor.

Wall hooks also contribute to the visual structure of the entryway. When installed in evenly spaced rows or aligned with a wall panel, they create a structured design element that complements minimalist style interiors. Wooden or metal hooks often appear in modern design inspiration because their simple forms support clean aesthetic presentation.
Because hooks can be installed in many configurations, they adapt well to different household needs. Some homes require only a few hooks for coats, while larger families may install multiple rows to accommodate more storage.
Setup Method
Start by determining the appropriate height for the wall hooks. A common placement height ranges between five and six feet from the floor. Use a measuring tape and pencil to mark the desired positions for each hook along the wall.
Gather installation tools including a drill, screws, wall anchors, and a level. If the wall is made of drywall, wall anchors help ensure the hooks remain securely attached when supporting heavier items such as bags or coats.

Drill pilot holes at the marked positions and insert wall anchors if necessary. Align each hook with the pilot hole and tighten the screws until the hook sits firmly against the wall surface.
Once installation is complete, test each hook to ensure it supports weight without movement. Arrange coats, bags, and hats so they hang evenly without overcrowding the space.
This simple installation creates a practical entryway organization system while maintaining a clean and accessible design.
Idea 3: Entryway Storage Bench
How to Create
An entryway storage bench combines seating with concealed storage, making it a functional addition to front entrances. The bench allows individuals to sit comfortably while putting on or removing shoes, while the interior storage area keeps footwear or seasonal accessories organized. On Pinterest, storage benches frequently appear in entryway inspiration because they provide practical functionality within compact spaces.

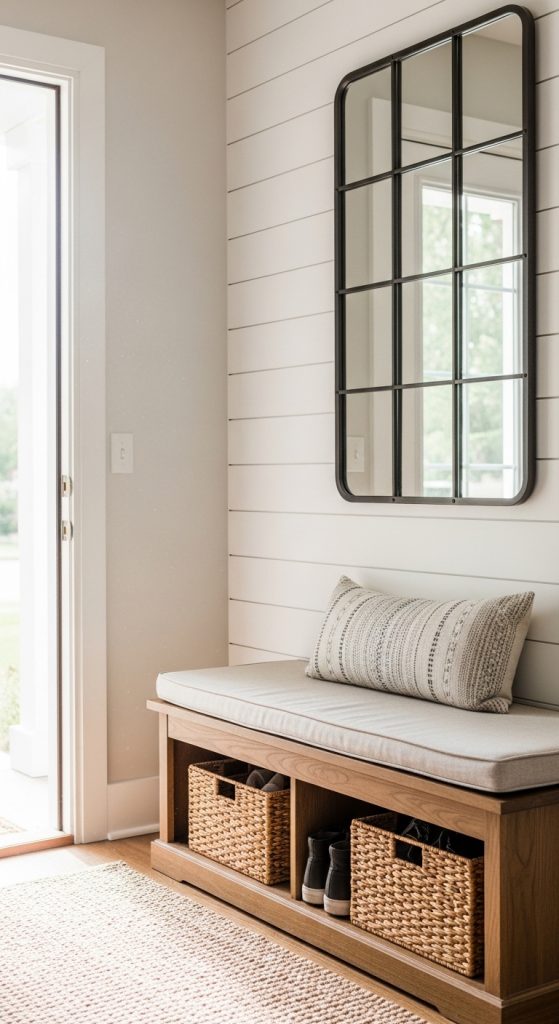
The design of a storage bench typically includes a lift-up seat or open shelving beneath the seating surface. This structure allows items to remain hidden from view while still being easily accessible. Maintaining hidden storage contributes to a tidy appearance, which aligns with modern design principles emphasizing organization and simplicity.
Storage benches also help define the entryway as a dedicated transition space. When positioned near the door, the bench encourages an organized routine for managing shoes and outdoor items before entering the main living area. Decorative cushions or simple textiles may be added to the seating surface to enhance comfort while maintaining the aesthetic of the space.
Because benches are available in many sizes, they adapt well to both large foyers and small apartment entryways. This flexibility makes them a practical solution often highlighted among Pinterest creative ideas for home decor.
Execution Process
Begin by measuring the entryway wall where the bench will be placed. Choose a bench width that allows sufficient walking space between the furniture and the doorway. Gather necessary materials if assembling a DIY bench, including wood panels, screws, hinges, and a drill.

Assemble the bench frame by securing the side panels and base structure together using screws. Attach the seat panel using hinges if the design includes lift-up storage. Ensure all connections are stable before placing the bench in the entryway.
Position the bench against the wall and confirm it remains level on the floor surface. Add storage baskets inside the bench compartment or beneath open shelves to organize shoes and accessories.
Place a cushion or textile cover on the seating surface for comfort. The completed bench creates a functional entryway seating area while maintaining organized storage for everyday items.
Idea 4: Entryway Mirror Wall Feature
How to Create

An entryway mirror serves both functional and decorative purposes in a front entrance area. Mirrors are commonly used in Pinterest ideas for entryway design because they reflect light, create a sense of openness, and provide a practical location for checking appearance before leaving the house. When placed strategically, a mirror becomes a central design element that improves both visibility and spatial perception.

The reflective surface helps distribute natural and artificial light throughout the entryway. This effect is particularly useful in smaller entrances or hallways where lighting may be limited. By reflecting surrounding light sources, the mirror makes the space appear brighter and more open.
Mirrors also contribute to the aesthetic structure of the entryway. A large framed mirror positioned above a console table or storage bench creates a balanced visual arrangement. The mirror functions as a vertical focal point that anchors surrounding decor elements such as plants, trays, or decorative bowls.
In modern design and minimalist style interiors, mirrors often feature simple frames or geometric shapes. These clean forms support organized layouts while maintaining a visually appealing entrance. Because of their versatility and practicality, mirror installations remain a frequent feature in Pinterest inspiration for entryway decoration and home organization.
Step-by-Step Guide
Begin by selecting a mirror that suits the scale of the entryway wall. Measure the wall space to ensure the mirror fits comfortably without overwhelming the area. A mirror width slightly smaller than the console table or bench beneath it usually creates a balanced composition.

Gather installation tools including a measuring tape, level, wall anchors, screws, and a drill. Use the measuring tape to determine the ideal placement height. The center of the mirror should typically align with eye level for convenient use.
Mark the mounting points with a pencil and ensure the mirror will hang evenly by using a level. Drill pilot holes at the marked positions and insert wall anchors if necessary. Wall anchors provide additional support, especially for heavier mirrors.
Secure the mounting hardware and carefully hang the mirror onto the wall brackets. Check the alignment again to confirm the mirror remains straight.
Once installed, arrange decorative objects beneath the mirror on a console table or shelf. The mirror will reflect these elements while increasing brightness throughout the entryway.

Idea 5: Shoe Storage Cabinet Entryway
How to Create
Shoe storage cabinets provide an organized solution for managing footwear near the front entrance. Entryways often accumulate shoes from daily use, and without proper storage they can quickly create visual clutter. On Pinterest, shoe storage cabinets frequently appear in home decor inspiration because they maintain order while preserving the aesthetic appearance of the space.
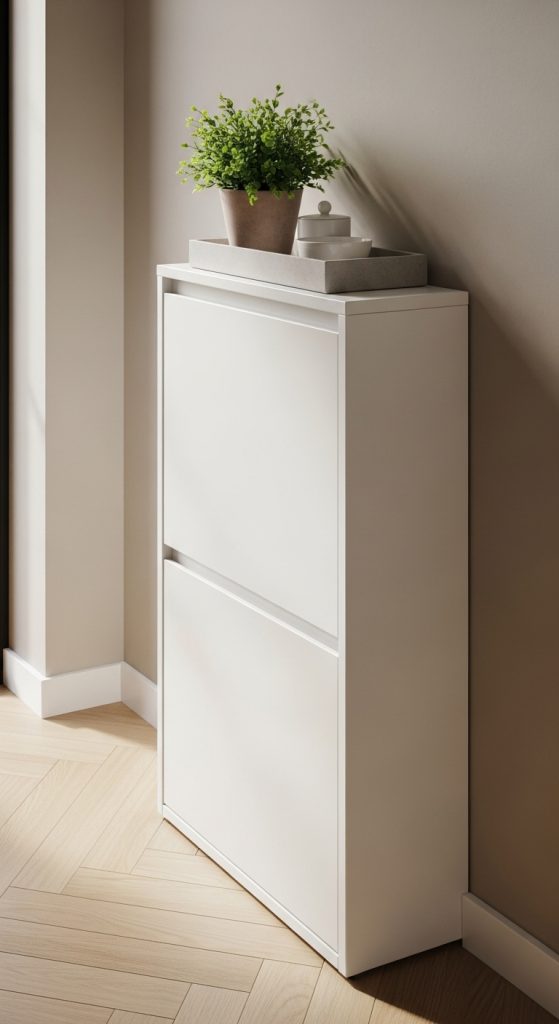
A shoe cabinet typically includes enclosed compartments that store footwear vertically or horizontally behind closed doors. This design hides shoes from view while still keeping them easily accessible. Maintaining concealed storage contributes to a clean and organized entryway environment.
In addition to organization, shoe cabinets also contribute to the visual layout of the entrance. Slim cabinets are especially useful in narrow hallways because they occupy minimal floor space while offering efficient storage. The flat top surface can also serve as a decorative area for small plants, trays, or keys.
Modern design trends often emphasize streamlined furniture with minimal detailing. Shoe cabinets with simple panel doors and neutral finishes align with these principles. Because they combine practicality with decorative potential, shoe cabinets remain a common feature in Pinterest creative ideas for entryway organization.

Setup Method
Start by measuring the available wall space near the front door. Choose a shoe cabinet that fits comfortably within the entryway without blocking movement through the doorway. Slim cabinets are often ideal for smaller spaces.
Place the cabinet against the wall and check that it stands evenly on the floor. If the cabinet is tall or narrow, secure it to the wall using brackets to prevent tipping. Gather tools such as screws, a drill, and a level to ensure proper installation.
Organize shoes within the cabinet compartments according to frequency of use. Everyday footwear should be stored in the most accessible section, while seasonal items can be placed in lower or rear compartments.
Use the top surface of the cabinet as a small organization zone. Decorative trays or containers can hold keys, mail, or small accessories. This arrangement ensures the cabinet supports both storage and visual organization within the entryway.

Idea 6: Floating Shelf Entryway Organizer

How to Create
Floating shelves provide a compact and flexible storage solution for entryways with limited floor space. Unlike traditional shelving units, floating shelves attach directly to the wall without visible support brackets. This creates a clean and minimalist appearance that aligns with modern design trends often featured in Pinterest inspiration.
In entryway spaces, floating shelves can serve multiple functions. They create a convenient location for storing keys, mail, or small decorative objects. Because they extend horizontally across the wall, shelves also help visually define the entryway area.
The open structure of floating shelves encourages organized placement of items. Decorative bowls or trays can be used to contain small objects while maintaining an uncluttered appearance. When combined with wall hooks or mirrors, floating shelves contribute to a layered and functional entryway layout.
Floating shelves are particularly useful for narrow hallways where large furniture pieces may not fit. Their compact design preserves walking space while still providing useful storage. Pinterest DIY tutorials frequently highlight floating shelves as beginner friendly projects because installation requires only basic tools and minimal materials.

Step-by-Step Guide
Begin by determining the height and width of the floating shelf placement. Mark the desired location on the wall using a pencil and measuring tape. Ensure the shelf will remain accessible without interfering with door movement.
Gather tools including a drill, wall anchors, screws, and a level. Install the mounting bracket or concealed support system included with the shelf design. Wall anchors should be used when attaching shelves to drywall for added stability.
Align the shelf bracket with the marked positions and secure it using screws. Use a level to confirm the bracket remains perfectly horizontal before tightening all hardware.
Slide the shelf onto the bracket system and secure it according to the shelf design. Once installed, arrange decorative containers, small plants, or trays on the shelf surface.

This floating shelf arrangement creates a practical entryway storage area while maintaining a minimalist style and organized visual layout.
Idea 7: Decorative Wall Panel Entryway Accent
How to Create
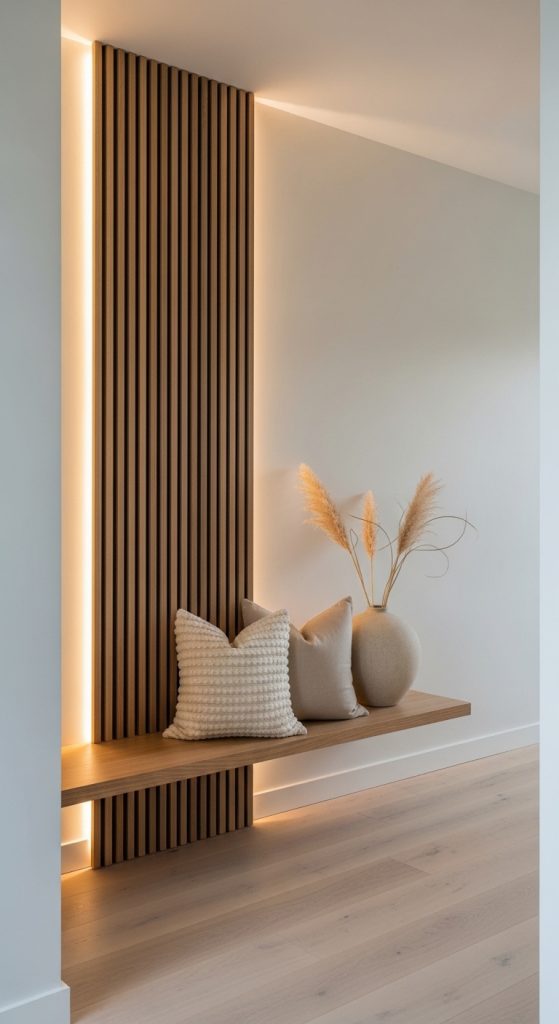
Decorative wall panels add texture and architectural interest to the entryway while defining the entrance area visually. On Pinterest, wall panel accents appear frequently in home decor inspiration because they transform simple walls into structured design features.
Wall panels can be created using wood slats, geometric molding patterns, or simple vertical boards. These materials introduce depth and visual rhythm to the entryway while maintaining a cohesive design appearance. Panels also help frame other decorative elements such as mirrors, lighting fixtures, or wall hooks.
In minimalist style interiors, vertical wooden slats are commonly used to create a modern aesthetic. The repeating lines draw attention to the wall while maintaining visual simplicity. In other designs, rectangular molding patterns create a more traditional architectural look.

Wall panels also serve a practical function. They protect the wall surface from scratches or wear caused by bags, coats, or everyday entryway activity. Because of their durability and decorative impact, panel accents are often included in Pinterest creative projects focused on improving entryway presentation.
Execution Process
Start by measuring the wall area where the decorative panel will be installed. Determine the spacing between panels to create a balanced design pattern. Mark the positions using a measuring tape and pencil.
Prepare materials such as wood slats, molding strips, construction adhesive, screws, and a drill. If painting the panels, apply primer and paint before installation for easier finishing.
Attach each panel to the wall using adhesive and screws where necessary. Use a level to ensure each panel remains straight during installation. Maintain consistent spacing between panels to preserve visual symmetry.

Once the panels are installed, fill any visible screw holes with wood filler and sand the surface smooth. Apply paint or stain to achieve the desired finish.
The completed wall panel design creates a decorative entryway backdrop while enhancing the architectural character of the space.
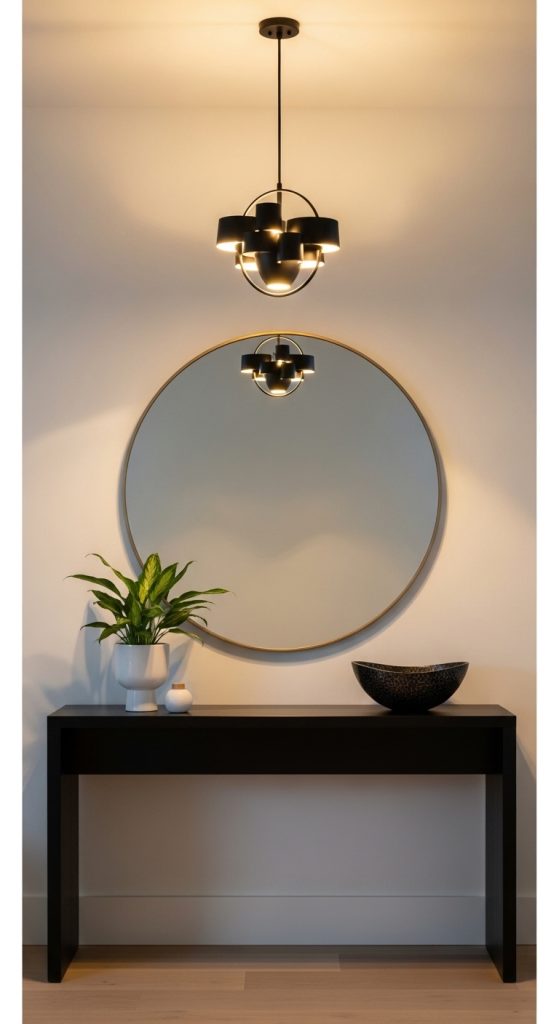
Idea 8: Entryway Lighting Upgrade
How to Create
Lighting plays an important role in defining the atmosphere and functionality of a front entryway. Proper illumination ensures safe movement while also highlighting decorative elements within the space. Pinterest inspiration often includes lighting upgrades as a simple yet effective way to improve entryway design.
Entryway lighting can take several forms, including ceiling fixtures, wall sconces, or pendant lights. The choice depends on ceiling height and available wall space. Well-placed lighting fixtures distribute illumination evenly while emphasizing key areas such as mirrors or storage furniture.
Lighting also contributes to the overall aesthetic of the entryway. Warm lighting tones create a welcoming environment, while brighter lighting improves visibility for daily routines. Fixtures with simple geometric shapes often complement modern design and minimalist interiors.
Because lighting installations usually require limited materials and straightforward installation steps, they are commonly featured in beginner friendly DIY tutorials. Upgrading the lighting fixture can significantly enhance both the appearance and usability of the entryway.
Setup Method
Begin by evaluating the existing lighting conditions in the entryway. Determine whether the area requires brighter illumination or decorative accent lighting. Select a fixture that fits the scale of the ceiling or wall space.
Turn off electrical power at the circuit breaker before removing the existing fixture. Gather tools including a screwdriver, ladder, wire connectors, and mounting hardware.

Disconnect the wiring from the old fixture and attach the mounting bracket for the new lighting unit. Connect the wires by matching the color-coded electrical connections and securing them with wire connectors.
Mount the fixture onto the bracket and tighten the screws to secure it in place. Install the light bulb and restore electrical power to test the installation.
Improved lighting enhances both safety and visual appeal within the entryway environment.
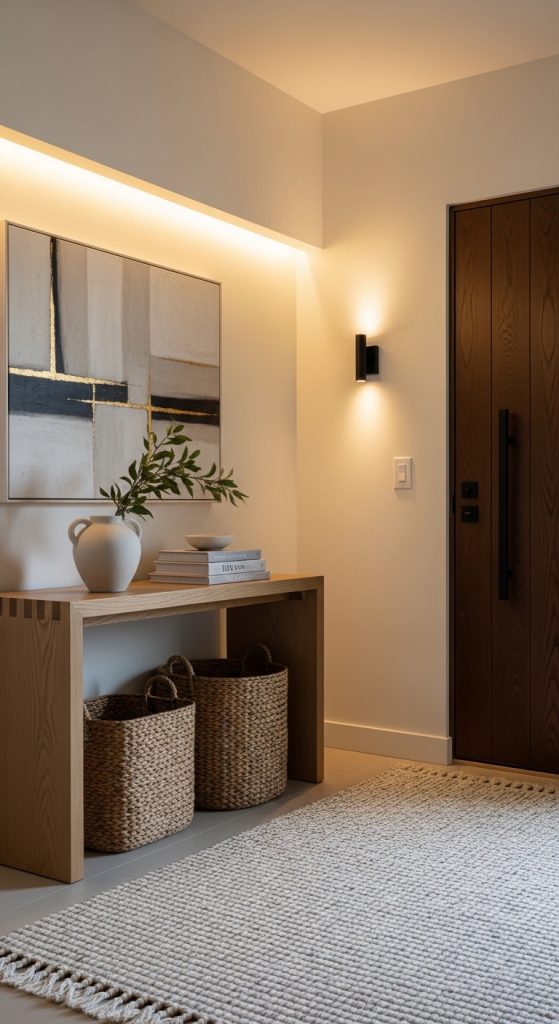
Idea 9: Entryway Rug Zone Definition
How to Create
An entryway rug defines the entrance area while providing practical protection for flooring. Rugs collect dirt and moisture from shoes, helping maintain cleanliness throughout the rest of the home. Pinterest entryway inspiration frequently includes rugs because they create a clear visual boundary around the entrance.

In design terms, a rug anchors the entryway furniture arrangement. When placed beneath a console table or near a storage bench, it visually connects these elements into a cohesive layout. Rugs also introduce texture and color that enhance the overall aesthetic of the space.
Durability is an important factor when selecting an entryway rug. Materials should withstand frequent foot traffic and resist moisture or dirt. Low-pile rugs are commonly used because they are easier to clean and allow doors to open smoothly.
Patterns or neutral tones can complement surrounding decor elements. Many Pinterest ideas favor simple geometric patterns or natural fiber textures that support minimalist design while maintaining visual interest.
Step-by-Step Guide
Begin by measuring the entryway floor area to determine the appropriate rug size. The rug should cover the main walking path while leaving some floor space visible around the edges.

Place the rug directly inside the front door or beneath entryway furniture. Ensure the rug lies flat without creating tripping hazards. If necessary, use a non-slip rug pad beneath the rug to prevent movement.
Position nearby furniture such as benches or console tables partially on the rug to create a unified layout. This arrangement visually anchors the furniture and reinforces the entryway zone.
Regularly clean the rug to maintain its appearance and functionality. The rug will protect flooring while contributing to the decorative presentation of the entrance.
Idea 10: Entryway Plant Decor

How to Create
Plants introduce natural elements into the entryway while enhancing the visual atmosphere of the space. Greenery appears frequently in Pinterest home decor inspiration because it creates a fresh and welcoming environment. Plants also soften architectural lines and add organic texture to interior spaces.

In entryways, plants are often placed near console tables, benches, or corners of the room. Their vertical form helps fill empty spaces while maintaining a balanced design composition. Smaller plants can be placed on shelves or tables, while larger floor plants add structure to wider entryways.
Plants also improve the sensory experience of the entrance. Natural greenery contrasts with furniture and wall surfaces, creating a visually dynamic environment. Many modern design styles incorporate plants as essential decorative elements.
Because plant decor requires minimal materials and simple planning, it remains a beginner friendly addition to entryway projects. When placed thoughtfully, plants enhance both the aesthetic and atmosphere of the entrance.
Step-by-Step Guide
Begin by selecting plants that suit the lighting conditions of the entryway. Some plants tolerate lower light levels, making them suitable for indoor entrance areas.

Choose containers that complement the existing decor style. Simple ceramic or neutral planters often work well with minimalist interiors.
Place the plant near natural light sources when possible. Position it in a corner or beside furniture where it will not obstruct walking paths.
Ensure the plant receives proper watering and maintenance according to its care requirements. Regular care helps maintain healthy foliage and consistent decorative appeal.
Plants complete the entryway environment by adding natural color and texture while reinforcing a welcoming home atmosphere.

Common Beginner Mistakes and How to Avoid Them
A common mistake in entryway design involves overcrowding the space with too many decorative elements or furniture pieces. Entryways often have limited floor area, and excessive furniture can restrict movement near the door. Planning the layout carefully helps maintain clear pathways. Another frequent issue occurs when storage solutions are not matched to the household’s daily needs. Installing hooks or shelves without considering the number of coats, bags, or shoes used regularly may result in insufficient storage capacity. Accurate planning ensures the entryway remains functional. Poor lighting placement can also reduce the usability of the space. Entryways require consistent illumination to support safe movement and organization. Selecting lighting fixtures that distribute light evenly prevents dark areas from forming near storage zones. Another mistake involves ignoring vertical wall space. Walls provide valuable storage opportunities through shelves, hooks, or decorative panels. Utilizing vertical space helps keep floors clear and organized. By focusing on proper planning, appropriate furniture size, and efficient storage systems, beginners can avoid these common issues and create a practical entryway layout.
Practical Tips for Better Results
Improving an entryway requires thoughtful planning and attention to functionality. One useful strategy involves organizing items based on daily routines. Frequently used objects such as keys, coats, and bags should remain easily accessible near the door. Less frequently used items can be stored in cabinets or baskets. Maintaining this hierarchy improves organization and prevents clutter from accumulating. Another effective approach involves coordinating entryway furniture with the surrounding interior design. Using consistent materials, colors, or shapes helps maintain visual harmony between the entryway and adjacent rooms. Lighting also plays an important role in improving the overall appearance of the space. Combining overhead lighting with reflective surfaces such as mirrors increases brightness while enhancing visual depth. Choosing durable materials for furniture and flooring accessories helps ensure the entryway remains functional despite heavy daily use. Finally, maintaining a clear surface area on tables or shelves contributes to a tidy appearance. Organized layouts improve both the practicality and aesthetic presentation of the entrance.
Styling, Presentation, or Organization Ideas
Styling an entryway involves arranging furniture and decorative elements so the space remains functional while maintaining visual balance. One effective approach is creating a layered arrangement that combines storage, lighting, and decorative features. For example, a console table can serve as the base layer, while a mirror above the table adds vertical emphasis. Small decorative objects placed on the table provide additional detail without overcrowding the surface. Rugs can also contribute to presentation by defining the entryway area visually. Choosing colors or textures that complement nearby furniture helps create a cohesive design. Plants or simple wall art can introduce subtle decorative accents that enhance the atmosphere of the entrance. Organization remains essential when styling the space. Baskets or trays can group small items together, preventing clutter from spreading across surfaces. Maintaining clear walking paths ensures the entryway remains practical for everyday movement. Through thoughtful styling and organization, the entryway becomes both a functional and visually appealing introduction to the home.
Budget or Time Planning
Front entryway projects are often manageable because they require relatively small investments compared with larger home improvement tasks. Budget planning begins with identifying the most essential elements for the space. Storage furniture such as benches or cabinets typically provides the greatest functional benefit, while decorative items can be added gradually over time. Many entryway improvements qualify as easy projects because they involve simple installations such as wall hooks, shelves, or mirrors. These projects require minimal materials and can often be completed within a few hours. Planning the project timeline in advance helps ensure efficient use of time. Gathering all necessary tools and materials before starting prevents interruptions during installation. Prioritizing essential organizational features also helps control costs. For example, installing hooks or shelves first may solve immediate storage needs before additional decorative elements are added. By approaching the project step by step, homeowners can improve the entryway gradually while maintaining both budget control and practical results.

Creative Expansion and Advanced Inspiration
After completing basic entryway improvements, additional design features can further enhance the space. One advanced approach involves layering multiple storage systems together. Combining a bench, wall hooks, and floating shelves creates a structured organization system that accommodates a variety of household items. Lighting upgrades can also expand the visual impact of the entryway. Installing accent lighting or decorative fixtures highlights key design elements while improving brightness. Decorative wall treatments such as textured panels or patterned paint designs can introduce architectural character to the space. Larger entryways may benefit from incorporating seating areas or small decorative furniture pieces that extend the functionality of the entrance. Smart organization tools such as labeled baskets or compartment trays can also improve storage efficiency. These creative ideas allow homeowners to develop more personalized entryway layouts while maintaining the practical structure established by the initial project.