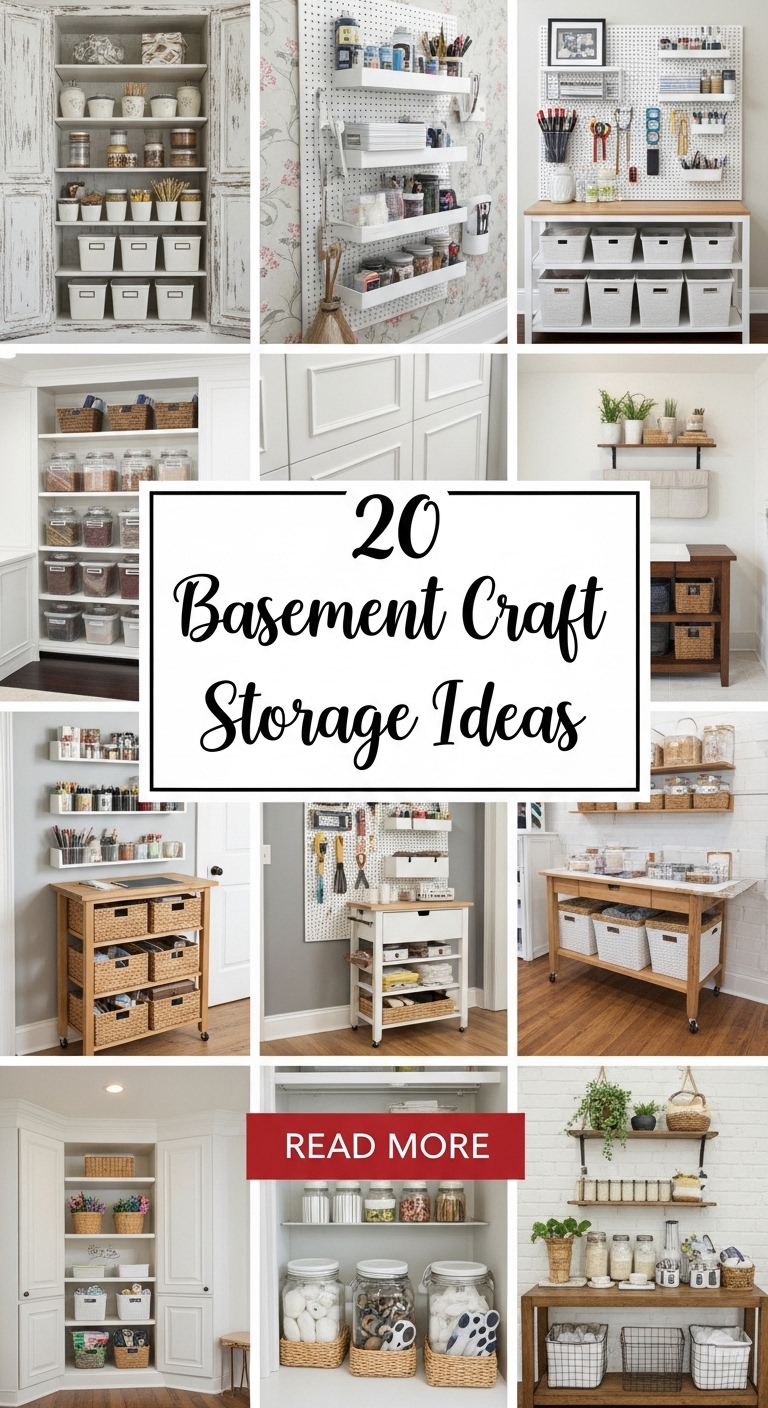
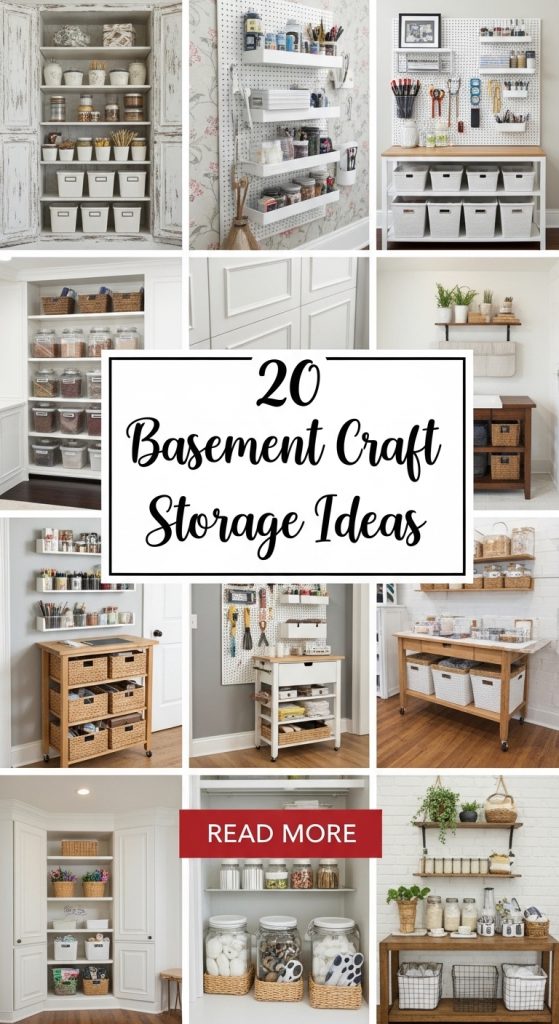
20 basement craft storage ideas
A basement craft space can quickly go from inspiring to overwhelming without the right storage systems in place. Between paper stacks, fabric rolls, vinyl sheets, yarn skeins, paint bottles, tools, beads, ribbons, glue guns, and seasonal supplies, crafting materials multiply fast. And unlike a kitchen or closet, craft supplies often vary wildly in size, shape, and frequency of use.
Basements present both opportunity and challenge when it comes to storage. On one hand, they typically offer more square footage than upper floors. On the other hand, they may have limited natural light, exposed ceilings, moisture concerns, awkward corners, or unfinished walls. That means storage must be strategic, durable, and well-organized to prevent clutter and protect materials.
The key to successful basement craft storage isn’t just buying more bins — it’s designing a system that supports your workflow. You want supplies visible but protected. Accessible but organized. Categorized but flexible enough to grow with your projects.
In this guide, you’ll discover 20 highly practical basement craft storage ideas designed for:
- Small basement corners
- Large open basement studios
- Multi-purpose shared spaces
- Budget-friendly setups
- High-volume craft collections
- Small business production spaces
Each idea includes:
- A clear definition of the storage concept
- Step-by-step setup instructions
- Materials needed
- Organization strategies
- Beginner-friendly implementation tips
Whether you need vertical shelving, labeled drawer systems, pegboard tool walls, rolling carts, closet conversions, or hidden cabinet storage, this list will help you create a Pinterest-worthy storage solution that actually works in real life.
These ideas focus on:
- Maximizing vertical space
- Reducing visual clutter
- Protecting supplies from basement moisture
- Improving workflow efficiency
- Creating aesthetic, save-worthy setups
Ready to transform your basement into an organized, functional creative hub? Let’s dive in.
1. Clear Bin Labeling System

One of the most powerful yet simple storage solutions for a basement craft space is a clear bin labeling system. Transparency reduces the need to open every container to find what you need, and labeled bins eliminate guesswork. This is especially important in basements where lighting may not be optimal.
Clear bins allow you to visually scan your supplies at a glance. When paired with consistent labeling, this system prevents duplicate purchases and wasted time. It’s perfect for storing smaller materials like ribbons, glue sticks, stickers, embellishments, beads, and seasonal craft supplies.
This solution works in both large and small basements and is budget-friendly.
What It Is
A categorized storage system using transparent bins with detailed labels.
Step-by-Step How-To
- Sort all supplies by category.
- Choose uniform clear storage bins.
- Place related items together.
- Label each bin clearly on front and lid.
- Arrange bins on shelves by frequency of use.
Materials Needed
- Clear plastic bins with lids
- Waterproof labels
- Label maker
- Shelving unit
2. Tall Vertical Shelving Units
Introduction

Basements often have generous wall height. Tall vertical shelving takes advantage of this by maximizing upward storage rather than spreading out across the floor.
This system works especially well for bulk storage, fabric bins, paper boxes, and labeled containers. It also keeps supplies off the floor, protecting them from potential moisture.
What It Is
Floor-to-ceiling shelving for large-scale organized storage.
Step-by-Step How-To
- Measure wall height.
- Install tall shelving units secured to studs.
- Place heavier bins on lower shelves.
- Store rarely used items on top shelves.
- Keep frequently used materials at eye level.
Materials Needed
- Tall shelving units
- Wall anchors
- Storage bins
- Step stool
3. Pegboard Tool Wall Organizer
Introduction

Tools often create clutter if left in drawers. A pegboard organizer keeps scissors, rulers, paintbrushes, and tools visible and accessible.
This is perfect for basement craft storage because it reduces drawer clutter and maximizes vertical space.
What It Is
Wall-mounted pegboard storage for tools and small supplies.
Step-by-Step How-To
- Install pegboard with spacers.
- Add hooks and small baskets.
- Arrange tools by category.
- Leave space for future additions.
Materials Needed
- Pegboard panels
- Mounting hardware
- Hooks
- Small baskets
4. Rolling Storage Cart System
Introduction

Rolling carts offer flexibility in shared basement spaces. You can move supplies where needed and store them compactly when not in use.
Perfect for project-based storage.
What It Is
A mobile tiered cart used for organizing current craft supplies.
Step-by-Step How-To
- Choose sturdy 3-tier cart.
- Assign each tier a category.
- Add smaller containers inside tiers.
- Roll cart under desk when finished.
Materials Needed
- Metal rolling cart
- Small storage bins
- Drawer dividers
5. Under-Table Storage Bins

Introduction
The space under your craft table is valuable real estate. Instead of leaving it empty, use stackable bins or drawer systems.
What It Is
Storage containers placed beneath work surfaces.
Step-by-Step How-To
- Measure table clearance.
- Purchase low-profile bins.
- Categorize supplies.
- Label clearly.
Materials Needed
- Low storage bins
- Labels
- Drawer units
6. Fabric Storage Cubes
Introduction
Fabric needs protection from dust and moisture. Storage cubes keep fabric folded neatly and protected.

What It Is
Cubed shelving for folded fabric storage.
Step-by-Step How-To
- Fold fabric uniformly.
- Sort by color or type.
- Place in cube bins.
- Label sections.
Materials Needed
- Cube organizer shelf
- Fabric bins
- Labels
7. Wall-Mounted Vinyl Roll Rack
Introduction
Vinyl rolls can become chaotic quickly. A wall-mounted rack keeps them vertical and visible.
What It Is
Dedicated storage rack for vinyl rolls.
Step-by-Step How-To
- Install vertical rack.
- Sort vinyl by type.
- Label roll ends.
Materials Needed
- Vinyl wall rack
- Mounting hardware
- Labels
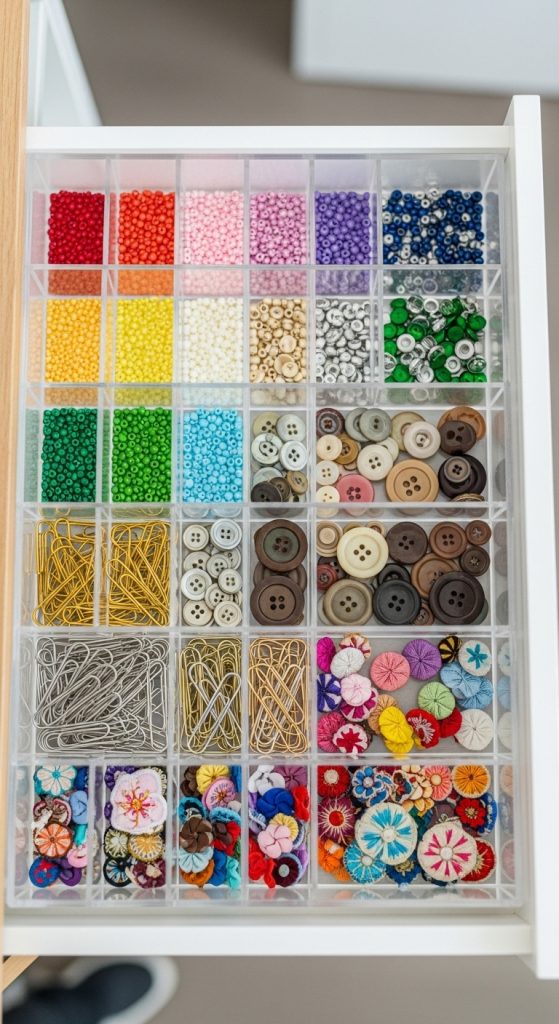
8. Drawer Divider Organization
Introduction
Small items like beads and embellishments require internal organization.
What It Is
Drawer systems with internal dividers.
Step-by-Step How-To
- Empty drawer.
- Insert adjustable dividers.
- Sort by category.
- Label sections.
Materials Needed
- Drawer dividers
- Small containers
- Label maker
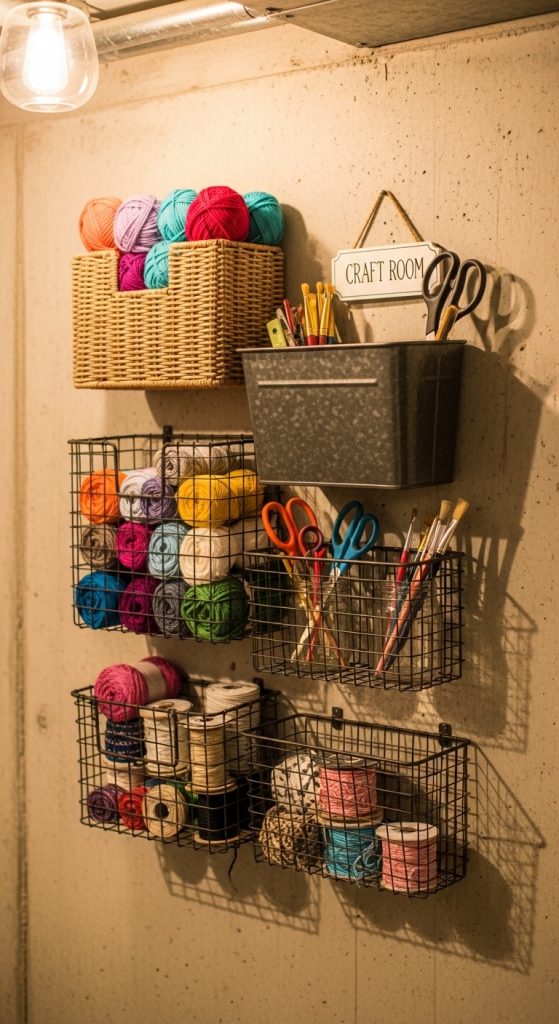
9. Hanging Basket Wall Storage
Introduction
Hanging baskets create accessible vertical storage while adding texture.
What It Is

Wall-mounted baskets for craft supplies.
Step-by-Step How-To
- Install wall hooks.
- Hang wire baskets.
- Categorize items.
Materials Needed
- Wire baskets
- Wall hooks
- Anchors
10. Labeled Paper Storage Drawers
Introduction
Paper crafting requires flat storage to prevent bending.
What It Is
Flat drawer storage system for cardstock and scrapbook paper.
Step-by-Step How-To

- Install flat file cabinet.
- Sort paper by color/theme.
- Label each drawer.
Materials Needed
- Flat file cabinet
- Dividers
- Labels
11. Overhead Ceiling Storage Racks
Introduction (Approx. 200 Words)
Basements often have one huge advantage over other areas of the home: exposed ceiling joists or high ceilings. Instead of letting that overhead space go unused, installing ceiling-mounted storage racks can dramatically expand your craft storage capacity without sacrificing valuable floor space. This is especially useful for storing seasonal craft materials, bulk paper packs, large decor pieces, or rarely used equipment.

Overhead storage works best for lightweight to medium-weight items that are properly contained in sealed bins. In basements, protecting supplies from potential moisture or dust is critical, so airtight containers are essential. This system is ideal for crafters who buy materials in bulk or rotate decor seasonally.
By moving infrequently used supplies upward, you free up eye-level shelves for everyday crafting essentials, improving both efficiency and visual organization.
What It Is
Ceiling-mounted storage racks designed to hold sealed storage bins above your workspace.
Step-by-Step How-To
- Measure ceiling clearance and joist placement.
- Install heavy-duty ceiling-mounted rack system.
- Use airtight plastic bins with lids.
- Label bins clearly on two sides.
- Store lightweight or seasonal items overhead.
- Use a stable step ladder for safe access.
Materials Needed
- Ceiling-mounted storage rack
- Airtight storage bins
- Labels
- Stud finder
- Step ladder
12. Glass Jar Small-Supply Station
Introduction

Small craft supplies like buttons, beads, clips, sequins, and pins can easily become cluttered if not contained properly. A glass jar storage station offers both functionality and aesthetic appeal. Transparent jars allow you to quickly identify contents while keeping tiny materials contained and dust-free.
This system works beautifully on open shelving or mounted wall rails. It’s especially Pinterest-worthy because the colorful contents become part of the decor. However, in basements, jars should be stored in areas with minimal vibration and secured shelving to prevent tipping.
This storage method is ideal for detail-focused crafters who work with small embellishments regularly.
What It Is
Clear glass containers used to store and display small craft supplies.
Step-by-Step How-To
- Sort small items by category.
- Place each category into individual jars.
- Label jar lids or sides clearly.
- Arrange jars on stable shelving.
- Group similar items together for visual organization.
Materials Needed
- Glass jars with lids
- Waterproof labels
- Open shelving
- Non-slip shelf liner
13. Lockable Cabinet for Specialty Tools

Introduction
If your basement craft space includes expensive equipment, sharp tools, or materials that need controlled storage, a lockable cabinet is a smart solution. This is particularly important for households with children or shared basement spaces.
Specialty tools like heat guns, soldering irons, precision cutters, and power tools should have designated, secure storage. Lockable cabinets also help protect higher-value supplies from dust and moisture.
This idea balances safety with organization while maintaining a clean aesthetic.
What It Is
A secured storage cabinet designed for valuable or hazardous craft equipment.
Step-by-Step How-To
- Choose a sturdy lockable cabinet.
- Install shelving inside for categorization.
- Store high-risk tools in designated compartments.
- Add interior lighting if needed.
- Keep keys stored safely but accessible.
Materials Needed
- Lockable storage cabinet
- Adjustable interior shelves
- Small tool bins
- Cabinet lighting
14. Color-Coded Storage Bin System
Introduction
Color-coding is one of the most efficient ways to speed up your workflow. Instead of reading every label, your brain instantly recognizes categories by color. This is especially helpful in large basement craft studios where multiple project types coexist.
For example, blue bins for painting supplies, pink bins for paper crafts, green bins for sewing materials, and yellow bins for vinyl. The key is consistency — once assigned, keep categories uniform.
Color-coded systems reduce decision fatigue and create a visually organized space that feels cohesive and intentional.

What It Is
A categorized storage system using color-specific bins for different craft types.
Step-by-Step How-To
- Identify your primary craft categories.
- Assign one color to each category.
- Purchase uniform bins in those colors.
- Add matching labels for clarity.
- Group same-color bins together on shelves.
Materials Needed
- Colored storage bins
- Labels
- Shelving unit
- Inventory checklist
15. Sliding Door Cabinet Storage
Introduction

In tight basement areas, traditional cabinet doors can block pathways when opened. Sliding door cabinets solve this issue while maintaining a clean, streamlined appearance.
These cabinets are perfect for hiding clutter while keeping supplies accessible. They work especially well in narrow basement corners where space efficiency is critical.
Sliding cabinets also help protect supplies from dust and moisture exposure, which is especially important in partially finished basements.
What It Is
Cabinet storage with sliding doors to save space and conceal supplies.
Step-by-Step How-To
- Measure available wall width.
- Install sliding door cabinet unit.
- Add adjustable interior shelving.
- Organize supplies into labeled bins.
- Group similar categories per shelf.
Materials Needed
- Sliding door cabinet
- Interior shelf dividers
- Storage bins
- Labels
16. Stackable Drawer Tower Units
Introduction

Stackable drawer towers are one of the most versatile basement craft storage solutions. They work especially well for small to medium-sized supplies like paints, adhesives, markers, ribbon, and tools.
Because they’re modular, you can expand vertically as your collection grows. Clear drawer versions allow quick visibility, while opaque versions offer a cleaner look.
These units are budget-friendly and ideal for beginners building their first organized basement craft system.
What It Is
Modular drawer units stacked vertically to create compact storage towers.
Step-by-Step How-To
- Choose stackable drawer units.
- Sort supplies by type.
- Assign one drawer per category.
- Label each drawer clearly.
- Place frequently used drawers at eye level.
Materials Needed
- Stackable drawer units
- Drawer labels
- Shelf risers (optional)
17. Magnetic Strip Tool Storage
Introduction
Metal tools like scissors, rulers, tweezers, and craft knives can be stored efficiently using magnetic strips mounted to the wall. This system eliminates drawer clutter and keeps tools visible.
Magnetic storage works especially well near worktables where tools are frequently used. It’s space-saving, visually clean, and ideal for small basement craft corners.
What It Is
Wall-mounted magnetic strips for holding metal crafting tools.
Step-by-Step How-To

- Install magnetic strip into wall studs.
- Test weight capacity.
- Arrange tools evenly spaced.
- Keep sharp edges facing downward safely.
Materials Needed
- Heavy-duty magnetic strip
- Mounting hardware
- Level tool
18. Seasonal Craft Rotation Storage

Introduction
Seasonal crafting supplies can quickly take over a basement if not rotated strategically. A seasonal rotation system stores off-season supplies in labeled, sealed bins and keeps current-season items accessible.
This prevents clutter and ensures your most relevant materials are easy to reach.
What It Is
A rotation-based storage system organized by season or holiday.
Step-by-Step How-To
- Sort supplies by season.
- Place off-season items in sealed bins.
- Label each bin clearly.
- Store off-season bins on higher shelves.
- Rotate at the start of each season.
Materials Needed
- Airtight storage bins
- Large seasonal labels
- Shelving unit
19. Fold-Down Wall Storage Table
Introduction
A fold-down table with built-in shelving provides both storage and workspace. When not in use, it folds flat against the wall, making it perfect for small basement corners.

This setup maximizes limited space while keeping supplies close to your workspace.
What It Is
A wall-mounted folding table with integrated storage compartments.
Step-by-Step How-To
- Install fold-down wall table hardware.
- Add small shelving above table.
- Store essential tools in small bins.
- Fold table up when finished.
Materials Needed
- Fold-down table kit
- Wall anchors
- Storage bins
- Level
20. Inventory Tracking Storage System
Introduction
The most advanced basement craft storage idea isn’t physical — it’s strategic. An inventory tracking system helps you monitor supplies, avoid duplicates, and plan purchases more efficiently.
This is especially helpful for serious hobbyists or small business crafters.
What It Is
A digital or written inventory system paired with labeled storage.
Step-by-Step How-To

- Categorize all supplies.
- Create spreadsheet or notebook tracker.
- Assign each storage bin a code.
- Record quantities and locations.
- Update monthly.
Materials Needed
- Spreadsheet software or notebook
- Label maker
- Storage coding system