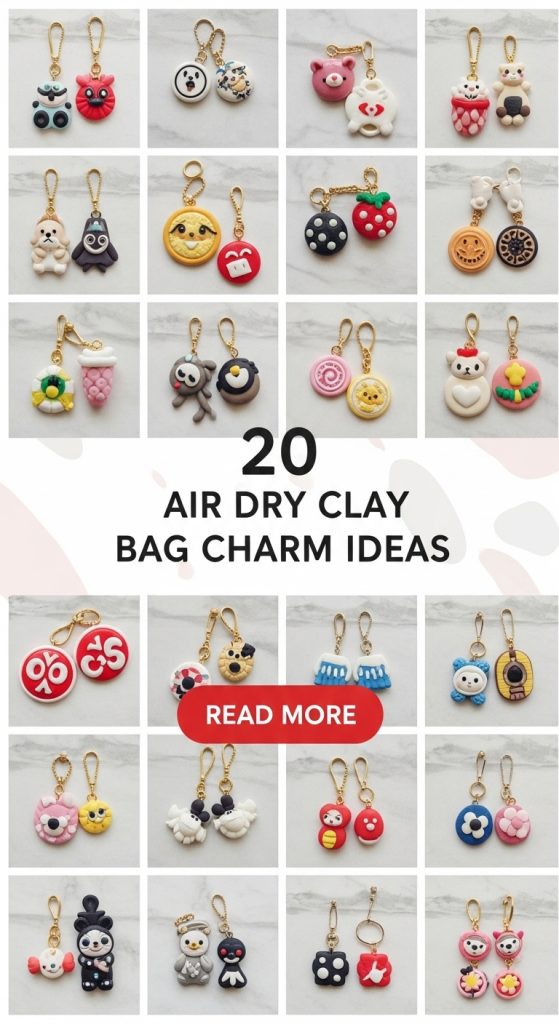
20 air dry clay bag charms ideas
Air dry clay has quickly become one of the most loved DIY materials for creative makers, Pinterest crafters, and small handmade business owners. It’s affordable, beginner-friendly, requires no kiln, and opens the door to endless design possibilities. If you’re looking for trendy, personalized, and aesthetic accessories, air dry clay bag charms are the perfect craft project to try. Whether you want to decorate your tote bag, backpack, purse, or even gift handmade charms to friends, these small accessories make a big style statement.
Bag charms are currently trending across Pinterest, TikTok, and Instagram because they allow you to personalize everyday bags in a unique and creative way. Instead of buying mass-produced keychains, you can craft custom pieces that reflect your personality—cute, minimal, boho, colorful, vintage, or modern. From initials and abstract shapes to miniature food designs and nature-inspired pieces, air dry clay makes it easy to experiment with textures, colors, and finishes.
One of the best things about air dry clay is how accessible it is. You don’t need professional tools or advanced sculpting skills. Basic household items like toothpicks, rolling pins, cookie cutters, and acrylic paint are enough to create beautiful charms. After shaping your design, you simply allow it to dry for 24–48 hours, then paint, seal, and attach it to a keyring or lobster clasp. The result? A trendy, handmade accessory that looks boutique-worthy.
These air dry clay bag charm ideas are perfect for:
- Beginner DIY crafters
- Handmade gift makers
- Teens and students who love customizing their bags
- Small Etsy or craft shop owners
- Anyone who loves Pinterest aesthetic crafts
In this guide, you’ll discover 20 detailed air dry clay bag charm ideas. Each idea includes a clear explanation, step-by-step instructions, and a materials list so you can easily recreate the design at home. The styles range from minimalist to colorful and playful, giving you plenty of inspiration for your next DIY session.
Let’s start with the first 10 creative and beginner-friendly air dry clay bag charm ideas.
1. Minimalist Initial Letter Charm
A minimalist initial charm is timeless, chic, and highly customizable. Whether it’s your own first letter, a partner’s initial, or a meaningful monogram, this design works beautifully on tote bags, backpacks, or handbags. It’s simple yet stylish, making it perfect for beginners.
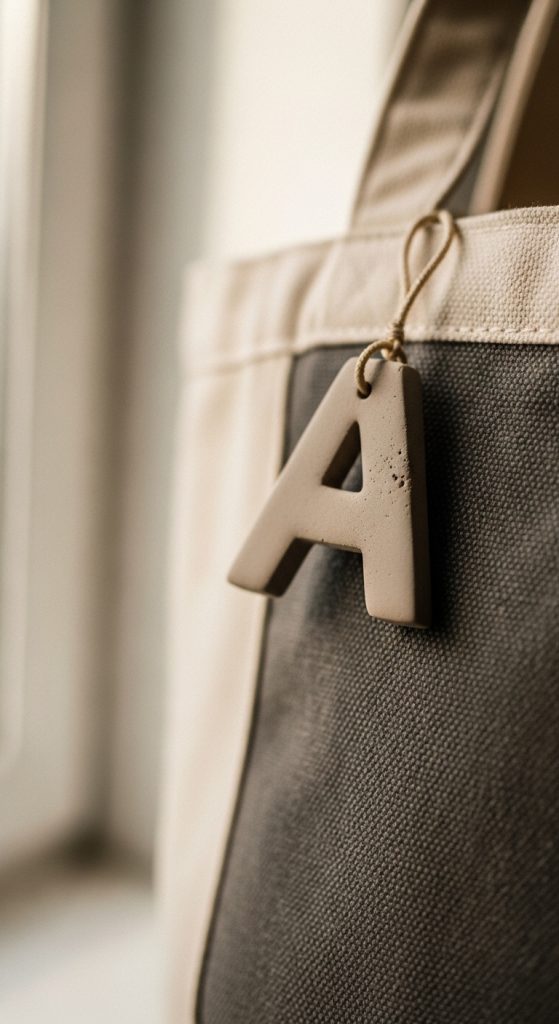
This charm style is especially popular in neutral tones like beige, white, soft pink, or matte black. You can keep it flat and sleek for a modern aesthetic or slightly raised with subtle texture for added character.
How to Make It
- Roll out air dry clay to about ¼ inch thickness.
- Use a craft knife or letter cutter to shape your initial.
- Smooth the edges gently with your fingers or a damp sponge.
- Poke a small hole at the top using a toothpick.
- Let dry completely for 24–48 hours.
- Paint in your chosen color.
- Seal with clear varnish.
- Attach a keyring or lobster clasp.
Materials Needed
- Air dry clay
- Rolling pin
- Craft knife or letter cutter
- Toothpick
- Acrylic paint
- Clear sealant
- Keyring or clasp
This charm is elegant, modern, and perfect for everyday use.
2. Cute Smiley Face Charm
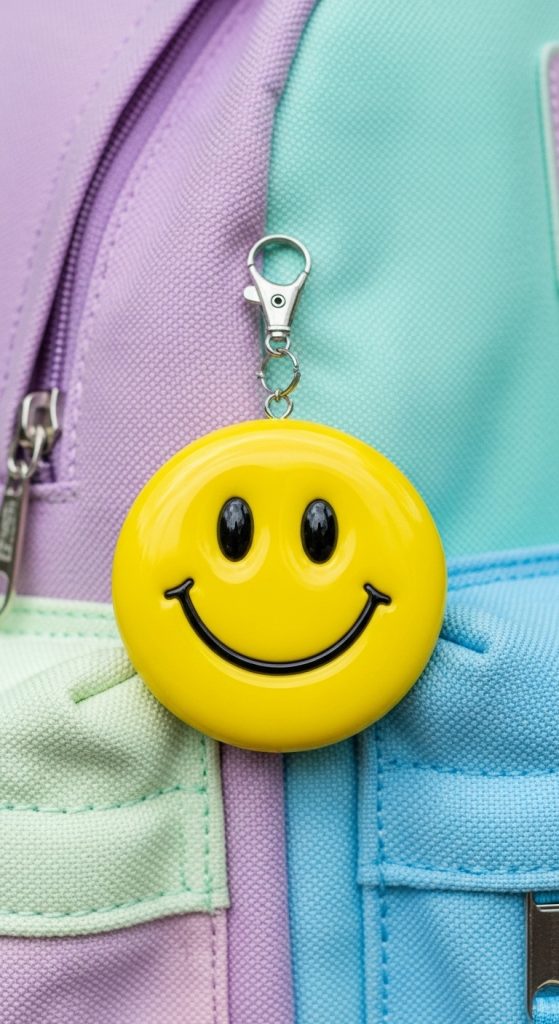
Smiley charms add playful energy to any bag. They’re bright, cheerful, and trendy—perfect for school backpacks or casual tote bags. You can experiment with pastel backgrounds, bold yellow faces, or even holographic finishes.
The design is beginner-friendly because it involves simple shapes and basic painting.
How to Make It
- Roll clay into a small ball.
- Flatten gently into a circle.
- Smooth edges carefully.
- Poke a hole at the top.
- Allow to dry fully.
- Paint base color.
- Add eyes and smile with fine brush.
- Seal and attach hardware.
Materials Needed
- Air dry clay
- Acrylic paints
- Small paintbrush
- Toothpick
- Sealant
- Keyring
This charm brings instant joy and personality to any bag.
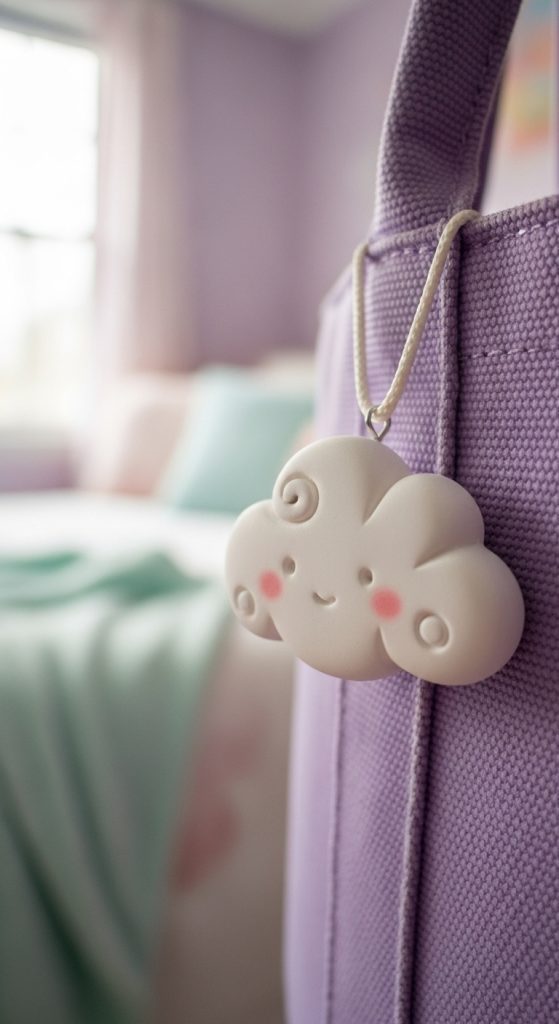
3. Mini Cloud Charm
Cloud charms are soft, dreamy, and Pinterest-worthy. They pair beautifully with pastel bags or kawaii aesthetics. You can add subtle blush details or tiny gold stars for extra charm.
How to Make It
- Shape clay into a small cloud silhouette.
- Smooth edges gently.
- Insert hole at the top.
- Let dry thoroughly.
- Paint white or pastel blue.
- Add blush or gold accents.
- Seal and attach ring.
Materials Needed
- Air dry clay
- Acrylic paint
- Fine brush
- Toothpick
- Sealant
- Keyring
Soft and adorable, this charm feels whimsical and light.
4. Boho Rainbow Charm
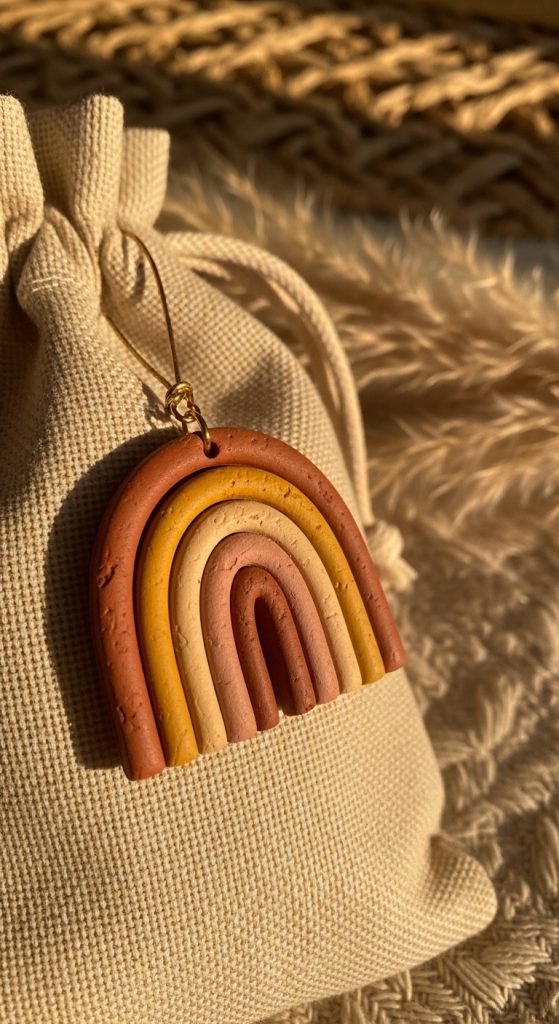
Boho rainbows are trending in handmade decor and accessories. This layered design looks complex but is surprisingly easy to create. Use earthy tones like terracotta, mustard, beige, and dusty pink for a modern boho aesthetic.
How to Make It
- Roll thin clay ropes.
- Curve each rope into arch shape.
- Stack arches from largest to smallest.
- Smooth joints gently.
- Create top hole.
- Let dry fully.
- Paint in earthy tones.
- Seal and attach hardware.
Materials Needed
- Air dry clay
- Acrylic paint
- Small brush
- Sealant
- Keyring
This charm adds warmth and trendy boho vibes.
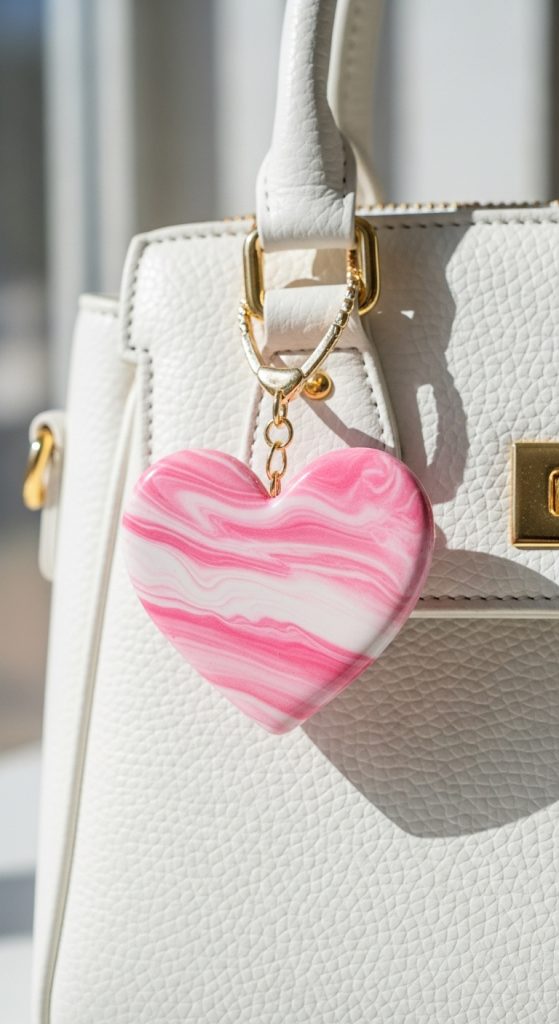
5. Mini Heart Charm
Heart charms are classic and romantic. You can keep them simple in solid colors or add marbled paint effects for a modern twist. They make wonderful handmade gifts.
How to Make It
- Roll clay flat.
- Cut heart shape using cookie cutter or knife.
- Smooth edges.
- Poke hole at top.
- Let dry.
- Paint or create marble effect.
- Seal and attach ring.
Materials Needed
- Air dry clay
- Heart cutter
- Acrylic paint
- Toothpick
- Sealant
- Keyring
Timeless and easy to personalize.
6. Mini Strawberry Charm
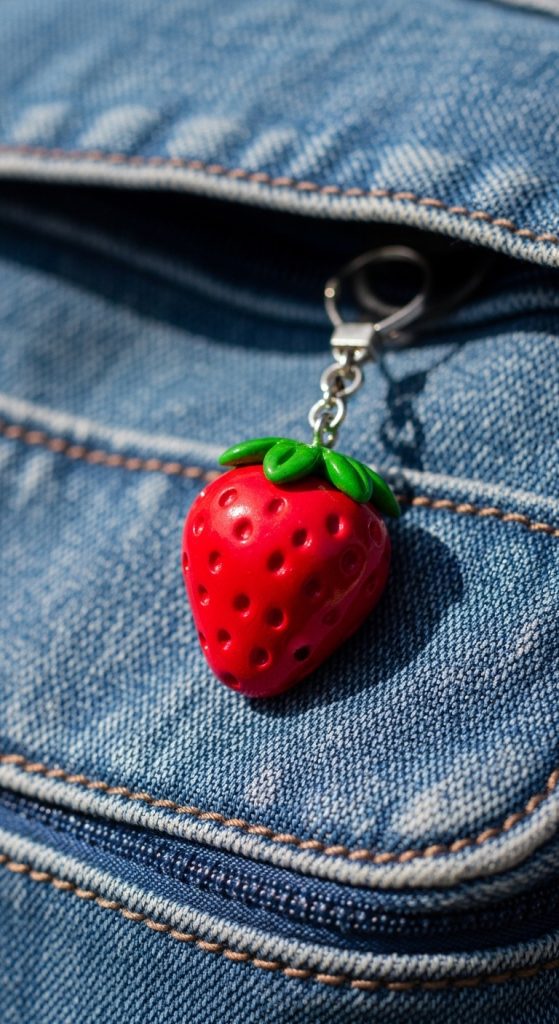
Fruit charms are cute and playful. A strawberry design is especially popular for spring and summer aesthetics.
How to Make It
- Shape clay into small oval.
- Slightly taper top.
- Add small indent dots for seeds.
- Shape green leaf top separately and attach.
- Insert hole carefully.
- Dry completely.
- Paint red and green.
- Seal and attach hardware.
Materials Needed
- Air dry clay
- Acrylic paint
- Fine brush
- Toothpick
- Sealant
- Keyring
Bright and fun for colorful bags.
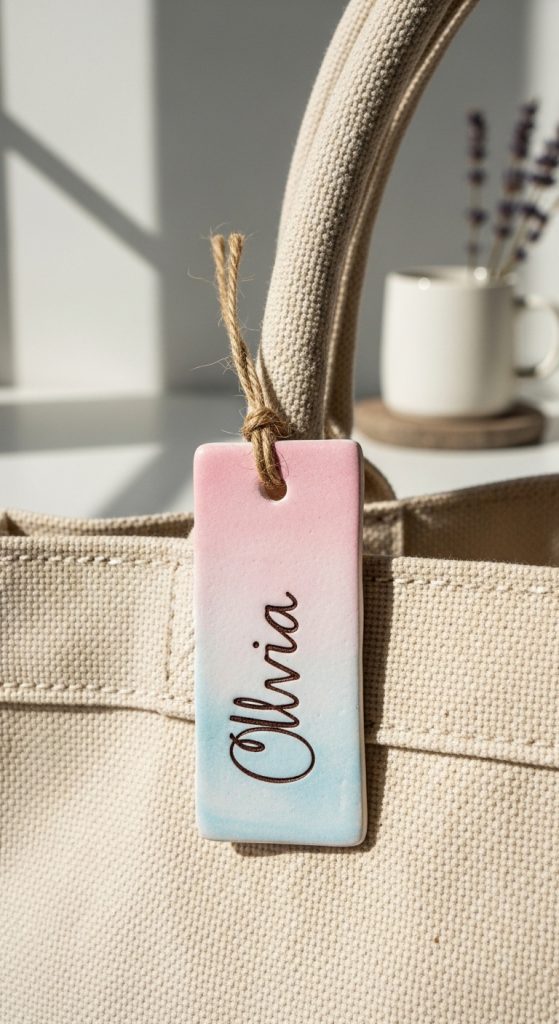
7. Mini Name Tag Charm
Personalized name tag charms feel custom and thoughtful. They’re perfect for gifting or small handmade businesses.
How to Make It
- Roll clay into rectangle or oval.
- Smooth edges.
- Use toothpick to carve name.
- Insert hole at top.
- Dry completely.
- Paint base and lettering.
- Seal and attach ring.
Materials Needed
- Air dry clay
- Toothpick
- Acrylic paint
- Sealant
- Keyring
Simple yet meaningful.
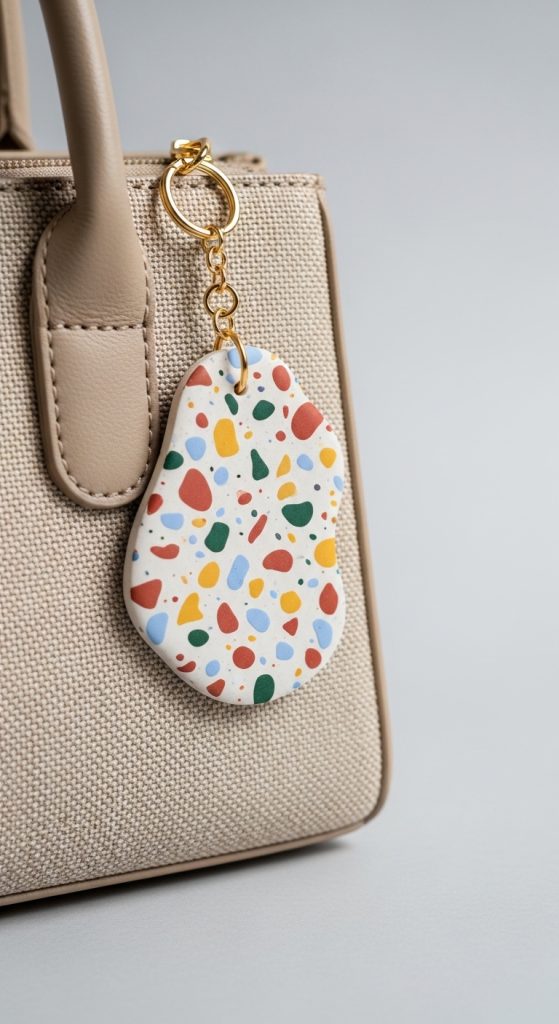
8. Abstract Terrazzo Charm
Terrazzo-style charms are modern and artistic. Add small clay color pieces pressed into a neutral base.
How to Make It
- Roll neutral clay base.
- Add tiny colored clay pieces.
- Press gently and flatten.
- Cut into desired shape.
- Insert hole.
- Dry fully.
- Seal with gloss varnish.
Materials Needed
- Air dry clay (multiple colors)
- Rolling pin
- Sealant
- Keyring
Trendy and unique.
9. Mini Mushroom Charm
Mushrooms are adorable cottagecore-inspired designs.
How to Make It
- Shape small dome for cap.
- Create thin stem.
- Attach pieces gently.
- Insert hole carefully.
- Let dry.
- Paint red and white dots.
- Seal and attach hardware.
Materials Needed

- Air dry clay
- Acrylic paint
- Fine brush
- Sealant
- Keyring
Perfect for whimsical bag styling.
10. Mini Star Charm
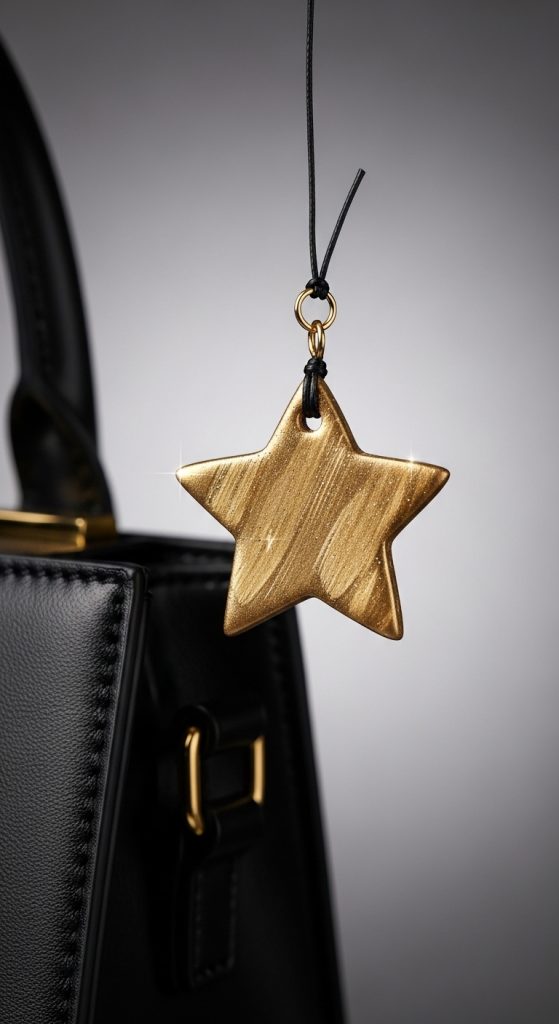
Star charms are simple yet eye-catching. You can paint them metallic gold or soft pastel.
How to Make It
- Roll clay flat.
- Cut star shape.
- Smooth edges.
- Insert hole.
- Dry thoroughly.
- Paint and seal.
- Attach ring.
Materials Needed
- Air dry clay
- Star cutter
- Acrylic paint
- Sealant
- Keyring
Butterfly charms are delicate, feminine, and perfect for soft aesthetic bags. Whether you love pastel cottagecore, Y2K vibes, or soft girl fashion, a handmade butterfly charm instantly adds charm and movement to your tote or backpack. The wings can be kept simple and flat, or you can gently curve them upward before drying to create a slightly dimensional look.
You can experiment with different color palettes—lavender and baby pink for dreamy aesthetics, bold blue and black for a monarch-inspired design, or even pearlescent white with gold outlining for an elegant finish. Adding tiny painted details like dots or gradient shading makes the charm look more professional and boutique-worthy.
How to Make It
- Roll air dry clay flat to about ¼ inch thickness.
- Draw or trace a butterfly shape and cut carefully using a craft knife.
- Smooth all edges with a damp fingertip or sponge.
- Lightly score subtle wing lines with a toothpick for texture.
- Poke a hole at the top center for hardware.
- Allow to dry completely (24–48 hours).
- Paint base colors and add detailed wing designs.
- Seal with clear varnish and attach a keyring.
Materials Needed
- Air dry clay
- Craft knife
- Toothpick
- Acrylic paints
- Small detail brush
- Clear sealant
- Keyring or lobster clasp
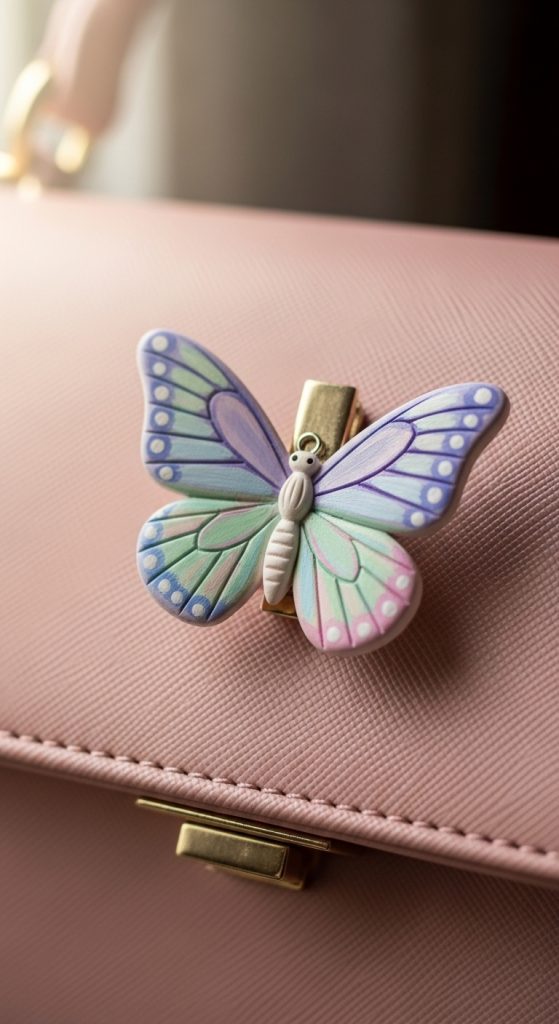
This charm is elegant, trendy, and perfect for spring-inspired styling.
12. Mini Croissant Charm
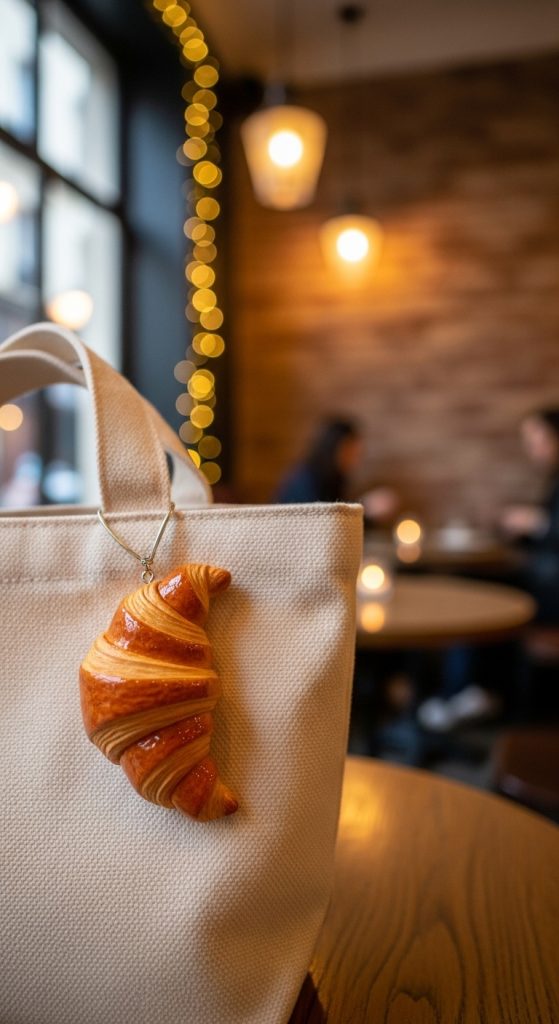
Food-inspired charms are incredibly popular, and a mini croissant gives off cozy café-core vibes. This design is slightly textured, making it look realistic and eye-catching. It’s perfect for tote bags, especially canvas or neutral-colored ones.
The charm can be painted in warm golden brown shades with subtle darker accents for a baked effect. Adding a glossy sealant makes it look even more realistic, almost like a miniature pastry.
How to Make It
- Roll clay into a thin rope shape.
- Flatten slightly and roll into a crescent form.
- Use a toothpick to press small curved lines for layered texture.
- Insert a hole carefully at the top edge.
- Let dry fully.
- Paint in layered brown tones for realism.
- Seal with gloss varnish and attach hardware.
Materials Needed
- Air dry clay
- Toothpick
- Acrylic paint (brown shades)
- Gloss sealant
- Keyring
This charm feels cozy, trendy, and playful.
13. Yin Yang Charm
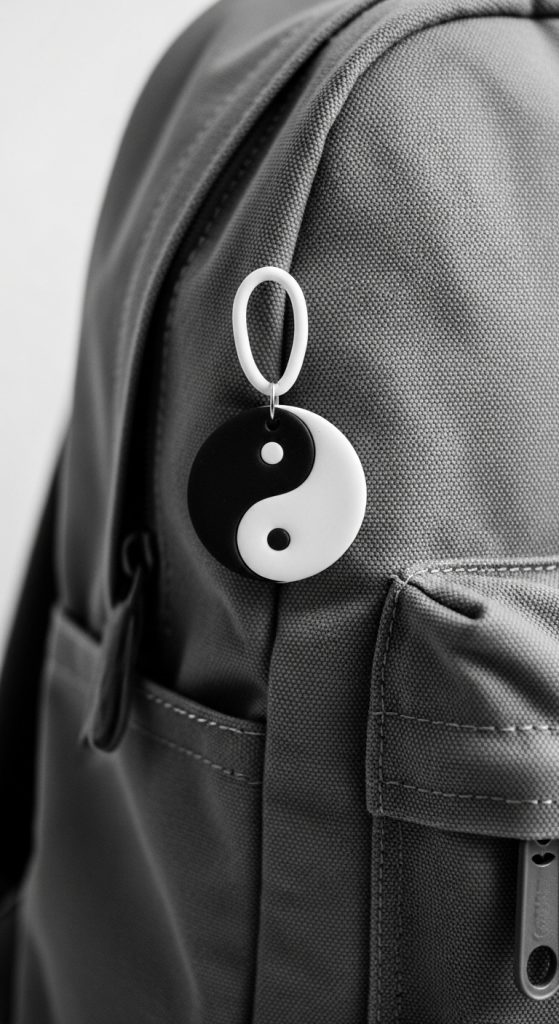
A yin yang charm is minimalist yet meaningful. It symbolizes balance and harmony, making it both aesthetic and symbolic. This design works beautifully in black and white, but you can also experiment with pastel variations for a softer look.
The circular shape is simple to create, and the painted details are beginner-friendly. This charm pairs especially well with monochrome bags or minimalist fashion styles.
How to Make It
- Roll clay into a smooth ball and flatten into a circle.
- Smooth edges evenly.
- Insert hole at the top.
- Let dry completely.
- Sketch the yin yang design lightly with pencil.
- Paint black and white sections carefully.
- Add small contrasting dots.
- Seal and attach hardware.
Materials Needed
- Air dry clay
- Acrylic paint (black and white)
- Fine brush
- Pencil
- Sealant
- Keyring
Simple, modern, and deeply symbolic.
14. Mini Seashell Charm
Seashell charms are perfect for summer aesthetics and beach-inspired styling. Whether you’re decorating a beach tote or adding coastal charm to your everyday bag, this design feels light and breezy.
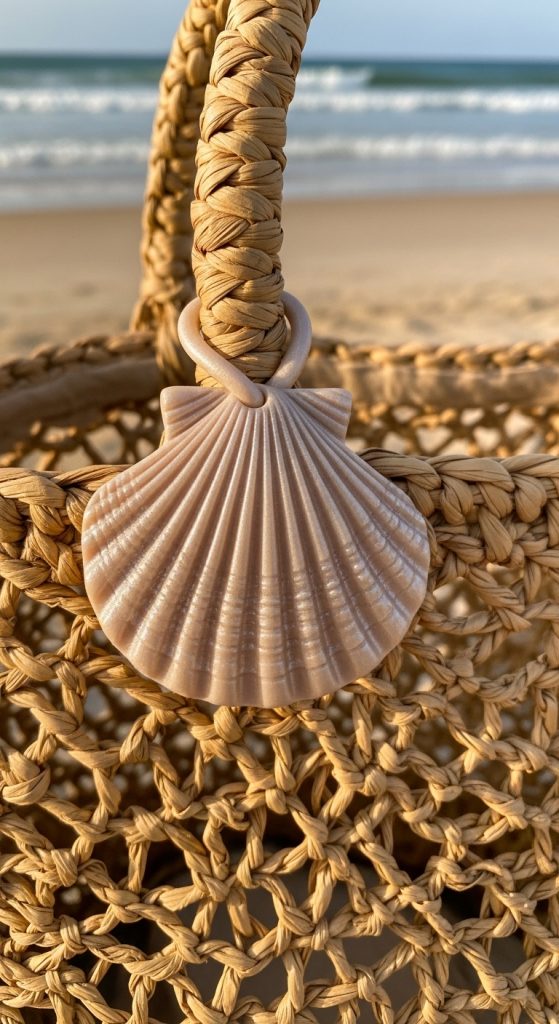
You can press real seashells gently into clay to create texture or sculpt simple ridged shell shapes by hand. Soft beige, pearl white, and sandy tones make it look realistic.
How to Make It
- Shape clay into a fan-like shell form.
- Press lines outward using a toothpick.
- Smooth edges carefully.
- Insert hole at the top.
- Let dry thoroughly.
- Paint in soft neutral tones.
- Add subtle shimmer for a pearlescent effect.
- Seal and attach hardware.
Materials Needed
- Air dry clay
- Toothpick
- Acrylic paint
- Pearl or shimmer paint (optional)
- Sealant
- Keyring
A perfect charm for coastal and summer vibes.
15. Mini Cat Face Charm
Animal-themed charms are always adorable, and a mini cat face is perfect for pet lovers. This design works well for school backpacks or cute everyday totes.
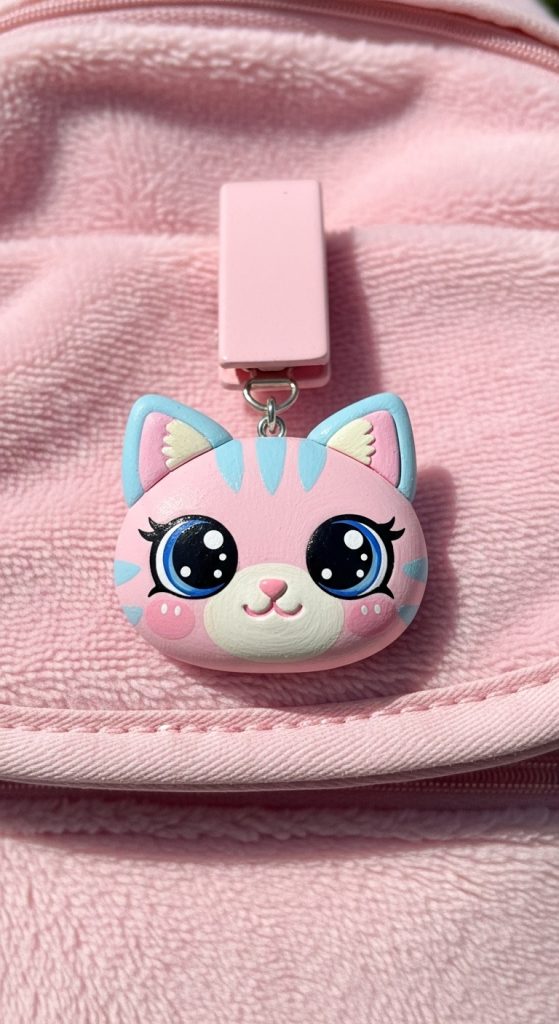
You can keep the design simple—just a rounded face with small ears and painted features. Customize it with different fur colors or expressions to make each charm unique.
How to Make It
- Roll clay into a small circle for the face.
- Add two small triangle shapes for ears and attach.
- Smooth all seams carefully.
- Insert hole at the top.
- Let dry fully.
- Paint base color and facial features.
- Seal and attach hardware.
Materials Needed
- Air dry clay
- Acrylic paints
- Small brush
- Toothpick
- Sealant
- Keyring
Cute, expressive, and perfect for gifting.
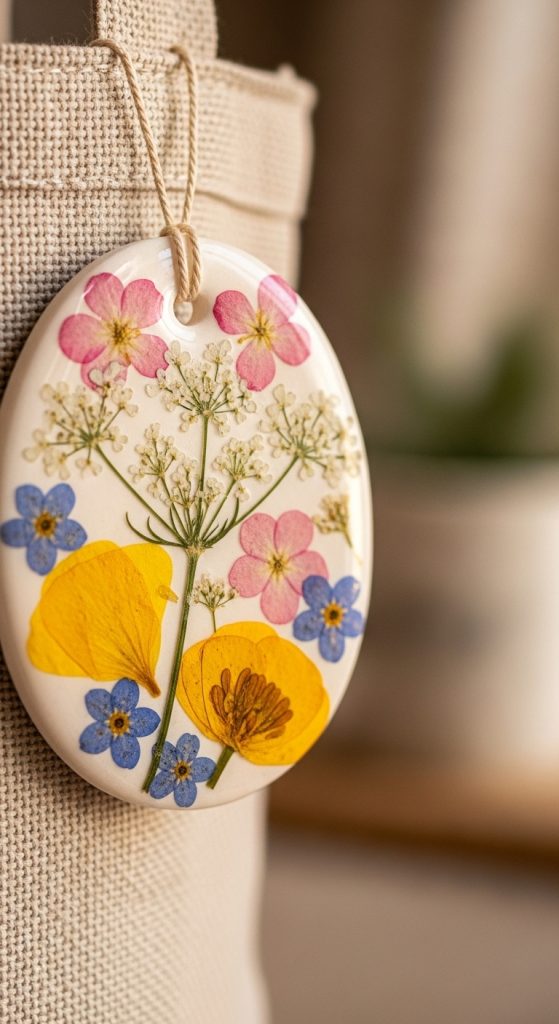
16. Pressed Flower Charm
Pressed flower charms look delicate and artistic. You can embed dried flowers directly into the clay before it dries for a soft, romantic aesthetic.
This charm works beautifully in oval or round shapes with neutral clay bases. After sealing, it resembles resin-style accessories but without complicated techniques.
How to Make It
- Roll clay flat and cut into oval or circle shape.
- Gently press dried flowers onto the surface.
- Lightly press to secure.
- Insert hole at the top.
- Let dry completely.
- Seal with clear gloss varnish for protection.
- Attach hardware.
Materials Needed
- Air dry clay
- Dried flowers
- Rolling pin
- Sealant
- Keyring
Soft, romantic, and Pinterest-perfect.
17. Mini Bubble Letter Charm
Bubble letters are bold and playful. Instead of minimalist initials, this design features chunky, rounded lettering for a trendy Y2K-inspired look.
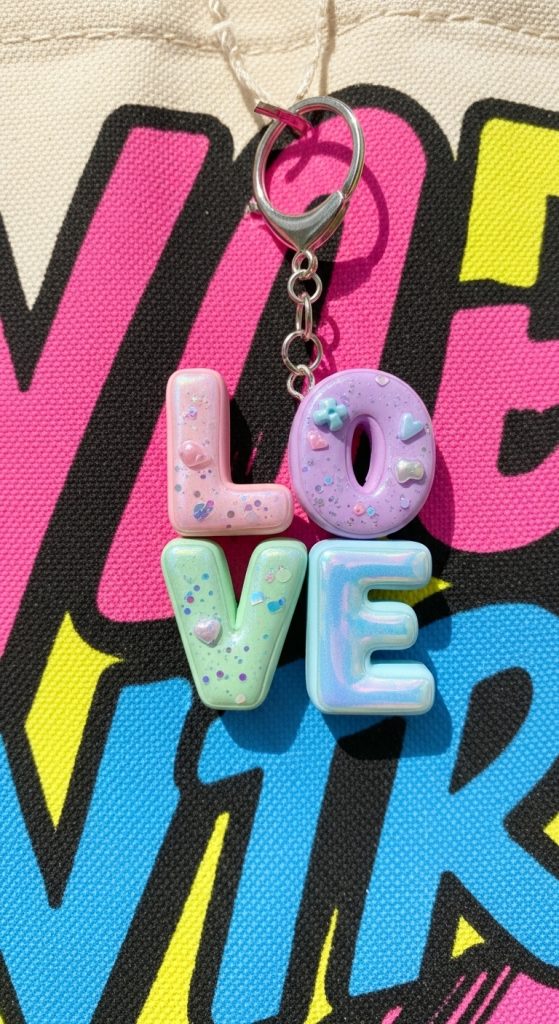
Bright pastel or neon colors make this charm stand out. You can create single letters or short words like “LOVE” or “JOY.”
How to Make It
- Roll clay into small rounded strips.
- Shape into thick bubble-style letters.
- Smooth seams carefully.
- Insert hole at top.
- Let dry completely.
- Paint in bold or pastel shades.
- Seal and attach hardware.
Materials Needed
- Air dry clay
- Acrylic paint
- Toothpick
- Sealant
- Keyring
Fun, bold, and trendy.
18. Mini Daisy Flower Charm
Daisies are simple and fresh. This design works beautifully in white and yellow but can also be customized in pastel tones.
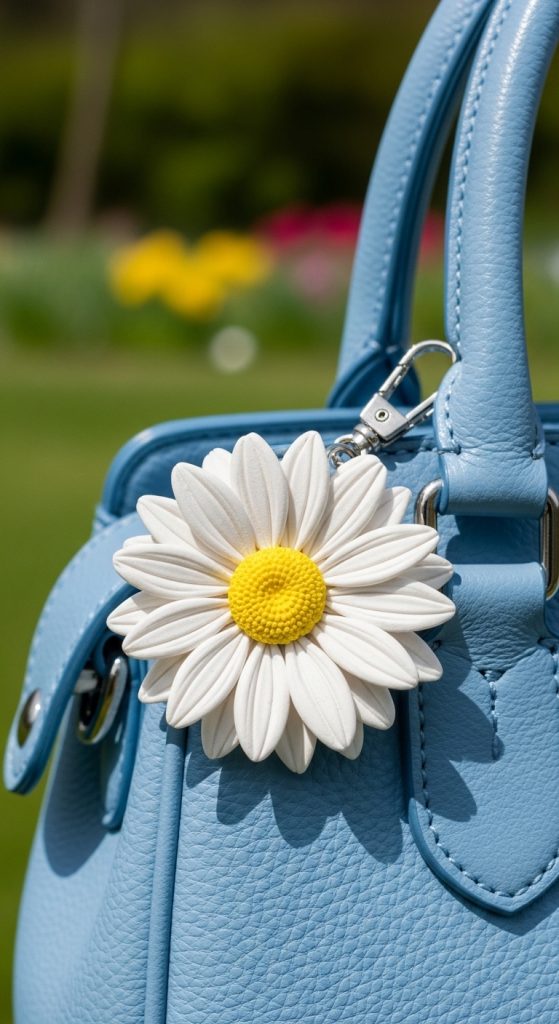
The layered petals give dimension while remaining beginner-friendly.
How to Make It
- Roll clay flat.
- Cut small petal shapes and arrange in circle.
- Add small circular center.
- Smooth gently.
- Insert hole at top.
- Let dry fully.
- Paint petals and center.
- Seal and attach hardware.
Materials Needed
- Air dry clay
- Acrylic paints
- Small brush
- Sealant
- Keyring
Bright and cheerful for spring bags.
19. Mini Envelope Love Charm
This charm resembles a tiny envelope with a heart seal. It’s romantic and perfect for Valentine’s gifts or meaningful keepsakes.
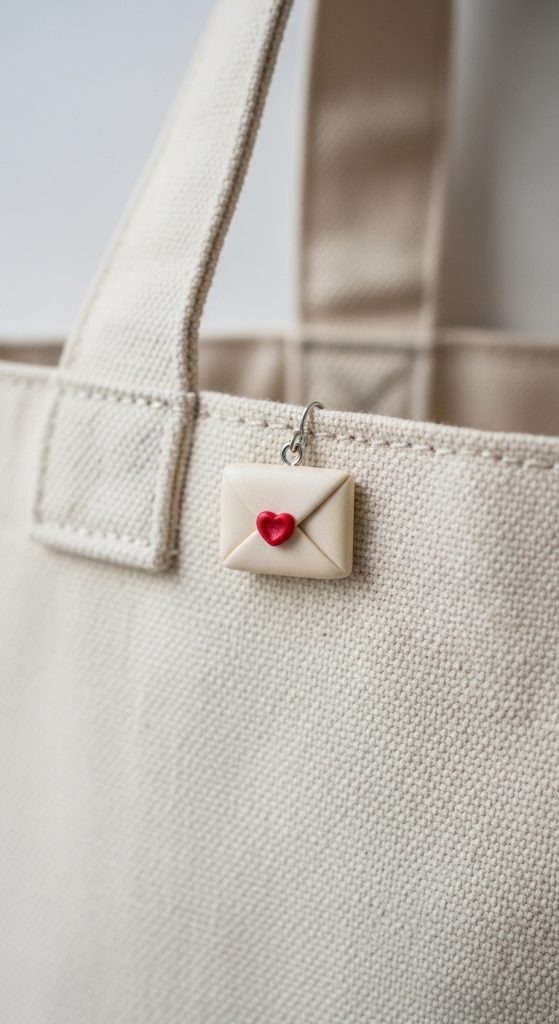
You can keep it minimal in white and red or experiment with pastel shades.
How to Make It
- Shape clay into small rectangle.
- Score diagonal flap lines.
- Add small heart shape in center.
- Insert hole at top.
- Let dry thoroughly.
- Paint base and heart detail.
- Seal and attach hardware.
Materials Needed
- Air dry clay
- Toothpick
- Acrylic paint
- Sealant
- Keyring
Sweet and meaningful.
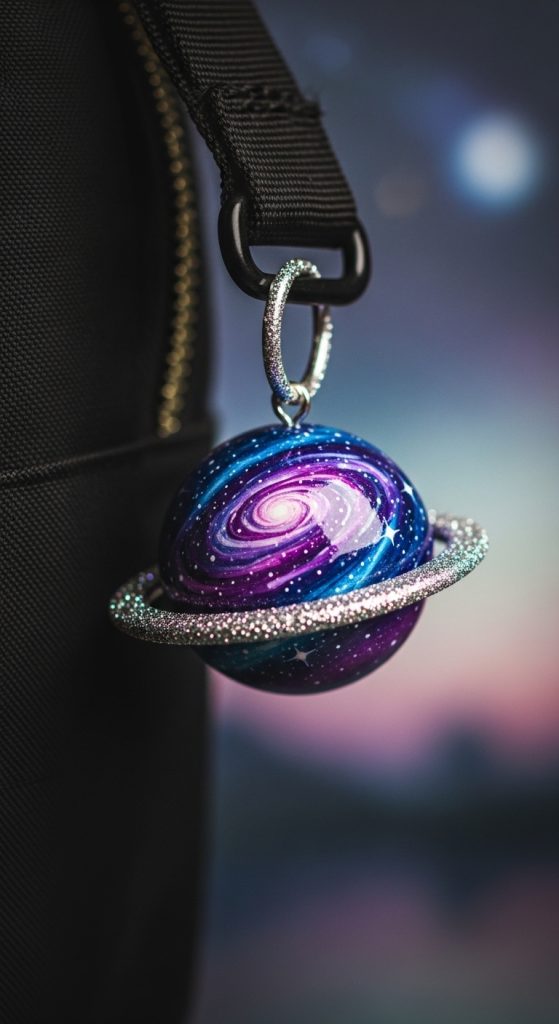
20. Mini Planet Charm
A tiny planet charm with rings gives off cosmic and dreamy vibes. It’s perfect for space lovers and aesthetic backpack styling.
Blend colors slightly before drying to create a galaxy-inspired look.
How to Make It
- Roll clay into small ball.
- Flatten slightly for planet shape.
- Add thin clay strip around middle for ring.
- Smooth connections gently.
- Insert hole at top.
- Let dry fully.
- Paint with blended cosmic shades.
- Seal and attach hardware.
Materials Needed
- Air dry clay
- Acrylic paint
- Small brush
- Sealant
- Keyring
Whimsical and eye-catching.