10 pottery bowl painting ideas
Introduction
Pottery bowl painting is a practical and creative project that combines functional design with artistic expression. This type of DIY activity is widely featured in Pinterest ideas because it allows individuals to create customized pieces that serve both decorative and everyday purposes. Painted bowls can be used for serving food, organizing small items, or enhancing home decor with handmade accents. This article explains how to approach pottery bowl painting using clear methods, accessible materials, and beginner friendly techniques. Readers will learn step by step processes for ten unique design ideas, each offering a different visual style and level of detail. The content focuses on practical execution, including preparation, painting methods, and finishing techniques that ensure durability. This topic is useful because it supports creative projects that are cost-effective and adaptable to different skill levels. It also provides inspiration for those interested in modern design, minimalist style, or aesthetic decoration. Each idea is structured to help readers plan and complete an easy project with clear results.
Why This Idea Is Trending or Useful
Pottery bowl painting has become a popular category in Pinterest ideas due to its balance of creativity and functionality. Many users seek DIY projects that result in usable objects rather than purely decorative crafts. Painted bowls meet this demand by offering both artistic value and practical application in daily life. The process is beginner friendly, requiring basic materials and simple tools that are easy to access. This makes it suitable for individuals exploring creative ideas without prior experience. The trend is also driven by the rise of handmade home decor, where personalized items replace mass-produced designs. Painted pottery allows for complete customization, making it ideal for modern design preferences and minimalist style interiors. Additionally, the project supports budget ideas because it can be completed with affordable supplies and reused materials. The step by step nature of bowl painting tutorials also aligns with Pinterest’s visual learning format, making it easier for users to follow and replicate designs. This combination of accessibility, practicality, and aesthetic appeal contributes to its growing popularity.
Materials and Preparation
Before starting any pottery bowl painting project, proper preparation ensures consistent results and long-lasting designs. The essential materials include plain ceramic or clay bowls, acrylic or ceramic paints, fine and medium brushes, a palette, water containers, and protective coverings for the workspace. For more detailed work, tools such as sponges, painter’s tape, and dotting tools can be included. Preparation begins by cleaning the bowl thoroughly to remove dust, oils, or residues that may affect paint adhesion. The surface must be completely dry before applying any paint. Planning the design is an important step, which can involve sketching ideas on paper or lightly outlining patterns on the bowl using a pencil. This helps maintain accuracy during the painting process. Organizing materials in advance prevents interruptions and supports a smooth workflow. Proper lighting and a stable surface improve precision, especially for detailed patterns. If the bowl is intended for functional use, selecting food-safe paints or applying a protective sealant after painting is necessary. Careful preparation supports both the creative and technical aspects of this project.
Idea 1: Minimalist Line Pattern Bowl
How to Create

Minimalist line pattern bowls focus on clean, simple designs that align with modern design and minimalist style trends. This concept uses thin lines, geometric shapes, or abstract strokes to create subtle decoration without overwhelming the surface. The simplicity of this design makes it beginner friendly and suitable for those exploring DIY pottery painting for the first time. The aesthetic relies on balance and spacing, where empty areas are just as important as painted sections. This approach supports a calm and organized visual effect, making it ideal for home decor in contemporary spaces. The color palette is typically limited to one or two tones, such as black on white or neutral shades, to maintain clarity and consistency. This type of creative project emphasizes precision rather than complexity, allowing beginners to focus on control and technique. It also works well for functional bowls used in kitchens or dining areas, where subtle decoration enhances usability without distraction.
The execution process begins by lightly sketching the desired pattern on the bowl using a pencil. Straight lines, curved strokes, or repeated shapes can be planned evenly around the surface. Using a fine brush, carefully paint over the outlines with steady hand movements. Painter’s tape can be used to create straight edges and maintain clean lines. It is important to apply thin layers of paint to avoid uneven texture. Allow each section to dry before adding additional details or layers. Consistency in line thickness improves the overall appearance, so maintaining steady pressure is essential. Once the design is complete, let the bowl dry fully before applying a sealant if needed. This step ensures durability and protects the painted surface. The result is a clean, modern bowl that fits seamlessly into minimalist home decor.
Idea 2: Floral Hand-Painted Bowl
Step-by-Step Guide

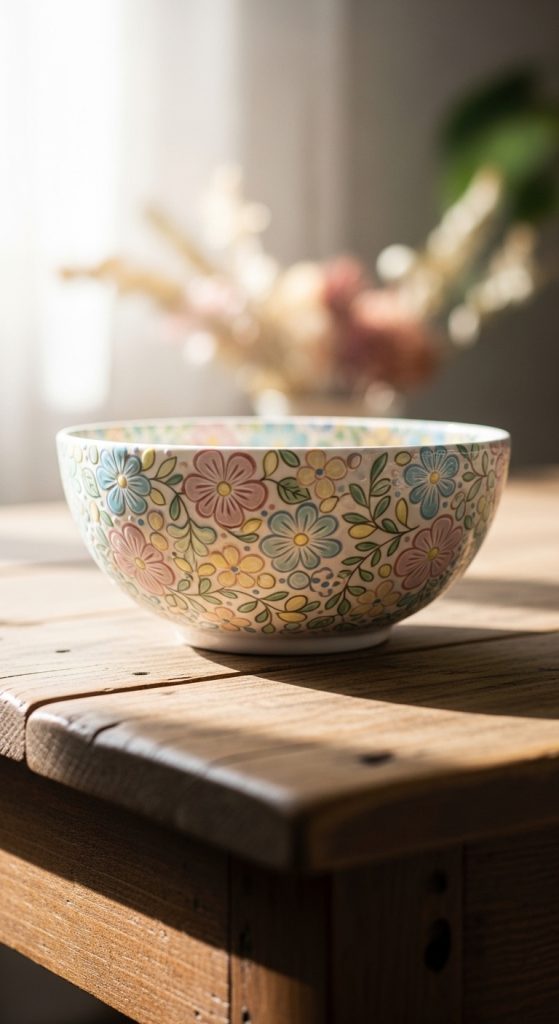
Floral designs are a common source of inspiration in Pinterest ideas because they offer flexibility in style and complexity. A floral hand-painted bowl can range from simple petal patterns to detailed botanical illustrations. This idea focuses on creating natural-looking flower elements that enhance the aesthetic value of the bowl. It is suitable for beginners because the design can be simplified into basic shapes such as circles and elongated strokes. Floral patterns are widely used in decoration, making this a versatile creative project for both display and functional use. The choice of colors plays an important role, with soft tones creating a subtle effect and bright colors adding visual impact. This approach allows for customization based on personal preference or existing home decor themes. The organic nature of floral designs also reduces the need for perfect symmetry, making it easier to achieve a balanced result.
To create this design, start by sketching simple flower shapes on the bowl surface. Begin with the center of each flower and build outward with petals. Use a small brush for detailed areas and a slightly larger brush for filling shapes. Layering colors adds depth, so apply a base color first and then add highlights or outlines once it dries. Leaves and stems can be added to connect the floral elements and create a cohesive pattern. Work gradually around the bowl to maintain spacing and avoid overcrowding. Allow each section to dry before continuing to prevent smudging. After completing the design, let the bowl dry completely. If the bowl will be used functionally, apply a protective coating to preserve the paint. This method results in a decorative bowl that reflects natural inspiration and handmade craftsmanship.
Idea 3: Geometric Pattern Bowl
How to Make

Geometric pattern bowls focus on structured shapes such as triangles, squares, and repeating patterns. This idea is widely used in modern design because it creates a visually organized and balanced appearance. The use of symmetry and repetition makes it appealing for home decor and organization purposes. Geometric designs are also suitable for beginners because they rely on simple shapes that can be easily replicated. This approach allows for experimentation with color combinations while maintaining a clear structure. The design can be bold or subtle depending on the chosen palette. It supports both aesthetic and functional use, making it a practical addition to DIY projects. The precision required in geometric patterns helps improve painting skills, particularly in maintaining straight lines and consistent spacing.
The process begins by dividing the bowl surface into sections using light pencil guidelines. Painter’s tape can be applied to create clean edges for each shape. Choose a limited color palette to maintain visual harmony. Apply paint within each section carefully, ensuring even coverage. Allow each color to dry before removing tape or adding adjacent colors to prevent bleeding. Repetition of shapes around the bowl creates a cohesive pattern. Once the base design is complete, outlines can be added to enhance definition. After the painting is finished, let the bowl dry completely. A sealant can be applied if durability is required. This method produces a structured and visually appealing bowl that fits well within contemporary decor themes.
Idea 4: Ombre Gradient Bowl
How to Create
Ombre gradient bowls use a gradual transition between colors to create a smooth and modern visual effect. This design is popular in Pinterest ideas because it combines simplicity with a refined aesthetic. The gradient can move from light to dark tones or blend between two or more colors. This approach is beginner friendly because it does not require complex shapes or precise detailing. Instead, the focus is on blending techniques and smooth transitions. Ombre designs work well in minimalist style interiors and can be adapted to various color schemes. The result is a soft, visually appealing bowl that enhances both decorative and functional use.
To create an ombre effect, start by selecting two or three compatible colors. Apply the lightest color at one end of the bowl and the darkest at the opposite end. Use a damp sponge or brush to blend the colors where they meet. Work gradually to ensure a smooth transition without visible lines. It is important to keep the paint slightly wet during blending to achieve a seamless gradient. Apply multiple thin layers if needed to enhance the effect. Allow the bowl to dry completely before handling. This technique results in a smooth, modern design that highlights color transitions effectively.
Idea 5: Polka Dot Pattern Bowl
Execution Process

Polka dot patterns are simple yet visually engaging, making them a popular choice for beginner friendly DIY projects. This design involves evenly spaced dots applied across the bowl surface, creating a playful and organized look. The pattern can be uniform or varied in size to add interest. Polka dots are widely used in decoration due to their versatility and ease of application. This idea works well for both functional bowls and decorative pieces. The design can be adapted to different color combinations, making it suitable for various home decor styles.
To execute this design, use a dotting tool or the end of a brush to create consistent dots. Start by planning the spacing using light pencil marks if needed. Dip the tool into paint and apply dots evenly across the surface. Maintain consistent pressure to ensure uniform size. Allow the dots to dry before adding additional layers or colors. For a more dynamic effect, vary the size of the dots or use multiple colors. Once complete, let the bowl dry thoroughly. This method produces a clean and visually appealing pattern that is easy to achieve.
Idea 6: Abstract Brushstroke Bowl

How to Create
Abstract brushstroke bowls focus on freeform painting techniques that emphasize movement and texture. This idea allows for creative expression without strict guidelines, making it accessible for beginners. The design is based on layered strokes, color blending, and varied brush techniques. Abstract patterns are widely used in modern design because they create dynamic and unique visuals. This approach encourages experimentation with color and form, resulting in a one-of-a-kind piece.
To create this design, select a range of colors and apply them using broad, sweeping brushstrokes. Vary the direction and pressure to create texture. Layer colors gradually, allowing some areas to overlap. Avoid overworking the surface to maintain a natural look. Allow each layer to dry before adding additional strokes. Once the design is complete, let the bowl dry fully. This technique results in a bold and expressive bowl that reflects artistic freedom.
Idea 7: Nature-Inspired Leaf Bowl

Step-by-Step Guide
Nature-inspired leaf designs bring organic elements into pottery painting. This idea focuses on creating leaf patterns that mimic natural forms. It is suitable for beginners because leaf shapes are simple and repetitive. The design can be adjusted to include different sizes and arrangements. This approach enhances the aesthetic value of the bowl while maintaining a natural theme.
To create this design, sketch leaf shapes around the bowl. Use a fine brush to outline each leaf and fill it with color. Add vein details using thinner lines for realism. Work gradually to maintain spacing and consistency. Allow each section to dry before continuing. Once complete, let the bowl dry fully. This method produces a calm and natural design.
Idea 8: Text and Quote Bowl
How to Make
Text-based designs focus on adding words or short phrases to the bowl surface. This idea is popular in Pinterest inspiration because it combines visual design with meaningful content. The text can be simple and aligned with the bowl’s shape. This approach works well for decorative or gift purposes.
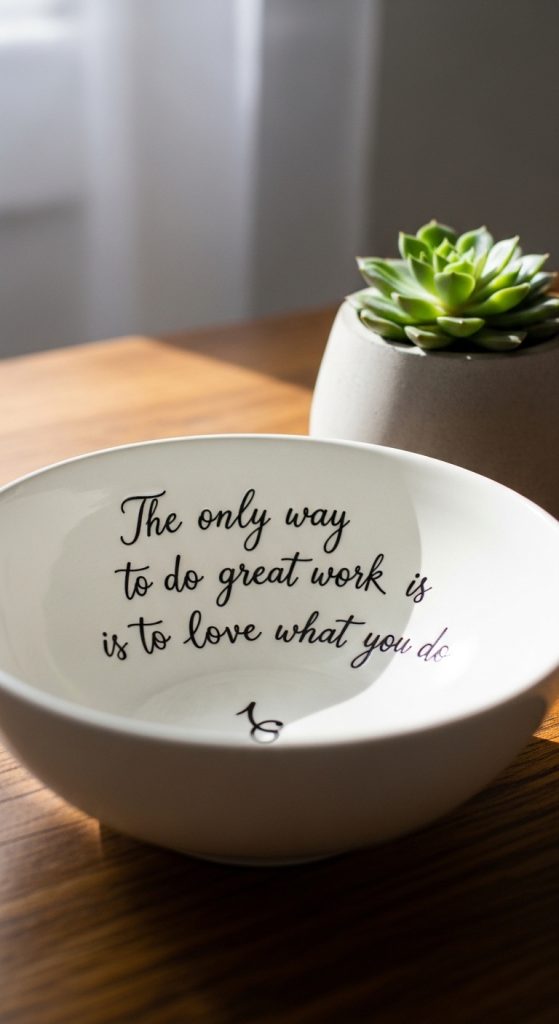
To create this design, sketch the text lightly using a pencil. Use a fine brush to paint over the letters carefully. Maintain consistent spacing and alignment. Allow the paint to dry before adding outlines or additional elements. Once complete, let the bowl dry fully. This method results in a personalized and functional piece.
Idea 9: Marble Effect Bowl
Execution Process

Marble effect bowls replicate the appearance of natural stone using paint techniques. This design is popular due to its elegant and modern aesthetic. It involves blending colors in a way that mimics marble patterns. This approach is beginner friendly and visually impactful.
To create this effect, apply a base color and then add thin lines of contrasting colors. Use a brush or tool to swirl the colors gently. Avoid overmixing to maintain distinct patterns. Allow the design to dry completely. This technique produces a sophisticated and polished look.
Idea 10: Color Block Bowl
How to Create
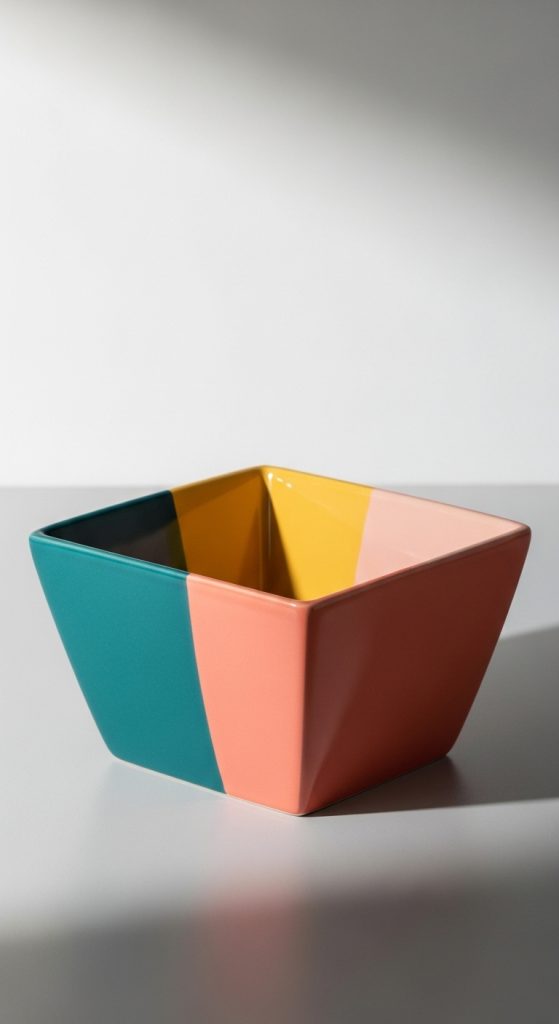
Color block bowls use large sections of solid color to create a bold and structured design. This idea is widely used in modern decor due to its clean and organized appearance. The design focuses on dividing the bowl into distinct areas.
To create this design, use painter’s tape to section the bowl. Apply different colors to each section carefully. Allow each section to dry before removing tape. Ensure clean edges for a professional finish. This method results in a bold and modern bowl.
Common Beginner Mistakes and How to Avoid Them
One common mistake in pottery bowl painting is applying paint on an unclean surface, which reduces adhesion and leads to uneven results. Proper cleaning and drying are essential before starting any design. Another issue is using too much paint at once, which creates thick layers that crack or smear. Applying thin, even coats improves durability and appearance. Beginners often skip planning, resulting in unbalanced designs. Sketching the pattern beforehand helps maintain structure and spacing. Rushing the drying process can also cause smudging, so allowing sufficient time between layers is necessary. Using the wrong tools, such as oversized brushes for detailed work, reduces precision. Selecting appropriate tools improves control and accuracy. Avoiding these mistakes ensures a smoother workflow and better final results.
Practical Tips for Better Results
Improving pottery painting results requires attention to technique and preparation. Using high-quality brushes with fine tips allows for more precise detailing. Working in a well-lit area improves visibility and accuracy. Rotating the bowl while painting helps maintain consistent angles and prevents uneven lines. Mixing colors on a palette before application ensures uniform tones. Practicing designs on paper before applying them to the bowl helps build confidence. Maintaining a steady hand by resting it on a stable surface reduces errors. Applying a protective sealant enhances durability, especially for functional bowls. These practical steps support consistent and professional-looking outcomes.
Styling, Presentation, or Organization Ideas
Painted pottery bowls can be styled in various ways to enhance their visual impact. Grouping bowls with similar color schemes creates a cohesive display. Using them for organization, such as holding keys or small items, combines function with decoration. Placing bowls on open shelves or tables highlights their design. Coordinating painted bowls with existing home decor elements improves overall aesthetic balance. Using different sizes and shapes adds variation to the arrangement. Proper styling enhances both the visual appeal and usability of the bowls.
Budget or Time Planning
Pottery bowl painting is a cost-effective project when planned efficiently. Using basic materials and reusable tools reduces expenses. Purchasing plain bowls in bulk lowers overall cost per piece. Planning the design in advance minimizes material waste and time spent correcting mistakes. Working on multiple bowls simultaneously allows for efficient use of drying time. Setting a clear timeline for each stage, including preparation, painting, and drying, ensures completion without delays. This approach supports both budget management and time efficiency.
Creative Expansion and Advanced Inspiration
After mastering basic techniques, pottery bowl painting can be expanded into more advanced creative projects. Combining multiple design styles, such as geometric and floral patterns, creates unique results. Experimenting with layered textures and mixed techniques adds depth and complexity. Creating themed sets of bowls enhances visual consistency. Exploring new color palettes and design concepts supports continuous improvement. Advanced inspiration can also include creating coordinated collections for specific spaces or purposes. This progression allows for ongoing creativity and skill development.