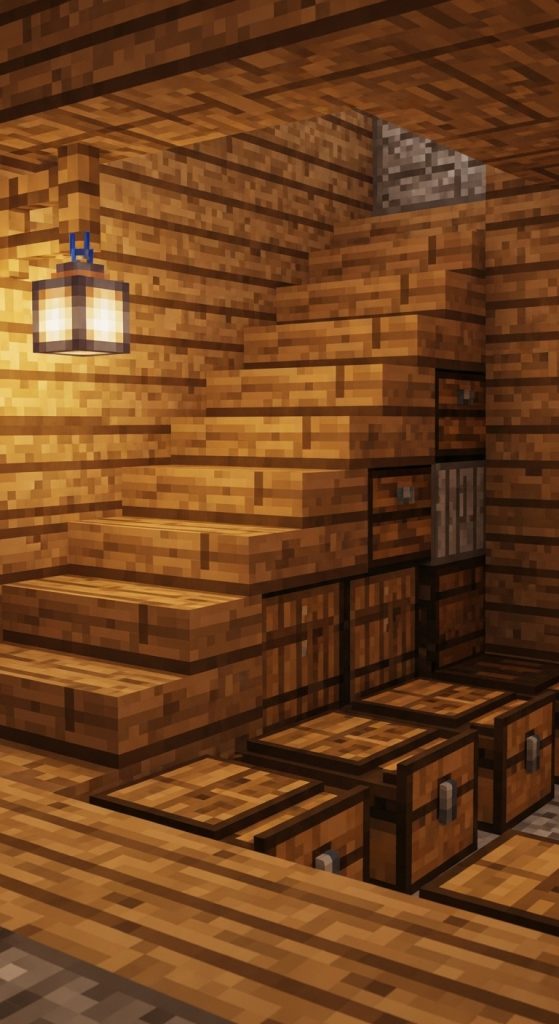
One of the most underused spaces in Minecraft builds is the area beneath stairs. Many players place stairs purely for vertical movement, leaving the underside as empty, wasted blocks. However, that triangular space is perfect for compact hidden storage. Under-stair storage is especially useful in starter houses, mountain bases, and compact survival builds where every block matters.
This design is ideal for early-game players because it doesn’t require redstone or rare materials. It’s also extremely aesthetic. Instead of a wall of obvious chests, you create a seamless staircase that secretly stores your most valuable items. It’s functional, clean, and space-efficient.
What This Design Is
Under-stair hidden storage integrates chests or barrels into the space beneath a staircase, often concealed by trapdoors, slabs, or matching blocks. It keeps your base tidy while adding secret compartments for tools, food, ores, or valuables.
How to Build It (Step-by-Step)
- Build your staircase against a wall.
- Leave the underside hollow instead of filling it with solid blocks.
- Place chests or barrels inside the hollow area.
- Cover the openings with trapdoors or matching stair blocks.
- Optionally add item frames for subtle labeling.
Materials Needed
- Stairs (wood or stone)
- Chests or barrels
- Trapdoors
- Item frames (optional)
- Slabs (optional for detailing)
This simple upgrade instantly improves your base organization without taking additional floor space.
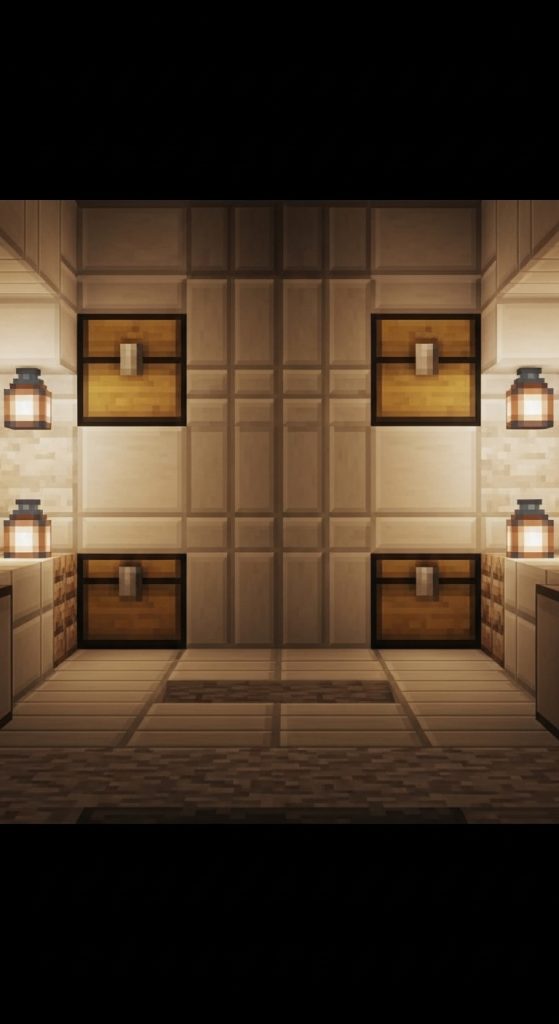
2. Compact Double Chest Wall Unit
Introduction
If you love organized walls but don’t want a massive storage room, a compact double chest wall unit is the perfect solution. Instead of spreading chests across your base, you dedicate one vertical wall and design it efficiently.
This design works beautifully in small houses, cabins, and underground bunkers. It turns storage into a design feature rather than an afterthought. With proper alignment and labeling, your wall becomes both decorative and practical.
What This Design Is
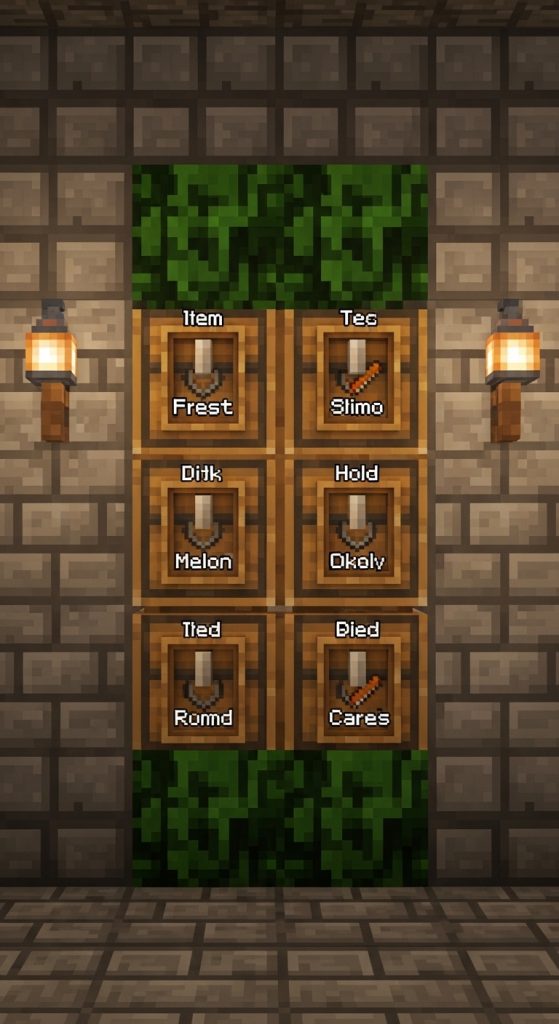
A vertical storage wall made from stacked double chests arranged symmetrically and framed with decorative blocks. It maximizes vertical space while keeping everything within reach.
How to Build It
- Choose a 5×3 wall area.
- Stack double chests two or three blocks high.
- Frame edges with logs or stone bricks.
- Add slabs on top for a finished look.
- Label with item frames.
Materials Needed
- 6–12 chests
- Decorative blocks (logs, stone bricks)
- Slabs
- Item frames
This is one of the cleanest and most beginner-friendly storage upgrades available.
3. Hidden Floor Trapdoor Storage
Introduction
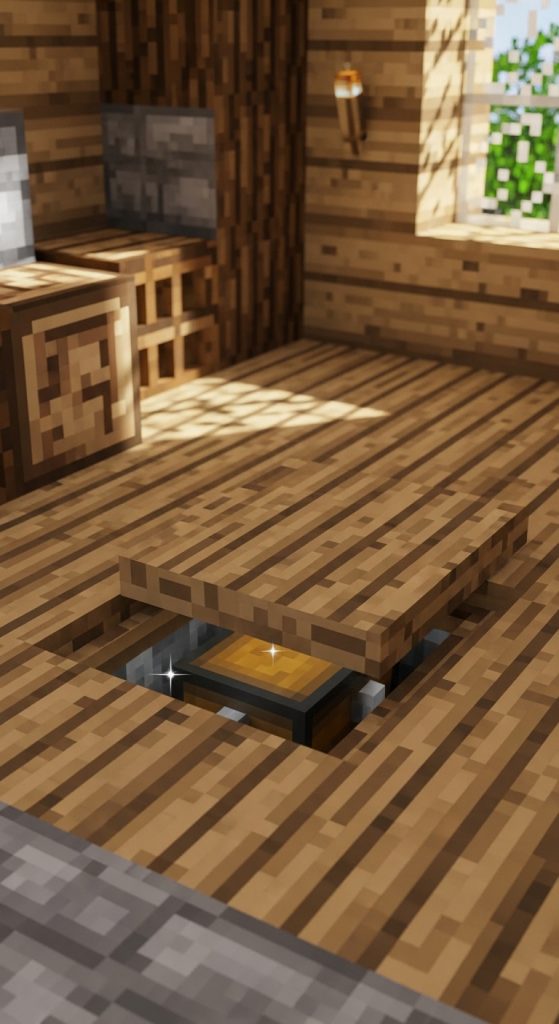
Hidden floor storage is perfect for players who enjoy secret compartments. Instead of placing visible chests, you build a small compartment beneath your floor. This keeps your base minimal and uncluttered.
It’s especially effective in modern builds or minimalist wooden houses. Your storage becomes completely invisible unless opened.
What This Design Is
A concealed chest compartment hidden beneath trapdoors or carpet in your floor.
How to Build It
- Dig a 2-block-deep hole in your floor.
- Place chests inside.
- Cover with trapdoors or carpet.
- Blend with surrounding flooring.
Materials Needed
- Chests
- Trapdoors or carpet
- Matching floor blocks
This design adds both security and aesthetic appeal.
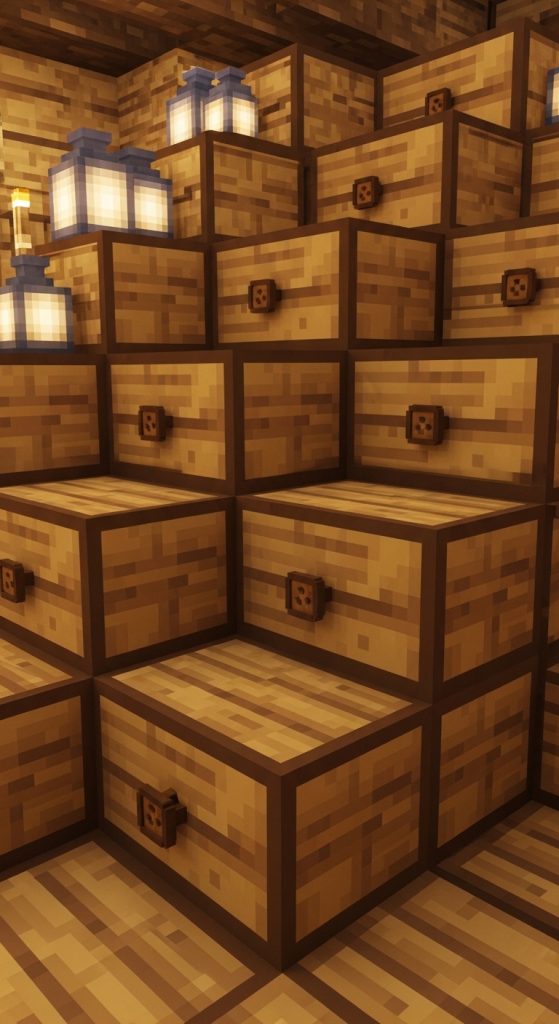
4. Barrel Corner Storage Nook
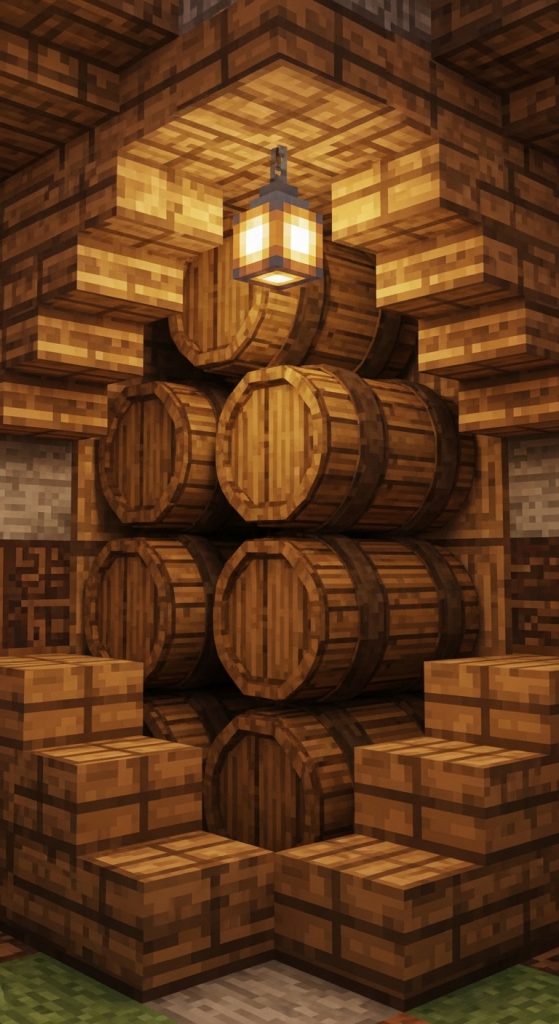
Introduction
Corners are often wasted in Minecraft builds. Instead of leaving them empty, transform them into vertical barrel storage towers. Barrels are ideal because they can open even when blocked above.
This makes them perfect for tight corners where chests would fail.
What This Design Is
A stacked barrel column placed in a corner for compact storage.
How to Build It
- Place barrels vertically in a corner.
- Surround with stairs for decorative framing.
- Add signs or item frames.
Materials Needed
- Barrels
- Stairs
- Item frames
Barrel storage is sleek, compact, and survival-friendly.
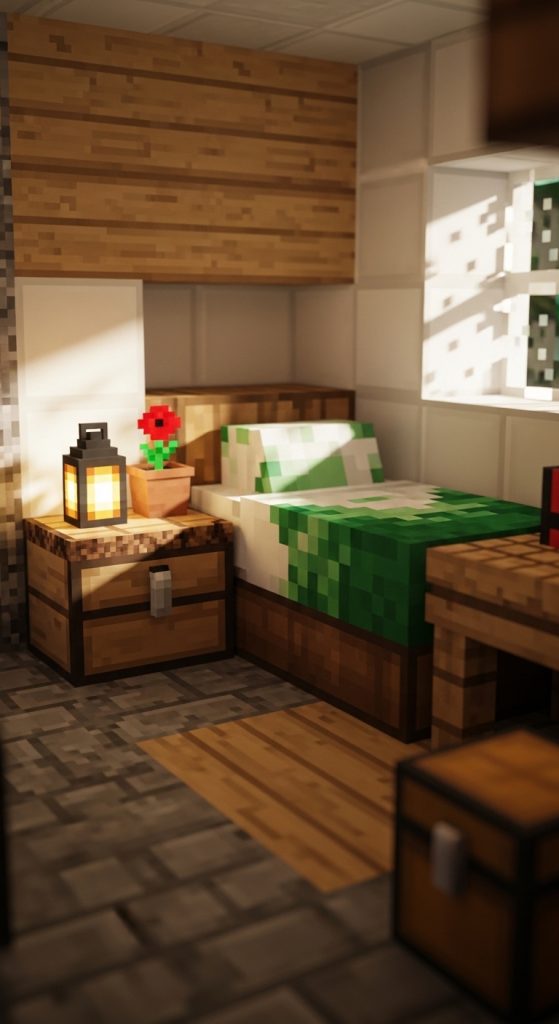
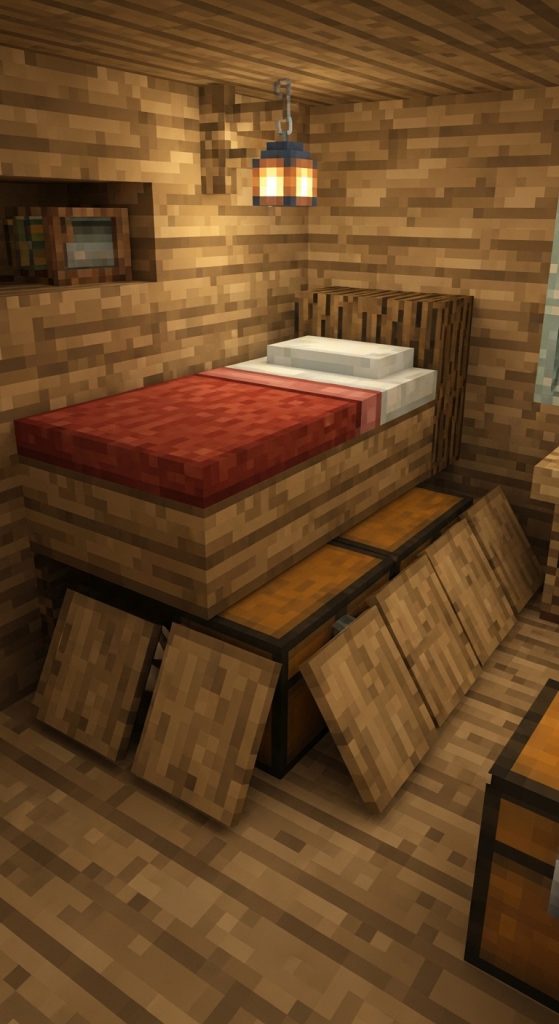
5. Bedside Mini Storage Drawer
Introduction
Even small bedrooms in Minecraft can benefit from hidden storage. By integrating chests into bedside tables, you combine decoration and functionality.
This is perfect for roleplay builds or aesthetic cottages.
What This Design Is
A single chest disguised as a bedside table.
How to Build It
- Place a chest beside your bed.
- Add a slab on top.
- Place a lantern or flower pot above.
Materials Needed
- Chest
- Slab
- Lantern or decoration
Small details like this make your base feel realistic.
6. Compact Automatic Smelter Storage
Introduction
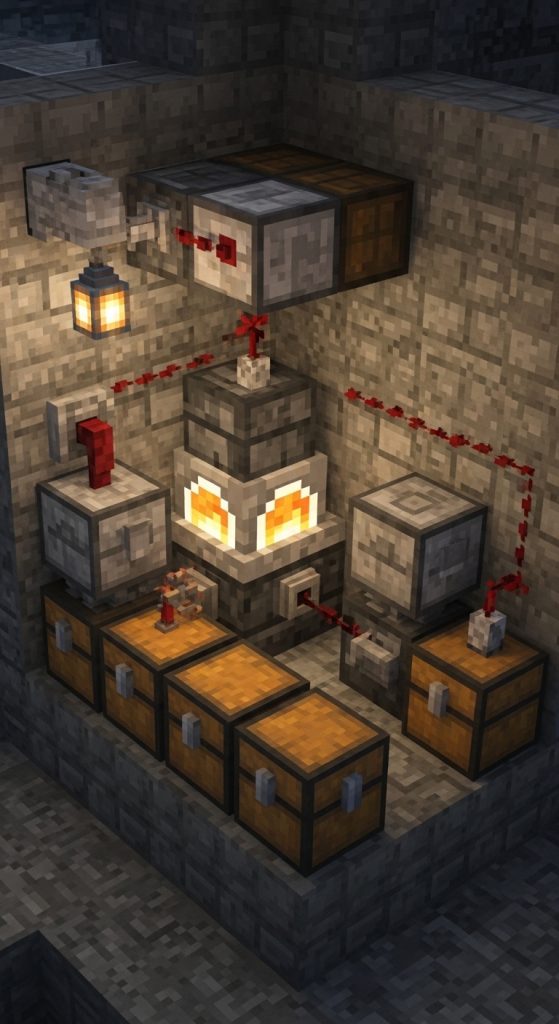
Smelting quickly fills your inventory. A compact smelter with built-in chest storage solves that problem while staying small enough for starter bases.
What This Design Is
A mini furnace array connected to input and output chests via hoppers.
How to Build It
- Place furnace.
- Add hopper on top and bottom.
- Connect chests.
- Fuel side hopper optional.
Materials Needed
- Furnace
- Hoppers
- Chests
- Fuel
Efficient and beginner redstone friendly.
7. Ladder Wall Storage Column
Introduction

Vertical builds benefit from wall storage integrated alongside ladders. This saves floor space entirely.
What This Design Is
A ladder wall with side-mounted chests or barrels.
How to Build It
- Build vertical ladder shaft.
- Place barrels beside ladders.
- Frame with logs.
Materials Needed
- Ladders
- Barrels
- Logs
Ideal for compact tower bases.
8. Kitchen Cabinet Storage Design
Introduction
Storage can be decorative. A kitchen-style cabinet storage unit brings life to your survival house.
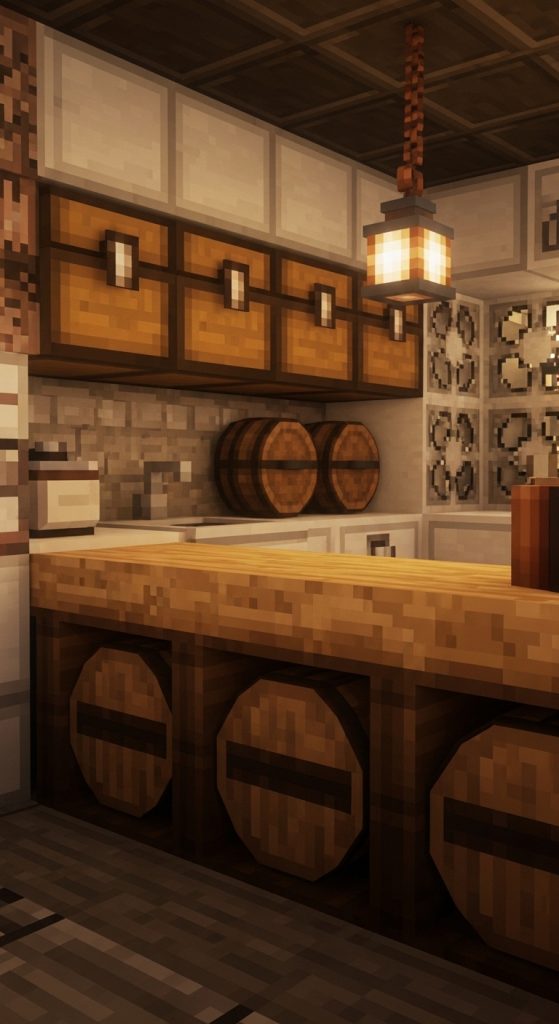
What This Design Is
Chests disguised as kitchen cabinets using trapdoors and slabs.
How to Build It
- Place chests against wall.
- Add trapdoors on front.
- Place slabs above as countertop.
Materials Needed
- Chests
- Trapdoors
- Slabs
Functional and aesthetic.
9. Compact Mining Drop-Off Station
Introduction
After mining trips, you need quick drop-off storage. A compact drop station near your entrance saves time.

What This Design Is
A chest sorting area near base entrance.
How to Build It
- Place 3 labeled chests.
- Add signs for ores, stone, valuables.
- Keep near door.
Materials Needed
- Chests
- Signs
Speeds up survival gameplay.
10. Under-Bed Hidden Chest Compartment
Introduction
Beds occupy space that can be optimized. By slightly elevating your bed, you create hidden storage underneath.
What This Design Is
A raised bed with concealed chest below.
How to Build It
- Raise bed with slabs.
- Place chest underneath.
- Cover sides with trapdoors.
Materials Needed
- Bed
- Chest
- Slabs
- Trapdoors
This clever trick maximizes tiny bedroom layouts.
In small Minecraft homes, thick walls are often overlooked as potential storage areas. Most players build standard one-block-thick walls, but if you expand your wall depth to two blocks, you unlock an incredible opportunity for embedded storage panels. This design keeps your interior looking clean and minimal while hiding large amounts of storage behind decorative textures. It’s especially useful in modern houses, medieval cottages, and underground bases where visible chest clutter ruins the aesthetic.
Wall-embedded storage is perfect for players who care about design but still need functionality. Instead of lining your floor with chests, you incorporate them directly into your architecture. The result is seamless storage that blends into your base’s design language. With proper framing, trapdoors, and detailing, these panels look intentional rather than improvised.
This idea is also extremely flexible. You can design small 2×2 embedded compartments or entire wall sections filled with hidden double chests. Beginners love this because it requires no redstone, just smart placement. More advanced players can even add piston doors later for a completely concealed effect.
What This Design Is
Wall-embedded storage panels are chest compartments built into double-thick walls, often covered with trapdoors or decorative blocks that match the room’s theme.
How to Build It
- Build a wall that is two blocks thick.
- Remove a 2×2 section from the interior side.
- Insert double chests into the hollow space.
- Cover the front with trapdoors or matching blocks.
- Frame the panel with logs, stone bricks, or contrasting blocks for style.
Materials Needed
- Chests
- Building blocks (wood planks, stone bricks, etc.)
- Trapdoors
- Decorative framing blocks
- Item frames (optional)
This design is ideal for compact homes that need serious storage without sacrificing visual appeal.
12. Staircase Drawer System
Introduction
Most players already use under-stair storage, but this design goes further by transforming each stair segment into its own “drawer.” It mimics real-life staircase storage systems and makes your base feel incredibly detailed and intentional. This design works beautifully in roleplay builds, cozy cottages, or organized survival homes.
Instead of a single hollow cavity under the stairs, you create multiple access points, each with its own chest or barrel. This maximizes vertical storage while maintaining accessibility. It also looks extremely Pinterest-worthy because the trapdoor “drawer fronts” create a realistic furniture aesthetic.
The beauty of this design lies in its modularity. You can scale it to fit small starter staircases or larger two-story homes. Every stair step becomes usable space. It’s efficient, compact, and visually satisfying.
What This Design Is
A staircase with individually accessible storage compartments built into each step section, often concealed with trapdoors to resemble drawers.
How to Build It
- Build a staircase against a wall.
- Hollow out the area beneath each step section.
- Place a chest or barrel in each cavity.
- Cover openings with trapdoors to resemble drawer fronts.
- Add buttons or item frames as decorative handles.
Materials Needed
- Stairs
- Chests or barrels
- Trapdoors
- Buttons (optional decorative detail)
- Item frames
This design maximizes every single block beneath your staircase.
13. Compact Ceiling Storage Loft
Introduction
When floor space is limited, look up. Ceiling storage lofts are a creative solution for tiny houses or underground bunkers. By building a small overhead platform with ladder access, you gain additional storage without expanding your base footprint.
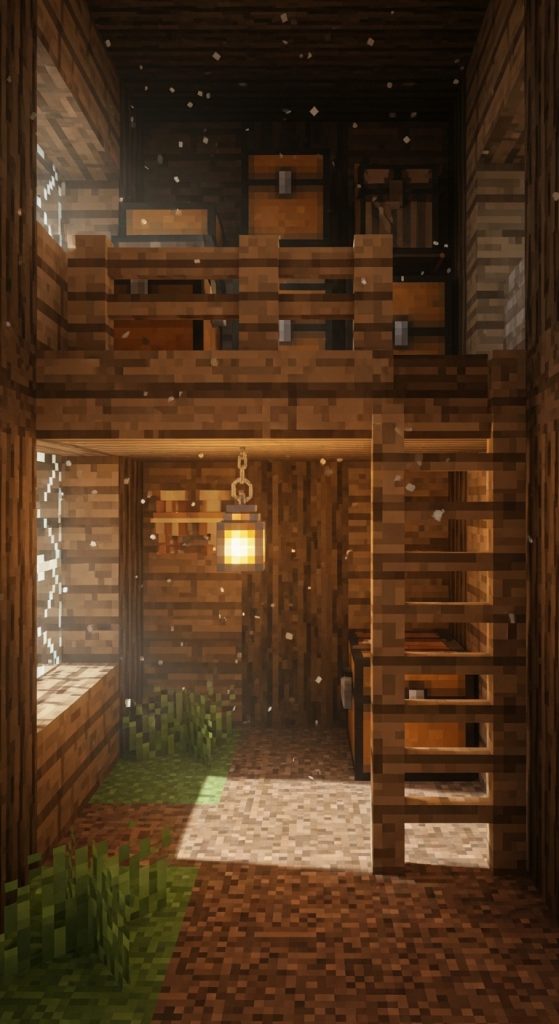
This design is perfect for early survival worlds where expanding outward might be dangerous. Instead, you expand upward. It’s especially useful in one-room starter houses. The loft can store seasonal items, rare resources, or overflow materials.
A ceiling storage loft also adds architectural interest. Your base feels layered and three-dimensional rather than flat and cramped. With fences or slabs acting as railings, the loft becomes both safe and stylish.
What This Design Is
An elevated platform near the ceiling that holds chests or barrels, accessible via ladder or stairs.
How to Build It
- Choose a wall corner.
- Build a small platform 3–4 blocks above ground.
- Add fence or slab railing.
- Place chests on the platform.
- Install ladder access.
Materials Needed
- Slabs or planks
- Fences
- Ladder
- Chests or barrels
Perfect for maximizing vertical space in tiny bases.
14. Compact Redstone Sorting Micro-System
Introduction
Many players assume automatic sorting systems require massive rooms. In reality, you can build a compact micro-sorter that fits inside a 5×5 area. This design is ideal for small survival bases where organization is essential but space is limited.
A micro-sorter automatically filters specific items into designated chests. This saves time after mining trips and prevents clutter. While it requires basic redstone knowledge, it’s still beginner-friendly when built on a small scale.
The compact nature of this system makes it perfect for focusing on only your most-used resources, like cobblestone, iron, and food. Instead of sorting everything automatically, you target key items.
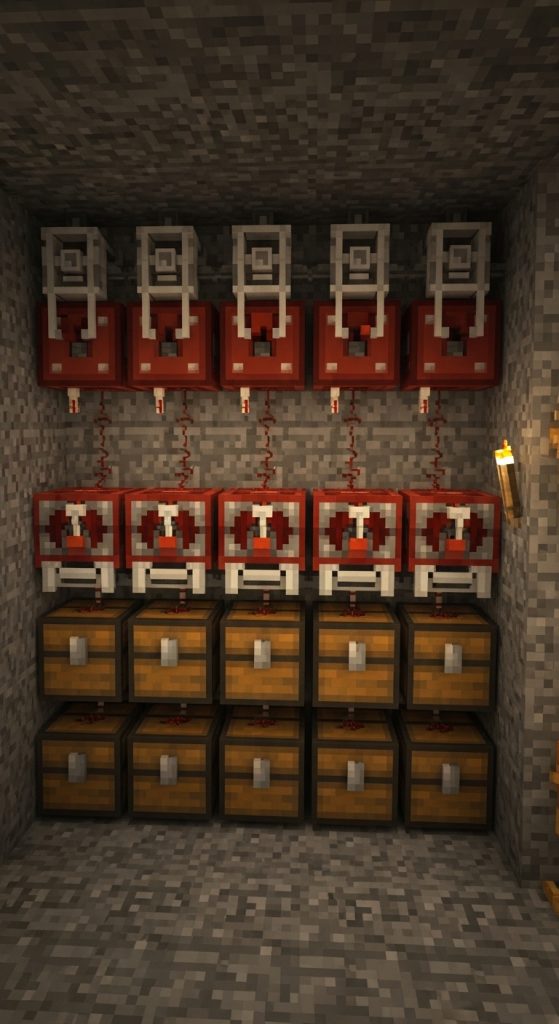
What This Design Is
A small redstone-powered item sorting system that filters selected items into individual chests.
How to Build It
- Place hopper line leading into chests.
- Add comparator and repeater behind each hopper.
- Insert filter items into hopper slots.
- Test with sample items.
Materials Needed
- Hoppers
- Comparators
- Redstone dust
- Repeaters
- Chests
- Building blocks
Compact automation significantly improves base efficiency.
15. Window Bench Storage
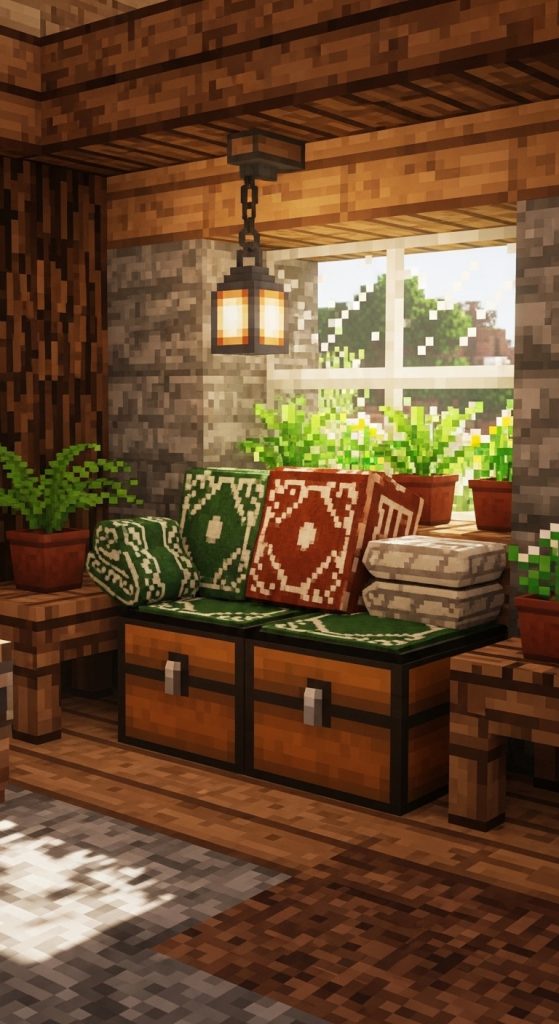
Introduction
Storage doesn’t have to look like storage. A window bench design allows you to combine seating and hidden chests into one functional build. This works beautifully in cottagecore builds, mountain houses, and aesthetic survival homes.
Instead of placing random chests, you build a bench beneath your window and hide storage inside. It enhances immersion and keeps your base tidy.
What This Design Is
A decorative bench beneath a window that conceals chests inside.
How to Build It
- Place double chest under window.
- Cover with slabs.
- Frame sides with stairs.
- Add decorative pillows (carpets or banners).
Materials Needed
- Chests
- Slabs
- Stairs
- Carpets or banners
Functional and aesthetic in one design.
16. Compact Farming Supply Cabinet
Introduction
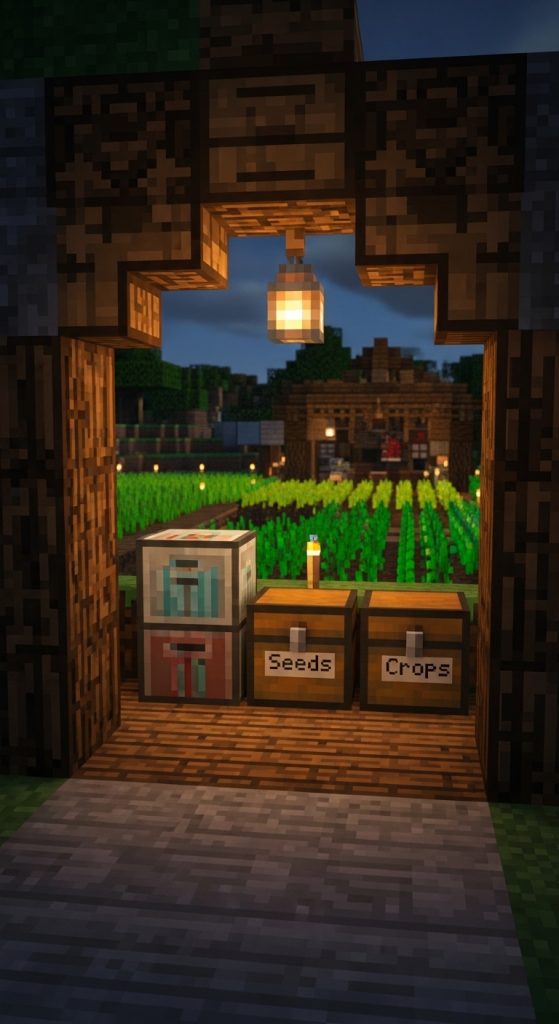
Farmers in Minecraft accumulate seeds, crops, bone meal, and tools quickly. Instead of scattering these items across multiple chests, create a compact farming cabinet near your fields.
This design keeps agricultural supplies centralized and easy to access. It reduces running back and forth across your base.
What This Design Is
A small cabinet-style chest cluster near your farm entrance.
How to Build It
- Place 2–3 chests near farm.
- Surround with trapdoors.
- Label clearly.
Materials Needed
- Chests
- Trapdoors
- Signs or item frames
Efficiency makes farming smoother and faster.
17. Compact Armor & Tool Closet
Introduction
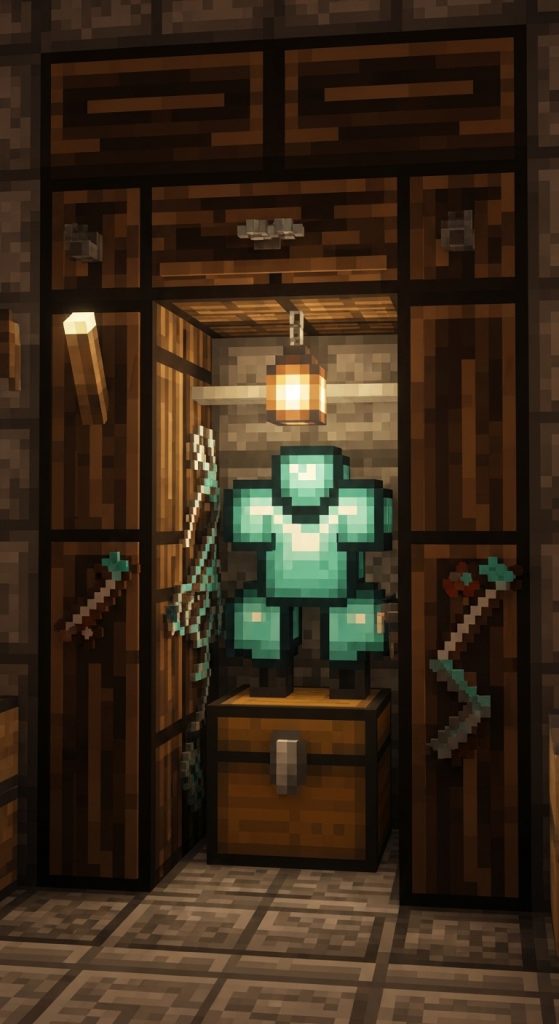
Tools and armor are frequently used but often poorly stored. A compact closet design keeps your gear organized and accessible. This is perfect for survival bases focused on exploration and combat.
It also improves roleplay immersion. Instead of random armor stands in the middle of your room, you create a dedicated gear station.
What This Design Is
A small closet-style storage corner combining armor stands and chest storage.
How to Build It
- Create 2-block-wide alcove.
- Place armor stand inside.
- Add chest above or below.
- Frame with trapdoors.
Materials Needed
- Armor stand
- Chests
- Trapdoors
- Decorative blocks
Keeps gear organized and stylish.
18. Compact Nether Portal Storage Wall
Introduction
The Nether portal area often becomes chaotic with random blocks and loot. Instead, integrate storage into the portal wall itself. This keeps fire-resistant gear and supplies nearby.
This design works in both overworld and nether bases. It’s compact and practical for quick access before dangerous trips.
What This Design Is
Storage integrated into the wall surrounding your Nether portal.
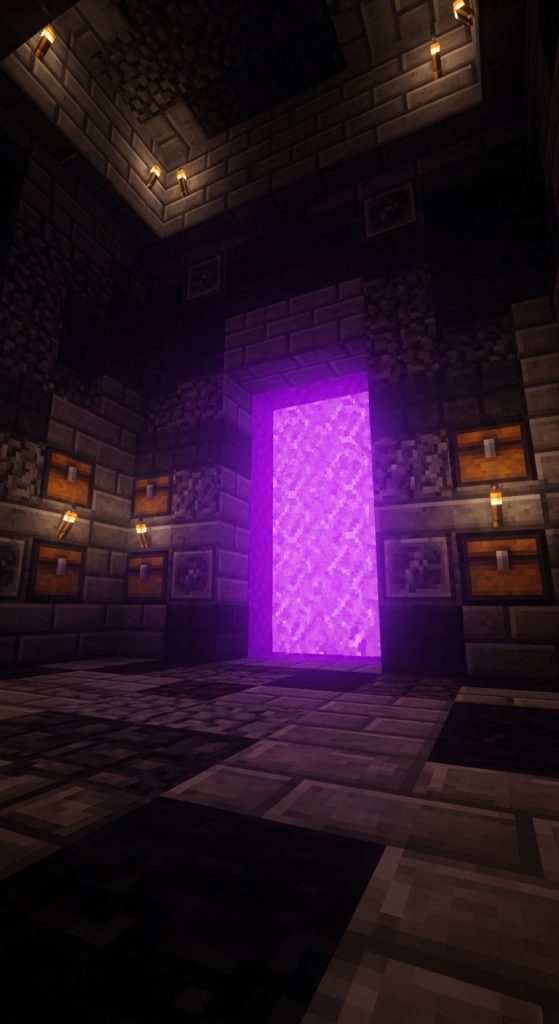
How to Build It
- Build portal frame.
- Expand wall thickness behind it.
- Insert chests into side walls.
- Cover with decorative blocks.
Materials Needed
- Chests
- Building blocks
- Trapdoors (optional)
Strategic storage improves survival efficiency.
19. Compact Village Trading Storage Corner
Introduction
Villager trading generates books, emeralds, enchanted gear, and excess items. Instead of cluttering your trading hall, build a compact storage corner dedicated to trade goods.
This keeps your trading system organized and efficient.
What This Design Is
A small chest cluster beside your villager area for trade-related items.
How to Build It
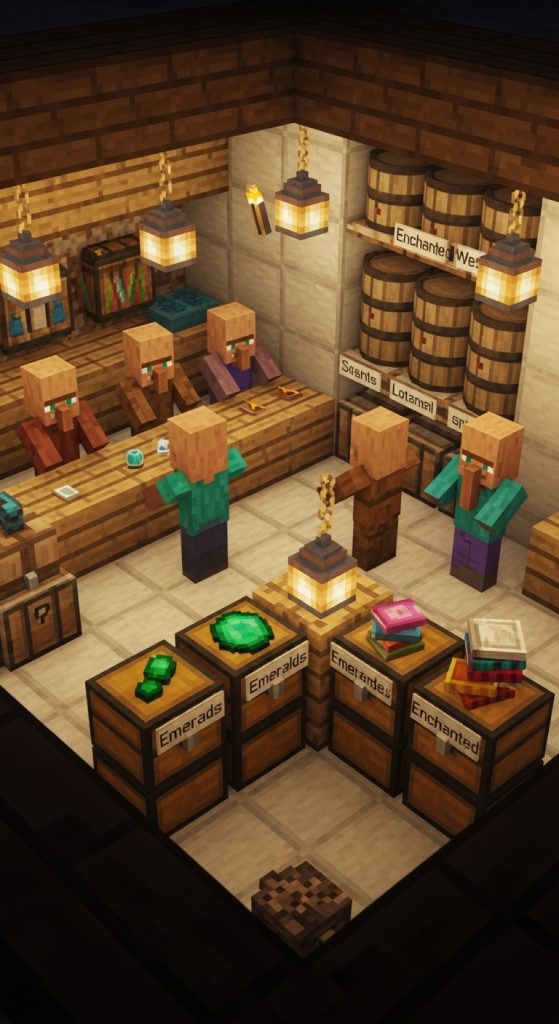
- Place 3–4 chests near trading hall.
- Label for books, emeralds, gear.
- Add barrel tower for overflow.
Materials Needed
- Chests
- Barrels
- Item frames
Keeps economic gameplay organized.
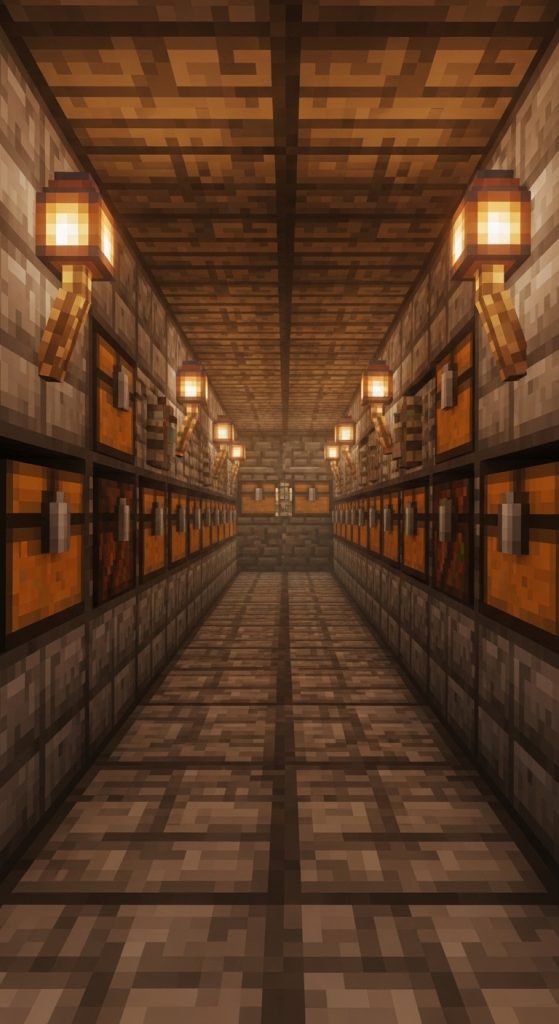
20. Compact Entryway Storage Hall
Introduction
Your base entrance is the most frequently used area. Adding compact storage here makes daily gameplay faster. This is perfect for food, torches, tools, and quick-access supplies.
Instead of running through your entire house, you keep essentials right by the door.
What This Design Is
A narrow storage hallway at your base entrance with labeled mini compartments.
How to Build It
- Create 3-block-wide hallway.
- Insert chests into side walls.
- Add item frames.
- Decorate with lanterns.
Materials Needed
- Chests
- Item frames
- Lanterns
- Decorative blocks
This design improves efficiency every time you leave or enter your base.