10 Textured Walls For Bedroom
Introduction
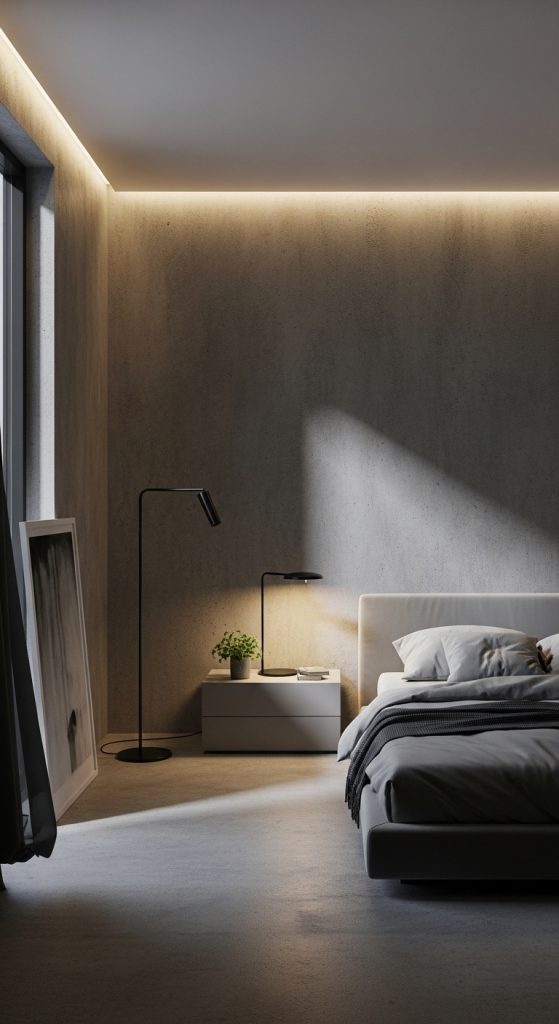
Textured walls have become a defining feature in modern bedroom interiors, offering depth, character, and visual structure without requiring major renovation. In many Pinterest ideas, textured walls are used to transform plain spaces into visually engaging environments that reflect both style and functionality. This approach focuses on enhancing surfaces through materials, patterns, and finishes that create dimension and interest. Readers will learn how to apply different textured wall techniques using accessible materials and clear step by step methods. Each concept in this guide is designed to be beginner friendly while maintaining a strong connection to modern design and minimalist style preferences. Textured walls are especially useful in home decor because they add aesthetic value without overcrowding the space with additional furniture or decoration. This article provides practical inspiration and detailed guidance to help readers execute each idea effectively. Whether working on a small room or a larger bedroom layout, these creative ideas support organized planning and achievable results within a structured DIY process.
Why This Idea Is Trending or Useful
Textured wall designs are widely featured in Pinterest inspiration due to their ability to enhance interiors with minimal structural changes. This trend aligns with the growing demand for DIY home decor solutions that are both cost-effective and visually impactful. Textured walls provide a practical way to introduce variety and depth, making them suitable for modern design approaches that emphasize clean yet dynamic surfaces. These designs are also adaptable, allowing individuals to choose from a wide range of materials and techniques based on their preferences and available resources. The accessibility of these methods makes them ideal for beginners, as many techniques require only basic tools and simple preparation. Additionally, textured walls contribute to better space organization by defining focal areas within the bedroom. This makes them particularly useful in creating balanced and cohesive interiors. As a result, textured wall projects have become a reliable option for those seeking creative ideas that combine aesthetic value with functional design.
Materials and Preparation
Preparing for a textured wall project requires careful selection of materials and proper planning to ensure consistent results. Common materials include plaster, wall putty, wood panels, wallpaper, fabric, paint, and textured rollers. Tools such as trowels, brushes, rollers, measuring tape, and level instruments are essential for accurate application. Before starting, the wall surface must be cleaned thoroughly to remove dust, grease, or uneven layers that may affect adhesion. Repair any cracks or imperfections using filler to create a stable base. Planning involves selecting a design that complements the bedroom’s overall home decor and aligns with available space and lighting conditions. For example, subtle textures work well in smaller rooms, while bold patterns can enhance larger walls. It is also important to define a clear step by step workflow, including preparation, application, and finishing stages. This organized approach reduces errors and ensures that each phase of the creative project is executed efficiently, resulting in a polished and durable textured wall.
Idea 1: Smooth Plaster Texture Wall
How to Create

A smooth plaster texture wall focuses on creating a refined surface with subtle variations that enhance light reflection. This design is commonly used in minimalist style interiors where simplicity and clean finishes are essential. The texture is not heavily raised but instead provides a soft depth that adds character without overwhelming the space. It works effectively as a background for bedroom furniture, allowing other elements of home decor to stand out. This approach is suitable for those seeking Pinterest ideas that emphasize balance and understated elegance. The smooth plaster technique also helps in improving wall durability by adding an extra protective layer.
To execute this design, begin by preparing the wall surface and applying a base coat of plaster evenly using a trowel. Spread the material in consistent strokes to avoid uneven buildup. Once the base layer is applied, use a finishing tool to create gentle variations in texture while maintaining a smooth appearance. Allow the plaster to dry completely before sanding lightly to remove imperfections. Apply a neutral or soft-toned paint to enhance the final look. This step by step process ensures a clean and professional finish, making it an easy project for beginners.
Idea 2: Rustic Brick Effect Wall
How to Create

A rustic brick effect wall replicates the appearance of exposed brick without requiring structural changes. This design adds warmth and texture, making it a popular choice in creative ideas for bedroom decor. The brick pattern introduces a structured yet natural look, which complements both modern and industrial interiors. It creates a focal point that enhances visual depth while maintaining a balanced aesthetic.
To create this effect, use brick-pattern stencils or textured panels. Apply a base coat of paint in a neutral shade, then use a sponge or brush to layer additional tones for a realistic finish. Carefully outline the brick pattern to maintain consistency. This step by step method allows for controlled application and detailed results. The use of simple materials makes this project accessible and suitable for DIY enthusiasts.
Idea 3: Wooden Slat Accent Wall

How to Create
Wooden slat walls introduce vertical lines that enhance height perception and organization within the bedroom. This design aligns with modern design trends that emphasize structure and natural materials. The slats create a rhythmic pattern that adds both texture and visual order.
Install evenly spaced wooden slats on the wall using adhesive or screws. Ensure alignment using a level tool. Finish with paint or stain to match the room’s aesthetic. This process provides a clean and structured result.
Idea 4: Textured Paint Roller Design

How to Create
Textured rollers create patterned surfaces using paint. This method is efficient and beginner friendly, making it a common DIY tutorial option.
Apply a base coat and use a textured roller to create patterns. Work in sections for consistency. This step by step approach ensures even coverage and clear patterns.
Idea 5: Fabric Wall Texture
How to Create

Fabric walls add softness and depth, improving both texture and comfort. This design is suitable for cozy bedroom settings.
Attach fabric panels using adhesive or frames. Smooth out wrinkles for a clean finish. This method is simple and effective.
Idea 6: Geometric Panel Texture
How to Create

Geometric panels create structured patterns that enhance modern interiors. This design focuses on symmetry and clean lines.
Install panels in defined shapes and paint them accordingly. This approach ensures a bold and organized appearance.
Idea 7: Concrete Finish Texture
How to Create
Concrete textures provide an industrial look with subtle variations. This design works well in minimalist settings.
Apply concrete finish materials evenly and smooth the surface. This process creates a durable and modern wall.
Idea 8: Stone Veneer Wall
How to Create

Stone veneer walls replicate natural stone surfaces, adding depth and texture. This design creates a strong visual impact.
Install veneer panels using adhesive and ensure proper alignment. This method provides a realistic finish.
Idea 9: Ombre Textured Wall
How to Create

Ombre walls blend colors gradually, creating a soft and dynamic texture. This design enhances visual flow.
Apply paint in gradient layers and blend transitions carefully. This step by step method ensures smooth color shifts.
Idea 10: 3D Wall Panel Texture
How to Create

3D panels add dimension through raised patterns. This design creates a bold focal point.
Install panels securely and paint as desired. This approach enhances depth and visual interest.
Common Beginner Mistakes and How to Avoid Them
One frequent mistake in textured wall projects is inadequate surface preparation, which leads to poor adhesion and uneven finishes. Cleaning and repairing the wall before applying any materials ensures a stable base. Another issue is inconsistent application, often caused by uneven pressure or incorrect tools. Maintaining steady movement and using appropriate tools improves consistency. Overloading the wall with excessive texture can also disrupt balance, especially in smaller bedrooms. Selecting a suitable design based on room size prevents this problem. Additionally, ignoring drying times can result in smudging or uneven layers. Allowing each stage to dry completely ensures durability. Avoiding these mistakes leads to better results and a smoother DIY process.
Practical Tips for Better Results
Achieving high-quality textured walls requires attention to detail and proper execution techniques. Always test materials on a small section before full application to ensure compatibility. Use consistent strokes and maintain even pressure when applying textures. Selecting complementary colors enhances the overall aesthetic. Working in sections improves control and reduces errors. Keeping tools clean ensures smooth application and prevents unwanted marks. These practical tips support efficient and accurate execution.
Styling, Presentation, or Organization Ideas
Textured walls should complement the bedroom’s overall design to create a cohesive look. Coordinating textures with furniture and lighting enhances visual harmony. Minimalist arrangements benefit from subtle textures, while bold designs can serve as focal points. Organizing the layout before starting ensures balanced placement. Thoughtful styling improves the final presentation.
Budget or Time Planning
Planning materials and steps in advance helps manage both time and budget. Choosing affordable materials such as paint and simple panels reduces costs. Breaking the project into stages allows for efficient completion. Preparing tools and workspace beforehand prevents delays. This structured approach ensures effective project management.
Creative Expansion and Advanced Inspiration
Advanced textured wall designs can combine multiple techniques for unique results. Integrating lighting with textures enhances depth and ambiance. Experimenting with patterns and materials expands creative possibilities. Larger spaces allow for more complex designs. Continuous exploration leads to innovative and personalized bedroom interiors.