10 Summer Crafts For Toddlers

Summer provides an excellent opportunity for toddlers to explore creativity through hands-on activities. Warm weather, longer days, and relaxed schedules allow parents and caregivers to introduce simple DIY craft projects that support learning and play at the same time. Summer crafts designed for toddlers focus on easy processes, safe materials, and colorful results that encourage curiosity and imagination. These activities are widely shared among Pinterest ideas because they combine entertainment with early childhood development.
Creative projects help toddlers practice basic skills such as color recognition, hand coordination, and shape identification. Many summer craft tutorials also introduce natural materials such as leaves, flowers, and sand, which connect children to outdoor environments. Through simple step by step instructions, toddlers can participate in making handmade decorations, playful art pieces, and small home decor items suitable for display.
This article presents ten beginner friendly summer craft ideas specifically designed for toddlers. Each idea explains the concept and the practical process required to complete the project using accessible materials. These creative ideas encourage exploration while remaining simple and safe for young children. Parents will learn how to prepare materials, guide the activity, and create engaging craft experiences that support learning during the summer season.
Why This Idea Is Trending or Useful
Toddler crafts have become popular on Pinterest because parents increasingly seek activities that combine creativity with learning. Summer craft projects offer practical ways to keep toddlers engaged while supporting early development. Many parents and educators prefer hands-on creative projects over passive screen time because crafts encourage interaction, experimentation, and physical coordination.
These creative ideas are also trending because they require simple materials that are easy to find at home or in craft stores. Items such as paper, washable paint, cardboard, and natural objects allow toddlers to participate safely in DIY activities. Most of these projects are designed as beginner friendly tutorials with clear step by step instructions. This makes them accessible for families with limited crafting experience.
Another reason these projects remain popular is their flexibility. Parents can adjust the complexity of each activity based on the toddler’s age and ability. Crafts can also be adapted for indoor or outdoor environments. For example, finger painting, nature crafts, and simple collage projects work well during warm summer days.
Pinterest users often search for creative projects that produce visible results quickly. Toddler crafts meet this need by offering colorful handmade decoration pieces that children feel proud to create and display.
Materials and Preparation
Preparing materials in advance is essential when planning summer craft activities for toddlers. Young children have limited attention spans, so organizing supplies before starting the project helps maintain engagement and ensures the activity flows smoothly. Selecting safe, non-toxic materials is also important to create a comfortable crafting environment.
Common materials used in toddler craft projects include construction paper, washable paint, child-safe glue, large craft sticks, cotton balls, cardboard pieces, and soft fabric scraps. Natural materials such as leaves, flowers, shells, and small stones can also be used to introduce outdoor inspiration into the creative project. Basic tools such as safety scissors, paintbrushes, and mixing trays may be required depending on the craft.
Preparing the workspace is another important step. A covered table or washable surface helps prevent mess and allows toddlers to explore freely. Keeping paper towels or cleaning cloths nearby also makes it easier to handle spills during the activity.
Parents should review the step by step instructions before beginning the project. This planning stage allows adults to guide the activity effectively while allowing toddlers to complete the creative process independently. Proper preparation ensures that DIY summer crafts remain enjoyable and organized for both children and caregivers.
Main Ideas
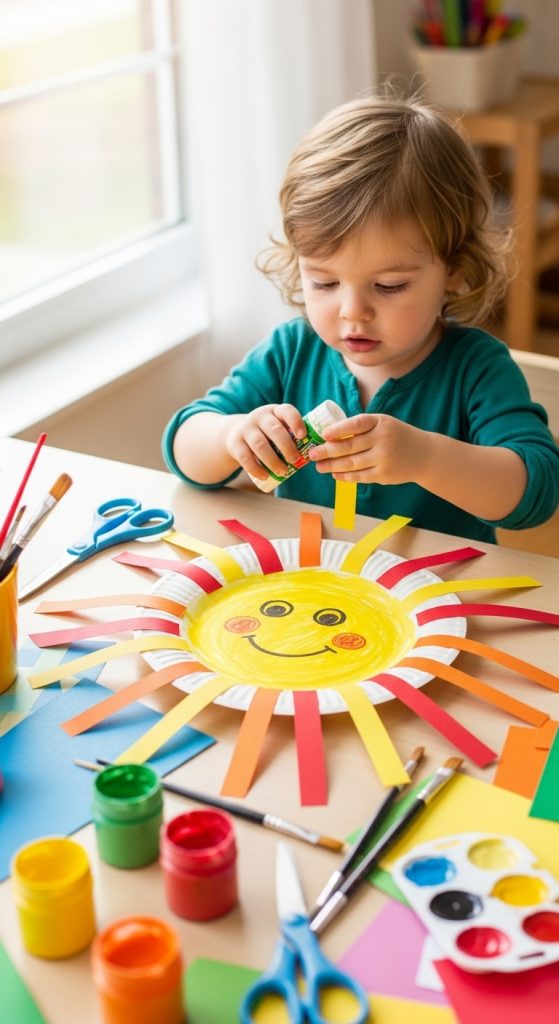
Idea 1: Paper Plate Sun Craft
How to Create
The paper plate sun craft is a simple creative project that introduces toddlers to bright summer themes. The sun is a familiar seasonal symbol, making it an ideal subject for beginner friendly art activities. This craft uses a paper plate as the base structure, allowing toddlers to transform a common household item into a colorful decorative piece.
The design concept focuses on representing the sun using vibrant colors and simple shapes. Toddlers can explore yellow and orange paint while adding decorative rays around the circular plate. Craft materials such as colored paper strips, yarn, or painted patterns help create a playful sun design that reflects summer inspiration.
This craft supports several early learning skills. Painting the plate encourages hand coordination and brush control. Adding rays around the edge introduces the concept of radial patterns and shape placement. The activity also encourages toddlers to identify colors and recognize the visual appearance of the sun.
Once completed, the handmade sun craft can be used as a cheerful decoration in playrooms or classrooms. It provides a visual reminder of the summer season while giving toddlers the opportunity to create something meaningful with their own hands.
Step-by-Step Guide
Begin by placing a paper plate on a protected crafting surface. Provide washable yellow paint and a wide brush so toddlers can cover the entire plate surface. Allow the child to paint freely until the plate becomes bright and colorful. This step introduces toddlers to painting techniques while building confidence in creative expression.
Once the paint dries, prepare materials for the sun rays. Cut strips of colored paper or yarn that will extend outward from the plate edge. Demonstrate how the rays represent sunlight spreading in different directions. This visual explanation helps toddlers understand the design concept.
Apply small amounts of child-safe glue along the edge of the plate and attach the paper strips around the circle. Encourage toddlers to place the rays evenly around the plate to form a balanced shape. Some rays can be longer while others remain shorter to create visual variation.
Finally, draw a simple smiling face in the center of the sun using washable markers. The finished paper plate sun becomes a bright handmade decoration that celebrates summer creativity and provides a memorable crafting experience.
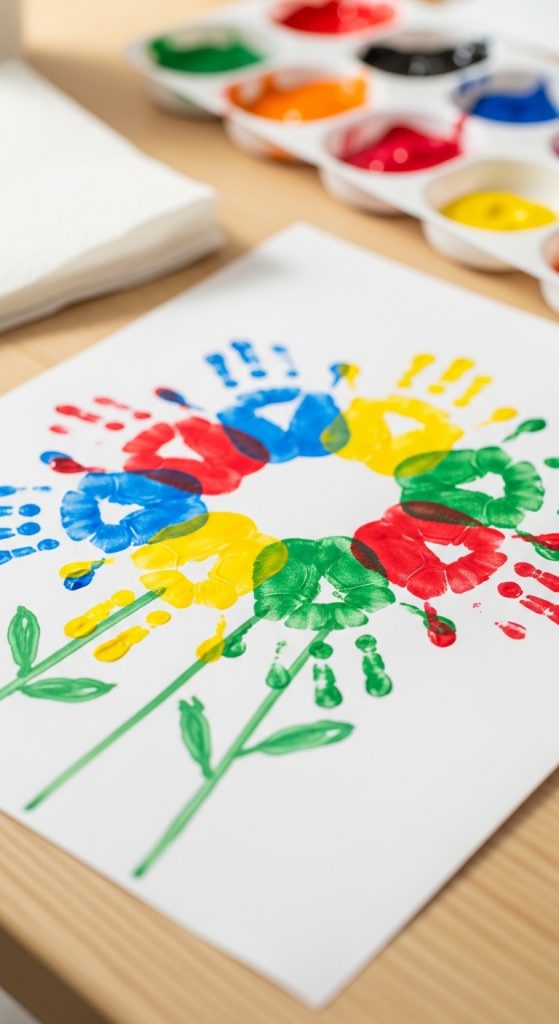
Idea 2: Handprint Flower Art
How to Make
Handprint flower art is a classic toddler craft that transforms a child’s handprint into a colorful flower design. This activity allows toddlers to use their own hand as a stamping tool, creating a personal connection to the artwork. The concept is simple and beginner friendly, making it suitable for children who are just beginning to explore painting.
In this creative project, the toddler’s handprint forms the petals of the flower. Each finger represents a petal extending outward from the center. The palm area becomes the base shape that connects the petals together. This natural pattern makes the handprint ideal for representing a flower structure.
Handprint crafts also create memorable keepsakes for families. The artwork captures the child’s hand size at a specific stage of growth while producing a colorful decorative piece. Many parents display these handmade artworks as seasonal decorations or save them as childhood memories.
The craft also supports sensory learning. Toddlers experience the texture of paint while exploring shapes created by their own hands. This interaction encourages curiosity and creativity while reinforcing the connection between art and physical movement.
Step-by-Step Guide
Prepare the crafting area with paper sheets and washable paint. Choose bright colors such as red, pink, or purple to represent flower petals. Pour a small amount of paint onto a plate so toddlers can dip their hands safely.
Gently guide the toddler to place their hand into the paint. Ensure that the fingers and palm are lightly coated without excessive paint buildup. Then help the child press their hand onto a sheet of paper to create a clear handprint. Lift the hand carefully to reveal the flower petal shape.
Allow the paint to dry before adding additional elements. Use green paint or markers to draw a flower stem extending downward from the palm area. Leaves can also be added on both sides of the stem to complete the plant design.
If desired, toddlers can repeat the handprint process using different colors to create multiple flowers on the same page. The final artwork becomes a vibrant handmade decoration that celebrates both creativity and summer inspiration.
Idea 3: Nature Leaf Collage
How to Create
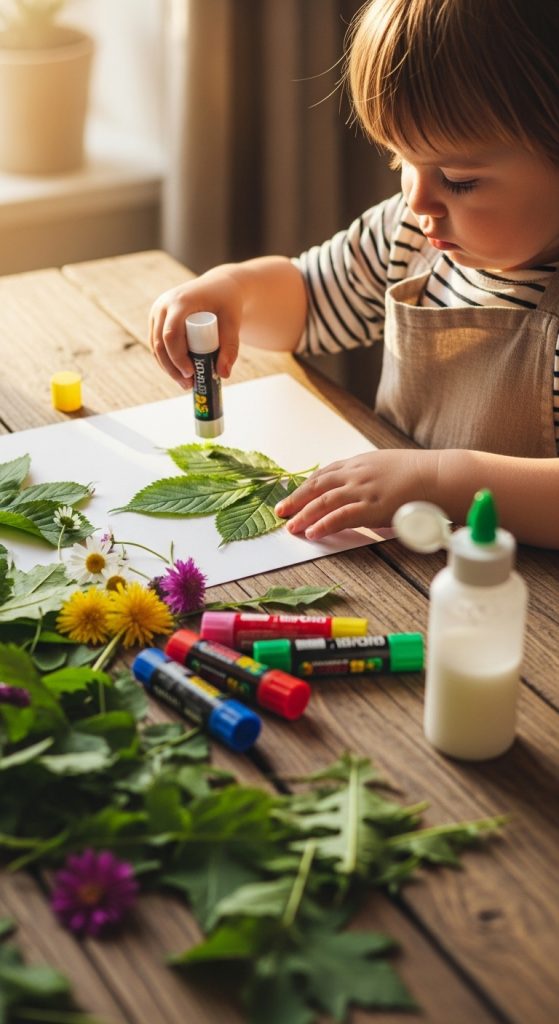
A nature leaf collage introduces toddlers to outdoor materials while encouraging artistic creativity. This craft focuses on collecting leaves and natural objects from gardens, parks, or outdoor spaces. Using real leaves as decorative elements allows toddlers to observe shapes, textures, and colors found in nature.
The collage process involves arranging these natural materials onto a sheet of paper to form patterns or images. Leaves of different sizes and shapes create interesting visual contrast. Some leaves may be long and narrow, while others appear round or textured. These variations allow toddlers to experiment with placement and composition.
Nature crafts also help toddlers develop awareness of their surroundings. Collecting leaves encourages observation of trees and plants, introducing basic environmental learning. The activity connects outdoor exploration with indoor creativity.
The final collage artwork reflects both the natural materials and the child’s design choices. Each piece becomes unique depending on the types of leaves collected. This creative project combines outdoor discovery with hands-on crafting, making it an engaging summer activity.
Step-by-Step Guide
Begin by taking a short walk outdoors with the toddler to collect leaves. Encourage the child to select leaves with different shapes and textures. Place the collected materials in a small container or bag for transport back to the crafting area.
Once indoors, place a large sheet of paper on the table and arrange the leaves without glue. This allows toddlers to experiment with placement before permanently attaching them. Leaves can be arranged randomly, in patterns, or shaped into simple images such as trees or flowers.
After deciding on the layout, apply small dots of child-safe glue to the back of each leaf and press them onto the paper. Encourage toddlers to press gently to secure each leaf in place.
Additional decorations can be added using crayons or markers. Toddlers may draw stems, sun shapes, or backgrounds around the leaves. The finished leaf collage becomes a natural handmade decoration that reflects both outdoor exploration and creative design.
Idea 4: Painted Ice Cream Cone Craft

How to Create
The painted ice cream cone craft introduces toddlers to summer themes using simple shapes and bright colors. Ice cream is commonly associated with warm weather, making it a recognizable subject for seasonal creative projects. This craft uses paper shapes to represent the cone and scoop, allowing toddlers to assemble a playful decoration using paint and basic collage techniques.
The design concept focuses on combining triangular and circular shapes to create the appearance of an ice cream cone. The cone base is usually represented by a triangle shape, while the ice cream scoop can be created with a circle or cloud-like cutout. These shapes help toddlers learn basic geometric forms while participating in a creative activity.
Painting the ice cream scoop allows toddlers to explore color combinations and textures. Different paint colors can represent various ice cream flavors, while additional decorations such as dots or sprinkles create visual interest. This type of craft encourages experimentation with color and pattern while remaining simple and beginner friendly.
The finished artwork becomes a playful summer decoration that toddlers can proudly display. It also helps children associate seasonal activities with creativity and artistic expression, making it a valuable addition to summer craft inspiration.
Step-by-Step Guide
Begin by preparing the craft shapes before inviting the toddler to start the project. Cut a triangle from brown construction paper to represent the ice cream cone. Next, cut a rounded shape from white or pastel colored paper to represent the ice cream scoop. Place both shapes on the crafting table so the child can easily see the structure of the design.
Provide washable paints in several bright colors such as pink, yellow, or light blue. Encourage the toddler to paint the scoop shape using brushes, fingers, or cotton swabs. Small dots can be added to represent sprinkles, creating a playful decorative effect.
Allow the painted scoop to dry completely before assembling the craft. Apply child-safe glue to the back of the scoop shape and attach it above the triangle cone. Press gently to secure the shapes together.
Finally, toddlers can add additional details such as a cherry on top using markers or small paper circles. The completed ice cream cone craft becomes a colorful handmade decoration that reflects summer creativity and simple artistic exploration.
Idea 5: Bubble Wrap Painting Art
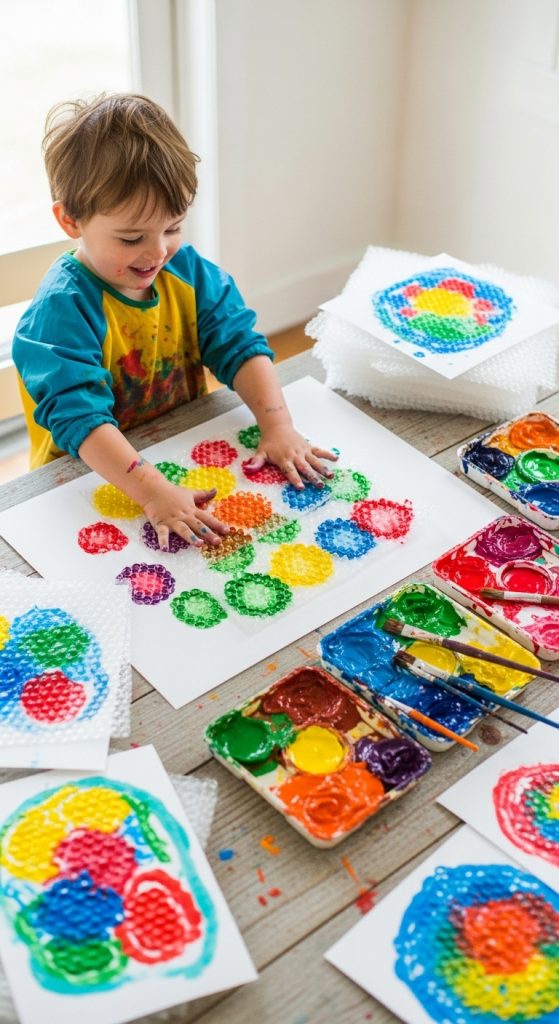
How to Make
Bubble wrap painting introduces toddlers to texture-based art techniques. This creative project uses bubble wrap as a stamping tool to create patterned paint prints on paper. The raised bubbles on the wrap produce repeating circular shapes, which appear as colorful patterns when pressed onto paint-covered surfaces.
The concept of this craft focuses on exploring texture and pattern through simple stamping actions. Toddlers can easily hold small pieces of bubble wrap and press them into paint before transferring the pattern onto paper. This process allows children to experiment with color combinations while observing how repeated shapes form decorative designs.
Bubble wrap painting also supports sensory development. The tactile surface of the wrap encourages toddlers to touch and explore materials while participating in the craft. The popping sound and soft texture add an engaging element that maintains the child’s attention during the activity.
The final artwork typically features clusters of small painted circles arranged in overlapping patterns. These designs can resemble flowers, abstract shapes, or playful backgrounds. As a beginner friendly DIY activity, bubble wrap painting offers a simple tutorial that transforms recycled materials into creative art tools.
Step-by-Step Guide
Start by cutting bubble wrap into manageable pieces that toddlers can easily hold. Each piece should be large enough to create visible patterns but small enough for comfortable handling. Place several paint colors on separate plates to allow easy access during the stamping process.
Guide the toddler to dip the bubble side of the wrap into the paint. Ensure that the bubbles are lightly coated rather than fully covered with thick paint. This helps create clearer patterns when stamping the wrap onto paper.
Next, press the painted bubble wrap onto a sheet of paper. Encourage the toddler to press gently and then lift the wrap to reveal the circular paint pattern. The repeating shapes will appear across the page as colorful clusters.
Toddlers can repeat this process using different paint colors and positions. Overlapping prints create layered patterns that add visual interest to the artwork. Once dry, the finished bubble wrap painting becomes a playful handmade decoration that highlights texture and color exploration.
Idea 6: Paper Fan Craft
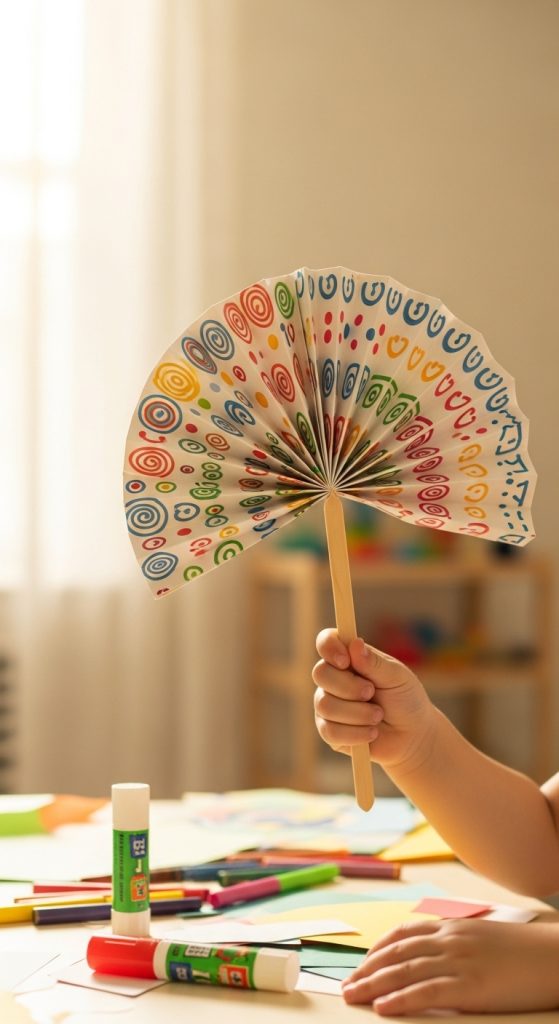
How to Create
Paper fan crafts introduce toddlers to simple folding techniques while producing a practical summer accessory. Paper fans have traditionally been used to create airflow during warm weather, making them a relevant seasonal craft project. The activity also helps toddlers develop early motor skills by practicing repetitive folding motions.
The design concept involves folding a sheet of paper back and forth in an accordion pattern. Once folded, the paper spreads outward to form a fan shape that can move air when waved. Toddlers can decorate the paper before folding, allowing them to personalize the final design.
Decorative patterns such as stripes, dots, or colorful scribbles add visual interest to the fan surface. Using bright paint or markers enhances the summer aesthetic and encourages creative expression. Craft sticks can also be attached to the fan to create a handle that makes it easier for toddlers to hold.
This DIY craft combines artistic decoration with practical function. The finished fan becomes both a handmade toy and a decorative piece. Through this creative project, toddlers learn simple folding techniques while producing a useful summer accessory.
Step-by-Step Guide
Begin by giving each toddler a rectangular sheet of sturdy paper. Provide markers, crayons, or washable paint so the child can decorate the paper surface. Encourage free drawing or simple patterns that cover the entire sheet.
Once the decorations are dry, demonstrate the folding technique. Fold one edge of the paper inward about two centimeters. Then fold the next section in the opposite direction. Continue alternating folds until the entire sheet forms an accordion pattern.
After the paper is fully folded, pinch one end of the accordion stack and secure it with glue or tape. Attach a craft stick to the folded edge to create a handle that allows the fan to open easily.
When the glue dries, gently spread the folds outward to form the fan shape. Toddlers can hold the handle and wave the fan to create airflow. This simple craft teaches basic folding skills while producing a playful handmade summer accessory.
Idea 7: Cotton Ball Cloud Painting
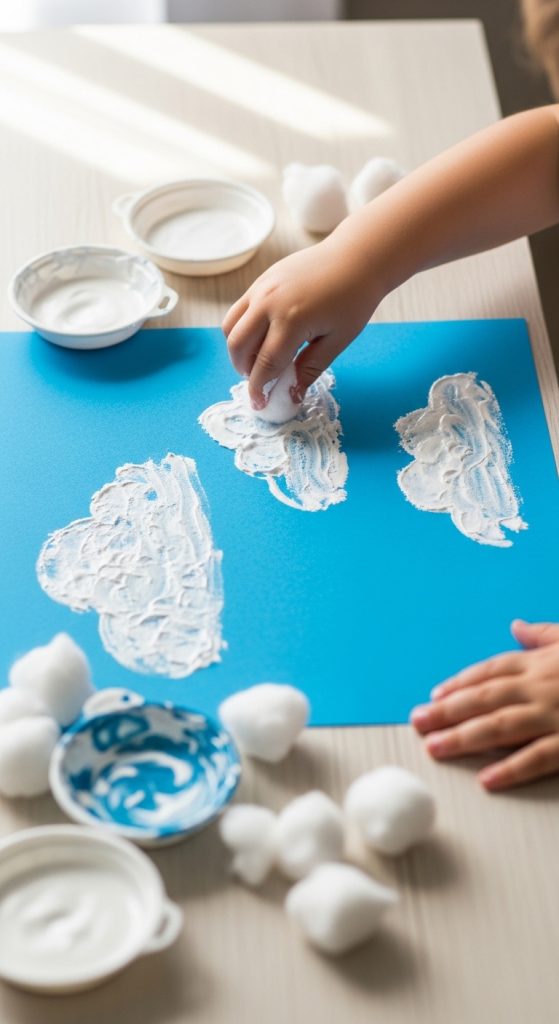
How to Create
Cotton ball cloud painting introduces toddlers to stamping techniques while exploring weather-related themes. Clouds are simple shapes that toddlers can easily recognize, making them suitable for beginner friendly art projects. Cotton balls serve as soft stamping tools that create fluffy textures when dipped in paint.
The design concept focuses on representing clouds in a blue sky background. Toddlers stamp cotton balls onto painted paper to form irregular cloud shapes. The soft texture of the cotton produces natural-looking patterns that resemble cloud formations.
This craft also introduces basic weather awareness. While creating cloud shapes, caregivers can explain how clouds appear in the sky and how they relate to weather conditions. This educational element adds value to the creative activity.
The finished artwork often includes additional decorations such as suns, birds, or rainbows drawn with crayons. These details help expand the design while keeping the project simple. Cotton ball cloud painting provides a sensory-friendly creative project that combines texture exploration with artistic expression.
Step-by-Step Guide
Start by preparing a sheet of blue construction paper to represent the sky. If blue paper is not available, toddlers can paint a sheet of white paper with blue paint and allow it to dry before continuing the project.
Place small amounts of white washable paint onto a plate. Give the toddler a cotton ball and demonstrate how to dip it lightly into the paint. The cotton should absorb a small amount of paint without becoming fully saturated.
Press the painted cotton ball onto the blue paper to create a cloud shape. Encourage toddlers to dab the cotton ball repeatedly to build larger cloud forms. The repeated dabbing motion helps produce the fluffy texture associated with clouds.
Once the cloud shapes are complete, toddlers can draw additional details using crayons or markers. Simple sun shapes or birds flying in the sky help complete the scene. The finished painting becomes a soft textured summer artwork inspired by the sky.
Idea 8: Colorful Sand Art Jar
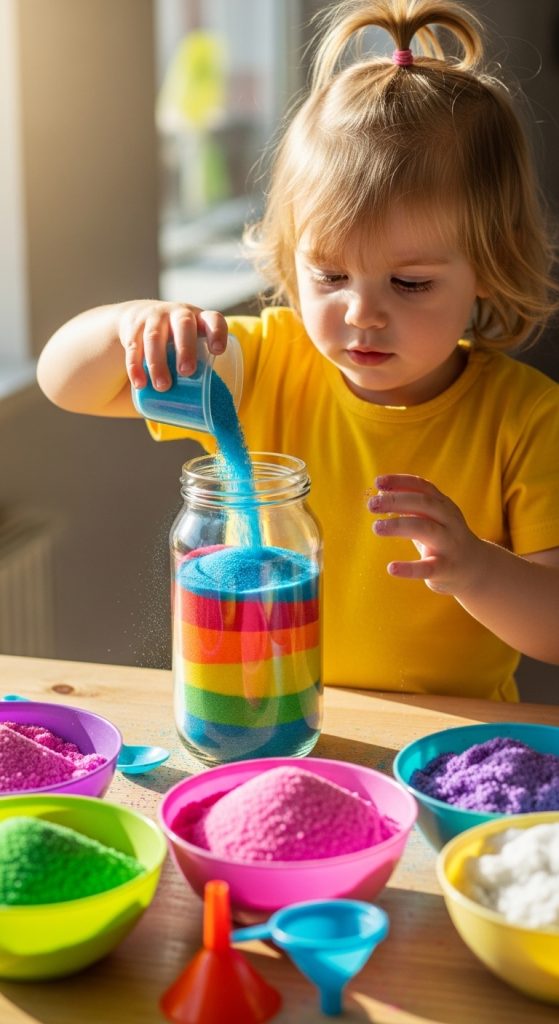
How to Make
Colorful sand art jars provide toddlers with an engaging activity that focuses on layering materials to create decorative patterns. Sand art projects are commonly associated with summer because sand is often connected to beaches and outdoor environments. Using colored sand inside transparent jars creates vibrant layered designs that remain visible from all sides.
The concept of this craft involves pouring different colors of sand into a clear container in separate layers. As each color settles, the jar gradually fills with stacked bands of sand. The layers form a decorative pattern that becomes the central feature of the finished project.
This craft helps toddlers practice careful pouring and coordination. The process requires slow movements to keep the layers distinct and avoid mixing the colors. Observing the layers build gradually inside the jar also introduces simple concepts of sequence and visual organization.
Sand art jars become attractive handmade decorations once completed. They can be placed on shelves, desks, or windowsills as colorful display pieces. This creative project combines sensory exploration with visual design while remaining simple enough for toddlers to complete with guidance.
Step-by-Step Guide
Begin by preparing small cups of colored sand in different shades. Place a clear plastic or glass jar on the crafting table so the toddler can easily see the interior. Providing a small funnel or spoon helps control the pouring process.
Guide the toddler to pour the first color of sand into the jar slowly. The sand should form a flat layer at the bottom of the container. Encourage the child to stop pouring once a visible layer forms.
Next, add a second color of sand on top of the first layer. Pouring slowly helps maintain clear separation between the colors. Continue layering additional colors until the jar becomes nearly full.
Once the layers are complete, close the jar with a lid to secure the sand inside. The finished jar displays a stacked pattern of bright colors. This DIY project creates a decorative object that toddlers can proudly display as part of summer home decor.
Idea 9: Finger Painted Rainbow Art
How to Create
Finger painting is a classic toddler activity that allows children to explore color through direct contact with paint. Creating a rainbow using finger painting introduces toddlers to color order while encouraging creative expression. Rainbows are visually appealing because they contain multiple bright colors arranged in curved bands.
The concept of this craft involves painting curved lines across paper to represent the rainbow arc. Toddlers use their fingers to apply paint rather than brushes, allowing them to feel the texture of the materials. This sensory experience makes the activity engaging and interactive.

The rainbow design also introduces basic color recognition. Each arc can represent a different color, helping toddlers learn the sequence of rainbow shades. This educational element supports early learning while maintaining the fun of creative play.
The finished artwork becomes a cheerful decoration suitable for display in playrooms or classrooms. Finger painted rainbows reflect both creativity and seasonal inspiration, making them popular among Pinterest ideas for toddler crafts.
Step-by-Step Guide
Prepare several small containers of washable paint in rainbow colors such as red, orange, yellow, green, blue, and purple. Place a large sheet of paper on the table to allow enough space for wide finger movements.
Guide the toddler to dip a finger into one paint color and draw a curved line across the paper. Demonstrate how the arc shape represents the top of a rainbow. Encourage the child to move their finger slowly to maintain a smooth curve.
Next, repeat the process using additional colors placed below the first arc. Each new line should follow the curve of the previous one to build the rainbow pattern. Toddlers may also add clouds at the ends of the rainbow using white paint.
Allow the artwork to dry completely before displaying it. The finished finger painted rainbow becomes a bright handmade decoration that celebrates color exploration and creative expression.
Idea 10: DIY Sticker Collage Board
How to Create
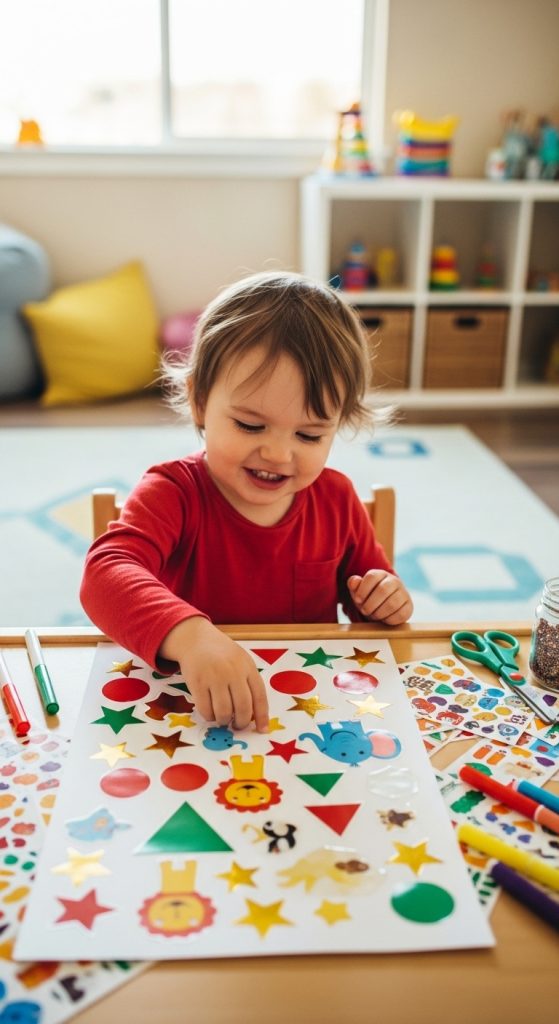
Sticker collage boards provide toddlers with an easy project that focuses on arranging decorative elements to create playful designs. Stickers are simple to use because they do not require glue or complicated tools. This makes them ideal materials for beginner friendly creative activities.
The concept of the sticker collage involves placing various stickers onto a sheet of paper or cardboard to create a themed design. Stickers may include shapes, animals, stars, or seasonal images related to summer. Toddlers can experiment with placement and arrangement to create unique patterns.
This craft supports early organization skills. Toddlers learn how to position elements on a page and fill empty spaces with decorations. The activity also encourages decision-making as children choose which stickers to place and where to position them.
The completed collage board becomes a colorful handmade decoration that reflects the toddler’s creativity. It can also be used as a decorative display piece or placed inside a frame for preservation. Sticker collage projects provide simple creative experiences that remain engaging for young children.
Step-by-Step Guide
Begin by placing a sheet of thick paper or cardboard on the crafting table. Provide a selection of large stickers that toddlers can easily peel and handle. Stickers with bright colors or recognizable shapes work best for this activity.
Demonstrate how to peel the sticker carefully from its backing without tearing it. Toddlers can then place the sticker onto the paper and press gently to secure it. Encourage the child to explore different positions and patterns while placing the stickers.
Continue adding stickers across the page until the board becomes filled with colorful decorations. Some areas can contain clusters of stickers while others remain spaced apart to create visual balance.
Once completed, the sticker collage board can be displayed on a wall or refrigerator. This easy DIY project allows toddlers to explore design and organization while producing a vibrant handmade artwork.