
Acrylic painting is a flexible and beginner friendly creative activity that allows anyone to explore color, texture, and composition without complex preparation. It is widely featured in Pinterest ideas because it supports a wide range of styles, from minimalist design to bold decorative artwork. Acrylic paint dries quickly, works on multiple surfaces, and requires simple materials, making it suitable for DIY projects at home. This article presents ten easy acrylic paint ideas designed to help beginners create aesthetic and practical pieces. Each idea focuses on clear methods, step by step execution, and realistic outcomes. Readers will learn how to plan their materials, apply basic painting techniques, and develop creative ideas that can be used for home decor, organization, or handmade gifts. The goal is to provide structured inspiration that is easy to follow while maintaining a modern and clean visual style.
Why This Idea Is Trending or Useful
Acrylic paint projects are trending because they combine creativity with accessibility. Many people search for DIY tutorials that require minimal tools and deliver visible results quickly. Acrylic painting fits this need because it does not require specialized training or expensive materials. It is also adaptable to different surfaces such as canvas, wood, glass, and paper, which makes it useful for home decor and decoration projects. Pinterest ideas often highlight acrylic painting because it allows users to create personalized designs that match modern design trends, including minimalist style and aesthetic color palettes. These projects are beginner friendly and can be completed in a short time, making them ideal for busy schedules. Additionally, acrylic paint supports layering and corrections, which reduces mistakes and improves confidence for new creators. This combination of flexibility, affordability, and creative control makes acrylic painting a practical and popular choice.
Materials and Preparation
Before starting any acrylic painting project, it is important to prepare the correct materials and workspace. Basic materials include acrylic paints in primary and neutral colors, brushes of different sizes, a palette for mixing, water containers, and a painting surface such as canvas or paper. Optional tools include masking tape, sponges, and palette knives for texture. Preparation begins by selecting a clean and well-lit workspace to ensure accurate color application. Surfaces should be dry and smooth; canvas can be pre-primed if needed. Planning the design in advance helps maintain organization and reduces errors during painting. Light sketching with a pencil can guide placement and proportions. It is also useful to test colors on a separate sheet before applying them to the final surface. Keeping a cloth or tissue nearby helps control excess paint and maintain clean edges. Proper preparation ensures smoother execution and more consistent results.
Idea 1: Simple Gradient Canvas
How to Create
A gradient canvas is a smooth transition between two or more colors, often used in modern design and minimalist style decor. This idea focuses on blending colors seamlessly to create a calming visual effect. Gradients are commonly used in Pinterest inspiration because they are easy to execute and adaptable to different color schemes. This project can match various home decor themes by selecting colors that align with the existing environment. Soft pastels create a light aesthetic, while bold tones produce a stronger visual impact. The concept relies on gradual color blending without visible lines, making it a suitable beginner friendly project. It also helps develop control over brush movement and paint consistency. The simplicity of this design allows users to focus on technique rather than complex patterns, making it an ideal starting point for acrylic painting.

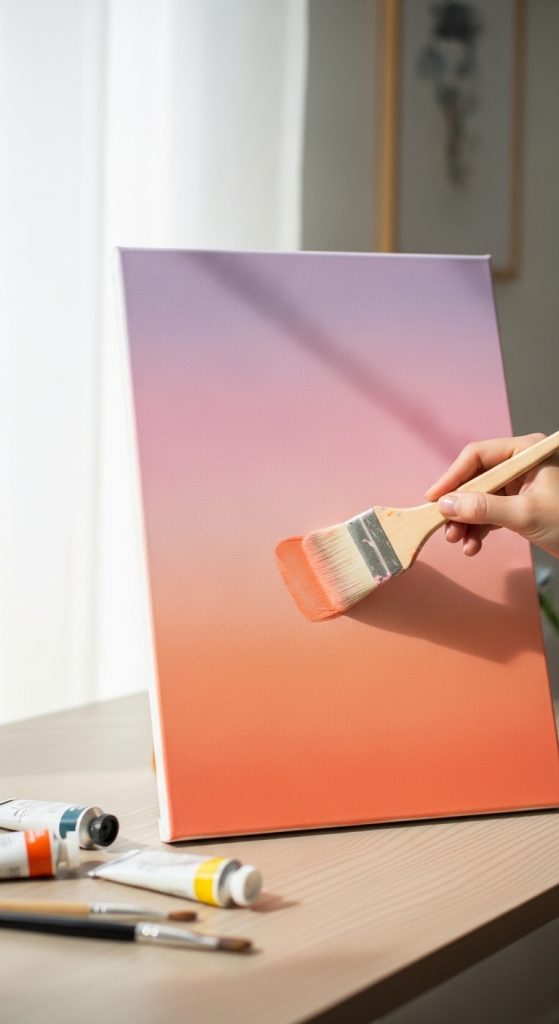
To create a gradient canvas, begin by selecting two or three colors that blend well together. Apply the lightest color at one end of the canvas using a wide brush. While the paint is still wet, add the second color next to it and begin blending where the colors meet using horizontal strokes. Continue blending until the transition appears smooth. If using a third color, repeat the process gradually. Keep the brush slightly damp to improve blending and avoid harsh lines. Work quickly because acrylic paint dries fast. If necessary, apply a second layer to refine the transition. Allow the canvas to dry completely before displaying. This step by step process ensures a clean and professional gradient effect.
Idea 2: Abstract Brush Stroke Art
How to Create
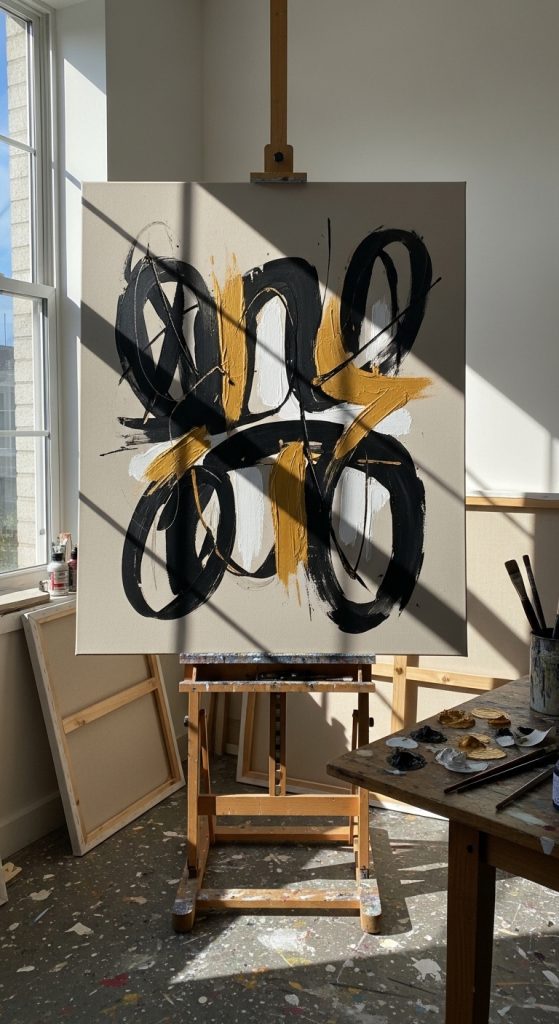
Abstract brush stroke art focuses on expressive movement rather than precise shapes. This style is widely used in creative ideas for modern home decor because it allows flexibility and personal interpretation. The design involves layering bold or neutral strokes to create visual interest without following strict patterns. It is especially suitable for beginners because it does not require drawing skills. The emphasis is on balance, color contrast, and spacing. Abstract art can complement minimalist style interiors by using limited color palettes or enhance vibrant spaces with contrasting tones. This idea encourages experimentation with brush types and stroke directions, making it an engaging creative project. It also helps users understand composition and visual weight in a simple and practical way.
To execute this idea, start with a neutral or light background on your canvas. Once dry, choose two to four colors for the brush strokes. Use different brush sizes to create variation in thickness. Apply strokes in different directions, such as vertical, diagonal, or curved, while leaving some negative space. Avoid overfilling the canvas to maintain balance. Allow each layer to dry slightly before adding new strokes to prevent color mixing. For added texture, use a palette knife for some strokes. Step by step layering helps build depth and structure. Once complete, let the artwork dry fully before placing it in your desired location.
Idea 3: Polka Dot Pattern Painting
How to Create
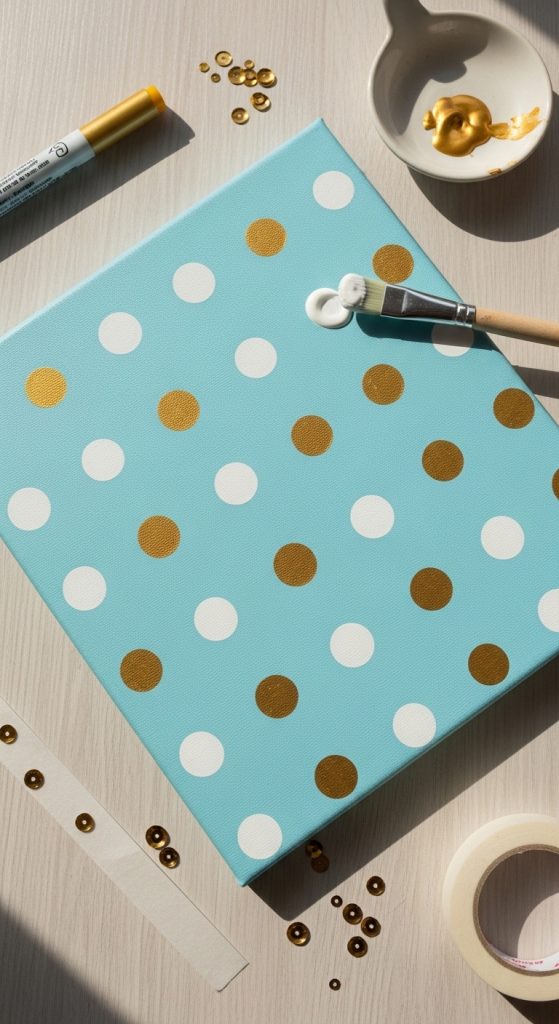
Polka dot painting is a simple and structured design that creates a playful yet organized aesthetic. It is commonly used in DIY projects because it requires minimal technique while producing consistent results. This pattern works well for decoration items such as small canvases, trays, or storage boxes. The repetition of dots creates rhythm and visual balance, which aligns with modern design principles. It is also a useful exercise for improving spacing and alignment skills. The design can be adjusted to fit different styles, from minimalist arrangements with neutral colors to vibrant patterns with multiple shades. This makes it a versatile and beginner friendly option for creative expression.
To create a polka dot pattern, begin by painting a solid background color and allowing it to dry completely. Use a round brush or the end of a tool to create evenly spaced dots across the surface. Dip the tool in paint and press it gently onto the surface to form consistent circles. Plan the spacing in advance to maintain uniformity. For a clean look, use a grid layout as a guide. Apply dots in one color or alternate between multiple colors for variation. Allow each layer to dry before adding additional details. This step by step method ensures neat and balanced results.
Idea 4: Minimalist Line Art Painting
How to Create
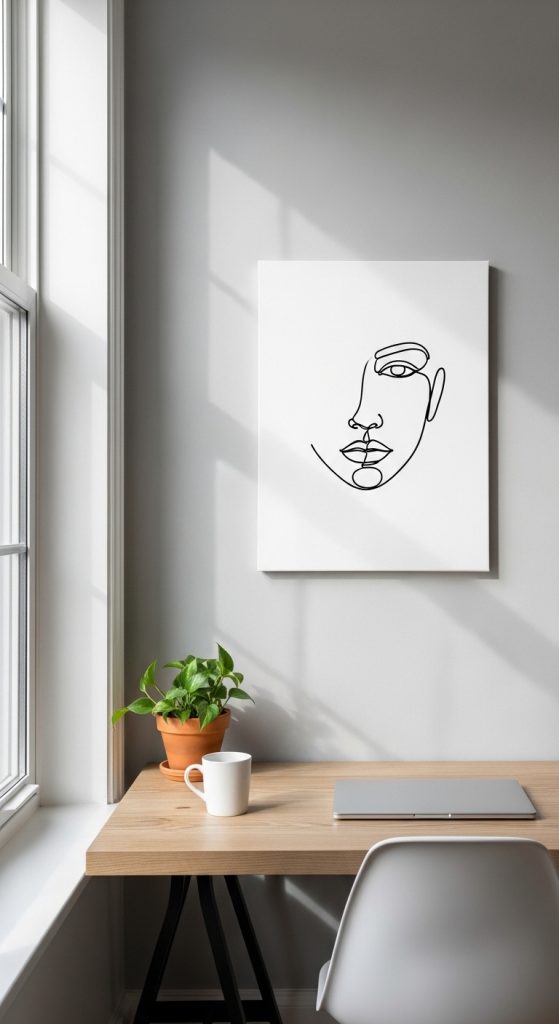
Minimalist line art focuses on simple outlines and clean compositions. This style is popular in Pinterest ideas because it aligns with modern aesthetic trends and requires minimal materials. The design typically features continuous lines that form shapes such as faces, plants, or abstract forms. It emphasizes simplicity and clarity, making it suitable for beginner friendly projects. The limited use of color helps highlight the form and structure of the design. This approach also supports creative exploration without overwhelming complexity. It is ideal for creating elegant home decor pieces that fit contemporary interiors.
To create minimalist line art, start with a plain background, usually white or neutral. Sketch the design lightly with a pencil to guide the lines. Use a thin brush and dark paint to trace over the sketch with smooth, continuous strokes. Maintain consistent pressure to keep the line thickness even. Avoid overworking the design to preserve its simplicity. If desired, add a small accent color for contrast. Allow the painting to dry completely before displaying. This process ensures a clean and refined final result.
Idea 5: Nature-Inspired Leaf Painting
How to Create
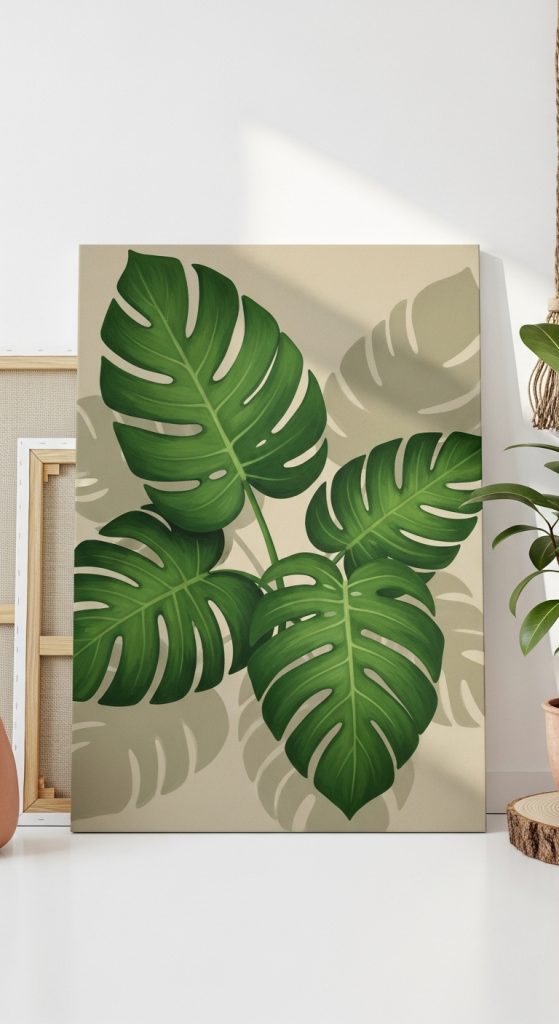
Nature-inspired leaf painting is a common creative project that brings organic elements into home decor. It focuses on simple leaf shapes and natural color palettes. This idea is popular because it connects with natural themes and creates a calming visual effect. The design can be adapted to different styles, including minimalist arrangements or layered compositions. It is also a practical way to practice brush control and shape formation. Using natural inspiration makes the process intuitive and accessible for beginners.

To execute this idea, begin with a light background. Sketch simple leaf shapes or paint them freehand using a medium brush. Use green tones or experiment with neutral shades for a modern look. Apply paint in smooth strokes, following the natural direction of the leaf veins. Add details such as lines or texture once the base layer is dry. Space the leaves evenly to maintain balance. This step by step method helps create a cohesive and natural composition.
Idea 6: Geometric Shape Painting
How to Create
Geometric painting uses basic shapes such as triangles, squares, and circles to create structured designs. This style is widely used in modern design due to its clean and organized appearance. It is suitable for beginners because it relies on simple forms and clear boundaries. The use of shapes allows for endless variations and creative ideas. It also supports color blocking techniques, which enhance visual contrast and balance.
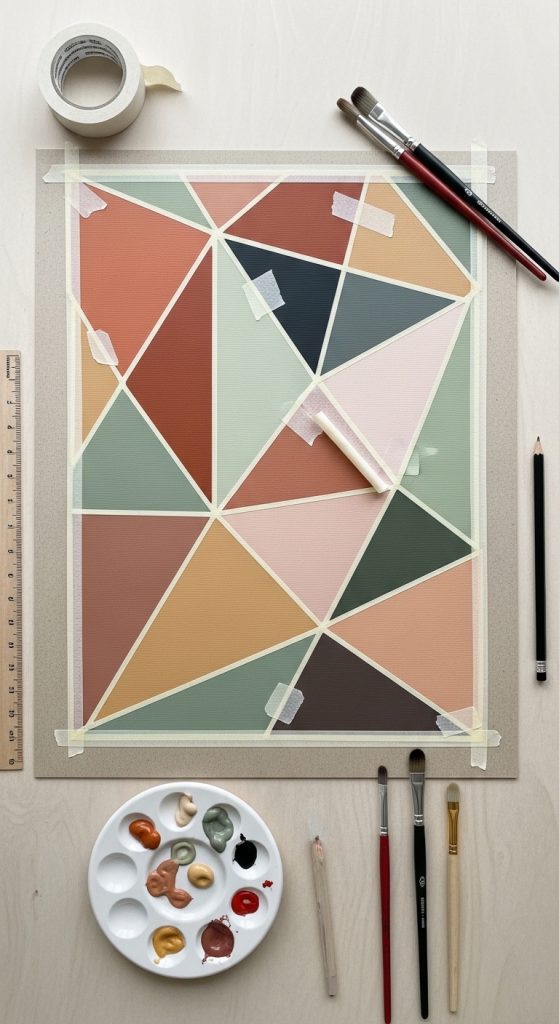
To create geometric art, start by marking shapes on the surface using a pencil or masking tape. Apply different colors within each shape, ensuring clean edges. Allow each section to dry before removing tape or painting adjacent areas. Use consistent color combinations to maintain harmony. This step by step approach ensures precise and structured results.
Idea 7: Galaxy Painting
How to Create
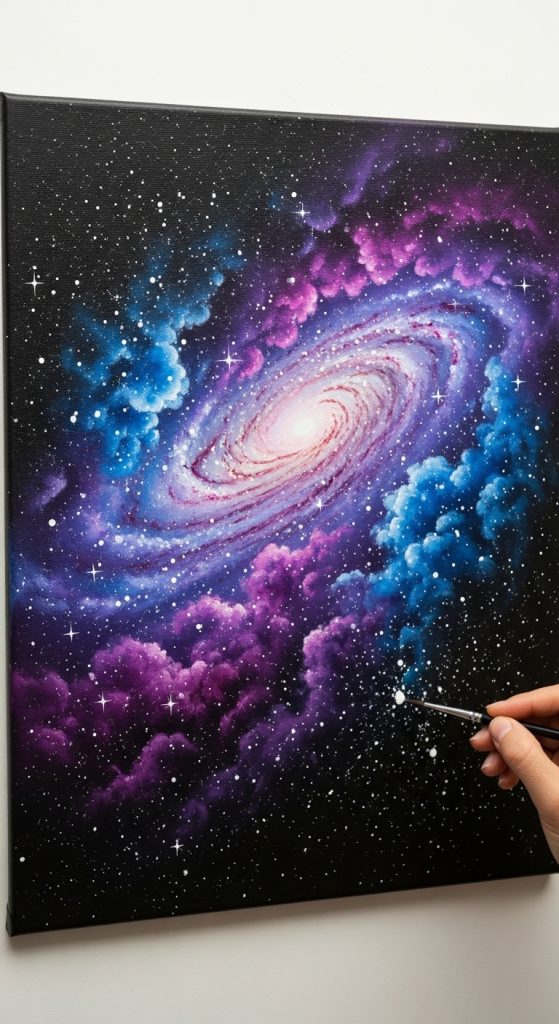
Galaxy painting is a visually rich design that uses blending and splatter techniques to create a space-inspired effect. It is a popular Pinterest idea because of its dramatic and aesthetic appearance. The design includes dark backgrounds with bright color highlights and small white dots representing stars. This project helps develop blending and layering skills while allowing creative freedom.
To create a galaxy effect, paint the background with dark colors such as black or deep blue. While still slightly wet, blend in lighter colors like purple or pink. Use a sponge for soft transitions. Once dry, dip a brush in white paint and lightly flick it to create star effects. Add larger stars manually for variation. This step by step process builds depth and realism.
Idea 8: Text Quote Canvas
How to Create
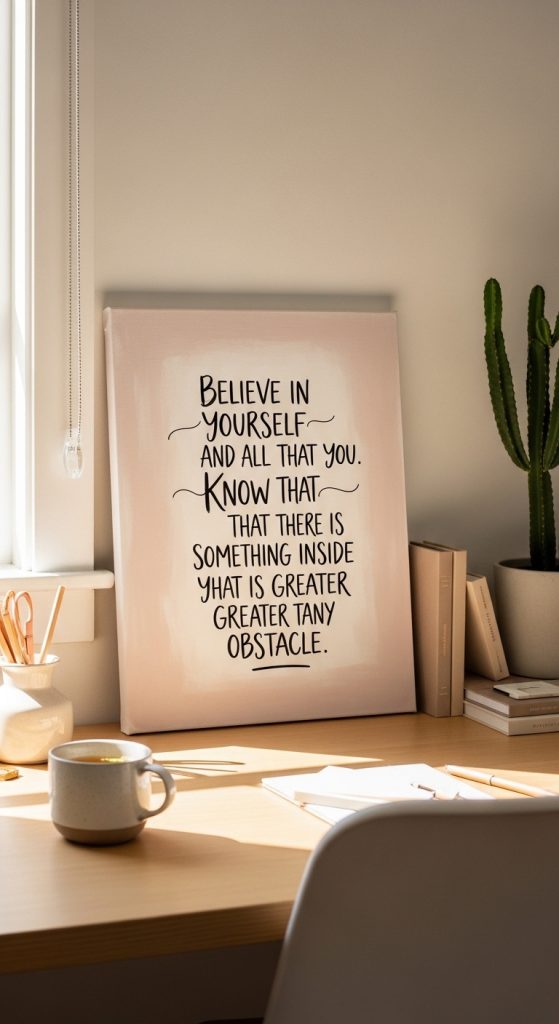
Text quote canvas combines painting with typography to create meaningful decoration pieces. This idea is widely used in home decor and organization spaces. It focuses on clear lettering and simple backgrounds. The design is practical because it allows customization of messages while maintaining aesthetic appeal.
To create this project, paint a background and allow it to dry. Sketch the text lightly to ensure alignment. Use a thin brush to paint the letters carefully. Maintain consistent spacing and thickness. Optionally, add simple decorative elements around the text. This step by step method ensures readability and balance.
Idea 9: Color Block Wall Art
How to Create
Color block art uses large sections of solid colors to create bold and modern compositions. It is a trending idea in minimalist style decor. The design emphasizes contrast and simplicity, making it easy to execute and visually effective.

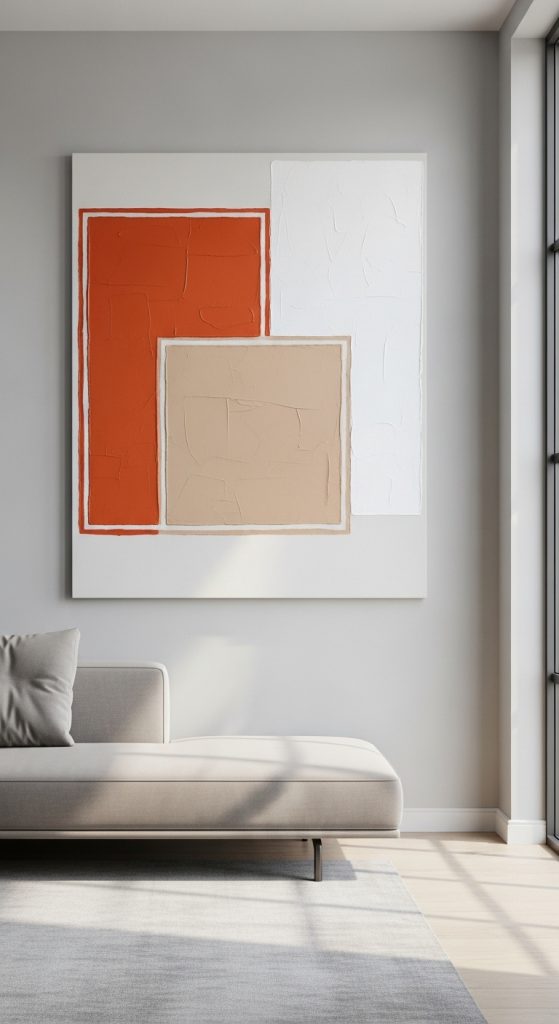
To create color block art, divide the canvas into sections using tape or guidelines. Paint each section with a different color, ensuring clean edges. Allow layers to dry before removing tape. Use balanced color combinations to maintain harmony. This step by step process results in a clean and structured artwork.
Idea 10: DIY Painted Coasters
How to Create
Painted coasters are functional and decorative items that combine creativity with practicality. This project is suitable for beginners because of its small size and manageable scope. It also supports experimentation with patterns and colors.
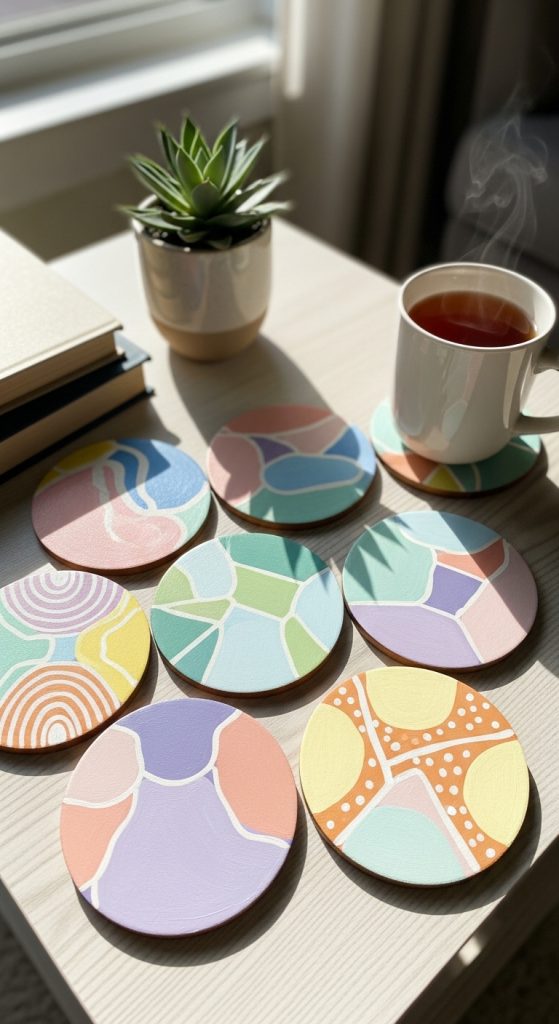
To create coasters, use a sturdy base such as wood or thick board. Paint the surface with a base color and allow it to dry. Add simple patterns such as dots, lines, or shapes. Seal the surface if needed for durability. This step by step method ensures long-lasting and visually appealing results.
Common Beginner Mistakes and How to Avoid Them
One common mistake is using too much paint, which can lead to uneven surfaces and longer drying times. Beginners also tend to skip preparation, resulting in poor composition and inconsistent results. Another issue is rushing the process without allowing layers to dry, which causes colors to mix unintentionally. To avoid these problems, use controlled amounts of paint, plan the design in advance, and work in layers. Cleaning brushes properly and maintaining a tidy workspace also improves results.

Practical Tips for Better Results
Use high-quality brushes that match the project size. Keep paint layers thin for better control and faster drying. Test colors before applying them to the final surface. Work in a well-lit area to ensure accurate color perception. Practicing basic strokes regularly helps improve consistency and precision.
Styling, Presentation, or Organization Ideas
Display finished pieces in groups to create a cohesive visual effect. Match color palettes with existing home decor for a unified look. Use frames or simple mounts to enhance presentation. Organize materials in labeled containers for easy access during future projects.
Budget or Time Planning
Plan projects based on available time to avoid rushing. Use basic materials that can be reused across multiple projects. Start with smaller designs before moving to larger pieces. This approach reduces waste and improves efficiency.
Creative Expansion and Advanced Inspiration
Explore combining multiple techniques such as gradients with geometric shapes. Experiment with textured tools for added depth. Try painting on different surfaces to expand creative possibilities. Developing new combinations helps create unique and advanced designs over time.
