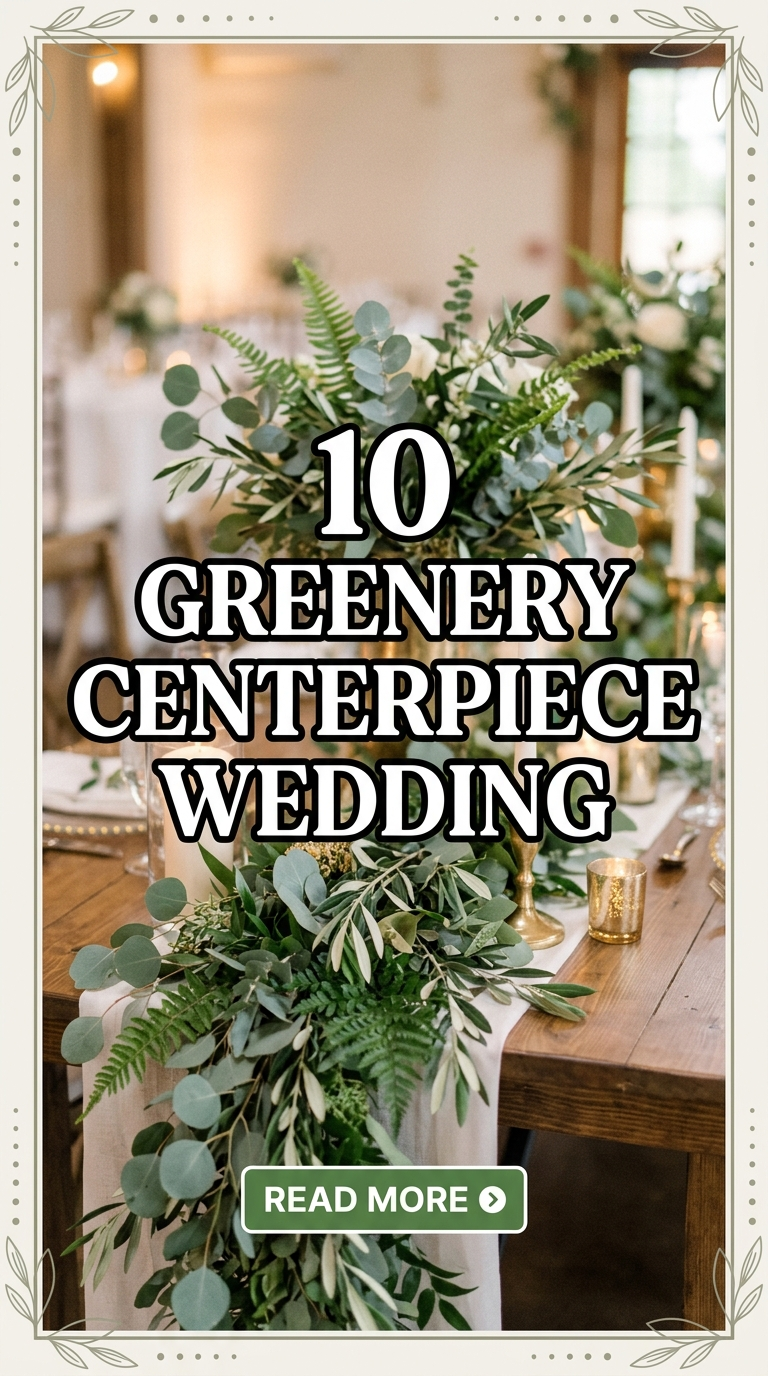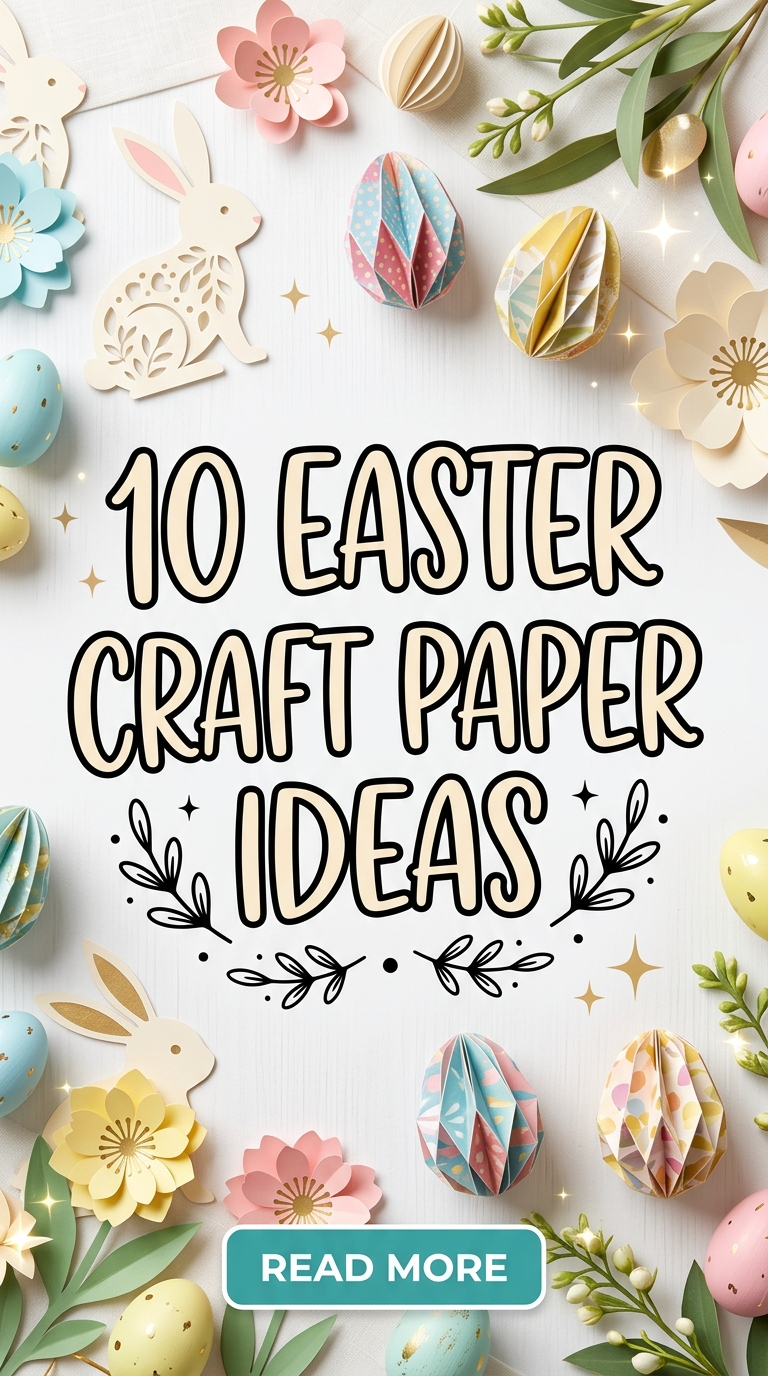
10 Easter Craft Paper Ideas

Easter craft paper ideas offer a simple and accessible way to create handmade decorations, gifts, and activity projects using affordable materials. Paper crafting involves cutting, folding, layering, and assembling paper into decorative or functional designs. This method is widely used in DIY projects because it requires minimal tools and allows flexibility in style, color, and structure.
Easter-themed paper crafts typically include elements such as eggs, bunnies, flowers, baskets, and spring motifs. These projects work well for home decor, classroom activities, family crafting sessions, and seasonal Pinterest ideas. Paper crafts are beginner friendly and adaptable for different age groups. With basic materials such as cardstock, colored sheets, glue, scissors, and markers, it is possible to create visually appealing decorations without complex equipment.
This article presents structured, step by step creative ideas designed to help you plan, prepare, and execute Easter paper projects efficiently. Each idea includes clear instructions, material guidance, and practical tips so that the final result looks clean, organized, and suitable for modern home decoration or seasonal display.
Why Easter Paper Crafts Are Popular and Useful
Easter paper crafts are trending because they combine affordability, creativity, and seasonal decoration in one practical activity. Paper is easy to store, easy to cut, and widely available, making it ideal for budget ideas and last-minute planning. Many families and educators choose paper-based DIY tutorials because they require minimal preparation and produce visually engaging results. Another reason these projects remain popular on Pinterest ideas boards is their versatility. The same design can be adapted into minimalist style decor, colorful children’s crafts, or modern aesthetic wall displays. Paper crafts also encourage skill development such as fine motor coordination, color matching, spatial awareness, and step by step execution. From a home decor perspective, handmade Easter decorations add personalized detail without requiring expensive materials. They can be customized to match neutral interiors, pastel spring themes, or bright festive setups. Since paper crafts are lightweight, they are easy to hang, arrange, or reorganize. This flexibility makes them ideal for creative project planning and seasonal decoration updates.
Materials and Preparation for Successful Results
Before starting any Easter craft paper project, proper material preparation ensures smooth execution. Basic materials include colored cardstock, patterned craft paper, scissors, glue sticks, liquid adhesive, rulers, pencils, and erasers. For more detailed decoration, additional items such as twine, ribbon, markers, glitter paper, hole punchers, and double-sided tape may be used. A clean, flat working surface is important to achieve precise cutting and neat assembly. Measuring tools help maintain symmetry, especially when creating egg shapes, banners, or layered designs. If working with children, prepare pre-cut templates to simplify the process. Organizing materials before beginning prevents interruptions and maintains workflow efficiency. Sorting paper by color and thickness allows faster selection during the creative process. It is helpful to sketch the design lightly in pencil before cutting permanent shapes. Planning color combinations in advance avoids mismatched results and improves the overall aesthetic. With structured preparation, even beginner friendly paper craft ideas can produce polished and decorative outcomes suitable for display.
1. Layered Pastel Paper Easter Eggs
Step-by-Step Guide

Layered pastel paper Easter eggs are decorative wall or table accents created by stacking multiple egg-shaped cutouts in coordinating colors. Begin by drawing an egg template on thick cardstock and cutting it out carefully. Use this template to trace identical shapes onto pastel craft paper in different shades. Cut at least three to five layers for each egg to create dimension. Slightly reduce the size of each inner layer to achieve a visible border effect when stacked. Arrange the layers before gluing to confirm alignment. Apply glue evenly across the surface and press firmly to avoid air bubbles. Once assembled, add decorative details such as thin paper strips, cut-out floral shapes, or geometric patterns. For hanging decoration, punch a small hole at the top and attach twine. This easy project works well as wall art, banner pieces, or table decor. The layered method creates depth without complex tools. It is a beginner friendly DIY tutorial that produces a clean, modern design suitable for minimalist or pastel-themed Easter decoration.
2. Paper Bunny Silhouette Wall Art
How to Create

Paper bunny silhouette wall art focuses on bold shape contrast and simple execution. Start by selecting a neutral background sheet such as white, beige, or soft gray cardstock. Draw a bunny outline on a separate colored paper sheet. The design should be smooth and continuous without excessive detail to maintain a clean silhouette. Cut the bunny shape precisely using sharp scissors. Position the cutout at the center or slightly off-center of the background sheet to create a balanced composition. Glue it securely and smooth out any edges. For additional texture, layer a smaller patterned bunny cutout on top of the base silhouette. Frame the finished piece using a simple border made from contrasting paper strips. This project suits modern design aesthetics and can be arranged as a gallery wall display. It requires minimal materials and provides strong visual impact. The simplicity of the silhouette technique makes it ideal for beginner friendly Easter decoration while maintaining an organized and aesthetic appearance.
3. Folded Paper Easter Baskets

Execution Process
Folded paper Easter baskets are small containers made entirely from sturdy craft paper. Begin with a square sheet of thick cardstock. Fold it diagonally in both directions to create crease lines. Unfold and fold each corner toward the center point to form a smaller square. Secure overlapping edges with glue. Lift opposite flaps upward and attach them to form basket sides. Cut a long paper strip to create a handle and glue it securely on both sides. Reinforce attachment points with extra adhesive to prevent tearing. Decorate the basket exterior with paper flowers, egg cutouts, or scalloped borders. These baskets are functional for holding small candies or decorative eggs. This creative project combines folding techniques with structural assembly. Proper measurement ensures symmetry and stability. Using thick paper is essential for durability. The basket design is a practical DIY tutorial that blends decoration and functionality, making it suitable for classroom activities or home display organization during Easter celebrations.
4. Paper Flower Easter Garland
Setup Method

A paper flower Easter garland adds vertical decoration to walls, windows, or mantels. Start by cutting multiple flower shapes in various pastel tones. Create at least three layers per flower for a dimensional effect. Stack the layers and secure them at the center using glue or a small brad fastener. Slightly curl the petals upward to enhance texture. Cut circular centers in contrasting colors and attach them. Prepare a long string or twine as the base for the garland. Evenly space the flowers along the string and glue or tape them securely at the back. Measure spacing to maintain visual balance. This easy project works well in minimalist style interiors or colorful spring setups. Consistent flower size ensures a uniform appearance. The garland can be customized with alternating egg shapes or bunny cutouts. This decoration method is simple, lightweight, and adaptable for different room sizes, making it a highly practical Pinterest idea for seasonal home decor planning.
5. Pop-Up Easter Card Designs
How to Make
Pop-up Easter cards use folding techniques to create three-dimensional interior designs. Start with a folded cardstock base. On the inside fold, cut two small parallel slits approximately two centimeters apart. Push the cut section inward to form a raised platform. Attach a paper egg, bunny, or chick cutout onto this raised section. Close and reopen the card to ensure smooth movement. Decorate the background with drawn grass, flowers, or pastel patterns. The front cover can include layered paper lettering spelling Easter greetings. This tutorial focuses on structural precision. Accurate measurements ensure the pop-up element aligns properly when folded. Use thicker paper for durability. This beginner friendly creative project allows personalization and handmade gifting. Pop-up techniques enhance visual interest without complicated materials. With careful folding and secure gluing, the final card becomes a functional decoration and greeting combined, making it suitable for both children and adults seeking meaningful handmade Easter inspiration.

6. Paper Egg Mosaic Art
Step-by-Step Guide

Paper egg mosaic art involves covering an egg-shaped base with small paper fragments to create textured patterns. Cut a large egg shape from thick cardstock. Prepare small pieces of colored paper in various shapes such as squares, triangles, or irregular fragments. Apply glue to a small section of the egg base and place paper pieces closely together, leaving minimal gaps. Continue section by section to prevent glue from drying prematurely. Use contrasting colors to form stripes, geometric blocks, or abstract patterns. Press each piece firmly for secure adhesion. Once complete, allow the mosaic to dry flat to prevent curling. This DIY tutorial develops attention to detail and planning skills. It is suitable for children and adults alike. The mosaic technique allows creative freedom while maintaining a structured shape. Finished pieces can be displayed on walls or mounted onto larger boards for group projects. This is a practical, low-cost decoration method that creates visually engaging Easter home decor.
7. Easter Paper Crown Craft
How to Create

An Easter paper crown is a wearable craft made from decorative cutouts attached to a headband base. Measure the circumference of the head and cut a long strip of sturdy paper accordingly. Form a circular band and secure the ends with glue or staples. Create decorative elements such as bunny ears, flowers, or egg shapes. Attach these elements evenly around the band. Reinforce connection points to prevent detachment. Keep decorations lightweight to maintain comfort. Adjust sizing before final gluing to ensure proper fit. This creative idea works well for children’s activities or themed gatherings. Using pastel colors maintains a seasonal aesthetic. The project combines measurement, cutting, and balanced placement. Structured assembly ensures durability. This beginner friendly Easter craft paper idea transforms simple materials into functional costume accessories suitable for celebrations or classroom events.
8. Hanging Paper Egg Ornaments
Execution Process

Hanging paper egg ornaments are created by layering identical egg cutouts and folding them at the center. Cut multiple identical egg shapes from decorative paper. Fold each egg vertically down the middle. Glue one half of an egg to the half of another folded egg. Continue attaching until all pieces form a circular 3D shape. Insert a string at the top before sealing the final piece. Allow adequate drying time to maintain structure. The ornament expands when opened, creating volume. This project works well for tree branches, window decor, or ceiling displays. Using patterned paper enhances visual interest. Equal folding ensures symmetry. This easy project requires precise alignment but minimal materials. The result is lightweight, decorative, and adaptable to various color schemes. Proper planning ensures a consistent and professional appearance suitable for seasonal home decor organization.
9. Paper Carrot Treat Cones
How to Make

Paper carrot treat cones combine decoration and functionality. Cut an orange paper semicircle and roll it into a cone shape. Secure the overlapping edge with glue. Fill the cone with small treats or decorative filler. Cut green paper strips and fringe one end to create carrot leaves. Insert the fringed strips into the cone opening and glue securely. Ensure the cone base is tightly sealed to prevent items from falling out. Adjust size depending on intended use. This creative project is suitable for table settings or gift presentation. Maintaining even curvature during rolling ensures stability. Reinforce edges for durability. The carrot cone design aligns with Easter themes while serving practical use. It is an accessible DIY tutorial that can be completed quickly with minimal preparation.
10. Easter Paper Table Centerpiece Display
Setup Method

An Easter paper table centerpiece can be constructed using layered cutouts arranged on a sturdy base. Begin with a rectangular cardboard base covered in pastel paper. Create standing egg and bunny shapes by attaching folded support tabs at the back of each cutout. Position elements at varying heights to create depth. Add paper grass strips around the base to conceal supports. Arrange flowers or smaller decorative pieces to fill empty spaces. Secure all elements firmly to prevent tipping. Maintain balanced spacing to avoid overcrowding. This project requires planning for symmetry and proportion. It works well as a dining table decoration or seasonal display accent. Using coordinated colors improves aesthetic consistency. Proper attachment methods ensure durability. This centerpiece design transforms simple paper materials into a structured decorative arrangement suitable for Easter gatherings.
Common Beginner Mistakes and How to Avoid Them
Many beginners cut shapes without using templates, which leads to uneven designs. Creating one master template ensures uniformity across repeated elements. Another common mistake is using excessive glue, which causes wrinkling or curling. Applying thin, even layers prevents this issue. Choosing paper that is too thin for structural projects can reduce durability. Thicker cardstock is recommended for baskets and standing decorations. Skipping measurement steps often results in asymmetry. Always measure and mark guidelines lightly before cutting. Rushing assembly can cause misalignment. Allow adequate drying time between steps. Maintaining organized materials reduces confusion and speeds up workflow. Addressing these common issues improves overall quality and ensures professional-looking results.
Practical Tips for Cleaner and More Aesthetic Results
Use sharp scissors for precise edges. Replace blades when cuts become uneven. Score folding lines lightly before bending to achieve crisp folds. Plan color combinations in advance to maintain visual harmony. Store completed crafts flat until fully dry. Work on a protected surface to prevent adhesive damage. Keep decorative elements proportionate to base size. Maintain balanced spacing in garlands and displays. These practical methods enhance presentation quality and ensure that DIY Easter paper projects look organized and thoughtfully designed.
Budget and Time Planning for Easter Paper Projects
Paper crafts are cost-effective when materials are planned in advance. Purchase neutral base supplies and supplement with seasonal colors. Batch cutting similar shapes saves time. Preparing templates reduces repeated measuring. Allocate drying time between assembly stages to prevent smudging. Schedule projects according to complexity, starting with simpler designs before advanced layered or structural crafts. Organized planning ensures efficient execution and reduces material waste.
Expanding Your Creative Paper Craft Skills
After mastering basic Easter craft paper ideas, explore advanced techniques such as quilling, embossing, or layered shadow box designs. Experiment with textured paper for dimension. Combine multiple methods in one project for unique results. Gradually increase complexity while maintaining structured planning and accurate measurement. Consistent practice improves cutting precision and design balance. Easter paper crafting provides a flexible foundation for broader seasonal decoration projects throughout the year.