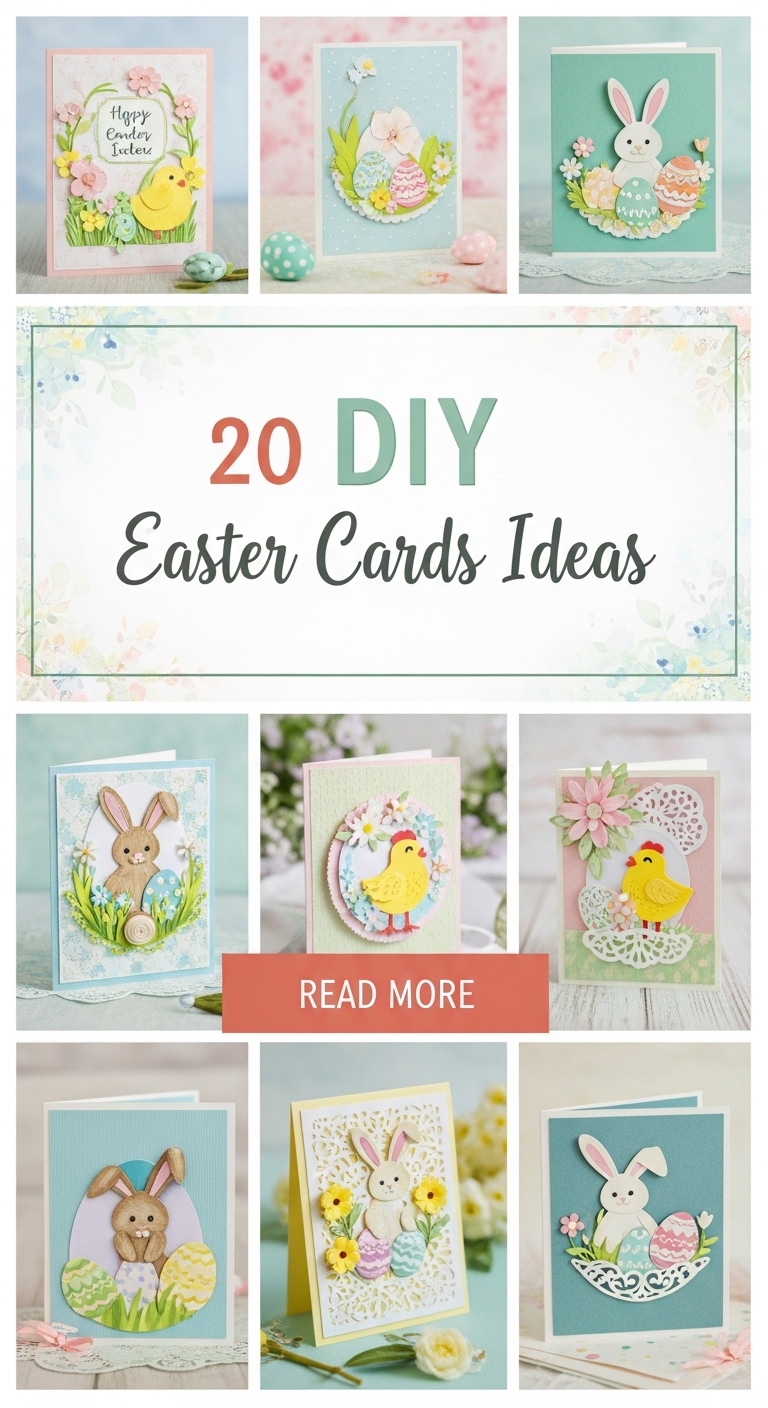
20 diy easter cards ideas
Easter is more than just pastel colors, chocolate eggs, and spring flowers — it’s a season of renewal, joy, and meaningful connections. One of the most heartfelt ways to celebrate this beautiful holiday is by creating DIY Easter cards. Handmade cards carry something that store-bought cards simply can’t replicate: personality, intention, and love. Whether you’re crafting with kids, preparing thoughtful notes for friends, or designing elegant Easter greetings for family members, DIY Easter cards allow you to express creativity while spreading joy.

In today’s Pinterest-inspired world, handmade Easter cards are not just thoughtful — they’re also aesthetic, photogenic, and highly shareable. From minimalist watercolor bunnies to textured 3D pop-up eggs, there are endless ways to create something truly special. The best part? You don’t need to be a professional artist or crafter to make stunning Easter cards. With the right materials, simple step-by-step guidance, and a little imagination, anyone can design beautiful, save-worthy Easter creations.
DIY Easter cards are perfect for beginners because they can be as simple or as detailed as you prefer. They can be budget-friendly using basic craft supplies or elevated with specialty paper and embellishments. They’re ideal for kids’ craft afternoons, classroom projects, church gatherings, or even relaxing solo creative time.
This guide will walk you through 20 detailed DIY Easter card ideas designed to be beginner-friendly, practical, and Pinterest-perfect. Each idea includes a clear explanation, step-by-step instructions, and a list of materials you’ll need to bring it to life. Whether your style leans toward cute and playful, rustic and farmhouse-inspired, or elegant and modern, you’ll find inspiration here.
Let’s start with the first 10 creative and beautiful DIY Easter card ideas you can make today.
1. Watercolor Bunny Silhouette Card
Introduction

Watercolor designs are one of the most Pinterest-loved Easter aesthetics because they feel soft, dreamy, and effortlessly elegant. A watercolor bunny silhouette card combines simplicity with artistic charm, making it perfect for beginners who want a polished result without complicated techniques. This card works beautifully for adults, teens, or even older kids who enjoy painting.
The gentle pastel tones associated with Easter — blush pink, baby blue, lavender, mint green, and soft yellow — create a calming spring vibe. The silhouette style means you don’t need advanced drawing skills; you simply paint a soft background and layer a simple bunny shape on top.
This design feels high-end and boutique-worthy but is surprisingly easy to make at home.
What This Idea Is
A folded card featuring a soft watercolor background with a bunny silhouette layered or painted on top, paired with a sweet Easter greeting.
Materials Needed
- Watercolor paper or thick white cardstock
- Watercolor paints
- Paintbrushes
- Pencil
- Black marker or paint
- Cup of water
- Paper towel
- Optional: gold pen for lettering
Step-by-Step How-To
- Fold your cardstock into a card base.
- Lightly sketch a bunny silhouette in pencil.
- Paint a soft watercolor wash across the front (avoid over-saturating).
- Let dry completely.
- Paint or outline the bunny silhouette in black or dark brown.
- Add “Happy Easter” using a gold pen or brush lettering.
- Allow everything to dry fully before closing the card.
This design photographs beautifully for Pinterest and feels timeless.
2. 3D Pop-Up Easter Egg Card
Introduction

If you want something interactive and impressive, a 3D pop-up Easter egg card is a showstopper. Pop-up cards create a delightful surprise when opened, making them especially exciting for children. While pop-up designs might seem complicated, this version keeps things simple and manageable.
This idea is perfect for parents crafting with kids, teachers creating classroom projects, or anyone wanting a playful Easter surprise. Bright colors and fun patterns make this design stand out on Pinterest boards.
What This Idea Is
A folded card that reveals a layered 3D paper Easter egg when opened.
Materials Needed
- Colored cardstock
- Patterned scrapbook paper
- Scissors
- Glue
- Pencil
- Ruler
Step-by-Step How-To
- Fold cardstock in half.
- Cut multiple egg shapes from patterned paper.
- Fold each egg shape in half vertically.
- Glue folded halves together to create a layered 3D effect.
- Attach the center fold to the card crease.
- Decorate the front with a simple “Happy Easter” message.
This card adds dimension and excitement while staying beginner-friendly.
3. Fingerprint Chick Card (Kid-Friendly)
Introduction
Nothing feels more personal than incorporating fingerprints into a handmade card. A fingerprint chick card is adorable, easy, and perfect for toddlers and preschoolers. This idea is ideal for family crafting time and makes a wonderful keepsake for grandparents.

Pinterest users love kid-made crafts that feel authentic and heartfelt. This card delivers both charm and personality.
What This Idea Is
A card decorated with small yellow fingerprint chicks, each turned into a cute baby chick using simple details.
Materials Needed
- White cardstock
- Yellow washable paint
- Black marker
- Orange marker
- Wet wipes
Step-by-Step How-To
- Fold cardstock in half.
- Dip finger lightly in yellow paint.
- Press fingerprints onto the card.
- Let dry.
- Add tiny eyes, beaks, and feet with markers.
- Write “Chick-ing You a Happy Easter!”
This card is playful, memorable, and perfect for kids.
4. Rustic Twine Cross Card
Introduction
For those who prefer faith-centered Easter designs, a rustic twine cross card brings a meaningful and elegant touch. This design focuses on the spiritual aspect of Easter and works beautifully for church communities or religious family members.

Rustic textures are extremely popular on Pinterest because they combine natural materials with simplicity.
What This Idea Is
A minimalist card featuring a cross made from twine on a neutral cardstock background.
Materials Needed
- Kraft cardstock
- Twine
- Glue
- Small dried flowers (optional)
Step-by-Step How-To
- Fold kraft cardstock.
- Cut twine into two pieces forming a cross.
- Glue twine carefully into place.
- Add small dried flowers at the intersection.
- Write “He Is Risen” underneath.
Simple, elegant, and deeply meaningful.
5. Pastel Polka Dot Egg Card
Introduction
Polka dots instantly create a cheerful Easter vibe. A pastel polka dot egg card is bright, playful, and perfect for anyone who loves color.
This design works great for bulk card-making because it’s repetitive and easy.

What This Idea Is
A large egg shape decorated with pastel polka dots using paint or markers.
Materials Needed
- White cardstock
- Pastel paints
- Round sponge or cotton swab
- Pencil
Step-by-Step How-To
- Sketch a large egg shape.
- Paint dots using sponge or cotton swab.
- Allow to dry.
- Outline egg shape lightly.
- Add greeting text.
Bright and Pinterest-ready.
6. Pastel Ombre Easter Egg Card
Introduction
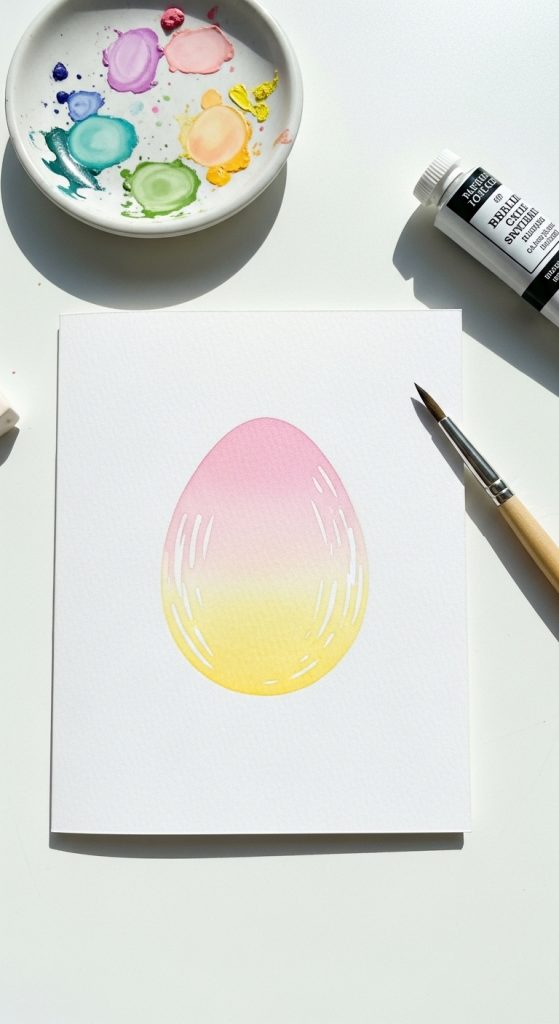
Soft color transitions are one of the most eye-catching trends in DIY paper crafts, especially for spring-themed projects. A pastel ombre Easter egg card blends two or three gentle hues into a smooth gradient, creating a dreamy, modern design that looks professionally made. Ombre effects are highly shareable on Pinterest because they photograph beautifully and feel artistic without being complicated.

This card idea is perfect for beginners who want to experiment with blending techniques while keeping the overall layout simple. You don’t need advanced painting skills — just patience and soft brush strokes. The key to a beautiful ombre effect is gradual blending and working while the paint is slightly wet.
Whether you choose pink fading into peach, blue into lavender, or mint into pale yellow, the final result feels fresh, light, and perfect for Easter gifting.
What This Idea Is
A folded card featuring a large egg shape filled with a soft pastel ombre color gradient.
Materials Needed
- Thick white cardstock
- Watercolor paints or acrylic paints
- Paintbrush (medium flat brush works best)
- Pencil
- Water cup
- Paper towel
Step-by-Step How-To
- Fold your cardstock neatly in half to create the card base.
- Lightly draw a large egg shape centered on the front.
- Choose two or three pastel shades that blend well together.
- Begin painting from the top of the egg using the lightest color.
- While still slightly wet, apply the second color below and gently blend where they meet.
- Continue blending downward for a smooth gradient transition.
- Let the paint dry completely.
- Outline the egg very lightly if desired and add a simple “Happy Easter” greeting underneath.
The finished card looks soft, artistic, and beautifully minimal.
7. Carrot-Shaped Easter Card
Introduction
If you’re looking for something playful and unique, a carrot-shaped Easter card is a charming alternative to traditional egg or bunny designs. This idea is especially fun for children but can also be styled in a more minimalist way for adults. The bold orange and green color combination instantly signals spring and Easter celebrations.
Carrot-shaped cards stand out because the card itself becomes the design. Instead of decorating a rectangle, you cut the cardstock into a carrot shape and fold it creatively. Pinterest users love creative-shaped cards because they feel fresh and different from standard layouts.
This project is simple, affordable, and great for crafting in batches.
What This Idea Is

A folded Easter card cut into the shape of a carrot with green leafy top detail.
Materials Needed
- Orange cardstock
- Green cardstock
- Pencil
- Scissors
- Glue
- Black fine-tip marker
Step-by-Step How-To
- Fold orange cardstock in half.
- Draw half of a carrot shape along the fold so it opens into a full carrot when cut.
- Carefully cut around the shape, keeping the fold intact.
- Cut green paper into leafy shapes and glue to the top back portion.
- Add subtle black dashed lines across the carrot for texture.
- Write a cute message inside like “You’re one of my favorite carrots!”
This design is playful, eye-catching, and perfect for kids and teachers.
8. Embossed Floral Easter Card
Introduction

Embossed cards add a professional, boutique-quality feel to handmade creations. The raised texture catches light beautifully and gives the card dimension without adding bulk. An embossed floral Easter card feels elegant, delicate, and perfect for gifting to adults or church members.
Embossing might sound advanced, but beginner-friendly embossing folders and simple manual machines make it accessible. Even if you don’t own an embossing machine, you can use pre-embossed paper to achieve a similar look.
Pinterest audiences love textured stationery because it appears luxurious and handcrafted.
What This Idea Is
A white or pastel card featuring a raised floral embossing pattern with a simple Easter greeting.
Materials Needed
- Cardstock (white or pastel)
- Embossing folder and machine (or pre-embossed paper)
- Glue (if layering)
- Fine-tip pen or calligraphy pen
Step-by-Step How-To
- Run cardstock through an embossing folder using your machine.
- Fold embossed cardstock into a card base (or attach embossed panel to base).
- Keep design minimal to highlight texture.
- Write “Happy Easter” or “Blessed Easter” in elegant script.
- Optionally add a small gold accent for contrast.
The raised floral detail gives this card a timeless spring elegance.
9. Pastel Confetti Shaker Card
Introduction
Shaker cards are interactive and full of joyful movement, making them especially exciting for Easter. A pastel confetti shaker card features a small transparent window filled with tiny sequins or paper confetti that move when shaken. This playful design feels festive and celebratory.

While shaker cards require a few extra materials, the process is manageable for beginners if done carefully. The finished result is worth the effort because it adds dimension and surprise.
Pinterest users love shaker cards because they’re dynamic and visually engaging.
What This Idea Is
A card with a clear window section filled with loose pastel confetti that moves inside.
Materials Needed
- Cardstock
- Clear plastic sheet (acetate)
- Foam adhesive strips
- Pastel confetti or sequins
- Scissors
- Glue
Step-by-Step How-To
- Cut a window shape (egg or circle) into the front of your folded card.
- Glue clear plastic sheet behind the window opening.
- Add foam adhesive strips around the window edge to create depth.
- Place confetti inside the window area.
- Seal with another layer of cardstock on top to trap confetti.
- Decorate the front with a simple greeting.
When shaken, the confetti moves, creating a magical effect.
10. Vintage Lace Easter Card
Introduction

For a romantic, soft, and slightly nostalgic aesthetic, a vintage lace Easter card is a beautiful choice. Lace instantly adds delicacy and charm, making the card feel timeless and elegant. This design is especially lovely for gifting to mothers, grandmothers, or anyone who appreciates classic details.
Vintage-inspired crafts are highly popular on Pinterest because they combine texture, softness, and subtle color palettes. Cream, blush, soft lavender, and muted sage tones work perfectly for this style.
The beauty of this card lies in layering delicate materials while keeping the message simple.
What This Idea Is
A soft pastel card decorated with lace trim, ribbon, and subtle spring embellishments.
Materials Needed
- Cream or pastel cardstock
- Lace trim
- Satin ribbon
- Glue
- Fine-tip pen
Step-by-Step How-To
- Fold cardstock to create base.
- Cut lace to fit across the front panel horizontally or vertically.
- Glue lace carefully and allow to dry.
- Tie a small satin ribbon bow and attach to lace.
- Write “Happy Easter” in elegant script.
- Keep additional decorations minimal to maintain vintage charm.
The final result feels delicate, heartfelt, and beautifully timeless.
11. Layered Paper Bunny Ears Card
Introduction

Layered paper crafts are extremely popular on Pinterest because they create depth, texture, and a professional handmade look without requiring complicated tools. A layered paper bunny ears card is soft, playful, and perfect for both kids and adults. The dimensional effect makes the design visually interesting while still being beginner-friendly.
This card works especially well if you enjoy working with pastel tones like blush pink, cream, soft gray, and baby blue. The layered look can be customized — you can keep it minimal and modern or add florals and embellishments for a more decorative finish. It’s also a great project for crafting in batches because once you create one template, you can replicate it quickly.
If you want a DIY Easter card that looks boutique-quality but remains simple to assemble, this is a wonderful option.
What This Idea Is
A folded card featuring raised, layered bunny ears made from stacked cardstock shapes for a dimensional effect.
Materials Needed
- White cardstock (card base)
- Pink and white colored paper
- Pencil
- Scissors
- Glue or foam adhesive squares
- Optional: small faux flowers or pearls
Step-by-Step How-To
- Fold white cardstock into a card base.
- Draw and cut two large bunny ear shapes from white paper.
- Cut smaller inner-ear shapes from pink paper.
- Glue pink inner pieces onto white ears.
- Use foam adhesive to attach ears slightly raised from the card surface.
- Add “Happy Easter” in soft script below.
- Optional: decorate around the ears with tiny flowers or pearls.
The layered texture makes this card feel high-end and perfect for Pinterest saves.
12. Minimalist Gold Foil Cross Card

Introduction
Minimalist designs are timeless and elegant. If you prefer clean lines, neutral colors, and understated beauty, a gold foil cross Easter card is a sophisticated choice. This idea focuses on simplicity while still making a strong visual impact.
Gold accents are trending in DIY paper crafts because they instantly elevate a design. Even beginners can achieve this effect using gold foil sheets, metallic pens, or gold paint. This card works beautifully for church communities, religious gatherings, or anyone who appreciates refined aesthetics.
The beauty of minimalist cards lies in restraint — less decoration allows the focal point to shine.
What This Idea Is
A simple white card featuring a centered gold cross with minimal text.
Materials Needed
- Thick white cardstock
- Gold foil sheet or metallic gold pen
- Glue (if using foil)
- Ruler
- Pencil
Step-by-Step How-To
- Fold cardstock neatly in half.
- Lightly sketch a centered cross using pencil and ruler.
- Apply gold foil with glue or carefully trace over lines using a metallic pen.
- Allow to dry completely.
- Add a small phrase underneath, such as “Blessed Easter.”
- Keep the rest of the card clean and uncluttered.
This design is elegant, modern, and incredibly photogenic.
13. Button Easter Egg Card
Introduction
Using buttons as embellishments adds charm, texture, and a touch of whimsy to DIY Easter cards. A button Easter egg card is creative and slightly vintage-inspired, making it stand out among typical paper designs.
Buttons are affordable and often available in craft drawers already, making this a budget-friendly project. Pinterest users love mixed-texture crafts because they look detailed and interesting up close.
This idea is perfect if you want to experiment with texture while keeping the steps simple.
What This Idea Is

An Easter egg shape created by gluing colorful buttons onto the front of a card.
Materials Needed
- Cardstock
- Assorted pastel buttons
- Strong craft glue
- Pencil
Step-by-Step How-To
- Fold cardstock.
- Draw a large egg outline.
- Fill the egg area with glue in sections.
- Press buttons into place tightly next to each other.
- Allow glue to dry fully before handling.
- Add a simple greeting above or below the egg.
The texture and color make this card visually engaging and unique.
14. Washi Tape Patterned Egg Card
Introduction
Washi tape is one of the easiest ways to create colorful patterns without painting or drawing. It’s beginner-friendly, mess-free, and perfect for creating modern Easter designs.
A washi tape patterned egg card allows you to experiment with stripes, florals, polka dots, or metallic accents. This idea is ideal for crafting in bulk since the process is fast and repetitive.
Pinterest loves washi tape crafts because they look neat, trendy, and customizable.
What This Idea Is
An egg shape filled entirely with layered strips of decorative washi tape.
Materials Needed

- White cardstock
- Assorted pastel washi tapes
- Pencil
- Scissors
Step-by-Step How-To
- Draw an egg shape on cardstock.
- Lay strips of washi tape across the egg area.
- Trim excess tape around the edges.
- Outline egg lightly with fine marker.
- Add Easter greeting in coordinating color.
Simple, clean, and beginner-approved.
15. Pop-Up Bunny Inside Card

Introduction
Interactive cards always feel extra special. A pop-up bunny inside card adds an element of surprise while remaining manageable for beginners.
This idea works especially well for kids, nieces, nephews, or friends who enjoy playful designs. Pop-up elements make your handmade card feel thoughtful and memorable.
What This Idea Is
A folded card that reveals a small standing bunny when opened.
Materials Needed
- White and colored cardstock
- Scissors
- Glue
- Markers
Step-by-Step How-To
- Fold card base.
- Cut two small parallel slits along the fold inside.
- Push tab inward to create pop-up platform.
- Cut out bunny shape.
- Glue bunny onto pop-up tab.
- Decorate inside background lightly.
Fun, interactive, and highly shareable.
16. Floral Frame Easter Card
Introduction
Spring florals are one of the most iconic Easter themes. A floral frame Easter card combines seasonal beauty with elegance, making it perfect for adults.
You can use artificial mini flowers, pressed flowers, or floral stickers. The framed look gives the card a professional appearance.
What This Idea Is
A card with a floral border framing a central Easter message.
Materials Needed
- Cardstock
- Faux flowers or floral stickers
- Glue
- Fine-tip pen
Step-by-Step How-To
- Fold cardstock.
- Arrange flowers around edges forming a frame.
- Glue securely.
- Write greeting in center.
- Let dry before closing.
Romantic and spring-inspired.
17. Chalkboard Style Easter Card
Introduction

Chalkboard aesthetics are trendy and rustic. This style contrasts dark backgrounds with white lettering for a dramatic effect.
Perfect for farmhouse-style lovers and modern crafters alike.
What This Idea Is
A black card with white hand-lettered Easter greeting and simple drawings.
Materials Needed
- Black cardstock
- White gel pen
- Pencil
Step-by-Step How-To
- Fold black cardstock.
- Sketch lettering lightly.
- Trace with white gel pen.
- Add simple bunny or egg doodles.
Bold and eye-catching.
18. Tissue Paper Mosaic Egg Card
Introduction

Tissue paper creates beautiful stained-glass effects. This craft is colorful, affordable, and great for kids.
It’s slightly messy but extremely rewarding visually.
What This Idea Is
An egg shape filled with small torn pieces of tissue paper.
Materials Needed
- Cardstock
- Colorful tissue paper
- Glue
Step-by-Step How-To
- Draw egg outline.
- Apply glue inside outline.
- Press torn tissue pieces into place.
- Let dry fully.
Bright and artistic.
19. Bunny Tail Pom-Pom Card
Introduction
Adding soft textures makes cards more interactive. A bunny tail pom-pom card is cute, simple, and fun.

This idea is especially popular for children’s Easter cards.
What This Idea Is
A bunny silhouette with a fluffy pom-pom tail.
Materials Needed
- Cardstock
- Small white pom-pom
- Glue
- Marker
Step-by-Step How-To
- Draw bunny outline.
- Glue pom-pom as tail.
- Add greeting message.
Soft and adorable.
20. Scripture Quote Easter Card
Introduction
For a meaningful and faith-centered Easter message, a scripture quote card focuses on reflection and hope.
It’s simple yet powerful, perfect for sharing encouragement.
What This Idea Is
A clean card featuring a handwritten or printed Bible verse.
Materials Needed
- Cardstock
- Calligraphy pen or printer
- Optional decorative border

Step-by-Step How-To
- Fold cardstock.
- Write or print chosen scripture.
- Add subtle border or floral detail.
- Keep design minimal.
Elegant, heartfelt, and timeless.