10 Garage Wall Organization Ideas
Garage wall organization transforms unused vertical surfaces into structured storage systems that improve efficiency and accessibility. Many garages accumulate tools, equipment, and miscellaneous items without a defined arrangement, leading to clutter and wasted space. Using wall-based storage solutions allows items to be categorized, displayed, and accessed without occupying valuable floor space. This Pinterest-inspired approach focuses on practical organization methods that are easy to implement and adaptable to different garage sizes. Readers will learn step by step techniques for creating functional wall storage using accessible materials and simple tools. These ideas combine DIY principles with modern design concepts, helping achieve a clean and organized environment. The focus remains on creating systems that are beginner friendly while maintaining durability and long-term usability. Each idea supports better planning and encourages consistent organization habits. With clear structure and thoughtful placement, garage walls can become efficient storage zones that support daily tasks and improve overall workspace functionality.
Why This Idea Is Trending or Useful
Garage wall organization is widely shared among Pinterest ideas because it addresses a common problem with practical and visually appealing solutions. As living spaces become more optimized, garages are being redesigned to serve multiple purposes, including storage and workspace functions. Wall organization supports this shift by maximizing vertical space and reducing clutter on floors. These methods align with modern design trends that emphasize clean layouts, minimalist style, and efficient use of space. The DIY nature of these solutions makes them accessible to beginners, as most systems require basic tools and simple installation steps. This approach also allows customization based on individual needs, making it highly adaptable. The visual appeal of organized walls contributes to its popularity, as clearly arranged tools and equipment create an aesthetic that is both functional and structured. These solutions provide long-term value by improving accessibility, saving time, and maintaining order, which makes them highly relevant in modern home organization trends.
Materials and Preparation
Successful garage wall organization begins with proper planning and preparation. Start by evaluating the current storage situation and identifying items that need to be organized. Group similar items together, such as tools, gardening equipment, and hardware, to determine storage requirements. Common materials include pegboards, wall-mounted rails, hooks, brackets, shelving units, and storage bins. Tools such as drills, screws, anchors, measuring tape, and levels are essential for secure installation. Cleaning the wall surface and removing unnecessary items is an important first step to create a clear workspace. Measure available wall space carefully to plan layout and spacing. Consider weight distribution when selecting mounting systems, ensuring that heavy items are supported securely. Accessibility should guide placement, with frequently used items positioned within easy reach. Proper planning reduces installation errors and ensures that the final system is both functional and visually organized. This preparation stage creates a strong foundation for implementing effective wall organization solutions.
Idea 1: Pegboard Wall System
How to Create
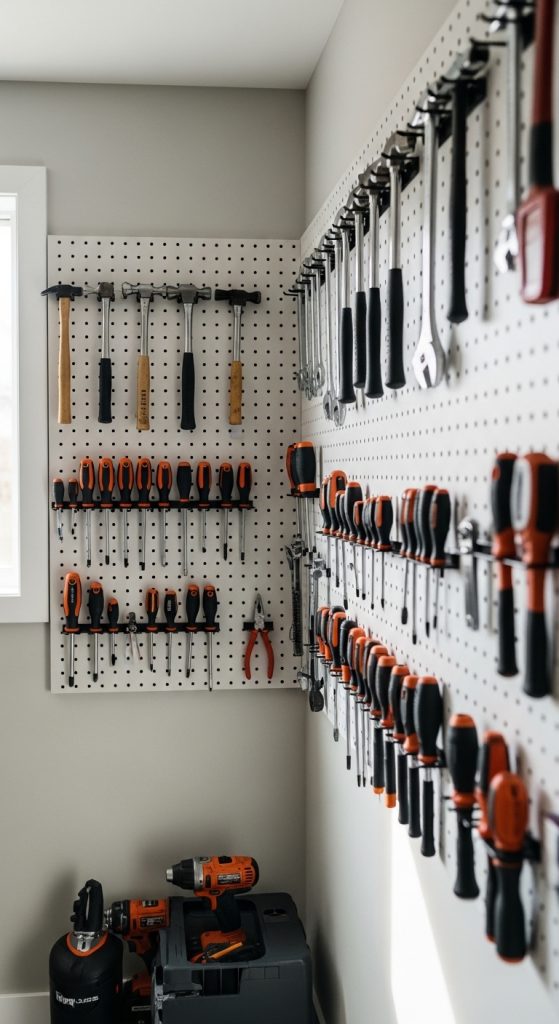
A pegboard wall system provides a flexible and efficient way to organize tools and small equipment. This method uses perforated boards that allow hooks and holders to be repositioned easily, making it adaptable to changing storage needs. Pegboards are ideal for keeping frequently used tools visible and accessible, reducing the time spent searching. This system supports a minimalist style by maintaining a clean and structured layout. Tools can be arranged by category, such as hand tools, measuring devices, and accessories, which improves workflow efficiency. The design also enhances safety by preventing tools from being scattered across work surfaces. Pegboard systems are commonly used in DIY projects because they are simple to install and require minimal materials. Their versatility makes them suitable for both small and large garages, allowing users to scale the system according to available space.
To install a pegboard system, begin by selecting a suitable wall area and measuring dimensions. Attach mounting strips to create space between the wall and the pegboard for hook placement. Secure the pegboard using screws and ensure it is level. Add hooks and holders based on the types of tools being stored. Arrange tools logically, placing frequently used items at eye level. Use labels if necessary to maintain organization over time. Additional accessories such as small bins can be attached to hold loose items. Regularly review and adjust the layout as storage needs change. This step by step process creates a practical and organized wall storage system.
Idea 2: Wall-Mounted Rail System
How to Create

A wall-mounted rail system uses horizontal tracks with adjustable hooks and holders to create a versatile storage solution. This system allows items to be repositioned easily, making it adaptable for different storage needs. It is suitable for hanging tools, extension cords, and lightweight equipment. The rail system keeps items off the floor and creates a clean, organized appearance. This approach supports modern design by maintaining clear lines and structured arrangements. It also improves accessibility, as items can be quickly removed and returned to their designated positions.
Begin by installing the rail securely along the wall using appropriate anchors and screws. Ensure the rail is level and capable of supporting the intended weight. Attach hooks and accessories based on storage requirements. Arrange items by category, grouping similar tools together. Adjust hook positions as needed to accommodate different sizes. Maintain spacing between items to prevent overcrowding. This setup method provides a flexible and efficient storage solution that can be modified over time.
Idea 3: Floating Shelf Storage
How to Create

Floating shelves provide a simple and effective way to store items while maintaining a clean visual appearance. These shelves are mounted directly onto the wall without visible brackets, creating a streamlined look. They are suitable for storing storage bins, containers, and smaller equipment. Floating shelves support minimalist design by reducing visual clutter and maintaining open space. They also allow for easy access to stored items, making them practical for everyday use.
To install floating shelves, measure and mark the desired positions on the wall. Use a level to ensure alignment and secure brackets or supports inside the wall. Attach the shelves firmly and test for stability. Arrange items based on size and weight, placing heavier items closer to the wall for support. Maintain consistent spacing between shelves for a balanced appearance. This method creates a functional and visually appealing storage solution.
Idea 4: Grid Panel Organizer
How to Create
Grid panel organizers use metal grids mounted on the wall to hold hooks, baskets, and accessories. This system offers flexibility similar to pegboards but with a more open design. It is suitable for storing tools, accessories, and small equipment. The grid structure allows for easy customization and rearrangement. This approach supports efficient organization and provides a clear visual layout.
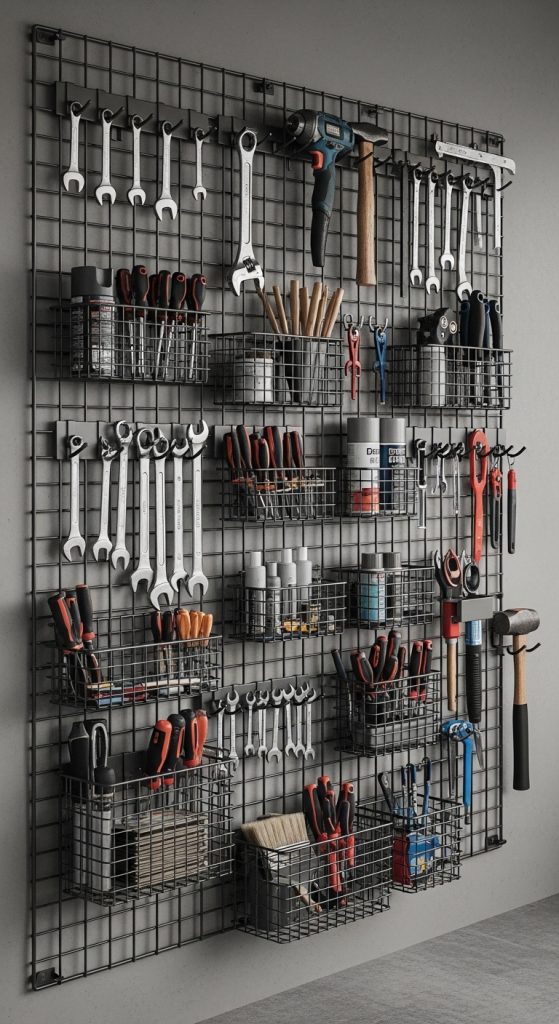
Install the grid panel securely using mounting hardware. Attach hooks and baskets according to storage needs. Arrange items logically and maintain spacing for easy access. This system is adaptable and can be expanded as needed.
Idea 5: Magnetic Wall Strips
How to Create
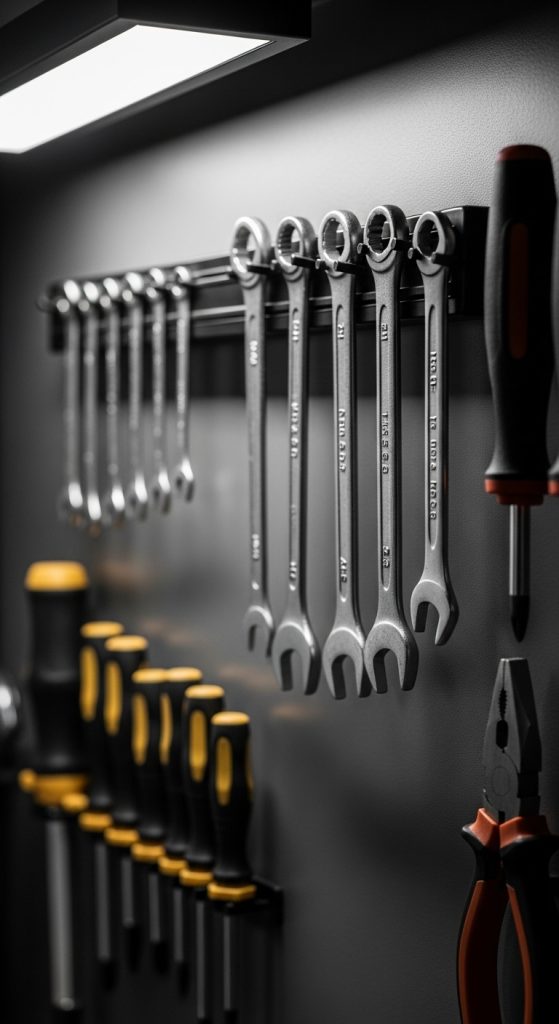
Magnetic wall strips provide a compact solution for storing metal tools. They keep tools visible and easily accessible while reducing clutter. This system is ideal for small tools that are used frequently. It supports efficient workflow and maintains a clean workspace.
Install magnetic strips securely on the wall. Arrange tools along the strip, ensuring weight limits are not exceeded. Group similar tools together for better organization. This method provides a simple and effective storage solution.
Idea 6: Hook-Based Hanging System
How to Create

Hook-based systems use wall-mounted hooks to hang larger items such as ladders, hoses, and equipment. This approach frees up floor space and keeps items organized. It is suitable for bulky items that are difficult to store on shelves.
Install heavy-duty hooks securely into wall studs. Hang items carefully and ensure balance. Arrange items by size and frequency of use. This system provides efficient storage for larger equipment.
Idea 7: Slatwall Storage Panels
How to Create
Slatwall panels feature horizontal grooves that hold adjustable hooks and accessories. This system provides a clean and organized appearance while offering flexibility. It is suitable for storing a variety of items.
Install slatwall panels securely and attach accessories as needed. Arrange items logically and adjust placements over time. This system offers a durable and customizable storage solution.
Idea 8: Cabinet Wall Storage
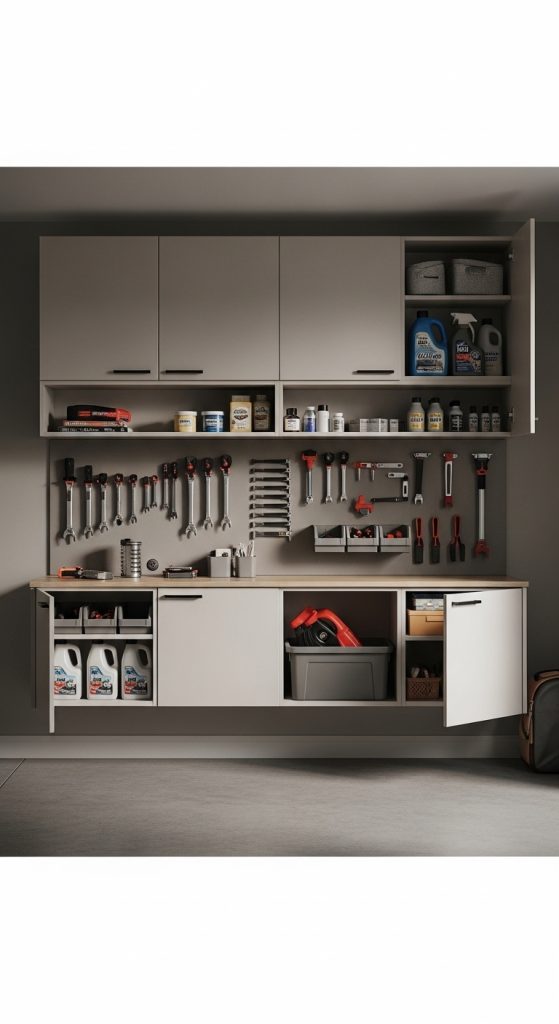
How to Create
Wall-mounted cabinets provide enclosed storage for items that need protection from dust. This system is suitable for storing chemicals, tools, and supplies. It supports a clean and organized appearance.
Install cabinets securely and arrange items inside based on categories. Use labels for easy identification. This method keeps items protected and organized.
Idea 9: Vertical Bin Wall System
How to Create

Vertical bin systems use stacked bins mounted on the wall to store small items. This approach is ideal for hardware and accessories. It improves organization and accessibility.
Install bin racks securely and sort items into categories. Label bins for clarity. This system provides efficient storage for small items.
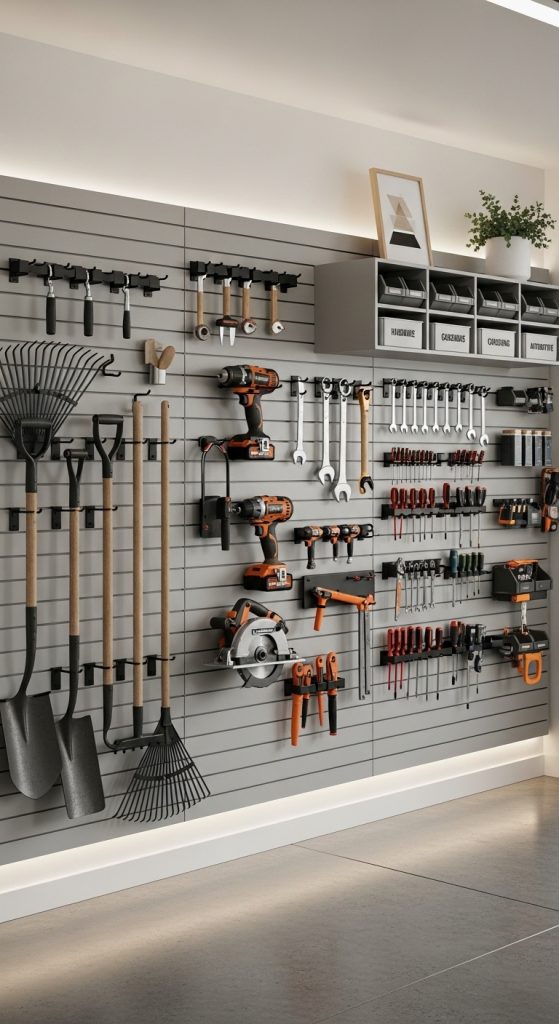
Idea 10: Combination Wall Storage Layout

How to Create
A combination system integrates multiple storage methods such as shelves, hooks, and panels. This approach maximizes efficiency by addressing different storage needs. It supports a structured and organized layout.
Plan the layout carefully and install each component securely. Arrange items based on categories and usage. Maintain consistency to ensure long-term organization.
Common Beginner Mistakes and How to Avoid Them
Many beginners start without a clear plan, leading to inefficient layouts and wasted space. Overloading storage systems is another common issue that can compromise safety. Ignoring vertical space limits storage potential. To avoid these mistakes, plan carefully, use appropriate materials, and ensure secure installation.
Practical Tips for Better Results
Use consistent labeling to maintain organization. Regularly declutter to prevent accumulation. Place frequently used items within easy reach. Combine different storage methods for better efficiency.
Styling, Presentation, or Organization Ideas
Use uniform containers and maintain consistent spacing. Choose neutral colors to support a minimalist style. Arrange items symmetrically for a clean appearance.
Budget or Time Planning
Start with essential systems and expand gradually. Use budget ideas by repurposing materials. Plan projects in stages to manage time effectively.
Creative Expansion and Advanced Inspiration
Expand storage systems by combining multiple methods. Integrate advanced DIY solutions for customization. Continuously improve layouts to maintain efficiency and organization.