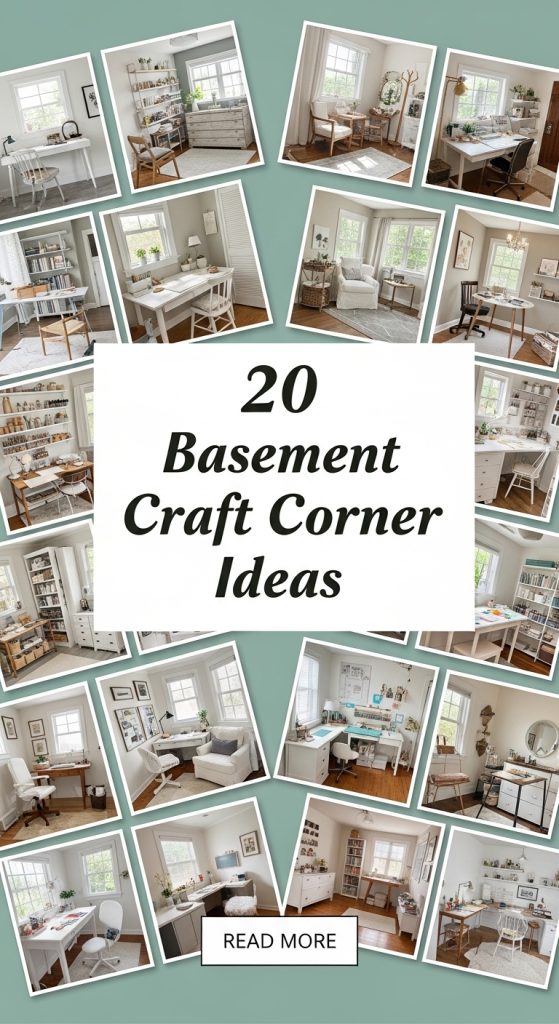
Turning your basement into a functional, inspiring craft corner is one of the smartest home upgrades you can make—especially if you love DIY projects, handmade décor, sewing, painting, scrapbooking, or seasonal crafts. Basements often become storage zones filled with boxes, unused furniture, and forgotten decorations. But with the right vision, that overlooked space can transform into a productive, organized, and creative sanctuary.
A basement craft corner doesn’t require a massive renovation or a full-room makeover. In fact, some of the most Pinterest-worthy craft spaces are compact, cleverly arranged corners that maximize vertical storage, lighting, and smart organization. Whether your basement is finished or unfinished, small or spacious, bright or dimly lit, there is always a way to carve out a dedicated area for creativity.
One of the biggest advantages of a basement craft corner is separation. Unlike dining tables or kitchen counters that need to be cleared daily, a basement space allows you to leave projects mid-process. This encourages deeper creativity and reduces setup time. You can keep supplies accessible, tools within reach, and works-in-progress safely stored.
However, basements also come with unique challenges: low ceilings, limited natural light, potential moisture issues, and awkward layouts. That’s why planning is essential. Proper lighting, moisture control, storage systems, and workspace ergonomics make the difference between a cluttered craft mess and a functional dream corner.
In this guide, you’ll discover 20 highly practical basement craft corner ideas designed for beginners and seasoned crafters alike. Each idea includes:
- A clear explanation of the concept
- Step-by-step setup instructions
- Materials and tools needed
- Smart organization tips
- Space-saving solutions
- Budget-friendly alternatives
Whether you love modern minimalism, cozy farmhouse aesthetics, colorful creative chaos, or ultra-organized labeling systems, there’s something here for you.
You’ll learn how to:
- Maximize vertical wall storage
- Create multi-purpose folding craft stations
- Design a sewing and fabric zone
- Build a pegboard tool wall
- Set up proper lighting for detailed work
- Organize paper, vinyl, yarn, and paint
- Turn small basement nooks into powerful creative hubs
This isn’t just about decorating a space. It’s about designing a workflow that supports your creativity. A well-planned craft corner reduces stress, increases productivity, and makes crafting more enjoyable.
So grab a notebook, start pinning your favorites, and let’s transform your basement into the ultimate creative haven.
1. The Compact Wall-Mounted Craft Station
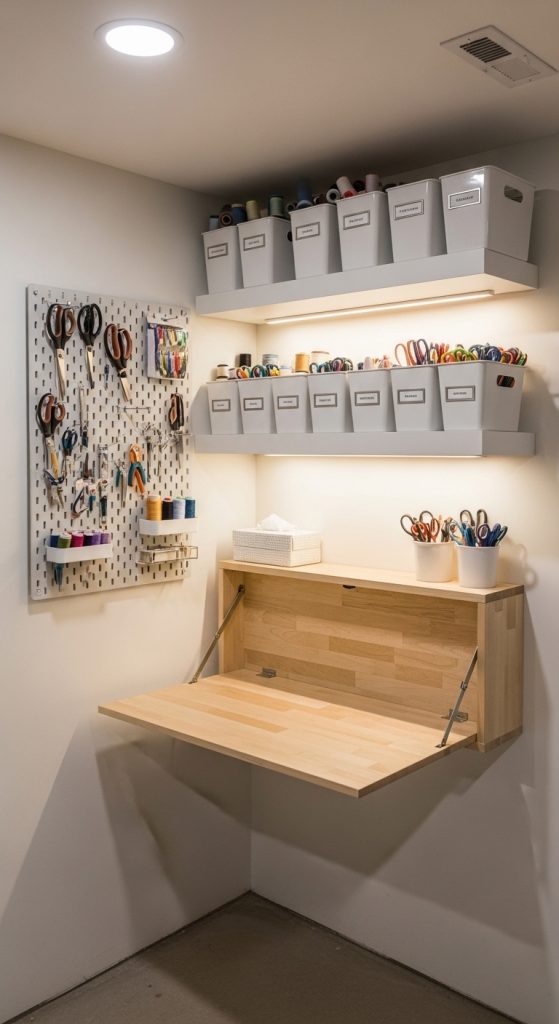
If your basement is small or partially unfinished, a compact wall-mounted craft station is one of the smartest solutions. This idea is perfect for tight spaces where you can’t dedicate an entire room to crafting but still want a functional, inspiring area. A wall-mounted station keeps everything vertical, organized, and easy to access while freeing up floor space.
This setup works especially well for paper crafts, Cricut projects, journaling, painting miniatures, and light DIY tasks. The key is maximizing wall height and minimizing clutter. By using fold-down desks, floating shelves, and vertical organizers, you create a high-functioning craft corner without overwhelming the basement.
What It Is
A vertically designed craft workspace attached directly to one wall, incorporating shelves, pegboards, and a fold-down desk.
Step-by-Step How-To
- Choose a dry, well-ventilated basement wall.
- Install moisture-resistant wall panels if unfinished.
- Mount a fold-down desk or floating desk.
- Install shelves above the desk.
- Add a pegboard for tools.
- Install LED strip lights under shelves.
- Add labeled containers for supplies.
Materials Needed
- Fold-down wall desk
- Floating shelves
- Pegboard panel
- Hooks and baskets
- LED strip lights
- Storage bins
- Drill and anchors
2. The Pegboard Power Craft Corner
Introduction

A pegboard power corner is the ultimate solution for organized crafters who love visibility and accessibility. Pegboards transform blank basement walls into fully customizable storage systems. Instead of rummaging through drawers, you can see everything at a glance—scissors, rulers, paintbrushes, glue guns, vinyl tools, and more.
This setup is ideal for multi-craft households where different projects require different tools. The beauty of a pegboard is flexibility: you can rearrange hooks and shelves anytime.
What It Is
A tool-focused vertical storage wall using pegboard panels to hold crafting essentials.
Step-by-Step How-To
- Measure and mark wall area.
- Install spacers behind pegboard.
- Mount securely into studs.
- Add hooks, small baskets, and mini shelves.
- Organize tools by category.
- Label sections for easy maintenance.
Materials Needed
- Pegboard sheets
- Mounting spacers
- Assorted hooks
- Small pegboard baskets
- Label maker
3. The Fold-Out Cabinet Craft Nook
Introduction
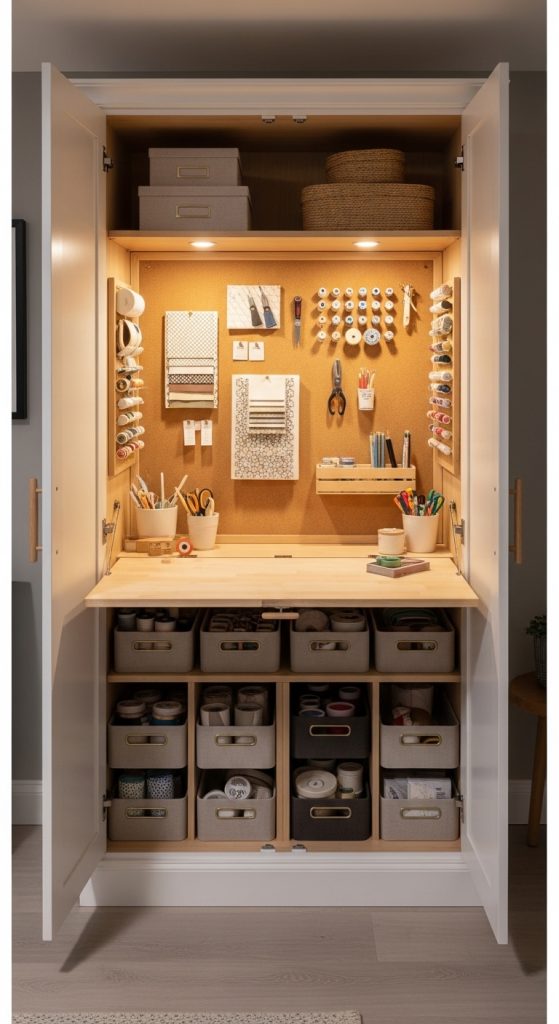
If you want your basement craft corner to disappear when not in use, a fold-out cabinet nook is ideal. This idea works especially well in shared basements where you need flexibility.
The cabinet opens to reveal shelves, storage bins, and a fold-down workspace. When closed, it looks like a simple storage cabinet.
What It Is
A large cabinet converted into a hidden craft workstation.
Step-by-Step How-To
- Purchase a deep storage cabinet.
- Install fold-down table mechanism inside.
- Add interior shelving.
- Attach corkboard or pegboard to doors.
- Add interior lighting.
- Organize supplies into labeled bins.
Materials Needed
- Storage cabinet
- Hinged fold-down desk hardware
- LED puck lights
- Storage containers
- Corkboard panel
4. The Basement Sewing Studio Corner
Introduction
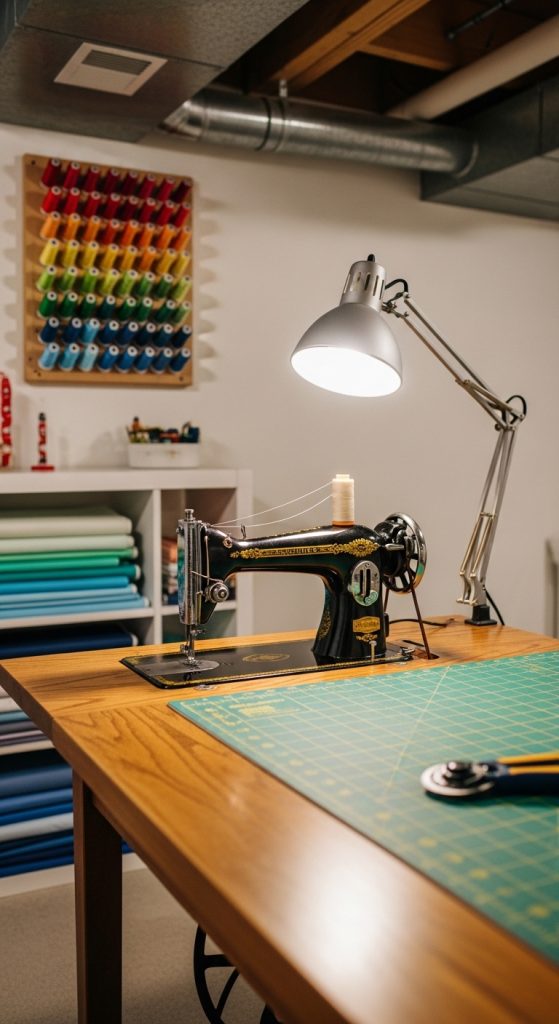
If sewing is your passion, your basement craft corner can become a dedicated sewing hub. Basements are ideal for sewing machines because they offer space for large tables and fabric storage.
What It Is
A sewing-focused craft corner with cutting table, machine station, and fabric organization.
Step-by-Step How-To
- Place sturdy table for machine.
- Add adjacent cutting surface.
- Install shelving for fabric.
- Use clear bins for organization.
- Add task lighting.
- Install thread rack.
Materials Needed
- Sewing table
- Cutting mat
- Fabric shelves
- Thread rack
- Adjustable lamp
5. The Minimalist White Craft Corner
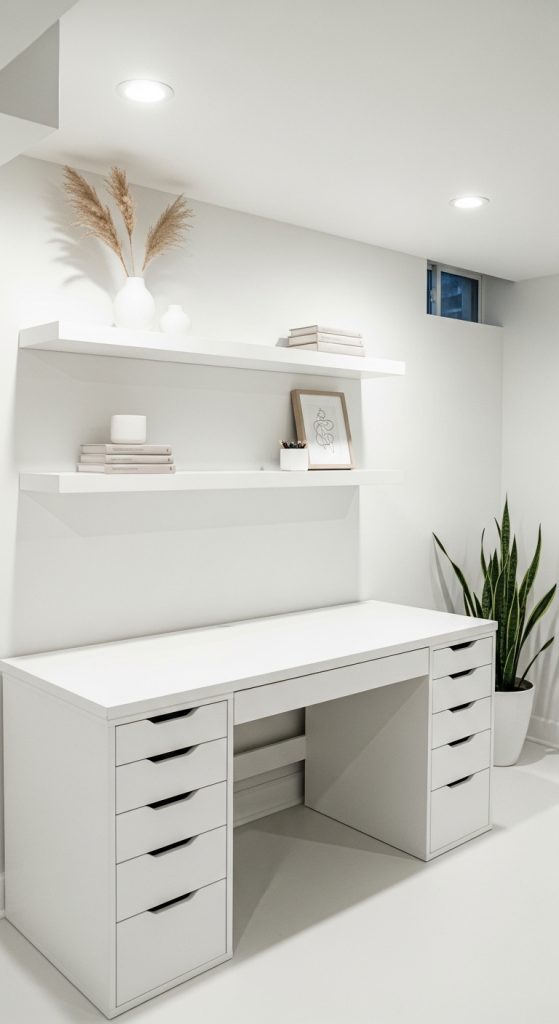
Introduction
If clutter overwhelms you, a minimalist white basement craft corner offers calm and focus. Light colors help brighten dim basement spaces.
What It Is
A clean-lined, neutral-toned craft station with hidden storage.
Step-by-Step How-To
- Paint walls bright white.
- Choose white desk.
- Add matching storage cabinets.
- Hide supplies in drawers.
- Keep decor minimal.
Materials Needed
- White desk
- Storage drawers
- Paint
- LED overhead lighting
6. The Rolling Cart Craft System
Introduction
A rolling cart system gives flexibility. Perfect for shared basement spaces.
What It Is
A mobile craft station using tiered rolling carts.
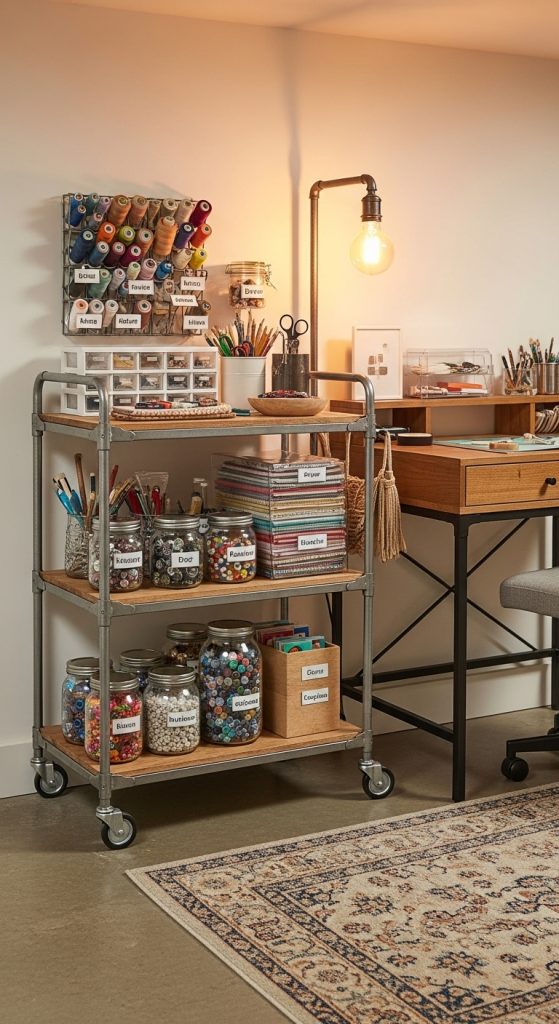
Step-by-Step How-To
- Buy sturdy 3-tier cart.
- Assign categories per tier.
- Add containers inside tiers.
- Store under table when not used.
Materials Needed
- Metal rolling cart
- Storage bins
- Drawer dividers
7. The Craft Island Workbench

Introduction
For larger basements, a central craft island provides space for big projects.
What It Is
A standalone workbench with storage underneath.
Step-by-Step How-To
- Place workbench centrally.
- Add bar stools.
- Install storage bins below.
- Add overhead lighting.
Materials Needed
- Workbench
- Storage cubes
- Industrial lighting
8. The Kids’ Shared Craft Corner
Introduction
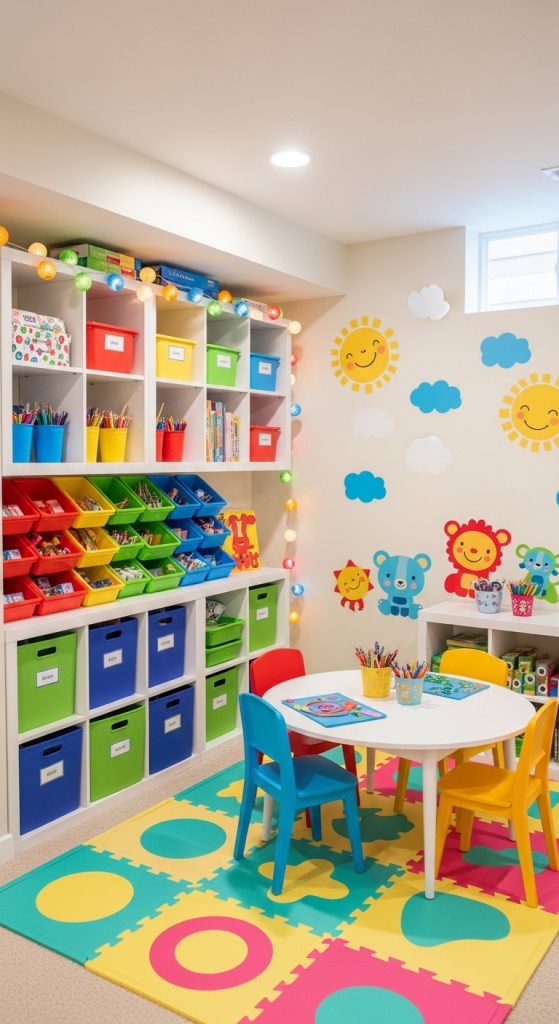
Create a basement craft zone for children with safe, accessible storage.
What It Is
Low-height craft station with labeled bins.
Step-by-Step How-To
- Install child-height table.
- Add cubby storage.
- Use washable surfaces.
- Create supply labels with pictures.
Materials Needed
- Kid-friendly table
- Plastic bins
- Washable mat
9. The Rustic Farmhouse Craft Corner
Introduction
If you love cozy, Pinterest-style aesthetics, a rustic farmhouse basement craft corner combines charm with function.
What It Is
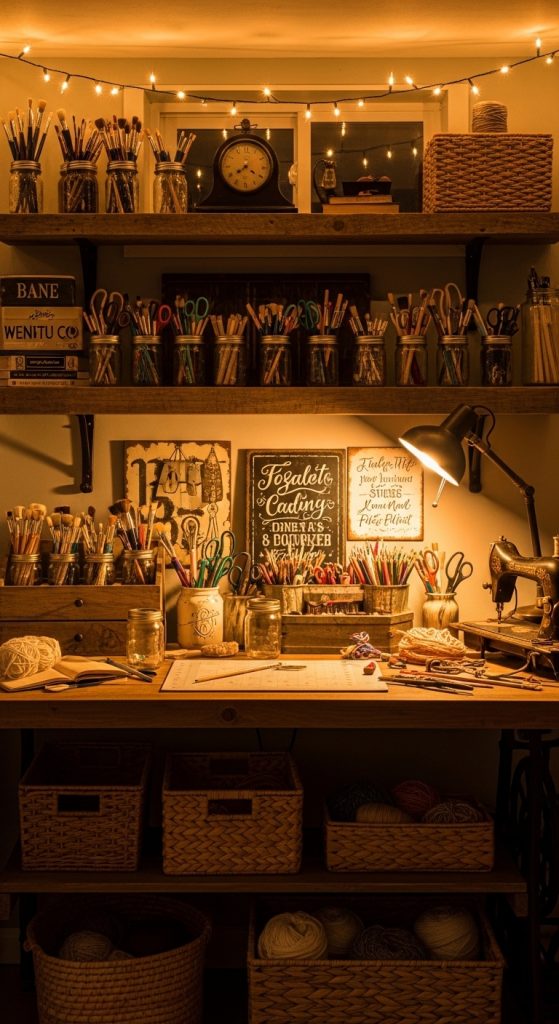
Wood-accented workspace with vintage storage touches.
Step-by-Step How-To
- Add reclaimed wood shelves.
- Use mason jars for storage.
- Add warm lighting.
- Incorporate woven baskets.
Materials Needed
- Wood shelves
- Mason jars
- Metal baskets
10. The Ultimate Paint & Art Studio Corner

Introduction
Artists need proper lighting, ventilation, and surface protection. A paint-focused basement craft corner gives you freedom to create without worrying about spills.
What It Is
An art station designed for painting and messy crafts.
Step-by-Step How-To
- Lay protective floor mat.
- Add easel or large table.
- Install bright daylight LED lights.
- Add wall drying rack.
- Store paints in clear drawers.
Materials Needed
- Easel
- Protective tarp
- LED lights
- Clear storage drawers
11. The Cricut & Cutting Machine Command Center
Introduction (Approx. 200 Words)

If you own a Cricut, Silhouette, or other cutting machine, you know how quickly vinyl rolls, transfer tape, blades, mats, and tools can take over your workspace. A dedicated Cricut command center in your basement craft corner creates a streamlined system that saves time and protects your equipment. Instead of constantly packing up your machine, you’ll have a permanent station ready for quick projects, last-minute gifts, or small business production.
Basements are ideal for cutting machines because they provide room for long vinyl rolls and extra storage shelving. With the right layout, you can create a mini production zone where design, cutting, weeding, and pressing happen smoothly in sequence.
This idea is perfect for DIY shirt makers, vinyl decal sellers, scrapbookers, and paper crafters who use digital cutting machines regularly.
What It Is
A dedicated, organized workstation specifically designed for cutting machines and vinyl crafting.
Step-by-Step How-To
- Choose a sturdy desk at least 24 inches deep.
- Place your cutting machine near a power outlet.
- Install wall-mounted vinyl roll holders.
- Add drawer dividers for blades, scrapers, and weeding tools.
- Set up a nearby heat press or ironing station.
- Label storage by material type (HTV, adhesive vinyl, cardstock).
- Install bright task lighting above the machine.
Materials Needed
- Sturdy desk
- Vinyl roll wall rack
- Drawer organizers
- Heat press or iron
- LED task lamp
- Storage bins with lids
- Label maker
12. The Yarn & Knitting Cozy Corner
Introduction
If you love knitting, crocheting, or macramé, a cozy yarn-focused craft corner can turn your basement into a warm creative retreat. Yarn projects often require large quantities of skeins, hooks, needles, and patterns, so proper storage prevents tangling and dust accumulation.

A yarn corner should feel soft and comfortable. Unlike workbench-style setups, this space benefits from cozy lighting, a comfortable chair, and decorative yarn storage that doubles as visual inspiration. Displaying yarn by color can transform your wall into a creative mood board.
This setup works beautifully in finished basements where comfort is a priority.
What It Is
A soft, organized crafting area dedicated to yarn-based crafts.
Step-by-Step How-To
- Install cubby shelves for yarn storage.
- Sort yarn by color or weight.
- Store hooks and needles in labeled containers.
- Add a comfortable armchair.
- Include a small side table for patterns and tea.
- Add warm LED lighting or a floor lamp.
Materials Needed
- Cube shelving unit
- Clear yarn bins
- Crochet hook case
- Comfortable chair
- Soft lighting fixture
- Small side table
13. The Craft Closet Conversion

Introduction
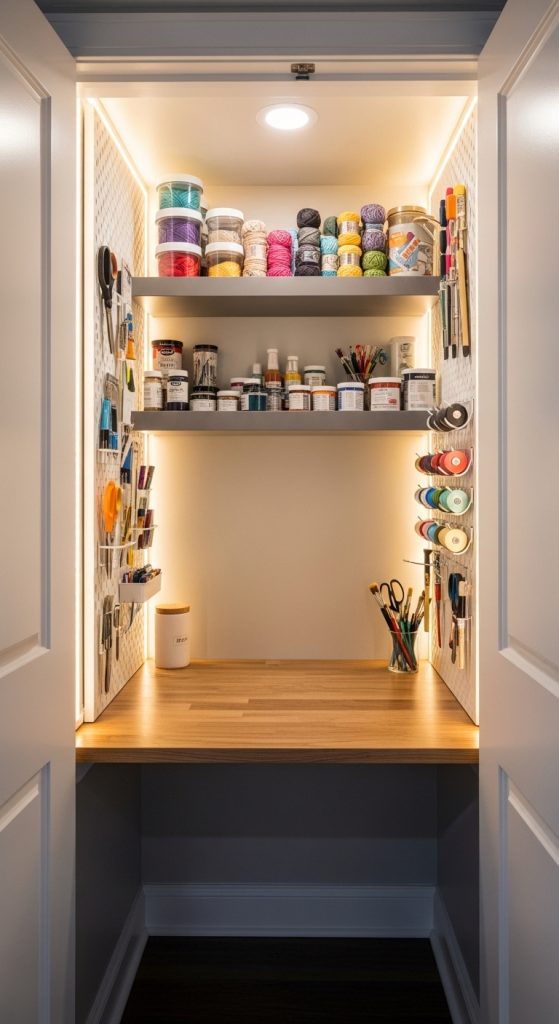
If your basement includes a small closet or under-stair storage area, converting it into a craft corner is a genius space-saving solution. Craft closet conversions are trending on Pinterest because they transform hidden storage into productive mini studios.
This idea is perfect for smaller homes where the basement is multipurpose. When the doors are open, you have a fully functional craft area. When closed, the space looks tidy and organized.
Closet craft corners work best when vertical space is maximized and lighting is upgraded.
What It Is
A closet transformed into a compact but highly organized craft workstation.
Step-by-Step How-To
- Remove existing shelving if needed.
- Install a wall-mounted desk inside the closet.
- Add shelves above the desk.
- Mount pegboard on side walls.
- Install LED strip lighting inside.
- Organize supplies in matching bins.
- Add a small stool that fits underneath.
Materials Needed
- Fold-down desk
- Floating shelves
- Pegboard panels
- LED strip lights
- Storage containers
- Compact stool
14. The Industrial Utility Craft Corner
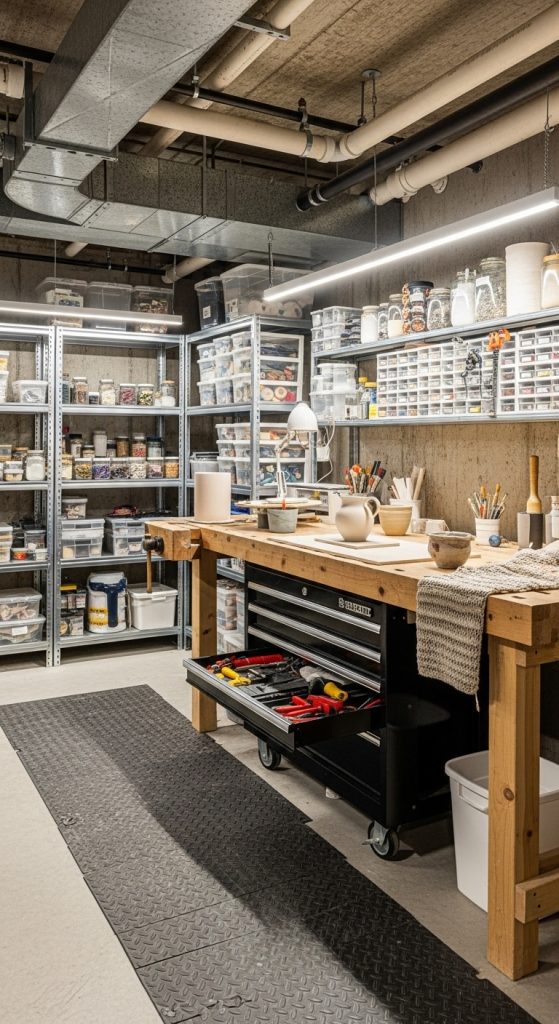
Introduction
For unfinished basements with exposed pipes or concrete floors, an industrial-style craft corner embraces the raw look instead of hiding it. Metal shelving, rolling tool chests, and heavy-duty work tables create a durable and functional environment perfect for serious DIY projects.

This setup works well for wood burning, heavy painting, home décor building, or mixed-media art. The focus here is durability and storage capacity.
What It Is
A heavy-duty craft space inspired by workshop aesthetics.
Step-by-Step How-To
- Install heavy-duty metal shelving.
- Use a solid wood or metal workbench.
- Add industrial-style lighting.
- Use stackable storage bins.
- Add a rolling tool chest for smaller items.
- Protect floors with rubber mats.
Materials Needed
- Metal shelving racks
- Workbench
- Rubber floor mats
- Rolling tool chest
- Industrial LED lights
- Plastic storage bins
15. The Scrapbooking Paradise Corner

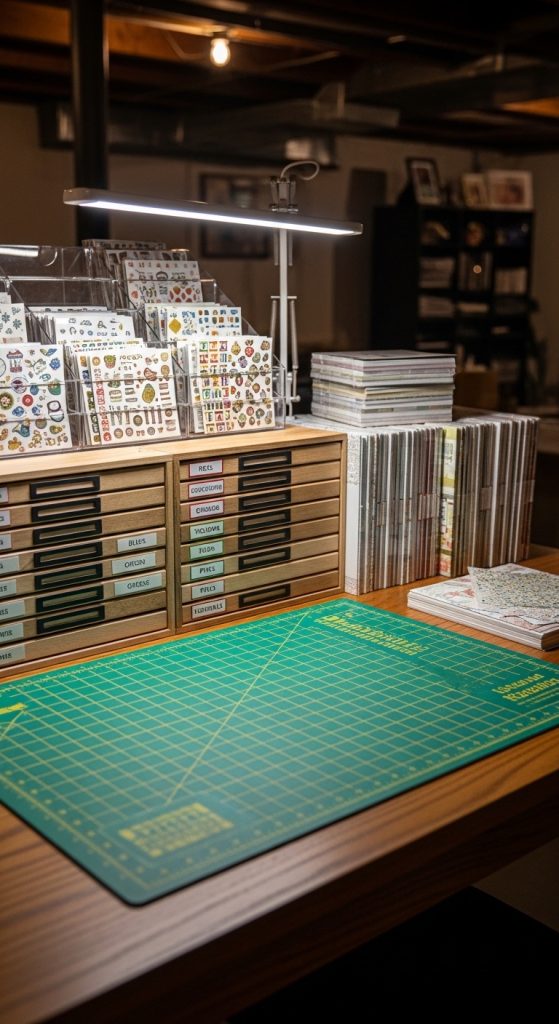
Introduction
Scrapbooking requires organization, especially for paper sheets, stickers, embellishments, and albums. A scrapbooking-focused basement corner allows you to store delicate paper flat and visible.
This setup works best with shallow drawers, paper racks, and vertical file organizers. Organization by theme or color saves time and keeps your creativity flowing.
What It Is
A paper-focused craft area designed specifically for scrapbooking and memory keeping.
Step-by-Step How-To
- Install flat paper drawers.
- Sort paper by color or collection.
- Store embellishments in clear divided containers.
- Add a large cutting mat.
- Install overhead lighting.
- Keep albums on accessible shelves.
Materials Needed
- Flat file paper storage
- Clear divided boxes
- 12×12 cutting mat
- Label maker
- Adjustable desk lamp
16. The Vertical Storage Maximizer
Introduction

Basements often have limited square footage but generous wall height. A vertical storage maximizer craft corner uses tall shelving and wall organizers to free up floor space.
This is ideal for crafters with extensive supply collections. Instead of spreading horizontally, everything stacks upward in an organized, accessible system.
What It Is
A floor-space-saving craft corner that emphasizes tall shelving and stacked storage.
Step-by-Step How-To
- Install tall bookcases.
- Secure shelves to the wall.
- Use labeled bins on each shelf.
- Store rarely used items higher up.
- Keep daily supplies at eye level.
- Add a compact desk below shelves.
Materials Needed
- Tall shelving units
- Storage bins
- Step stool
- Wall anchors
- Compact desk
17. The Multi-Craft Zoning Corner
Introduction
If you enjoy multiple types of crafts—painting, sewing, vinyl, paper—you need defined zones. A zoning corner divides one basement area into mini sections.
Clear separation prevents cross-contamination (like glitter in sewing supplies) and boosts workflow efficiency.
What It Is
A structured craft corner divided into organized sub-areas by activity type.

Step-by-Step How-To
- Map out your craft categories.
- Assign each category a designated zone.
- Use shelving as visual dividers.
- Color-code storage bins per craft type.
- Install task lighting per zone.
- Keep shared tools centrally located.
Materials Needed
- Open shelving units
- Color-coded bins
- Task lamps
- Label maker
- Storage carts
18. The Budget-Friendly DIY Craft Corner
Introduction
You don’t need a large budget to create a functional basement craft corner. With repurposed furniture and dollar-store containers, you can build an inspiring setup without overspending.
Budget craft corners focus on creativity over perfection. It’s about smart reuse and strategic organization.
What It Is
A low-cost craft station built using repurposed and affordable materials.
Step-by-Step How-To
- Repurpose an old desk or table.
- Use mason jars for tool storage.
- Install inexpensive wall hooks.
- Use plastic drawer units for supplies.
- Add affordable LED lighting.
- Label everything clearly.
Materials Needed
- Secondhand desk
- Mason jars
- Plastic drawer units
- Wall hooks
- Budget LED light fixture
19. The Bright & Colorful Creative Studio
Introduction
If you thrive in vibrant environments, a colorful craft corner adds energy to your basement. Bright paint, bold storage bins, and creative wall décor turn your workspace into a motivational zone.
Color can increase inspiration and make crafting feel exciting.
What It Is
A visually stimulating craft area featuring bold color palettes.
Step-by-Step How-To
- Paint one accent wall.
- Choose colorful storage bins.
- Add framed art or inspiration quotes.
- Install bright LED lighting.
- Keep supplies sorted but visible.
- Add a comfortable chair with patterned fabric.
Materials Needed
- Wall paint
- Colorful storage bins
- Wall frames
- Desk lamp
- Decorative accessories
20. The All-In-One Ultimate Basement Craft Hub
Introduction
For serious crafters or small business owners, the ultimate craft hub combines storage, workspace, and workflow efficiency into one organized system. This setup uses a central work table, surrounding wall storage, task lighting, and categorized organization.
This is ideal for large basements with room to expand.
What It Is
A fully integrated craft command center combining multiple organizational systems.
Step-by-Step How-To
- Place a large central table.
- Surround walls with shelving.
- Add pegboards for tools.
- Install bright overhead lighting.
- Create labeled zones for each craft type.
- Use rolling carts for flexible storage.
- Maintain a weekly cleanup system.
Materials Needed
- Large work table
- Wall shelving units
- Pegboards
- LED ceiling lights
- Rolling carts
- Clear storage bins
- Label maker