10 basement kids craft room
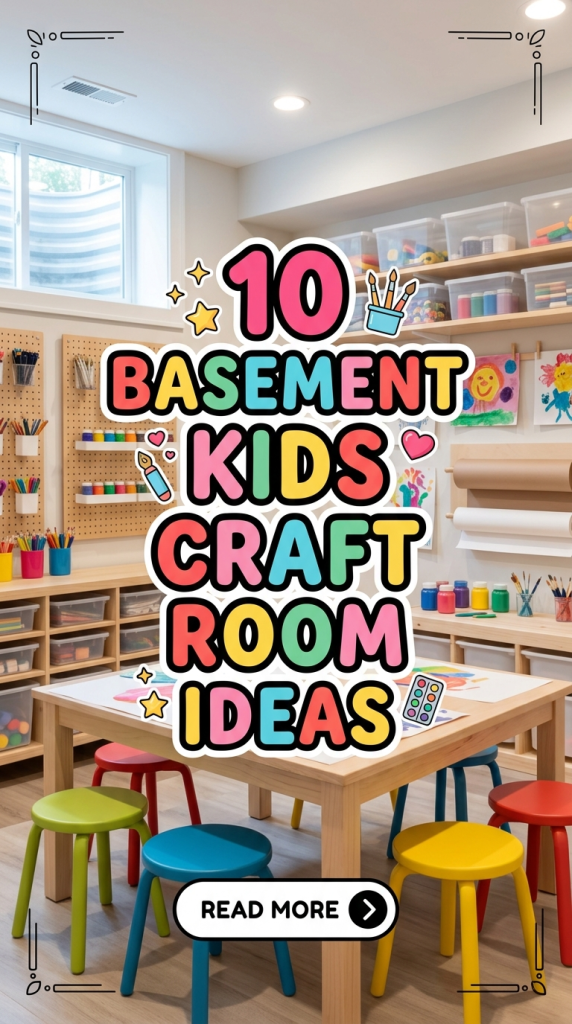
A basement kids craft room provides a dedicated space where creativity, learning, and organization come together in a practical and controlled environment. This type of setup transforms an underused area into a functional zone designed for hands-on activities such as painting, drawing, paper crafts, and DIY projects. A well-planned craft room supports skill development, encourages independent play, and helps manage creative materials effectively.
This article explains how to design and organize a basement craft room using structured Pinterest ideas that focus on usability, safety, and visual appeal. Readers will learn how to prepare the space, select suitable materials, and apply step-by-step methods to create different themed craft zones. Each idea is designed to be beginner friendly and adaptable to various basement sizes. The goal is to provide clear, actionable guidance for building an organized and inspiring creative project space that supports both fun and learning. By following these ideas, readers can achieve a balanced mix of function and aesthetic suitable for modern home decor.
Why This Idea Is Trending or Useful
Basement craft rooms for kids are trending because they combine creativity with efficient use of space. Many homes have basements that are underutilized or used for storage only. Converting this area into a structured DIY workspace adds value and improves organization within the home. Pinterest ideas often highlight craft rooms because they support both educational and recreational activities in one place. This concept is especially useful for families who want to keep creative materials contained instead of spreading them across living areas. A basement setup reduces mess visibility while still allowing easy supervision. It also offers flexibility in design, from minimalist style setups to colorful, themed environments. The DIY appeal lies in its adaptability, as parents can customize layouts based on available materials and budget ideas. The project is accessible for beginners because it does not require complex construction, only thoughtful planning and arrangement. This makes it a practical and creative solution aligned with modern design trends.
Materials and Preparation
Before setting up a basement kids craft room, proper planning and preparation are essential. Start by assessing the available space, including lighting, ventilation, and floor condition. Basements may require additional lighting, so installing bright overhead lights or task lamps is important. Basic materials include storage bins, shelving units, child-sized tables, chairs, and wall organizers. Craft-specific materials such as paper, paints, brushes, scissors, glue, and markers should be sorted in advance. Tools like label makers, hooks, and containers help maintain organization. Preparing the area involves cleaning the space thoroughly and ensuring it is dry and safe for children. Consider using washable flooring or mats to handle spills. Planning should also include zoning the room into sections such as painting, building, and storage areas. This step-by-step preparation ensures that the craft room remains functional and easy to maintain. A well-organized setup supports long-term use and reduces clutter, making it a successful creative project.
Idea 1: Color-Coded Craft Station
How to Create
A color-coded craft station organizes materials based on categories using consistent color schemes. This approach helps children quickly identify supplies and return them after use. Assign specific colors to different types of materials such as blue for painting tools, yellow for paper crafts, and green for building supplies. Use matching bins, labels, and trays to reinforce the system. This method improves organization and creates a visually structured environment that aligns with modern design principles. It also supports learning by helping children associate colors with activities. The layout should include open shelving so materials remain accessible. This setup is especially useful in basement spaces where visibility may be limited. A structured color system reduces confusion and keeps the creative process efficient. This idea is beginner friendly and can be implemented using affordable materials, making it a practical solution for families seeking clear organization.

The execution process involves grouping all craft materials into categories first. Place each category into containers that match the assigned color. Label each bin clearly using both text and color indicators. Arrange these bins on shelves within easy reach of children. Position the craft table in the center of the station to allow easy access to all supplies. Ensure that frequently used materials are placed at lower levels. Introduce a simple rule for children to return items to their designated color zone after use. This step-by-step method ensures long-term organization and reduces cleanup time. Adding wall charts that match the color system can further reinforce the structure. This setup transforms the craft room into a functional and visually organized space.
Idea 2: Wall-Mounted Supply Organizer
How to Create
A wall-mounted supply organizer maximizes vertical space and keeps the floor area clear. This design uses pegboards, hooks, and hanging containers to store craft materials efficiently. It is particularly effective in basement craft rooms where space may be limited. The system allows tools such as scissors, brushes, and rulers to be displayed visibly and accessed easily. Transparent containers can be used for smaller items to maintain visibility. This setup improves organization and prevents clutter accumulation on work surfaces. It also enhances safety by keeping sharp tools out of reach of very young children when placed higher on the wall. The visual arrangement contributes to an aesthetic and structured environment, making it a popular choice among Pinterest ideas for home decor.

To implement this setup, start by installing a pegboard or wall grid securely onto the basement wall. Use hooks, clips, and baskets to hold different materials. Group similar items together to maintain logical organization. Position frequently used tools at eye level for easy access. Ensure that heavier items are supported with stronger hooks. Add labels to each section to guide children during cleanup. This step-by-step arrangement ensures that the system remains functional and easy to maintain. Regularly review the layout and adjust as needed based on usage patterns. This method provides a durable and flexible storage solution.
Idea 3: Minimalist Craft Table Setup
How to Create
A minimalist craft table setup focuses on simplicity and functionality. This design reduces visual clutter and creates a calm environment that supports focused creativity. Use a clean, neutral-colored table with only essential tools placed on the surface. Storage is kept nearby but not directly on the table, ensuring a clear workspace. This approach aligns with modern design and minimalist style principles. It is particularly effective in basement craft rooms where maintaining brightness and openness is important. Limiting visible items helps children concentrate on one task at a time. The setup also makes cleaning easier and reduces distractions.
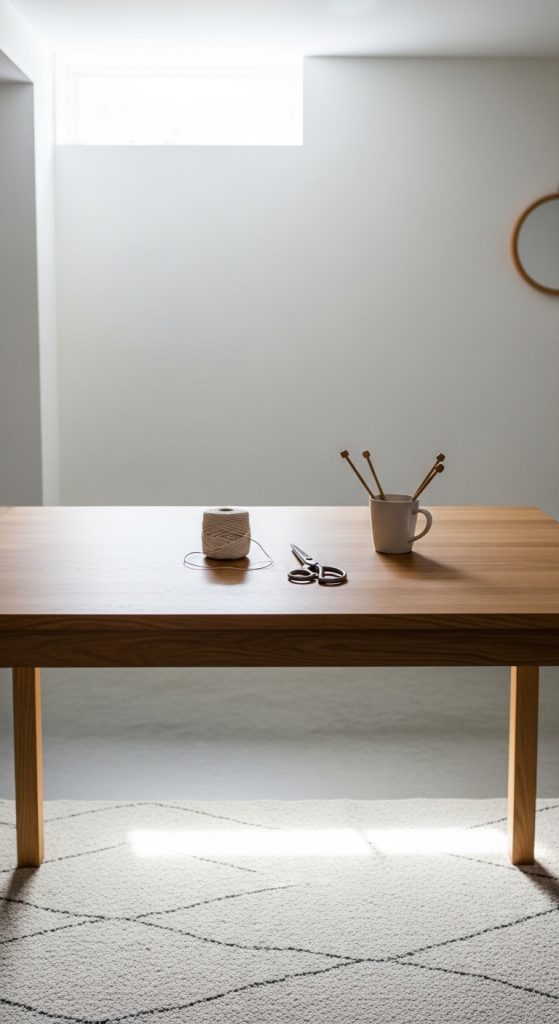
To create this setup, select a sturdy table with a smooth, easy-to-clean surface. Place essential tools such as pencils, scissors, and paper in a small organizer on the table. Store additional materials in nearby drawers or shelves. Keep the area well-lit to compensate for basement lighting conditions. Establish a routine where children clear the table after each session. This step-by-step process ensures that the workspace remains tidy and functional. Adding a simple wall decoration or inspiration board can enhance the aesthetic without adding clutter. This setup supports efficient and organized creative activities.
Idea 4: Art Display Gallery Wall
How to Create
An art display gallery wall allows children to showcase their creations in a structured and meaningful way. This idea transforms the basement craft room into a personalized creative environment. Use frames, clips, or magnetic boards to display finished artwork. Rotating the displayed pieces regularly keeps the space dynamic and engaging. This setup encourages creativity by giving children a sense of accomplishment. It also adds an aesthetic element to the room, aligning with Pinterest inspiration trends. The gallery wall can be arranged in a grid pattern for a clean and organized look.

To set up this feature, designate a wall section for displaying artwork. Install frames or clipboards evenly spaced across the wall. Use lightweight materials to ensure safety. Encourage children to select their favorite pieces for display. Rotate artwork weekly or monthly to keep the wall updated. This step-by-step method ensures that the gallery remains organized and visually appealing. Adding labels with dates or project names can enhance the presentation. This idea combines decoration with motivation, making it both functional and inspiring.
Idea 5: DIY Craft Supply Cart
How to Create

A DIY craft supply cart provides mobility and flexibility within the basement craft room. This setup uses a rolling cart to store frequently used materials, allowing children to move supplies easily between different areas. It supports organization by keeping tools in one portable unit. This idea is especially useful for shared spaces or multi-purpose basements. The cart can be divided into sections for different materials, maintaining order while providing convenience. It is a practical and beginner friendly solution that fits various layouts.
To create this cart, choose a sturdy rolling unit with multiple tiers. Assign each level to a specific category such as drawing tools, paper supplies, or adhesives. Use small containers within each tier to separate items. Label each section clearly to maintain organization. Place the cart near the main work area for easy access. Establish a habit of returning items to the cart after use. This step-by-step approach ensures efficient use of space and materials. The mobility of the cart makes it adaptable to different activities, enhancing the overall functionality of the craft room.
Idea 6: Themed Craft Zones
How to Create
Themed craft zones divide the basement into specific areas dedicated to different activities. Examples include a painting zone, a paper craft zone, and a building zone. This structure improves organization and helps children focus on one type of activity at a time. Each zone is equipped with relevant materials and tools, reducing the need to move supplies frequently. This method aligns with structured planning and enhances usability. It also supports efficient cleanup by keeping materials contained within their designated areas.

To implement this idea, start by identifying the main types of crafts the children enjoy. Allocate specific sections of the basement to each activity. Use shelves, mats, or small partitions to define each zone. Place relevant materials within each area to avoid overlap. Ensure that each zone has adequate lighting and workspace. This step-by-step setup creates a clear and organized environment. Regularly review the arrangement and adjust based on usage patterns. This approach ensures long-term functionality and supports a wide range of creative ideas.
Idea 7: Chalkboard and Whiteboard Wall
How to Create

A chalkboard and whiteboard wall provides a reusable surface for drawing, planning, and experimenting with ideas. This feature adds versatility to the basement craft room and supports both creative expression and learning activities. The wall can be divided into sections for different uses, such as drawing, writing, or planning projects. This setup is practical and easy to maintain, as surfaces can be cleaned and reused. It also reduces paper usage, making it a sustainable option.
To create this wall, apply chalkboard paint or install whiteboard panels on a designated section of the basement wall. Ensure the surface is smooth and properly prepared before application. Provide chalk, markers, and erasers in nearby storage. Encourage children to use the wall for brainstorming and sketching ideas. This step-by-step method ensures effective use of the space. Regular cleaning maintains usability and appearance. This feature enhances the functionality of the craft room while supporting continuous creativity.
Idea 8: Storage Cube Organization System
How to Create

A storage cube system uses modular units to organize craft materials efficiently. Each cube can hold a specific category of supplies, making it easy to maintain order. This setup is highly adaptable and works well in basement environments where flexibility is important. The uniform structure creates a clean and organized appearance that aligns with modern design trends. It also allows for easy expansion as new materials are added.
To set up this system, arrange cube storage units along a wall or under a worktable. Assign each cube to a specific category such as paper, tools, or decorations. Use labeled bins inside each cube to keep items contained. Position frequently used materials at accessible heights. This step-by-step approach ensures efficient organization and easy access. Regularly review and reorganize the cubes to maintain functionality. This system supports long-term use and simplifies storage management.
Idea 9: Craft Room Lighting Upgrade
How to Create
Proper lighting is essential in a basement craft room to ensure visibility and comfort. This idea focuses on improving lighting conditions using a combination of overhead lights and task lighting. Bright, even lighting reduces eye strain and enhances accuracy during detailed work. It also improves the overall aesthetic of the space, making it more inviting. This setup is particularly important in basements where natural light may be limited.

To implement this upgrade, install bright overhead fixtures that provide consistent illumination across the room. Add adjustable desk lamps for focused lighting on work surfaces. Use neutral or daylight bulbs to maintain color accuracy during crafts. Position lights to minimize shadows on the workspace. This step-by-step method ensures effective lighting distribution. Regular maintenance, such as cleaning fixtures and replacing bulbs, keeps the system efficient. Proper lighting significantly improves the usability of the craft room.
Idea 10: Creative Inspiration Corner
How to Create
A creative inspiration corner serves as a dedicated area for idea generation and planning. This space includes mood boards, sample materials, and reference images that inspire new projects. It helps children develop creative thinking by providing visual cues and examples. This setup aligns with Pinterest inspiration trends and supports continuous engagement in creative activities. The corner can be updated regularly to reflect new themes or seasonal ideas.

To create this area, designate a small section of the basement for inspiration materials. Install a corkboard or pinboard to display images and samples. Include a small table or shelf for sketching and planning. Encourage children to contribute their own ideas and references. This step-by-step approach ensures that the corner remains active and relevant. Regular updates keep the space engaging and useful. This feature enhances creativity and supports ongoing project development.
Common Beginner Mistakes and How to Avoid Them
A common mistake when setting up a basement craft room is overcrowding the space with too many materials at once. This reduces usability and creates confusion during activities. Another issue is poor organization, where items are not grouped logically, making it difficult to find supplies. Insufficient lighting is also a frequent problem in basement environments, leading to discomfort during use. To avoid these issues, focus on clear planning and gradual setup. Introduce materials in stages and organize them into defined categories. Ensure proper lighting is installed before starting any activities. Avoid placing all items on open surfaces; instead, use storage solutions to maintain order. Regular maintenance and cleanup routines help sustain the system. By addressing these mistakes early, the craft room remains functional and easy to manage.
Practical Tips for Better Results
Maintaining consistency in organization is key to achieving long-term success in a basement craft room. Use labeled containers and clearly defined zones to simplify access and cleanup. Choose durable and easy-to-clean materials to handle frequent use. Establish routines for organizing supplies after each session. Keep frequently used items within reach and store less-used materials in higher or closed storage. Regularly review the setup and adjust based on changing needs. These practical tips improve efficiency and ensure that the craft room remains a productive and enjoyable space. Consistent planning and organization enhance the overall quality of the creative project.
Styling, Presentation, or Organization Ideas
Styling a basement craft room involves balancing functionality with visual appeal. Use coordinated colors and simple design elements to create a cohesive look. Avoid excessive decoration that may distract from activities. Display finished crafts to add personality and motivation. Arrange storage units in a symmetrical layout for a clean and structured appearance. Incorporate elements such as wall art or simple patterns to enhance the aesthetic. Maintaining a minimalist style helps keep the space organized and visually appealing. These ideas ensure that the craft room supports both creativity and efficient organization.
Budget or Time Planning
Planning a basement craft room within a budget requires prioritizing essential items first. Start with basic furniture such as tables and storage units. Gradually add additional features based on available resources. Use affordable materials and repurpose existing items where possible. Break the setup process into manageable steps to avoid overwhelming costs and time commitments. Focus on functionality before adding decorative elements. This approach ensures efficient use of resources while achieving a practical and organized space.
Creative Expansion and Advanced Inspiration
Once the basic craft room is established, additional features can be introduced to expand its functionality. Consider adding digital tools for design projects or incorporating seasonal themes into the setup. Advanced ideas include creating collaborative workspaces or integrating educational activities into the craft environment. Expanding the space gradually allows for continuous improvement without disrupting the existing setup. These creative ideas support long-term use and keep the craft room engaging and adaptable.