
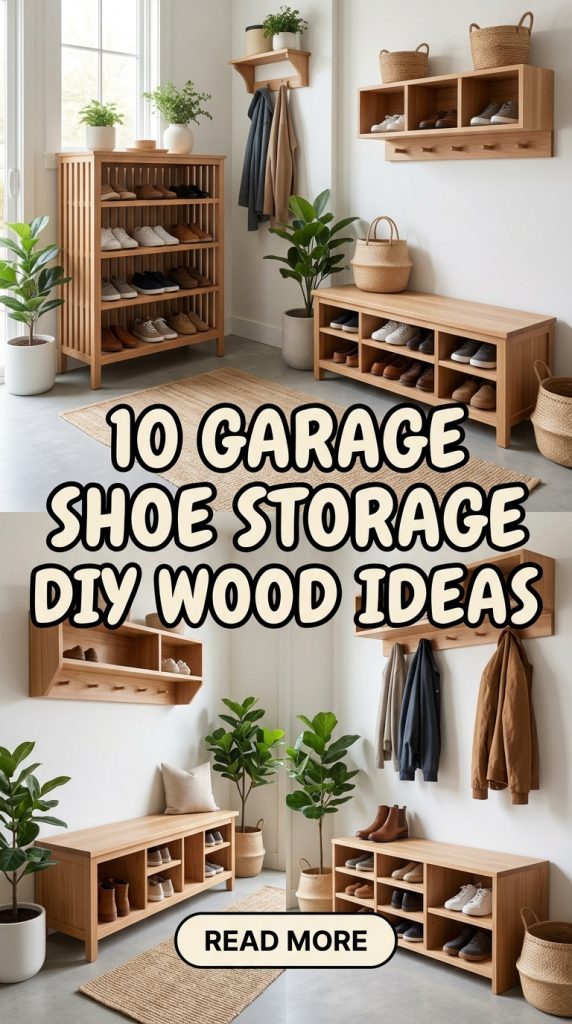
10 Garage Shoe Storage DIY Wood Ideas
Garage shoe storage is a practical solution for managing footwear that is frequently used outdoors or stored seasonally. Without a structured system, shoes can quickly create clutter, collect dust, and reduce available space. This article presents Pinterest ideas focused on DIY wooden storage solutions designed to improve organization and maintain a clean garage environment. Readers will learn how to create functional and durable storage using accessible materials and simple construction methods. Each idea focuses on maximizing space, improving accessibility, and maintaining a visually structured layout. Wooden storage systems are widely used because they offer strength, adaptability, and compatibility with modern design aesthetics. These creative ideas are suitable for beginners and can be customized based on available space and storage needs. A well-organized shoe storage system helps maintain cleanliness, prevents damage to footwear, and supports efficient daily routines. This guide provides step by step solutions that combine practical design with a minimalist style, ensuring both functionality and aesthetic consistency.
Why This Idea Is Trending or Useful
DIY wooden shoe storage for garages is gaining popularity due to the increasing focus on home organization and efficient space management. Many households require dedicated areas for storing outdoor footwear separately from indoor spaces. These Pinterest ideas offer practical value by providing structured solutions that reduce clutter and improve accessibility. Wooden designs are especially relevant because they are durable, easy to work with, and adaptable to various layouts. The DIY approach allows users to customize storage based on the number and type of shoes, making it highly flexible. Modern design trends emphasize clean lines and organized spaces, which align with these storage solutions. These creative ideas are also beginner friendly, as they use common materials and straightforward building techniques. The ability to create functional storage without relying on complex systems makes these projects accessible. Additionally, wooden storage contributes to a neat and cohesive garage aesthetic, supporting both organization and visual appeal.
Materials and Preparation
Before starting a garage shoe storage DIY project, proper preparation ensures efficient results. Begin by assessing the available garage space and determining the number of shoes to be stored. Measure wall areas, floor space, and any unused corners to identify suitable locations for storage units. Common materials include plywood, wooden planks, screws, nails, and brackets. Tools such as a drill, saw, measuring tape, and level are typically required. Sorting shoes by type or frequency of use helps define storage categories and layout planning. Consider ventilation when designing wooden storage to prevent moisture buildup. Planning should also include spacing between shelves to accommodate different shoe sizes. Cleaning the garage before starting provides a clear workspace and improves accuracy during installation. Sanding and finishing wood surfaces enhances durability and appearance. Labeling or organizing sections can support long-term maintenance. This structured planning process ensures that each DIY project is safe, practical, and aligned with efficient organization goals.
Idea 1: Tiered Wooden Shoe Rack
How to Create
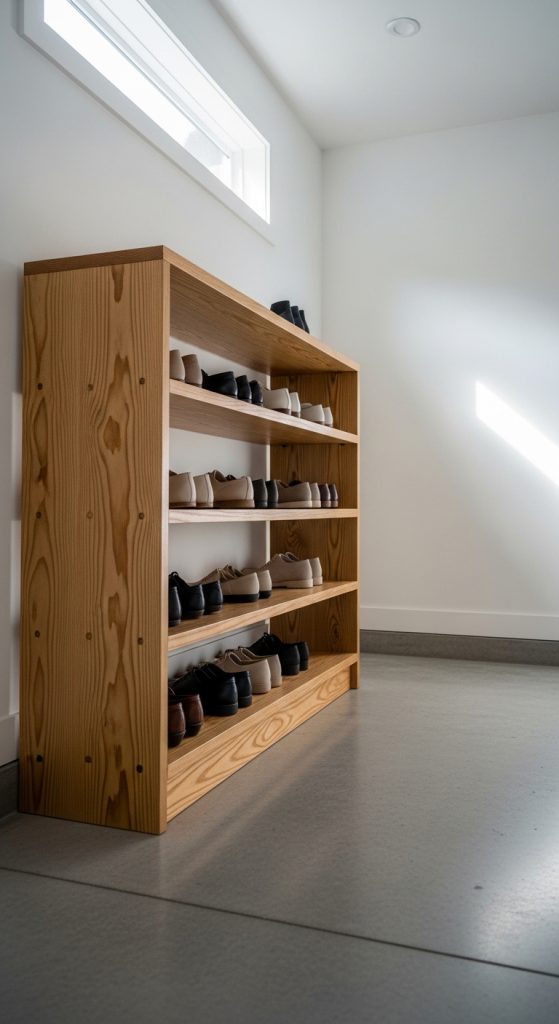
A tiered wooden shoe rack is a structured storage solution designed to hold multiple pairs of shoes in a vertical arrangement. This design uses stacked horizontal shelves to maximize space while maintaining clear visibility of each pair. The tiered format supports organization by separating shoes into levels based on type or frequency of use. This approach helps maintain a clean layout and prevents shoes from piling up on the floor. The design fits well within modern design and minimalist style preferences, as it emphasizes clean lines and simple structure. It is suitable for garages of all sizes because the height and width can be adjusted according to available space. This system improves accessibility and ensures that shoes remain organized and easy to locate. It also protects footwear from damage caused by stacking or improper storage.
To build this rack, measure the desired height and width based on storage needs. Cut wooden planks to create horizontal shelves and vertical supports. Assemble the frame using screws, ensuring each shelf is evenly spaced. Use a level to maintain alignment and stability. Sand the surfaces to remove rough edges and improve durability. Place the rack against a wall or secure it for additional stability. Arrange shoes on each tier based on category. This step by step process results in a durable and efficient storage system that supports long-term organization.
Idea 2: Wall-Mounted Wooden Shoe Shelves
Step-by-Step Guide

Wall-mounted wooden shelves provide an efficient way to store shoes while keeping the floor area clear. This design uses vertical wall space to create a structured storage system that improves accessibility and organization. Each shelf acts as a dedicated platform for shoes, allowing easy visibility and quick retrieval. This method is particularly useful in smaller garages where floor space is limited. The design aligns with modern minimalist style by reducing clutter and maintaining a clean appearance. It also supports better airflow around shoes, helping to maintain cleanliness and prevent moisture buildup. This system can be customized with different shelf lengths and spacing to accommodate various shoe types.
To install wall-mounted shelves, begin by measuring the wall area and marking the positions for each shelf. Cut wooden boards to the required size and sand the edges for a smooth finish. Attach brackets to the wall using screws and anchors, ensuring they are aligned and level. Place the wooden boards on the brackets and secure them firmly. Test the stability before placing shoes. Arrange footwear neatly on each shelf to maintain organization. This easy project provides a practical and visually organized storage solution.
Idea 3: Wooden Crate Shoe Storage System
How to Make

Wooden crate storage offers a modular approach to organizing shoes in the garage. Each crate acts as an individual compartment, allowing flexible arrangement and easy expansion. This system is useful for categorizing shoes by type or season. The crate design supports airflow and visibility, making it easier to maintain organization. It also aligns with creative ideas that emphasize adaptability and simple construction.
To create this system, use wooden crates and stack them securely or mount them to a wall. Sand the surfaces and ensure stability. Arrange crates in a pattern that fits the available space. Place shoes inside each crate based on category. This method provides a flexible and beginner friendly storage solution.
Idea 4: Slanted Wooden Shoe Display Rack
How to Create

A slanted shoe rack is designed to hold shoes at an angle, improving visibility and accessibility. This design prevents shoes from sliding and allows quick identification of each pair. It supports a clean and organized layout while adding a structured visual element.
To build this rack, cut wooden boards and assemble them at an angle using supports. Secure the structure firmly and ensure stability. Place shoes on each level, allowing them to rest securely. This setup provides efficient organization.
Idea 5: Pull-Out Wooden Shoe Drawers
Execution Process
Pull-out drawers provide concealed storage while maintaining easy access. This design keeps shoes protected from dust and maintains a clean appearance. It is suitable for garages that require hidden storage solutions.

To build drawers, create a wooden frame and install sliding mechanisms. Construct drawers that fit within the frame. Ensure smooth movement and proper alignment. Organize shoes inside each drawer. This system enhances both organization and protection.
Idea 6: Bench with Built-In Shoe Storage
How to Make

A wooden bench with built-in storage combines seating and organization. This design allows users to sit while putting on shoes, improving convenience.
To build the bench, construct a sturdy frame and add compartments underneath. Secure all joints and ensure stability. Place shoes inside compartments. This dual-purpose design maximizes functionality.
Idea 7: Vertical Wooden Shoe Tower
Setup Method

A vertical shoe tower uses height to store multiple pairs in a compact footprint. This design is suitable for limited spaces.
To create the tower, build a tall frame with evenly spaced shelves. Secure the structure to prevent tipping. Arrange shoes on each level. This solution improves space efficiency.
Idea 8: Corner Wooden Shoe Rack
How to Create
Corner racks utilize unused areas to provide additional storage. This design fits neatly into garage corners without interfering with movement.

To build, measure the corner space and cut angled shelves. Install supports and secure the shelves. Arrange shoes neatly. This method maximizes space usage.
Idea 9: Wooden Pallet Shoe Organizer
Step-by-Step Guide

A pallet organizer repurposes wood into a functional storage system. This design supports sustainability and efficient organization.
To create, clean and sand a wooden pallet. Position it vertically or horizontally. Secure it to the wall and place shoes within gaps. This easy project provides a creative storage solution.
Idea 10: Hanging Wooden Shoe Slots
How to Create

Hanging wooden slots provide a unique way to store shoes vertically. This design keeps shoes off the floor and improves accessibility.
To build, create wooden compartments and mount them to the wall. Ensure secure installation. Place shoes inside each slot. This system enhances organization.
Common Beginner Mistakes and How to Avoid Them
A common mistake in DIY wooden shoe storage is inaccurate measurement, which leads to poorly fitting structures and wasted materials. Beginners often overlook weight distribution, resulting in unstable shelves or racks. Using untreated wood can cause damage over time, especially in garage environments where moisture is present. Another issue is overcrowding storage units, which reduces accessibility and increases clutter. Failing to plan proper spacing between shelves can make it difficult to store different types of shoes. To avoid these problems, always measure carefully and plan dimensions based on actual storage needs. Use durable materials and ensure all joints are secure. Maintain adequate spacing for different shoe sizes and avoid overloading structures. This approach ensures a stable and efficient storage system.
Practical Tips for Better Results
For better results, focus on consistent organization and proper maintenance. Group shoes by type or frequency of use to improve accessibility. Use vertical space effectively to maximize storage capacity. Regularly clean and inspect wooden structures to maintain durability. Ensure all installations are secure and stable. These practical tips enhance both functionality and visual appeal.
Styling, Presentation, or Organization Ideas
A well-organized shoe storage system can enhance the overall garage aesthetic. Use a consistent wood finish to create a cohesive look. Arrange shoes neatly and avoid clutter. Maintain clear pathways for movement. This approach combines organization with modern design.
Budget or Time Planning
Garage shoe storage projects can be completed efficiently with proper planning. Use budget ideas by repurposing materials and focusing on essential designs. Break the project into manageable steps. This ensures steady progress and cost control.
Creative Expansion and Advanced Inspiration
Once basic storage is complete, consider expanding with modular designs or additional compartments. Experiment with layouts to improve efficiency. These creative ideas allow continuous improvement and customization of garage shoe storage systems.


