10 DIY Ponds Backyard Ideas

Creating a backyard pond is a practical way to enhance outdoor space while adding a functional water feature. DIY ponds have become a popular choice in Pinterest ideas because they combine creative design with achievable construction methods. A well-planned pond can improve visual balance, support small ecosystems, and create a calm outdoor atmosphere. These projects can be adapted to different yard sizes, budgets, and design preferences, making them accessible for beginners.
This article explains how to build various DIY pond styles using simple materials and clear step by step methods. Readers will learn how to prepare, design, and execute different pond ideas with a focus on organization, structure, and durability. Each concept is presented with a practical approach to ensure the project remains realistic and achievable. From minimalist containers to natural-style ponds, these ideas provide inspiration for both decorative and functional outdoor improvements.
Why This Idea Is Trending or Useful
DIY backyard ponds are trending because they align with the growing interest in home decor and outdoor organization. Many homeowners are focusing on creating relaxing spaces that do not require complex construction. Ponds provide a strong visual focal point while remaining relatively simple to build compared to larger landscaping projects.
These projects also support creative ideas that combine aesthetics with function. A small pond can help regulate outdoor temperature, support plants, and create a structured garden layout. The DIY approach makes these ideas budget friendly, allowing people to reuse materials such as containers, stones, and liners.
Another reason for their popularity is accessibility. Most pond designs can be completed using basic tools and widely available materials. Beginner friendly tutorials make it possible to complete projects step by step without prior experience. The flexibility of design also allows for customization, making each pond unique while maintaining a modern design or minimalist style depending on preference.
Materials and Preparation
Before starting a DIY pond project, it is essential to prepare the right materials and plan the layout. Common materials include pond liners, waterproof containers, gravel, stones, aquatic plants, and a small water pump if circulation is required. Tools such as shovels, measuring tape, and levelers are also necessary for accurate setup.
Preparation begins with selecting a suitable location. The area should have partial sunlight and stable ground to prevent shifting. Planning the size and depth is important, as it determines water volume and maintenance needs. Mark the pond outline clearly before digging or placing containers.
Proper layering ensures durability. A base layer of sand or soft soil protects liners from damage. Stones and edging materials help secure the structure while improving appearance. If adding plants or fish, consider water depth and filtration requirements. Careful planning at this stage reduces errors and ensures the project progresses smoothly.
Idea 1: Natural Rock Garden Pond
How to Create
A natural rock garden pond is designed to blend with the surrounding landscape using uneven shapes and organic materials. This type of pond focuses on creating a realistic outdoor feature that resembles a natural water source. Stones of different sizes are arranged to form irregular edges, while plants are placed around the perimeter to soften the structure. This design works well in gardens that prioritize a natural or rustic aesthetic.
To create this pond, start by marking an irregular shape and digging to varying depths. Line the base with sand, then install a durable pond liner. Arrange large rocks around the edges to secure the liner and create structure. Add smaller stones inside the pond for texture. Fill with water gradually while adjusting rock placement. Incorporate aquatic plants such as water lilies to enhance the natural appearance. Ensure proper leveling to avoid water overflow and maintain stability.
Idea 2: Container Pond for Small Spaces

Step-by-Step Guide
A container pond is ideal for limited spaces such as patios or small yards. This idea uses a waterproof container like a ceramic pot or barrel to create a compact water feature. It is a beginner friendly project that requires minimal digging and can be completed quickly. The design focuses on simplicity while still achieving an aesthetic result.
To build this pond, choose a sturdy container and place it on a level surface. Add a layer of gravel at the bottom for stability. Fill the container with water and introduce small aquatic plants. If desired, install a small pump to keep water moving. Position decorative stones around the container to integrate it into the surrounding area. This method requires less maintenance and is suitable for those looking for easy project solutions.
Idea 3: Raised Wooden Frame Pond
How to Make

A raised wooden frame pond provides a structured and modern design that stands above ground level. This approach is useful for areas where digging is not practical. The frame creates a defined boundary while allowing for customization in size and shape. It also adds an architectural element to backyard decor.
Construction begins by building a rectangular or square wooden frame using treated wood. Ensure the frame is level and securely assembled. Line the interior with a waterproof pond liner, making sure there are no folds that could trap debris. Fill with water and add stones or plants as needed. This design allows for easy access and maintenance while maintaining a clean and organized appearance.
Idea 4: Mini Wildlife Pond
Execution Process
A mini wildlife pond is designed to support small ecosystems by attracting birds, insects, and beneficial organisms. This type of pond focuses on ecological balance rather than purely decorative elements. It uses natural materials and plant diversity to create a sustainable environment.

To create this pond, dig a shallow area with gently sloping sides. Install a liner and add layers of soil and gravel. Introduce native aquatic plants to support wildlife. Avoid using chemicals to maintain a natural habitat. Provide access points such as stones for animals to enter and exit safely. This pond requires careful planning to maintain ecological balance while remaining low maintenance.
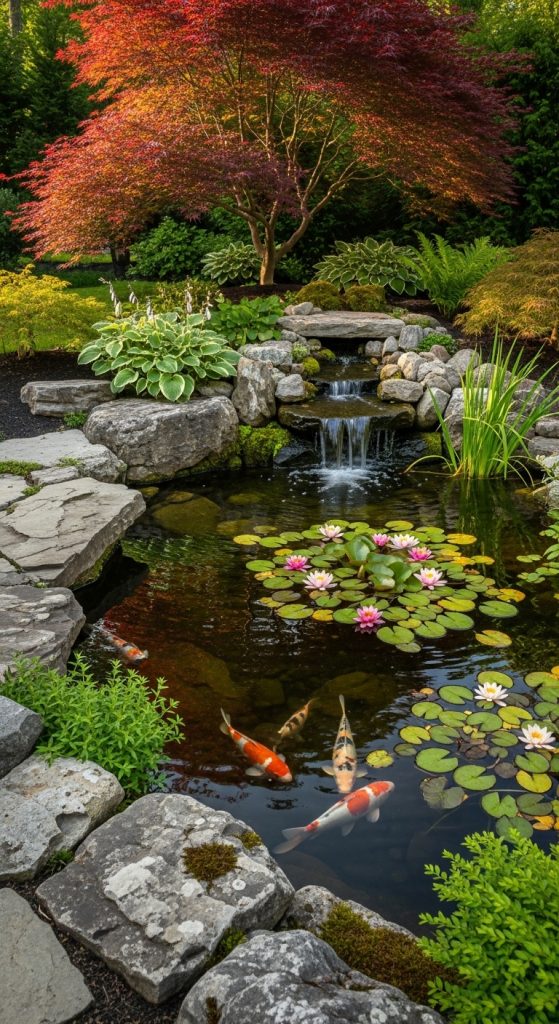
Idea 5: Waterfall Feature Pond
How to Create
A waterfall feature pond combines moving water with a traditional pond structure. The addition of a waterfall enhances sound and visual appeal while improving water circulation. This design is often used in modern home decor settings to create a focal point.

Begin by constructing the pond base and installing a liner. Build an elevated section using stones or bricks to support the waterfall. Install a pump to circulate water from the pond to the top of the waterfall. Arrange stones carefully to guide water flow. Test the system to ensure consistent movement. This setup adds dynamic elements while maintaining a cohesive design.
Idea 6: Pond with Wooden Deck Surround

Setup Method
A pond with a wooden deck surround integrates seating and functionality into the design. This idea focuses on combining relaxation space with a water feature. The deck provides a clean surface for walking or sitting while framing the pond visually.
To build this design, first construct the pond using a liner and stable base. Then build a wooden deck around it, ensuring proper support and spacing. Leave access points for maintenance. The deck should be treated to resist moisture. This combination enhances usability and creates a structured outdoor environment.
Idea 7: Stone Bowl Tiered Pond

How to Make
A tiered pond uses multiple stone bowls or basins arranged at different heights. Water flows from one level to another, creating a cascading effect. This design is compact and visually appealing, making it suitable for decorative purposes.
Set up each bowl securely on a stable base. Use a small pump to circulate water between levels. Ensure proper alignment to prevent spillage. Add small stones and plants for decoration. This project requires careful positioning but offers a unique aesthetic result.
Idea 8: Pond with Floating Plants
Step-by-Step Guide
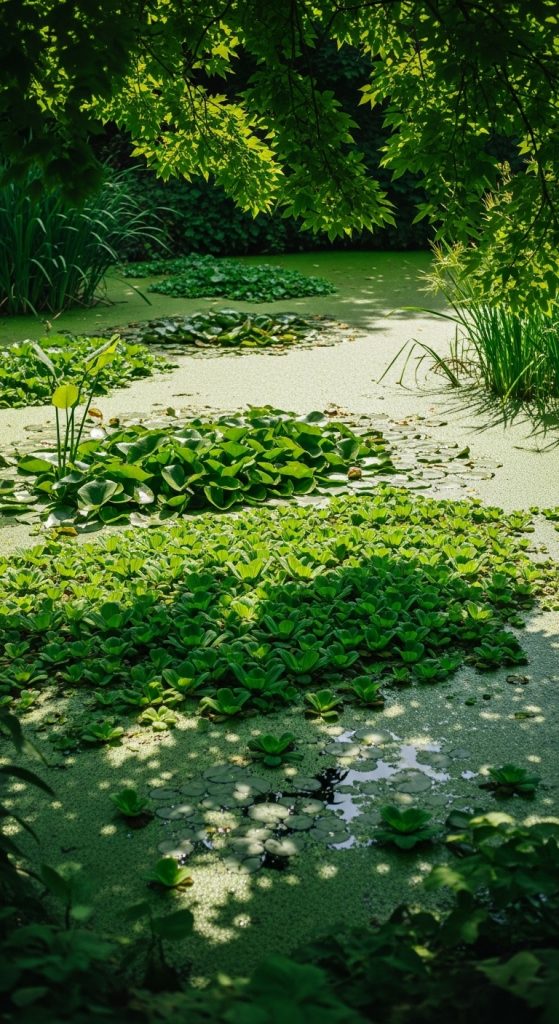
A pond focused on floating plants emphasizes greenery and natural coverage. This idea reduces visible water surface while creating a lush appearance. It is suitable for those interested in plant-based decoration.
Start by building a standard pond structure. Add floating plants such as water lettuce or lilies. Ensure there is enough space for growth and movement. Maintain water quality to support plant health. This approach creates a balanced and low-maintenance design.
Idea 9: Gravel Base Minimalist Pond
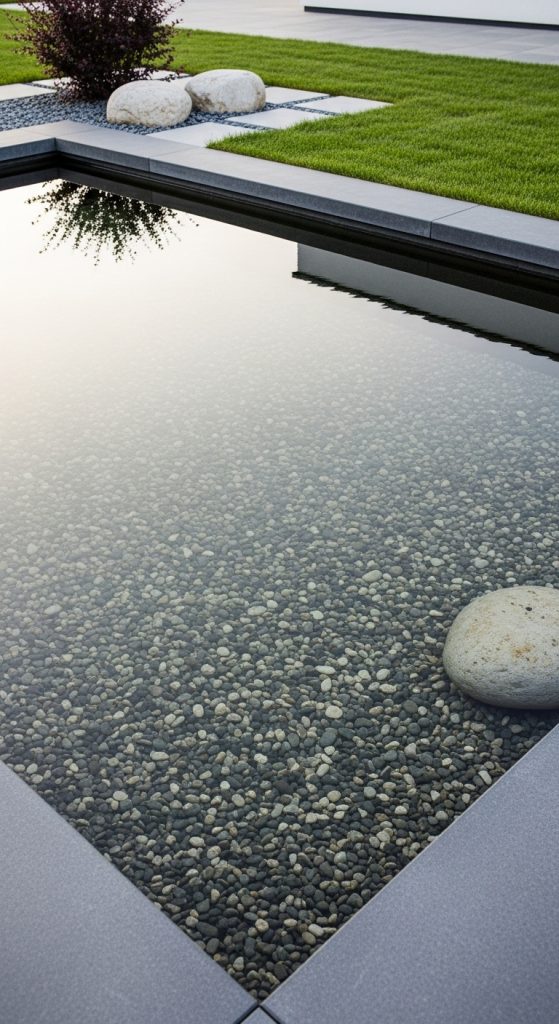
How to Create
A minimalist pond uses clean lines and simple materials to achieve a modern design. Gravel replaces complex decorations, creating a streamlined appearance. This style works well in contemporary outdoor spaces.
Construct a basic pond shape and line it properly. Add a layer of fine gravel at the bottom. Keep plant selection minimal to maintain simplicity. Use neutral tones for surrounding materials. This design focuses on organization and clarity.
Idea 10: Recycled Material Pond
Execution Process

A recycled material pond uses repurposed items such as old tubs or containers to create a functional water feature. This idea supports budget ideas while encouraging sustainability. It is a practical option for those looking to reuse materials.
Select a suitable container and ensure it is waterproof. Clean it thoroughly before use. Place it securely in the desired location and fill with water. Add stones or plants for decoration. This method reduces costs while still delivering an effective result.
Common Beginner Mistakes and How to Avoid Them
One common mistake is poor planning of pond size and depth. Incorrect dimensions can lead to water imbalance and maintenance issues. Always measure carefully before starting. Another issue is improper liner installation, which can cause leaks. Ensure the liner is smooth and secure.
Using unsuitable materials can also affect durability. Avoid materials that are not waterproof or stable. Overcrowding plants is another frequent problem. Maintain proper spacing to allow growth and prevent water quality issues.
Neglecting maintenance planning leads to long-term problems. Consider cleaning access and water circulation during the design stage. Addressing these mistakes early ensures a successful and long-lasting project.
Practical Tips for Better Results
Use a level tool to ensure the pond surface is even. Uneven surfaces can cause water overflow. Choose materials that are durable and suitable for outdoor conditions. Incorporate a simple filtration system to maintain water clarity.
Plan plant placement carefully to balance aesthetics and function. Use a mix of submerged and floating plants for better results. Regularly check water levels and adjust as needed.
Keep the design simple if you are a beginner. Start with smaller projects and expand gradually. These practical steps improve overall quality and reduce potential issues.
Styling, Presentation, or Organization Ideas
Organize the surrounding area to complement the pond design. Use stones, gravel, or wooden elements to create defined edges. Maintain consistency in materials to achieve a cohesive look.
Incorporate lighting to highlight the pond during evening hours. Position plants strategically to frame the water feature. Keep pathways clear for easy access and maintenance.
Arrange decorative elements carefully to avoid clutter. Focus on balance and proportion to enhance visual appeal. Proper styling ensures the pond integrates seamlessly into the backyard environment.
Budget or Time Planning
Plan the project based on available time and resources. Smaller ponds can be completed in a few hours, while larger designs may require several days. Allocate time for preparation, construction, and adjustments.
Use budget friendly materials such as recycled containers and locally available stones. Avoid unnecessary expenses by focusing on essential components.
Break the project into manageable steps to maintain efficiency. This approach ensures steady progress while minimizing delays. Proper planning helps complete the project within the desired timeframe.
Creative Expansion and Advanced Inspiration
Once the basic pond is complete, consider adding advanced features such as lighting, bridges, or additional water elements. Expanding the design can enhance functionality and visual appeal.
Experiment with different layouts and materials to create unique variations. Combine multiple ideas to develop a customized project.
Advanced inspiration includes integrating ponds with garden pathways or seating areas. These additions create a more interactive outdoor space. Continuous improvement allows the project to evolve while maintaining its original structure.