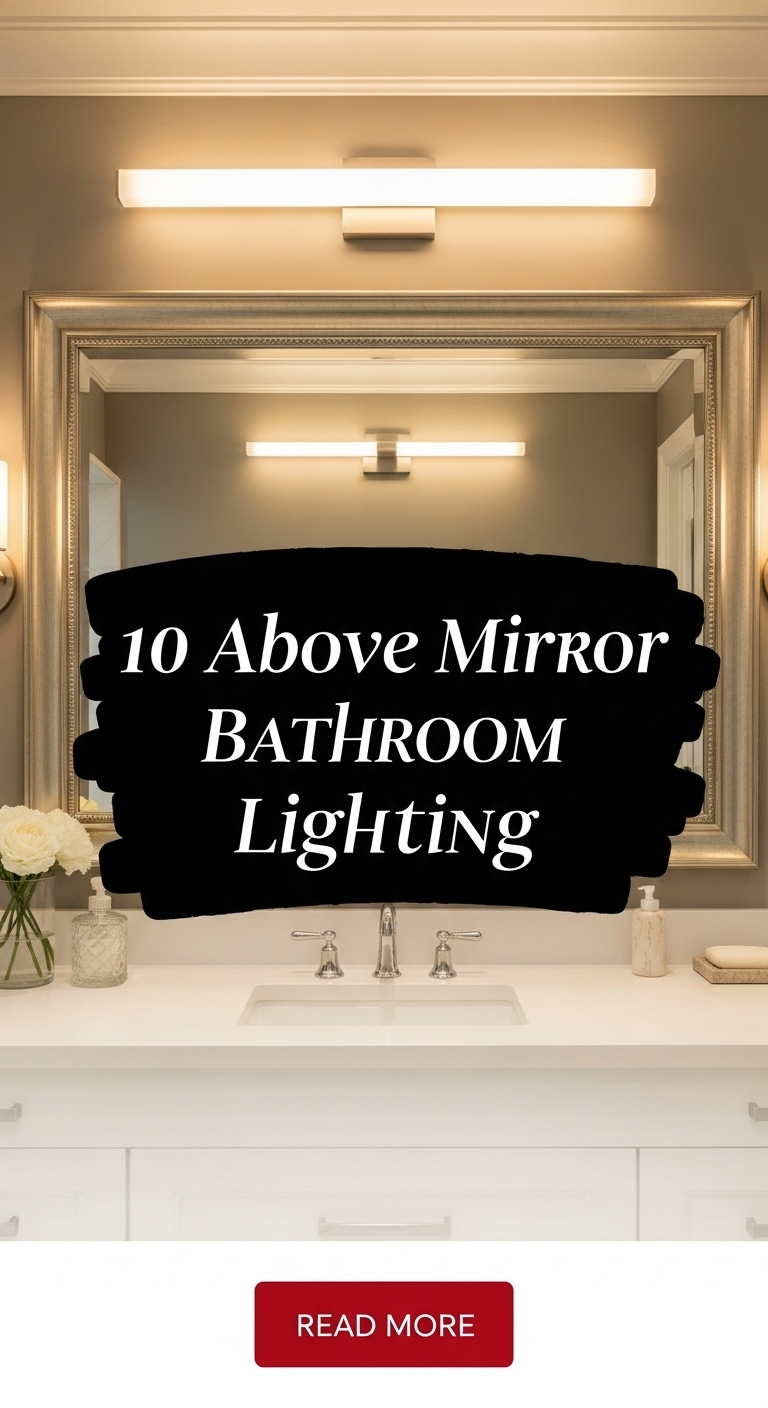
10 above mirror bathroom lighting

Above mirror bathroom lighting plays a key role in both functionality and visual structure within a space. It provides direct illumination for daily tasks such as grooming while also contributing to the overall aesthetic of the bathroom. Many Pinterest ideas highlight this type of lighting because it combines practical use with modern design. Proper placement and design of above mirror lighting improve visibility, reduce shadows, and create a balanced environment.
This article presents ten above mirror bathroom lighting ideas, each focusing on a different approach to design, placement, and execution. Readers will learn how to select appropriate lighting styles, understand the importance of positioning, and follow step by step methods to install or arrange lighting effectively. The content emphasizes practical solutions that can be implemented using simple materials and planning.
These creative ideas align with modern design trends that prioritize clean lines, minimalist style, and efficient use of space. Each lighting concept is presented as an easy project that enhances both function and decoration. The goal is to provide clear guidance that supports better organization, improved lighting quality, and a refined bathroom setup.
Why This Idea Is Trending or Useful
Above mirror bathroom lighting is trending due to its ability to improve both usability and design. Pinterest ideas often feature this setup because it provides focused illumination exactly where it is needed. Proper lighting above the mirror reduces shadows on the face, making daily routines more efficient and accurate.
The practical value of this lighting lies in its direct placement. It ensures even light distribution across the mirror area, which is essential for grooming tasks. This makes it a reliable solution for functional lighting needs. The DIY appeal also contributes to its popularity, as many lighting setups can be installed or adjusted using basic tools and materials.
From a design perspective, above mirror lighting supports modern design trends that emphasize simplicity and structure. Clean fixtures and organized placement create a polished and cohesive look. These lighting options can be adapted to different bathroom sizes and layouts, making them accessible for various users.
Their combination of functionality, accessibility, and aesthetic improvement makes above mirror lighting a consistent choice among trending ideas.
Materials and Preparation
Preparing for above mirror bathroom lighting requires careful planning and the use of appropriate tools. Common materials include light fixtures, mounting hardware, screws, and electrical connectors. Basic tools such as a drill, screwdriver, measuring tape, and level are necessary to ensure proper installation. These materials support secure placement and accurate alignment.
Start by measuring the width of the mirror and determining the ideal placement for the light fixture. The lighting should be centered above the mirror to ensure balanced illumination. Planning the height is also important, as it affects how light spreads across the face and surrounding area.
Turn off the power supply before beginning any installation. This step ensures safety during the process. Mark the mounting points using a measuring tape and level to maintain symmetry. Proper planning helps prevent uneven placement and reduces the need for adjustments.
Organizing materials and preparing the workspace improves efficiency. It ensures that the installation process runs smoothly and results in a clean and structured setup. These preparation steps make the project manageable and suitable for beginners.
Idea 1: Single Horizontal Light Bar

How to Create
A single horizontal light bar is a straightforward lighting solution placed directly above the mirror. It provides even illumination across the entire width of the mirror, reducing shadows and creating a balanced light distribution. This design is commonly used in Pinterest inspiration because it offers a clean and minimalist style that fits various bathroom layouts.
The horizontal placement ensures that light spreads evenly from side to side. This makes it suitable for daily grooming tasks that require clear visibility. The design focuses on simplicity, making it a practical option for both small and large bathrooms.
Step-by-Step Guide
Measure the width of the mirror and mark the center point above it. Use a level to draw a straight guideline for the fixture placement. This ensures alignment and symmetry.
Install the mounting bracket securely using screws. Attach the light bar to the bracket and connect the wiring according to safety guidelines. Turn the power back on and test the light. This step by step tutorial ensures a clean and balanced installation.
Idea 2: Dual Light Fixtures Above Mirror
How to Create
Dual light fixtures involve placing two separate lights above the mirror. This design provides additional brightness and enhances symmetry. It is suitable for wider mirrors where a single fixture may not provide sufficient coverage.
The placement focuses on dividing the space evenly, ensuring both sides receive equal illumination.
Step-by-Step Guide

Measure the mirror width and divide it into two equal sections. Mark the positions for each fixture above these points.
Install each fixture separately, ensuring they are aligned horizontally. Connect the wiring and test the lights. This method creates a balanced and functional lighting setup.
Idea 3: Industrial Pipe Lighting
How to Create

Industrial pipe lighting uses exposed piping combined with light fixtures to create a structured and modern design. This style adds visual interest while maintaining functionality.
It is often used in creative projects that emphasize raw materials and clean lines.
Step-by-Step Guide
Assemble the pipe structure according to the desired length. Mount it securely above the mirror.
Attach the light fixtures to the pipe and connect the wiring. This tutorial creates a durable and visually distinct lighting solution.
Idea 4: LED Strip Above Mirror
How to Create
An LED strip placed above the mirror provides continuous and even lighting. This style is compact and suitable for minimalist designs.
It creates a soft and consistent glow.

Step-by-Step Guide
Measure the mirror width and cut the LED strip accordingly.
Attach the strip using adhesive backing and connect it to a power source. This easy project ensures smooth and uniform lighting.
Idea 5: Vintage Bulb Bar Lighting
How to Create

This design features multiple exposed bulbs arranged in a horizontal bar. It provides strong illumination and a decorative appearance.
The arrangement focuses on evenly spaced bulbs.
Step-by-Step Guide
Install a mounting bar above the mirror.
Attach the bulbs at equal distances and connect the wiring. This method ensures balanced lighting.
Idea 6: Minimalist Wall Sconce Row

How to Create
A row of small wall sconces placed above the mirror creates a clean and organized look.
It supports a minimalist style.
Step-by-Step Guide
Mark equal spacing for each sconce.
Install them securely and connect wiring. This creates a structured setup.
Idea 7: Backlit Mirror Lighting
How to Create
Backlit lighting places lights behind the mirror, creating a soft glow around its edges.
It enhances ambiance and reduces harsh shadows.

Step-by-Step Guide
Install LED strips behind the mirror frame.
Connect to power and adjust placement for even light. This creates a subtle effect.
Idea 8: Adjustable Spotlights
How to Create
Adjustable spotlights allow directional lighting above the mirror.

They provide flexibility in light positioning.
Step-by-Step Guide
Install the spotlight fixture above the mirror.
Adjust angles to direct light evenly. This ensures targeted illumination.
Idea 9: Glass Shade Lighting Bar

How to Create
Glass shade lighting uses covered bulbs to diffuse light evenly.
It creates a soft and balanced effect.
Step-by-Step Guide
Mount the bar above the mirror.
Attach glass shades and bulbs. This ensures smooth lighting.
Idea 10: Floating Shelf with Integrated Lighting
How to Create
This design combines a shelf with built-in lighting above the mirror.
It adds both function and organization.
Step-by-Step Guide
Install the shelf securely.
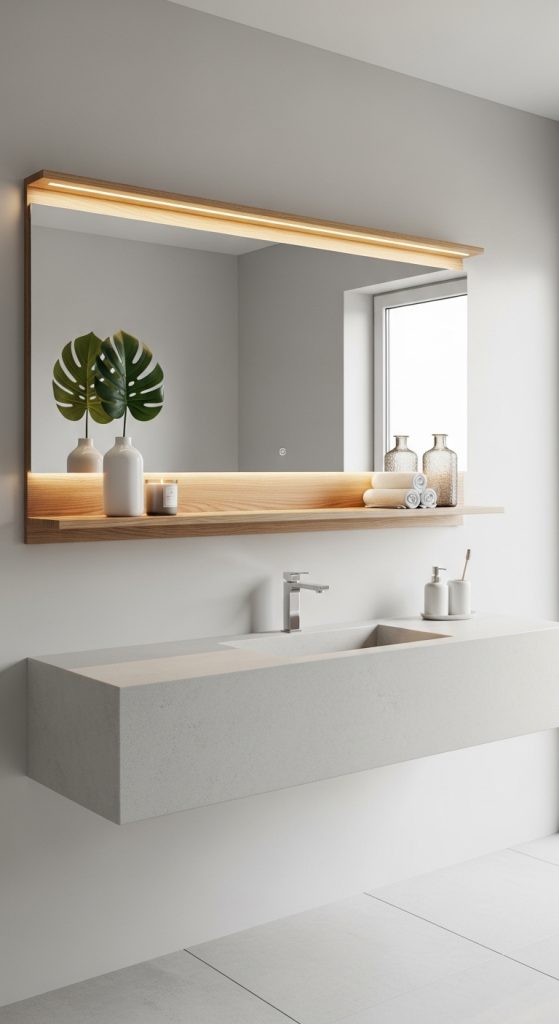
Attach lighting underneath and connect wiring. This method creates a dual-purpose setup.
Common Beginner Mistakes and How to Avoid Them
Incorrect placement can lead to uneven lighting. Always measure carefully before installation. Ignoring alignment may result in an unbalanced appearance.
Skipping safety steps during wiring can create risks. Always turn off power before working.
Practical Tips for Better Results
Use a level to ensure straight installation. Choose appropriate light intensity for clear visibility.
Plan placement before installation to improve efficiency.
Styling, Presentation, or Organization Ideas
Match lighting style with overall bathroom design. Maintain clean lines for a cohesive look.
Organized placement enhances visual balance.
Budget or Time Planning
Most lighting setups require basic materials, making them suitable for budget ideas. Planning reduces installation time.
Simple designs can be completed quickly.
Creative Expansion and Advanced Inspiration
Combine multiple lighting styles for unique designs. Experiment with placement and brightness.
These creative ideas expand possibilities while maintaining practicality.


