10 DIY Big Flowers Paper Decoration
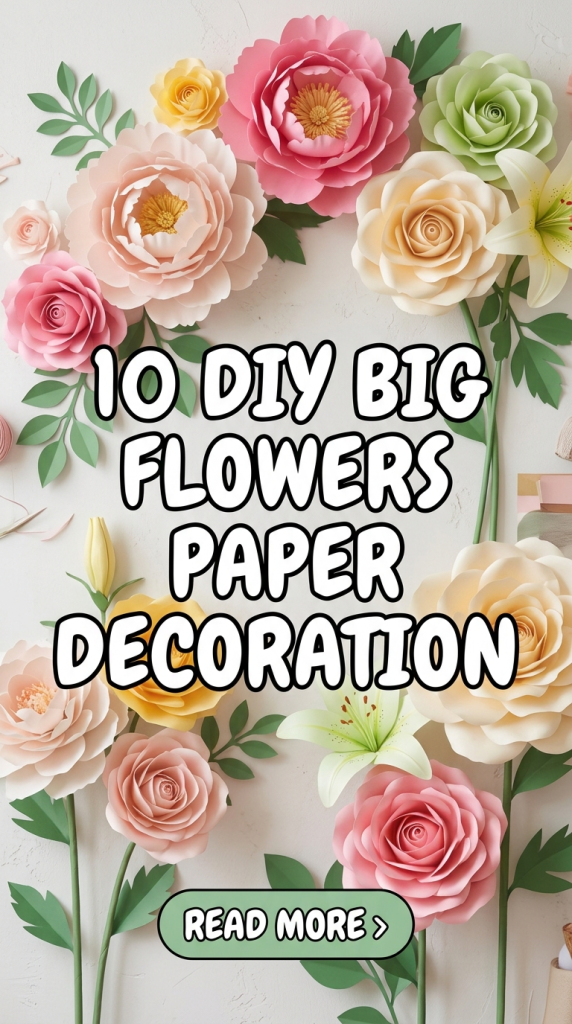
Large paper flower decorations have become a widely shared concept in Pinterest ideas due to their ability to transform spaces using simple materials and clear step-by-step methods. These oversized decorative elements are commonly used in home decor, event styling, and creative projects where visual impact is required without complex construction.
This article explains how to create ten distinct DIY big paper flower designs using accessible materials and beginner friendly techniques. Each idea focuses on structure, layering, and shaping methods that define large-scale paper flowers. Readers will learn how to plan, assemble, and refine each design using practical instructions. The content also explains preparation steps, material selection, and execution processes that support consistency and clean results.
This topic is useful because it combines aesthetic value with low-cost DIY methods, making it suitable for both personal decoration and organized setups such as parties or photo backdrops. The goal is to provide clear guidance that allows accurate replication of each design while maintaining flexibility for customization.
Why This Idea Is Trending or Useful
DIY big paper flower decoration is trending due to its strong visual appeal and adaptability across different environments. These decorations are commonly used in modern design setups because they create a focal point without requiring permanent installation. Their popularity in Pinterest ideas comes from their combination of simplicity and impact, allowing beginners to achieve large-scale decorative results with basic materials. The designs align with minimalist style concepts when neutral tones are used, and they also support vibrant aesthetic themes when bright colors are applied. Another reason for their relevance is accessibility. Most designs require paper, adhesive, and basic cutting tools, which makes them suitable for budget ideas and easy project planning. These decorations are also reusable when constructed properly, adding practical value. Their DIY nature supports creative ideas and customization, allowing users to adjust petal shapes, sizes, and arrangements. This flexibility makes them suitable for both home decor and event decoration while maintaining a consistent visual structure.
Materials and Preparation
Before starting any big paper flower decoration, proper preparation ensures accuracy and efficiency. Common materials include colored craft paper or cardstock, scissors, glue, double-sided tape, and a base such as cardboard or foam board for support. Additional tools such as rulers, pencils, and templates help maintain uniform shapes and sizes. Selecting the right paper thickness is important because it affects the structure of the petals. Thicker paper provides stability, while lighter paper allows easier shaping. Preparation begins with planning the flower size and determining the number of layers required. Sketching or printing templates ensures consistency across petals. Cutting multiple pieces at once can reduce time and improve uniformity. Workspace organization is also essential. Keeping materials arranged allows smoother execution of each step-by-step process. Adhesive selection should match the weight of the paper to prevent detachment. Proper planning supports a clean final appearance and reduces material waste. This stage establishes the foundation for all creative project outcomes.
Idea 1: Layered Rose Paper Flower
How to Create
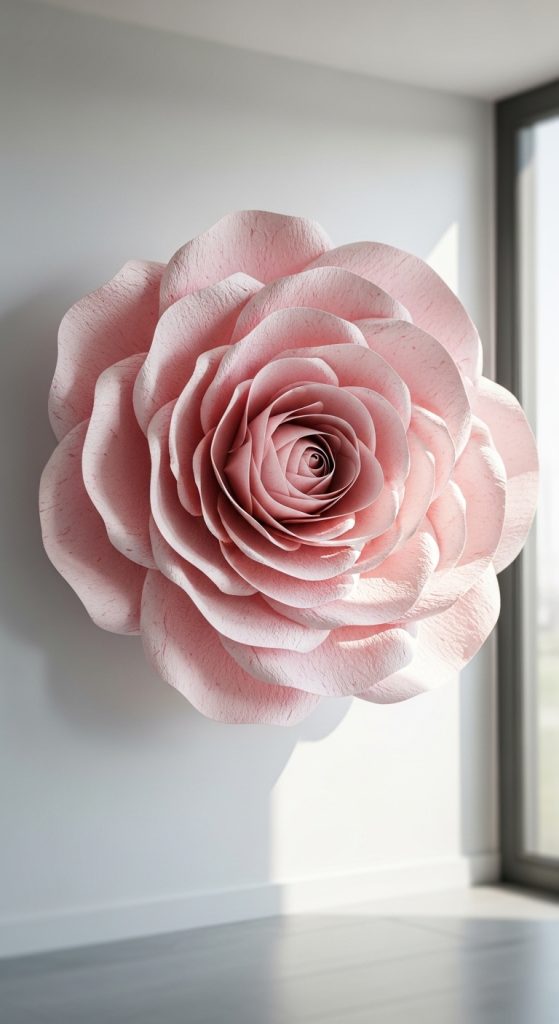
The layered rose paper flower focuses on building depth through multiple petal layers arranged in a circular pattern. This design mimics the structure of a natural rose by gradually increasing petal size from the center outward. Each petal is slightly curved to create dimension, and the layering technique defines the overall shape. The center is tightly formed using smaller petals, while outer layers expand to create a full bloom effect. This method is commonly used in Pinterest ideas because it produces a balanced and realistic aesthetic. The design works well in both minimalist style and bold decoration themes depending on the chosen color palette. Maintaining symmetry during assembly ensures the flower appears structured rather than uneven. The layering process is essential for achieving a professional appearance, and careful placement of each petal contributes to the final visual impact.
The execution process begins by cutting petals in three different sizes using templates. Smaller petals are rolled slightly inward, while larger ones are gently curved outward using a pencil or similar tool. Start by attaching the smallest petals to form the center. Gradually add medium and large petals around this base using glue or tape. Ensure each layer overlaps slightly to maintain continuity. Attach the completed flower to a sturdy backing to preserve its shape. Adjust petal angles as needed to enhance depth. This step-by-step method allows beginners to create a structured and visually appealing paper flower using simple materials.
Idea 2: Giant Dahlia Paper Flower
How to Create
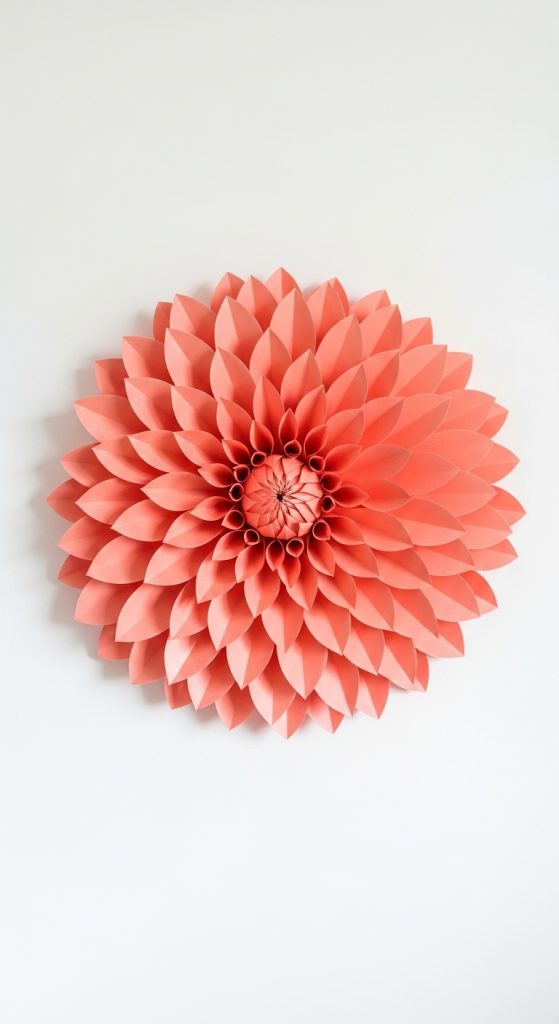
The giant dahlia paper flower is defined by its dense arrangement of pointed petals that radiate outward in a symmetrical pattern. This design emphasizes repetition and precision, making it suitable for large decorative installations. Each petal is folded slightly along the center to create a dimensional effect. The layered structure forms a compact and textured surface that enhances the overall aesthetic. This style is widely used in creative ideas because it delivers a bold visual statement while remaining manageable for beginners. The uniformity of the petals ensures a clean and organized appearance, which aligns with modern design trends.
To construct this flower, cut multiple identical petal shapes from paper. Fold each petal slightly to create a central crease. Begin attaching petals to a circular base, starting from the outer edge and working inward. Overlap each petal slightly to maintain density. Continue layering until the center is filled completely. Use consistent spacing to avoid gaps. Secure all layers firmly to prevent shifting. This step-by-step approach ensures stability and precision. The final structure should appear full and evenly distributed, making it suitable for wall decoration or event backdrops.
Idea 3: Peony Style Paper Flower
How to Create
The peony style paper flower focuses on soft, rounded petals arranged in multiple layers to create a full and textured bloom. This design emphasizes volume and smooth transitions between layers. The petals are wider and more curved compared to other flower styles, which contributes to a softer aesthetic. This type of decoration is frequently used in home decor setups because it blends well with both neutral and colorful themes. The structure relies on gradual layering rather than sharp angles, making it suitable for creating an elegant and balanced look.
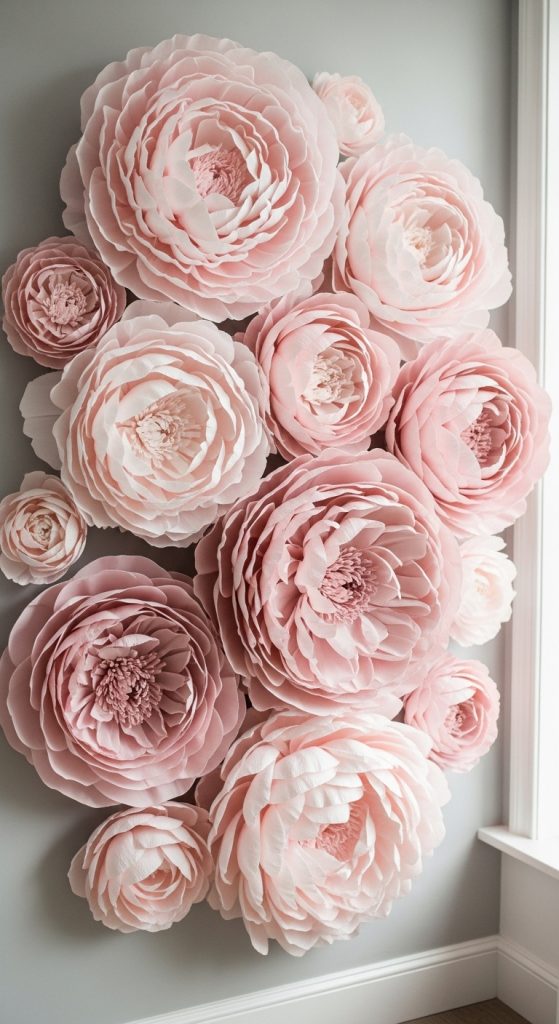
To make this flower, cut rounded petals in various sizes. Shape each petal by gently curling the edges outward. Start with the smallest petals at the center and gradually add larger ones around them. Use glue to secure each layer, ensuring slight overlap for continuity. Rotate each layer slightly to avoid alignment gaps. Continue building until the desired size is achieved. Attach the flower to a base for support. Adjust the petals to enhance volume and symmetry. This process creates a soft and detailed paper flower suitable for aesthetic decoration.
Idea 4: Sunflower Paper Decoration
How to Create
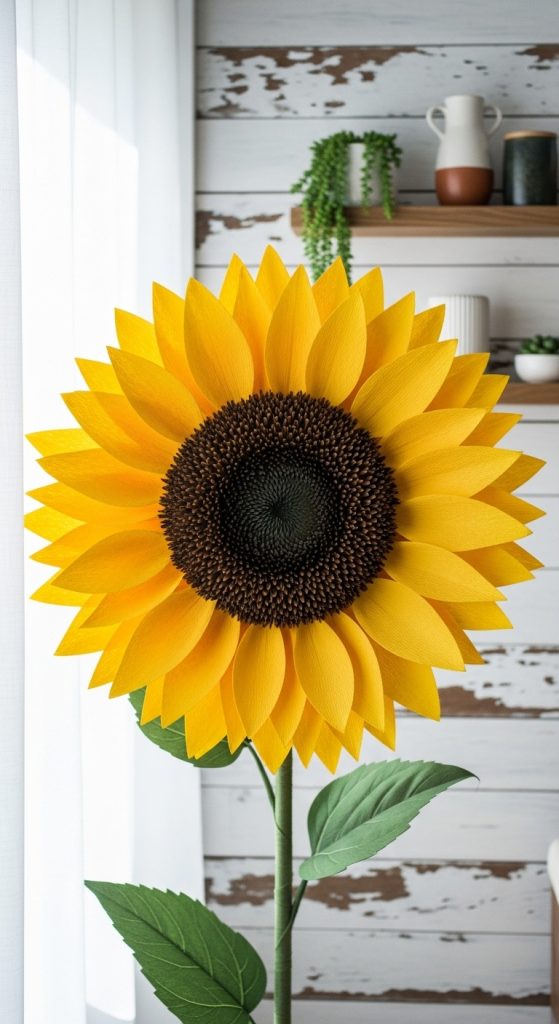
The sunflower paper decoration uses a combination of elongated petals and a textured center to replicate the structure of a sunflower. The contrast between the outer petals and the central disk creates a clear focal point. This design is commonly used in DIY projects because it combines simple shapes with strong visual impact. The arrangement of petals in a radial pattern ensures balance and symmetry. The central area is often layered or textured to add depth.
Begin by cutting long oval-shaped petals and a circular base. Attach the petals evenly around the base, ensuring consistent spacing. Create the center using small rolled or layered paper pieces to form texture. Secure the center firmly in place. Adjust the petals slightly outward to enhance the flower’s shape. This step-by-step method creates a structured and recognizable sunflower design suitable for decoration.
Idea 5: Spiral Cut Paper Flower
How to Create
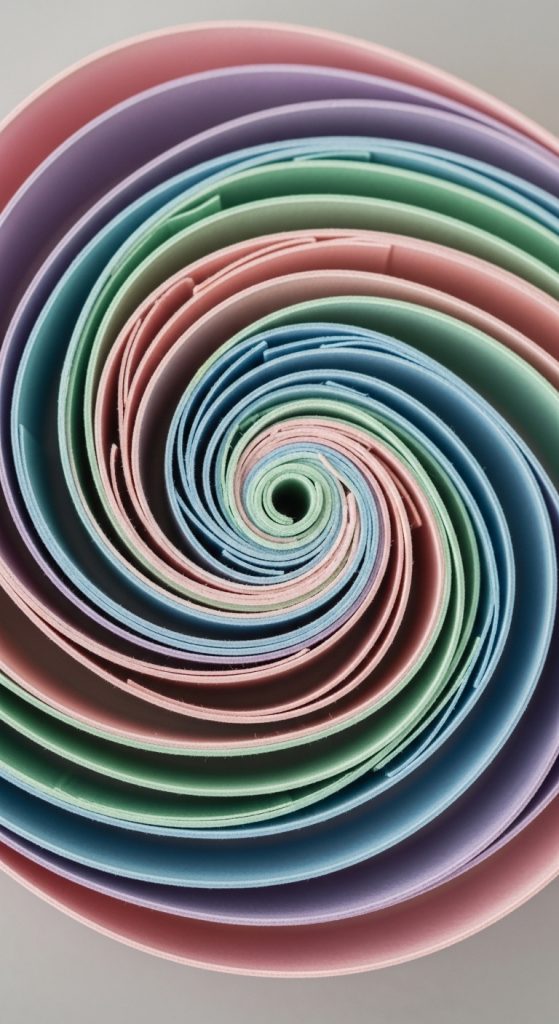
The spiral cut paper flower uses a continuous spiral shape to form a compact and layered bloom. This design is efficient and requires fewer pieces compared to layered flowers. The spiral is rolled inward to create the flower structure, resulting in a tight and cohesive form. This method is popular in easy project tutorials because it simplifies the construction process while still producing a decorative result.
Cut a large spiral shape from paper. Begin rolling from the outer edge toward the center. Apply glue along the base to secure the rolled structure. Allow the flower to expand slightly for a natural appearance. Attach the base to maintain stability. Adjust the outer edges for a balanced look. This technique is quick and suitable for beginners.
Idea 6: Fringed Paper Flower
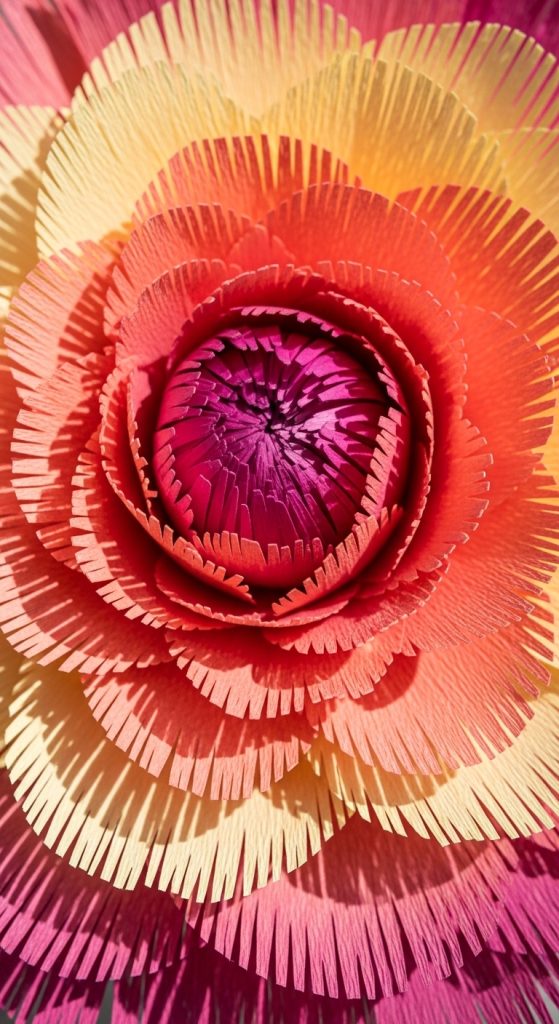
How to Create
The fringed paper flower is defined by thin cuts along the edges of paper strips, creating a textured and layered appearance. This design adds depth through repeated fine details rather than large petals. It is commonly used in decoration projects where texture is the main focus.
Cut long strips of paper and create evenly spaced fringe cuts along one edge. Roll the strip tightly to form the center. Continue wrapping additional strips to build volume. Secure with glue. Fluff the fringes outward to create a full effect. This method produces a dense and textured flower suitable for creative decoration.
Idea 7: Lotus Inspired Paper Flower
How to Create
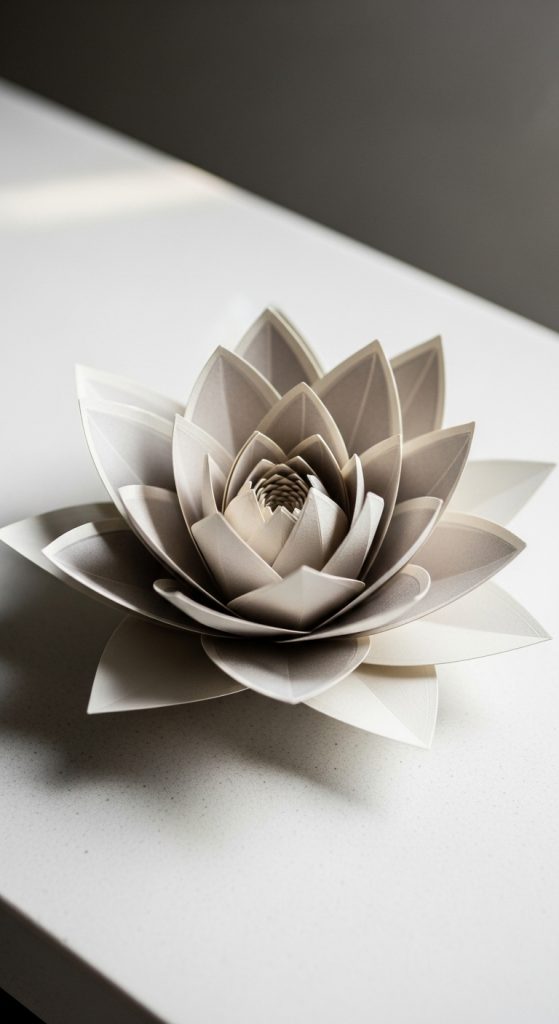
The lotus inspired paper flower features layered petals arranged in a symmetrical and upward-facing pattern. This design emphasizes clean lines and structured layering. The petals are pointed and arranged in multiple tiers to create a balanced shape.
Cut pointed petal shapes and arrange them in layers on a circular base. Each layer should be slightly offset from the previous one. Secure with glue and adjust angles to create an upward effect. Continue layering until the desired fullness is achieved. This structured approach creates a balanced decorative piece.
Idea 8: Minimalist Flat Paper Flower
How to Create
The minimalist flat paper flower uses simple shapes and minimal layering to create a clean and modern design. This style aligns with minimalist home decor trends and focuses on clarity and simplicity.
Cut uniform petal shapes and arrange them around a flat circular base. Use minimal layering and keep spacing consistent. Attach a simple center piece. Ensure all elements are aligned properly. This design is easy to execute and suitable for modern decoration.
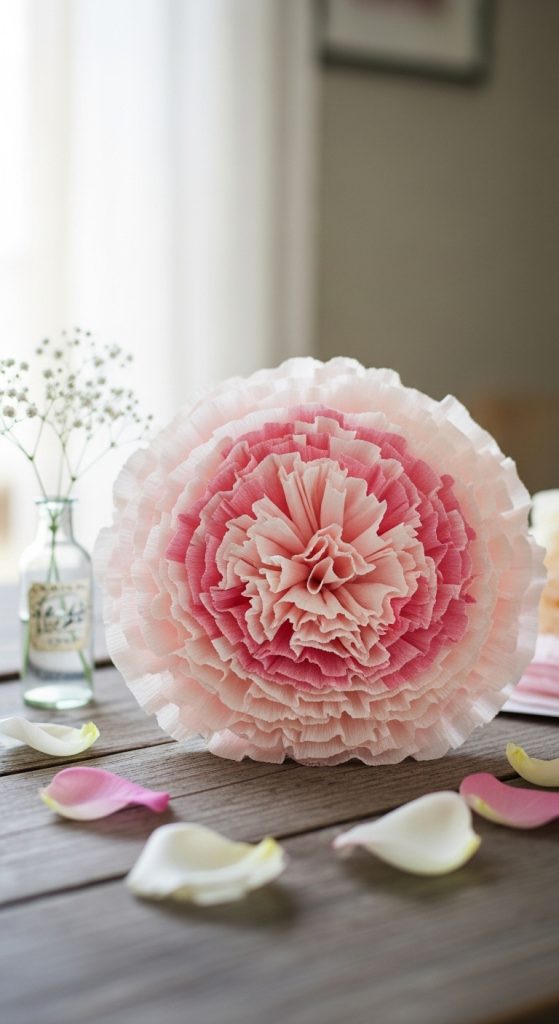
Idea 9: Multi-Layer Carnation Flower
How to Create

The multi-layer carnation flower uses ruffled edges and dense layering to create a textured appearance. The petals are stacked closely to form a compact bloom. This design is commonly used in DIY decoration due to its detailed structure.
Cut multiple circular shapes and create scalloped edges. Stack and secure them at the center. Fluff each layer outward to create volume. Adjust layers for symmetry. This method produces a full and textured flower.
Idea 10: Oversized Backdrop Flower
How to Create
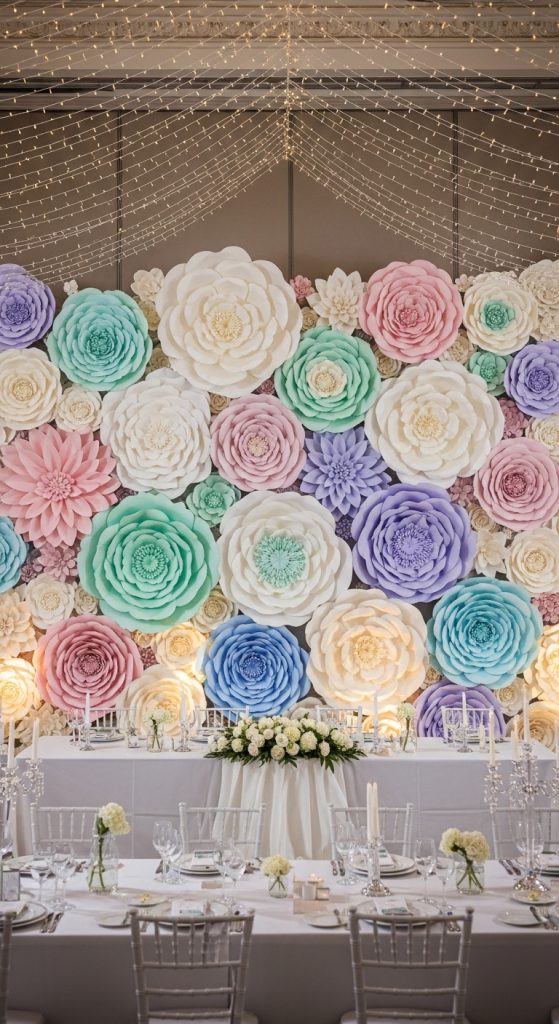
The oversized backdrop flower is designed for large-scale decoration such as walls or event setups. It uses exaggerated petal sizes and strong layering to create a focal point.
Cut large petal shapes and attach them to a sturdy base. Start with outer layers and work inward. Ensure each layer overlaps evenly. Add a central element for detail. Secure all components firmly. This design creates a bold decorative feature suitable for large spaces.
Common Beginner Mistakes and How to Avoid Them
One common mistake is using inconsistent petal sizes, which disrupts the symmetry of the flower. Accurate templates help maintain uniformity. Another issue is weak adhesive application, leading to unstable structures. Using appropriate glue ensures durability. Overlapping petals incorrectly can create gaps, so consistent spacing is important. Poor planning often results in uneven layering, so preparing materials in advance improves accuracy.
Practical Tips for Better Results
Use templates to ensure consistent shapes. Work in layers rather than attaching all pieces at once. Adjust petal angles gradually to create depth. Keep tools organized for efficiency. Practice shaping techniques before final assembly. These steps improve precision and overall appearance.
Styling, Presentation, or Organization Ideas
Arrange flowers in clusters for balanced decoration. Combine different sizes to create depth. Use neutral tones for minimalist style or bright colors for bold themes. Position flowers at varying heights for visual interest. These methods enhance presentation.
Budget or Time Planning
Use affordable paper materials to reduce costs. Cut multiple petals at once to save time. Plan designs before starting to avoid material waste. Work in stages to manage time efficiently. These strategies support practical project completion.
Creative Expansion and Advanced Inspiration
Combine multiple flower styles in one arrangement. Experiment with layered color variations. Create themed decorations using coordinated designs. Expand projects into wall installations or event backdrops. These ideas support advanced creative development.