20 DIY Things With Paper ideas
Paper is one of the most versatile, affordable, and accessible crafting materials in the world. It’s lightweight, easy to manipulate, and endlessly customizable. From simple folded designs to intricate decorative art, paper DIY projects allow you to turn something ordinary into something extraordinary. Whether you’re crafting for home decor, gifts, organization, school projects, or seasonal decorations, paper can transform into almost anything with a little creativity.

One of the biggest advantages of paper crafts is affordability. You don’t need expensive tools or advanced skills to create something beautiful. Basic supplies like scissors, glue, markers, and colored paper can open the door to countless creative possibilities. This makes paper DIY projects perfect for beginners, students, kids, and anyone who loves budget-friendly crafting.
Paper crafting also encourages creativity and mindfulness. The process of folding, cutting, layering, and designing can feel calming and therapeutic. It allows you to focus on details and create something with your hands, which is incredibly rewarding in today’s digital world.
Another reason paper crafts are so popular — especially on Pinterest — is their visual appeal. Paper projects often look aesthetic, colorful, and customizable. You can match them to any theme, season, or color palette. Whether you prefer minimalist neutrals or bold vibrant designs, paper adapts easily.
From handmade greeting cards to wall art, flowers, organizers, and gift packaging, the possibilities are endless. Paper crafts can be functional or decorative — or both. They can also be personalized, which makes them perfect for gifts and special occasions.
In this guide, you’ll discover 20 detailed DIY paper ideas that are beginner-friendly, creative, and Pinterest-worthy. Each project includes a clear explanation, materials list, and easy step-by-step instructions so you can confidently create beautiful paper crafts at home.
Let’s start with the first 10 ideas.
1. DIY Paper Wall Flowers
Introduction (200 Words)
Paper wall flowers are one of the most popular and eye-catching paper crafts. They instantly transform any room into a stylish, decorative space without the cost of real floral arrangements. Whether you’re decorating a bedroom, living room, party backdrop, or special event like a birthday or baby shower, paper flowers create a bold and beautiful statement.

The beauty of paper wall flowers is their flexibility in size and color. You can create oversized dramatic blooms or small delicate ones. You can match them to your room’s aesthetic, seasonal theme, or event color scheme. They’re also long-lasting, unlike real flowers, making them a practical decor solution.
This project is perfect for beginners because it requires simple cutting and layering techniques. Once you learn the petal-shaping method, you can create endless variations.
What It Is
Large decorative paper flowers designed to hang on walls as art or event decor.
Materials Needed
- Colored cardstock or crepe paper
- Scissors
- Glue gun or craft glue
- Pencil
- Round object for tracing (optional)
Step-by-Step Instructions
- Draw and cut multiple petal shapes in varying sizes.
- Slightly curl the edges using a pencil.
- Layer petals from largest to smallest.
- Glue them in circular formation.
- Add a contrasting center piece.
- Attach adhesive backing for wall display.
2. DIY Handmade Greeting Cards
Introduction (200 Words)

Handmade greeting cards are thoughtful, customizable, and meaningful. Instead of buying a generic card, creating one from paper allows you to personalize every detail. Whether it’s for birthdays, anniversaries, holidays, or thank-you notes, handmade cards feel special and intentional.
Paper greeting cards are beginner-friendly and require minimal supplies. You can keep the design simple and elegant or go bold with layered elements and 3D decorations. Adding handwritten messages inside makes them even more meaningful.
This craft is perfect for anyone who loves sentimental gestures.
What It Is
A custom-designed folded paper card with decorative elements and a handwritten message.
Materials Needed
- Cardstock
- Decorative paper
- Glue
- Markers
- Stickers (optional)
Step-by-Step Instructions
- Fold cardstock in half.
- Cut decorative shapes for the front.
- Glue layered elements.
- Write your message inside.
- Add finishing touches like glitter or stickers.
3. DIY Paper Bookmark Designs
Introduction (200 Words)
Paper bookmarks are simple yet practical crafts. They make perfect small gifts for readers and students. Plus, they’re fully customizable.

You can create minimalist aesthetic bookmarks, colorful patterns, or themed designs.
What It Is
A decorative paper strip designed to mark pages in books.
Materials Needed
- Thick paper
- Scissors
- Hole punch
- Ribbon
Step-by-Step Instructions
- Cut paper into rectangle strip.
- Decorate with drawings or patterns.
- Punch hole at top.
- Add ribbon.
4. DIY Paper Gift Boxes
Introduction (200 Words)

Paper gift boxes are stylish and practical. Instead of buying gift packaging, you can craft custom boxes.
They’re perfect for small presents, jewelry, or party favors.
What It Is
Folded paper box used for packaging gifts.
Materials Needed
- Thick decorative paper
- Ruler
- Glue
Step-by-Step Instructions
- Measure and cut square paper.
- Fold edges inward.
- Glue corners.
- Decorate lid.
5. DIY Paper Lanterns
Introduction (200 Words)
Paper lanterns create warm ambiance and are perfect for parties or room decor.
What It Is
Folded paper cylinder with decorative slits.

Materials Needed
- Colored paper
- Scissors
- Glue
Step-by-Step Instructions
- Fold paper lengthwise.
- Cut vertical slits.
- Roll into cylinder.
- Glue ends.
6. DIY Paper Origami Hearts
Introduction (200 Words)
Origami hearts are small but meaningful crafts perfect for notes and decor.

What It Is
Folded paper heart using origami technique.
Materials Needed
- Square paper
Step-by-Step Instructions
- Fold diagonally.
- Create triangular base.
- Fold corners upward.
- Shape top curves.
7. DIY Paper Wall Art Quotes
Introduction (200 Words)
Create inspiring quote art using layered paper designs.

What It Is
Decorative framed quote made with paper.
Materials Needed
- Cardstock
- Printed quote
- Glue
- Frame
Step-by-Step Instructions
- Print quote.
- Layer background paper.
- Glue and frame.
8. DIY Paper Flower Bouquet

Introduction (200 Words)
Paper flower bouquets are beautiful alternatives to real flowers.
What It Is
Handmade paper flowers arranged like a bouquet.
Materials Needed
- Colored paper
- Floral wire
- Tape
Step-by-Step Instructions
- Cut petal shapes.
- Attach to wire stem.
- Wrap with tape.
- Arrange bouquet.
9. DIY Paper Storage Organizer
Introduction (200 Words)
Paper organizers help keep desks neat and aesthetic.

What It Is
Folded paper compartments for organizing items.
Materials Needed
- Thick paper
- Glue
- Ruler
Step-by-Step Instructions
- Measure compartments.
- Fold paper into box shapes.
- Glue together.
10. DIY Paper Garland Decoration
Introduction (200 Words)

Paper garlands are perfect for parties and seasonal decor.
What It Is
Connected paper shapes hung as decoration.
Materials Needed
- Colored paper
- String
- Glue
Step-by-Step Instructions
- Cut repeating shapes.
- Glue onto string evenly spaced.
- Hang for display.
11. DIY Paper Envelope Designs
Introduction (200 Words)
Handmade paper envelopes are a beautiful way to elevate letters, invitations, or small gift notes. Instead of using plain store-bought envelopes, creating your own allows you to customize the size, color, and design. Whether you’re sending a birthday card, a love letter, or party invitations, a decorative envelope instantly adds personality and charm.

This DIY project is simple yet elegant. You can use patterned scrapbook paper, minimalist neutral tones, or even recycled magazine pages for a unique look. Adding wax seals, stickers, or handwritten calligraphy makes it even more Pinterest-worthy.
Paper envelopes are perfect for beginners because the folding technique is straightforward. Once you learn the basic structure, you can experiment with different shapes and styles — square envelopes, mini envelopes, or even heart-shaped flaps.
They’re practical, affordable, and incredibly aesthetic.
What It Is
A handmade folded paper envelope customized for letters, cards, or small flat gifts.
Materials Needed
- Decorative paper or cardstock
- Scissors
- Glue or double-sided tape
- Pencil
- Ruler
- Optional: wax seal, stickers, ribbon
Step-by-Step Instructions
- Place your card in the center of the paper to measure sizing.
- Cut paper into a square large enough to fold around the card.
- Fold bottom corner upward over the card.
- Fold side corners inward.
- Fold top corner downward to close.
- Glue side flaps securely.
- Add decorative seal or sticker to finish.
12. DIY Paper Photo Frame

Introduction (200 Words)
A DIY paper photo frame is a creative and budget-friendly way to display your favorite memories. Instead of buying traditional frames, you can design one that matches your room’s aesthetic. This project works beautifully for desk decor, wall art, or small gifts.
Paper frames are lightweight and easy to customize. You can layer colors, create cut-out borders, or add textured details. It’s also a fantastic craft for kids or beginners because it requires basic cutting and gluing skills.
This DIY idea is especially popular on Pinterest because it blends functionality with creativity. Whether you want a minimalist white frame, a floral-themed border, or something bold and colorful, paper gives you flexibility.
It’s simple, personal, and stylish.
What It Is
A handmade decorative frame crafted from layered paper to hold photos.
Materials Needed
- Thick cardstock
- Scissors or craft knife
- Glue
- Decorative paper
- Printed photo
Step-by-Step Instructions
- Cut two identical rectangles from cardstock.
- Cut a window opening in one piece.
- Decorate the front border with patterns or layered paper.
- Glue three sides together, leaving the top open.
- Insert photo inside.
- Add stand support to the back if desired.
13. DIY Paper Accordion Book
Introduction (200 Words)
An accordion book is a fun and interactive paper craft that unfolds into multiple connected panels. It’s perfect for mini scrapbooks, storytelling projects, or personalized gifts. This format is unique because it expands horizontally, creating a visually engaging experience.

Accordion books are simple to make and allow endless customization. You can use them to document trips, write affirmations, or create a themed photo display. They’re compact but hold a surprising amount of content.
This project is beginner-friendly and requires only folding and gluing techniques. It’s also highly aesthetic when displayed open on a desk or shelf.
What It Is
A folded paper booklet that expands like an accordion.
Materials Needed
- Long strip of cardstock (or glue shorter strips together)
- Ruler
- Pencil
- Markers
- Glue
Step-by-Step Instructions
- Measure and mark equal sections along the paper strip.
- Fold back and forth along the marks.
- Decorate each panel with photos, drawings, or quotes.
- Create separate front and back covers.
- Glue covers to each end.
14. DIY Paper 3D Butterflies
Introduction (200 Words)
Paper 3D butterflies are delicate, elegant decorations that instantly add charm to any space. They are perfect for bedroom walls, nursery decor, party backdrops, or scrapbook embellishments.

The magic of this craft lies in layering. By slightly folding the wings upward, you create a realistic three-dimensional effect. You can use patterned paper, watercolor designs, or metallic finishes for added dimension.
This is an easy beginner craft that delivers high visual impact. It’s inexpensive but looks beautifully detailed.
What It Is
Layered paper butterflies designed to appear three-dimensional.
Materials Needed
- Colored or patterned paper
- Scissors
- Pencil
- Glue dots
Step-by-Step Instructions
- Draw or print butterfly templates.
- Cut multiple butterfly shapes in different sizes.
- Fold each butterfly gently down the center.
- Glue only the center body to the surface.
- Slightly lift wings for 3D effect.
15. DIY Paper Desk Calendar
Introduction (200 Words)
A paper desk calendar is both decorative and functional. Instead of purchasing one, you can create a custom calendar tailored to your aesthetic. It’s perfect for students, home offices, or creative workspaces.
This project allows you to personalize colors, fonts, and layouts. You can include motivational quotes or small illustrations for each month. It’s simple yet organized, making it a practical DIY idea.
Paper calendars are especially satisfying because you can design them exactly how you like.
What It Is
A handmade monthly calendar created using paper sheets.
Materials Needed
- Cardstock
- Ruler
- Pen
- Binder ring or small stand

Step-by-Step Instructions
- Cut 12 equal-sized cards.
- Draw monthly grids on each.
- Label months clearly.
- Decorate with small designs.
- Punch holes and bind together.
16. DIY Paper Paperclip Bookmarks
Introduction (200 Words)

Paperclip bookmarks are tiny but adorable crafts that combine functionality with creativity. By attaching decorative paper shapes to paperclips, you create cute markers for books and planners.
They’re perfect for gifting or selling as small handmade products. You can create themes like animals, flowers, or minimalist shapes.
This project is beginner-friendly and requires minimal supplies.
What It Is
Decorated paper shapes attached to paperclips for bookmarking.
Materials Needed
- Paperclips
- Colored paper
- Glue
- Scissors
Step-by-Step Instructions
- Cut small shapes from paper.
- Fold shape in half.
- Glue paperclip inside fold.
- Press firmly and let dry.
17. DIY Paper Gift Tags
Introduction (200 Words)
Paper gift tags are small details that elevate any present. Instead of generic store tags, handmade versions feel personal and creative.
You can design minimalist, rustic, or colorful tags to match your wrapping style.

They’re quick, easy, and perfect for holiday gifting.
What It Is
Small decorative labels attached to gift wrapping.
Materials Needed
- Thick paper
- Hole punch
- Ribbon
- Markers
Step-by-Step Instructions
- Cut tag shapes.
- Decorate front.
- Punch hole at top.
- Thread ribbon through.
18. DIY Paper Star Decorations
Introduction (200 Words)
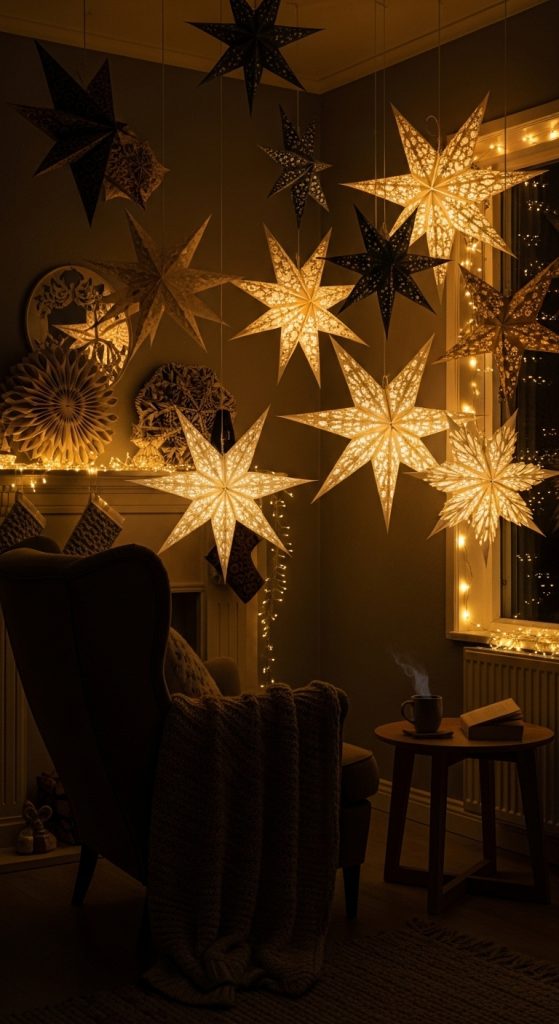
Paper stars are beautiful decorative pieces that can hang from ceilings or be placed on walls. They’re especially popular for holiday decor and nursery rooms.
By folding and assembling multiple paper pieces, you create dimensional stars.
They’re simple yet stunning.
What It Is
Folded and assembled paper pieces forming star shapes.
Materials Needed
- Colored paper
- Glue
- Scissors
Step-by-Step Instructions
- Cut identical diamond shapes.
- Fold slightly along center.
- Glue edges together in star formation.
- Attach string for hanging.
19. DIY Paper Notepad
Introduction (200 Words)
Creating your own paper notepad is practical and customizable. You can design covers that match your aesthetic and refill pages easily.
This DIY is perfect for journaling lovers or students.
What It Is
Stacked paper sheets glued at one edge to form a notepad.
Materials Needed

- Plain paper
- Decorative cardstock
- Glue
Step-by-Step Instructions
- Stack papers evenly.
- Apply glue along one edge.
- Attach decorative cover.
- Let dry under weight.
20. DIY Paper Shadow Box Art
Introduction (200 Words)
Paper shadow box art is a layered craft that creates depth and dimension inside a frame. By cutting multiple layered designs and spacing them apart, you create a 3D scene.
This project looks intricate and impressive but can be made using simple layered paper techniques.
It’s perfect for home decor or gifting.
What It Is
Layered cut paper arranged inside a frame for 3D effect.
Materials Needed
- Multiple sheets of cardstock
- Craft knife
- Foam spacers
- Frame

Step-by-Step Instructions
- Draw layered scene designs.
- Cut carefully using craft knife.
- Stack layers with foam spacers.
- Place inside deep frame.