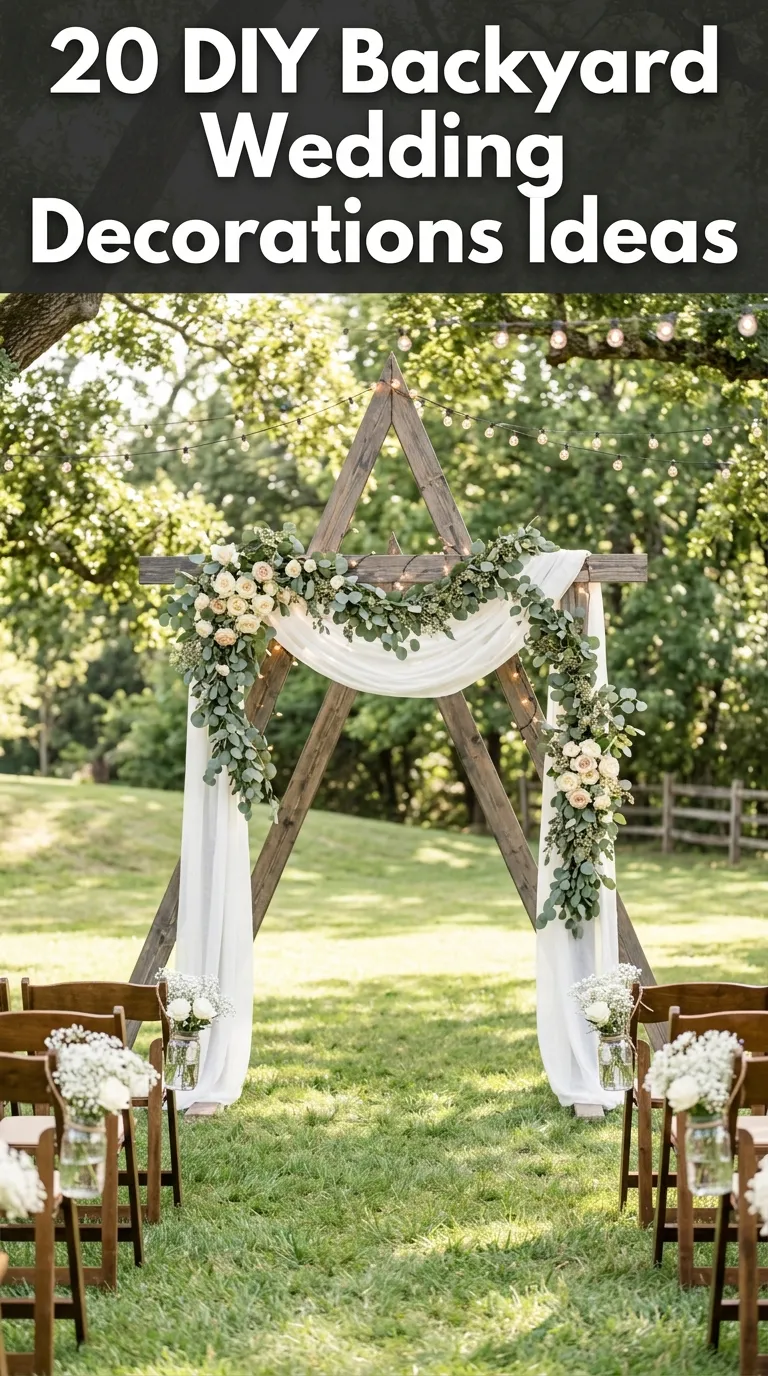
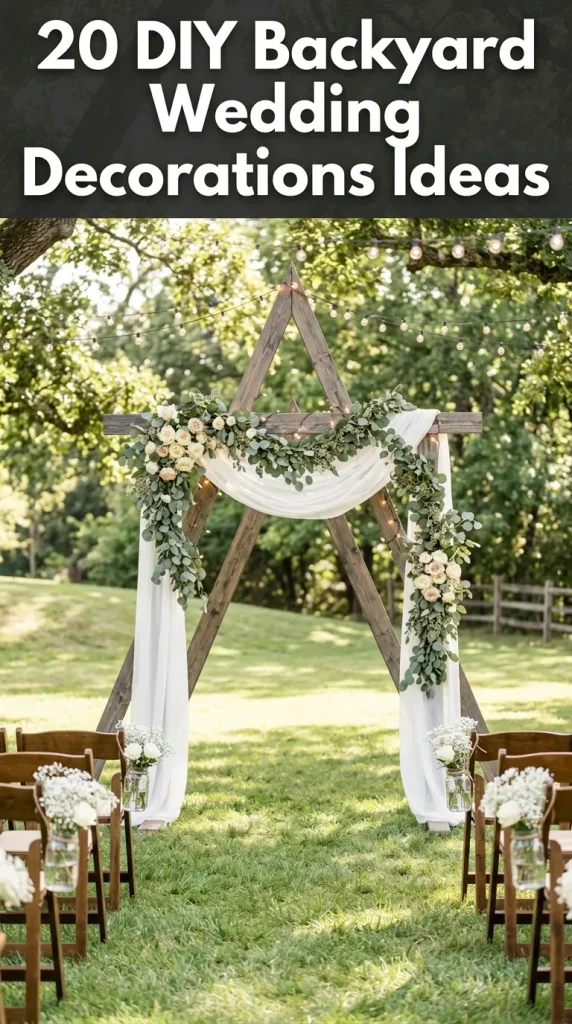
20 DIY Backyard Wedding Decorations ideas
A backyard wedding is one of the most personal, meaningful, and flexible ways to celebrate your love. Unlike traditional venues, a backyard offers a blank canvas—one that allows couples to design every detail with intention, creativity, and heart. This freedom is exactly why DIY backyard wedding decorations have become so popular, especially among couples who want a wedding that feels intimate, authentic, and reflective of their personal style.

DIY decorations are not just about saving money, although budget-friendliness is certainly a major benefit. They are about storytelling. Every handmade sign, every repurposed jar, every carefully arranged string light adds character and warmth that simply can’t be replicated by mass-produced décor. When guests walk into a backyard wedding filled with DIY touches, they immediately feel the love, effort, and thought that went into the celebration.
Backyard weddings also allow couples to work with natural surroundings rather than against them. Trees, fences, patios, lawns, and gardens can all be transformed into beautiful design elements with the right decorations. DIY décor makes it easier to adapt to these spaces creatively—turning ordinary outdoor features into magical focal points. Whether your backyard is large and open or small and cozy, thoughtful decorations can make it feel intentional and wedding-worthy.
Another advantage of DIY backyard wedding decorations is flexibility. You can create items at your own pace, adjust designs as inspiration evolves, and repurpose many elements for both the ceremony and reception. DIY projects also make it easier to involve friends and family, turning the planning process into a meaningful experience rather than a stressful one.
That said, successful DIY décor isn’t about doing everything—it’s about choosing the right projects. The best DIY backyard wedding decorations are practical, visually impactful, and achievable, even for beginners. They enhance the space without overwhelming it and create a cohesive look when viewed together.
In this guide, you’ll find 20 carefully curated DIY backyard wedding decoration ideas designed to help you transform your outdoor space into a beautiful wedding setting. Each idea includes a clear explanation, step-by-step instructions, and a list of materials to help you plan efficiently and confidently. These ideas range from simple, budget-friendly projects to statement décor pieces that become unforgettable focal points.
Whether you’re planning a rustic celebration, a romantic garden wedding, a boho-inspired event, or a minimalist modern gathering, these DIY decoration ideas can be adapted to fit your vision. Let’s begin with the first 10 DIY backyard wedding decoration ideas that couples love for their beauty, simplicity, and Pinterest-worthy charm.
Idea 1: DIY String Light Canopy
Introduction
A DIY string light canopy is one of the most transformative decorations you can add to a backyard wedding. It instantly turns an open outdoor space into a warm, romantic environment and creates a magical atmosphere as soon as the sun begins to set. This decoration is especially impactful because it provides both ambiance and functional lighting.

Definition / Explanation
A string light canopy involves suspending strands of lights overhead, usually anchored to trees, poles, fences, or the house itself. The lights can be arranged in straight lines, zigzags, or a tent-like pattern depending on the layout of your backyard.
Step-by-Step How-To
- Measure the area you want to cover
- Identify sturdy anchor points (trees, poles, fence posts)
- Install hooks or guide wires if needed
- Hang string lights evenly across the space
- Test lighting at dusk and adjust spacing
Materials Used
- Outdoor-rated string lights
- Extension cords
- Hooks or zip ties
- Ladder
Idea 2: DIY Mason Jar Lanterns
Introduction
Mason jar lanterns are a classic DIY backyard wedding decoration that never goes out of style. They’re affordable, versatile, and incredibly charming, making them perfect for rustic, vintage, or romantic weddings.

Definition / Explanation
These lanterns are created by placing candles or LED lights inside mason jars, which can then be hung or placed throughout the backyard to add soft, glowing light.
Step-by-Step How-To
- Clean and dry mason jars
- Wrap wire around jar necks for handles
- Insert LED candles or tea lights
- Hang jars or place them along pathways
- Light just before the ceremony or reception
Materials Used
- Mason jars
- Floral wire or twine
- LED candles or tea lights
Idea 3: DIY Wooden Welcome Sign
Introduction
A DIY wooden welcome sign sets the tone for your backyard wedding from the moment guests arrive. It feels personal, thoughtful, and helps transform a casual backyard into a purposeful wedding space.
Definition / Explanation
This decoration typically features a wooden board or pallet with hand-painted or vinyl lettering welcoming guests to the celebration.

Step-by-Step How-To
- Choose a wood board or pallet
- Sand the surface lightly
- Paint or stain the wood
- Add lettering using paint or vinyl
- Lean or mount near the entrance
Materials Used
- Wooden board or pallet
- Paint or stain
- Paintbrushes or vinyl letters
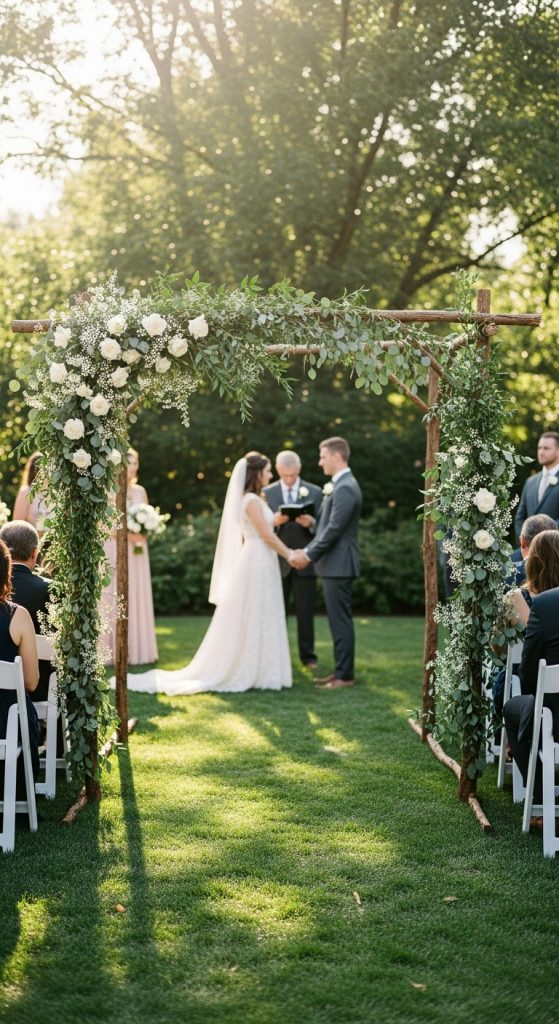
Idea 4: DIY Ceremony Arch with Greenery
Introduction
A ceremony arch is a powerful focal point, and creating one yourself adds deep meaning to your backyard wedding. A greenery arch feels organic, elegant, and perfectly suited for outdoor spaces.
Definition / Explanation
A DIY ceremony arch is usually constructed from wood, metal, or PVC and decorated with greenery, florals, or fabric.
Step-by-Step How-To
- Build or assemble the arch frame
- Secure the structure in the ground
- Attach greenery in clusters
- Add florals or fabric accents
- Check stability before the ceremony
Materials Used
- Arch frame materials
- Greenery or florals
- Floral wire or zip ties
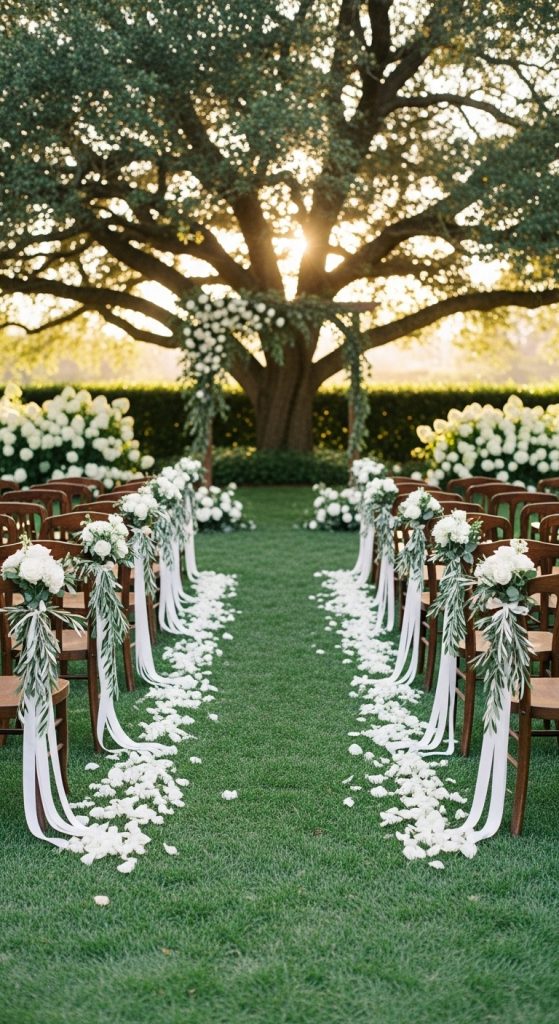
Idea 5: DIY Aisle Decorations Using Chairs or Benches
Introduction
DIY aisle decorations help define the ceremony space and guide guests’ attention toward the altar. In a backyard setting, they create structure without feeling formal or rigid.
Definition / Explanation

These decorations are simple accents attached to chairs or benches lining the aisle, often using florals, greenery, or fabric.
Step-by-Step How-To
- Choose aisle markers (greenery, florals)
- Attach with ribbon or wire
- Keep spacing consistent
- Avoid blocking seating
- Match ceremony color palette
Materials Used
- Greenery or flowers
- Ribbon or twine
- Scissors
Idea 6: DIY Table Centerpieces with Seasonal Flowers
Introduction
DIY table centerpieces allow you to bring your wedding colors and personality into the reception space. Using seasonal flowers keeps costs down and ensures a natural look.
Definition / Explanation
These centerpieces are typically simple arrangements placed in jars, vases, or bottles that match your overall décor style.
Step-by-Step How-To
- Choose flowers in season
- Trim stems evenly
- Arrange loosely for a natural look
- Place one centerpiece per table
- Add candles if desired
Materials Used
- Flowers
- Vases or jars
- Floral shears
Idea 7: DIY Hanging Greenery Installations
Introduction

Hanging greenery installations add vertical interest and help fill open backyard spaces. They’re especially effective over dining areas or dance floors.
Definition / Explanation
These installations use greenery suspended from overhead structures like pergolas, branches, or string light wires.
Step-by-Step How-To
- Identify hanging points
- Prepare greenery bundles
- Secure bundles with wire
- Hang evenly
- Adjust height for clearance
Materials Used
- Greenery
- Floral wire
- Hooks or zip ties
Idea 8: DIY Beverage Station Decor
Introduction
A decorated beverage station keeps guests refreshed while doubling as a design feature. DIY touches make it feel intentional and fun.

Definition / Explanation
This setup usually includes drink dispensers, signage, and decorative accents styled together.
Step-by-Step How-To
- Select a table or bar area
- Add drink dispensers
- Create simple drink signs
- Decorate with greenery or flowers
- Keep supplies organized
Materials Used
- Drink dispensers
- Table or cart
- Signage materials
Idea 9: DIY Photo Display or Memory Table
Introduction
A DIY photo display adds emotional depth to your backyard wedding. It tells your story and invites guests to connect with your journey.

Definition / Explanation
This décor includes framed photos, string displays, or boards showcasing memories.
Step-by-Step How-To
- Select meaningful photos
- Print in consistent sizes
- Arrange on a table or line
- Secure frames or clips
- Add subtle decorative accents
Materials Used
- Photos
- Frames or clips
- String or boards
Idea 10: DIY Pathway and Lawn Decor
Introduction
DIY pathway décor guides guests through your backyard while enhancing safety and style. It’s a subtle but impactful decoration.

Definition / Explanation
This includes lanterns, signs, or markers placed along walkways and open lawn areas.
Step-by-Step How-To
- Identify guest pathways
- Add lighting or markers
- Space evenly for clarity
- Secure items for outdoor use
- Test visibility at night
Materials Used
- Lanterns or lights
- Stakes or holders
Idea 11: DIY Candle Cluster Decorations
Introduction
Candle clusters are one of the easiest ways to instantly create romance in a backyard wedding setting. They add warmth, intimacy, and a soft glow that transforms outdoor spaces—especially as daylight fades. DIY candle clusters are popular because they are affordable, flexible, and incredibly photogenic, making them perfect for both ceremony and reception décor.

Definition / Explanation
A candle cluster is a grouping of candles arranged together on tables, along walkways, or near focal points like the altar or dance floor. These clusters often mix different candle heights and containers to create visual depth.
Step-by-Step How-To
- Choose a mix of pillar candles, votives, or LED candles
- Select containers such as glass holders, lanterns, or jars
- Group candles in odd numbers for balance
- Place clusters on stable, flat surfaces
- Test lighting levels before the event
Materials Used
- Candles or LED candles
- Glass holders or lanterns
- Lighters or batteries
Idea 12: DIY Fabric Chair Sashes and Ties
Introduction
Fabric chair sashes are a simple DIY decoration that adds softness and color to a backyard wedding. They help unify seating and tie the ceremony and reception décor together without requiring major setup or expense.

Definition / Explanation
Chair sashes are strips of fabric tied around chairs or benches. They are often made from chiffon, gauze, linen, or cotton for a relaxed, outdoor-friendly look.
Step-by-Step How-To
- Choose fabric that matches your color palette
- Cut fabric into even-length strips
- Tie loosely around chair backs
- Keep knots consistent for a clean look
- Focus on aisle or head table seating
Materials Used
- Fabric rolls
- Fabric scissors
- Measuring tape
Idea 13: DIY Hanging Paper Lanterns
Introduction
Paper lanterns are a fun and whimsical DIY backyard wedding decoration that works beautifully for both daytime and evening celebrations. They add height, dimension, and playful charm to open outdoor spaces.

Definition / Explanation
Paper lanterns are lightweight decorative orbs hung from trees, pergolas, or string light lines. They come in various sizes and colors to match any wedding theme.
Step-by-Step How-To
- Choose lantern sizes and colors
- Assemble lanterns ahead of time
- Attach fishing line or string
- Hang at varying heights
- Secure safely for outdoor use
Materials Used
- Paper lanterns
- Fishing line or string
- Hooks or branches
Idea 14: DIY Dessert Table Backdrop
Introduction
A DIY dessert table backdrop turns a simple sweets table into a show-stopping focal point. In a backyard wedding, it helps define space and adds visual interest without overwhelming the setting.
Definition / Explanation
This decoration uses fabric, greenery, signage, or wood panels placed behind the dessert table to create a styled background.

Step-by-Step How-To
- Choose backdrop materials
- Set up a support structure
- Attach fabric, greenery, or signs
- Keep colors cohesive
- Style dessert table in front
Materials Used
- Fabric or greenery
- Backdrop stand or frame
- Clips or ties
Idea 15: DIY Handwritten Table Numbers or Names
Introduction
Handwritten table numbers or names add a personal, heartfelt touch to your backyard wedding reception. This small detail can elevate table décor while showcasing your personality.
Definition / Explanation
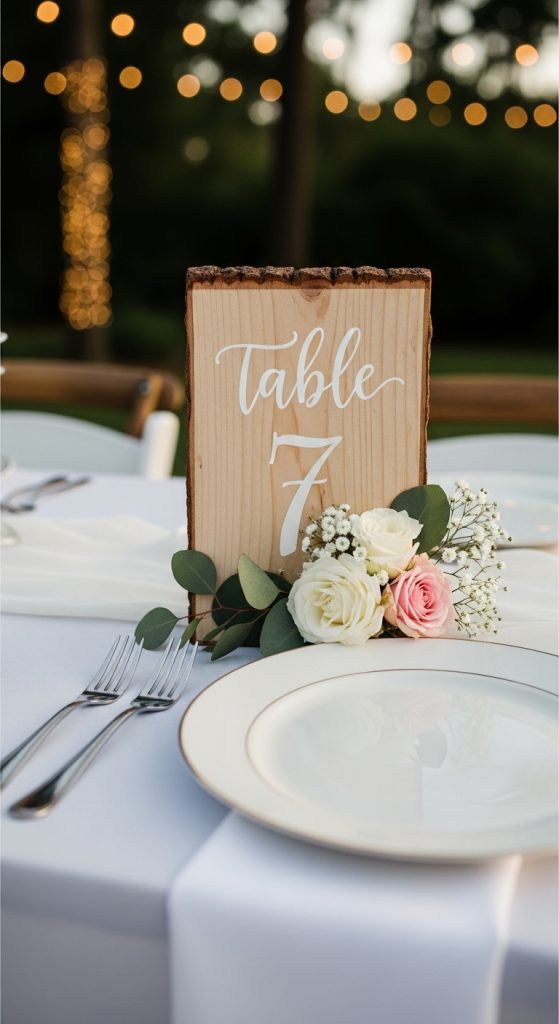
Instead of printed numbers, couples create handwritten cards, wood signs, or acrylic pieces featuring table numbers or meaningful names.
Step-by-Step How-To
- Choose a base material
- Practice lettering beforehand
- Write or paint table identifiers
- Seal if needed for outdoor use
- Display consistently on tables
Materials Used
- Cardstock, wood, or acrylic
- Paint pens or markers
- Easels or holders
Idea 16: DIY Fence and Tree Decorations
Introduction

Backyards often include fences, trees, or natural boundaries that can be transformed into beautiful décor features. Decorating these elements helps the entire space feel intentional and wedding-ready.
Definition / Explanation
This décor involves attaching greenery, florals, signs, or lights to existing backyard structures.
Step-by-Step How-To
- Identify areas to decorate
- Choose lightweight décor
- Attach using zip ties or hooks
- Avoid damaging trees or fences
- Keep spacing balanced
Materials Used
- Greenery or florals
- String lights or signs
- Zip ties or hooks
Idea 17: DIY Lounge Area with Pillows and Rugs
Introduction
Creating a DIY lounge area adds comfort and style to a backyard wedding. It gives guests a place to relax and socialize away from tables and the dance floor.

Definition / Explanation
A lounge area uses rugs, pillows, benches, or low seating arranged in a cozy, inviting layout.
Step-by-Step How-To
- Choose a quiet corner of the yard
- Lay down outdoor rugs
- Add pillows and low seating
- Keep colors cohesive
- Ensure weather-appropriate materials
Materials Used
- Rugs
- Pillows
- Benches or poufs
Idea 18: DIY Confetti or Petal Toss Station
Introduction
A confetti or petal toss station adds a fun, interactive moment to your backyard wedding. It’s a small detail that creates big photo opportunities.
Definition / Explanation
This station provides guests with petals, dried flowers, or eco-friendly confetti to toss during the couple’s exit.

Step-by-Step How-To
- Choose eco-friendly toss materials
- Prepare small containers or cones
- Arrange near ceremony exit
- Add simple signage
- Assign someone to guide guests
Materials Used
- Petals or confetti
- Paper cones or baskets
- Signage
Idea 19: DIY Guest Book Display
Introduction
A DIY guest book display allows guests to leave meaningful messages while doubling as a decorative feature. Backyard weddings benefit from creative guest book alternatives that feel relaxed and personal.
Definition / Explanation
This can include message cards, wooden signs, photo books, or creative keepsakes displayed on a table.
Step-by-Step How-To

- Choose guest book format
- Set up a dedicated table
- Provide pens or markers
- Add simple décor accents
- Display instructions clearly
Materials Used
- Guest book or cards
- Pens or markers
- Table décor
Idea 20: DIY Exit Decor with Sparklers or Ribbons
Introduction
DIY exit décor creates a memorable ending to your backyard wedding celebration. Whether it’s sparklers or ribbon wands, this moment leaves a lasting impression.
Definition / Explanation
Exit décor includes items given to guests to wave or light as the couple exits, creating a celebratory atmosphere.

Step-by-Step How-To
- Choose exit items
- Prepare and distribute safely
- Plan timing with photographer
- Ensure safety guidelines
- Clean up afterward
Materials Used
- Sparklers or ribbon wands
- Lighters or containers