10 Butterfly Bush Landscaping Ideas

Butterfly bush landscaping is a structured approach to designing outdoor spaces that attract pollinators while maintaining a visually organized garden layout. A butterfly bush, known for its dense flower clusters and nectar-rich blooms, serves as a central feature in many Pinterest ideas focused on garden aesthetics and functionality. These plants support butterflies by providing a consistent food source, while also contributing to overall garden design through height, color, and texture.
This article explains how to incorporate butterfly bushes into landscaping using practical, beginner friendly methods. Readers will learn how to plan layouts, select supporting plants, and arrange elements to create a balanced and functional outdoor space. Each idea includes a clear explanation and a step by step process to ensure that the project remains manageable and realistic. The goal is to combine creative ideas with structured planning so the final design meets both aesthetic and environmental needs. These landscaping ideas are suitable for different garden sizes and can be adapted based on available space, materials, and personal design preferences.
Why This Idea Is Trending or Useful
Butterfly bush landscaping is widely featured in Pinterest ideas because it combines decoration with ecological purpose. These plants attract butterflies, which support pollination and contribute to a healthy garden environment. This dual function makes butterfly bushes a practical addition to outdoor spaces. The design also aligns with modern home decor trends that focus on natural elements and organized layouts.
The popularity of this concept is also linked to its DIY appeal. Butterfly bush landscaping does not require advanced gardening skills, making it accessible for beginners. The process can be broken into simple steps, allowing users to follow a clear tutorial and achieve visible results. This makes it an easy project that delivers both visual and functional benefits.
Another reason for its popularity is flexibility. Butterfly bushes can be used in various layouts, including borders, focal points, and mixed gardens. This adaptability allows for creative project planning while maintaining structure. The combination of aesthetic value, environmental support, and beginner friendly execution makes butterfly bush landscaping a trending and practical idea.
Materials and Preparation
Proper preparation is essential for successful butterfly bush landscaping. The first step is selecting a location that receives full sunlight, as butterfly bushes require direct light to produce strong blooms. Soil preparation is equally important. The soil should be well-drained and enriched with compost to support healthy plant growth. Removing weeds and leveling the ground ensures a clean foundation for planting.
Basic materials include butterfly bush plants, complementary flowering plants, mulch, compost, and garden tools such as a shovel and watering equipment. Additional elements like stones or edging materials can be used to define garden structure. Selecting plants that bloom at different times helps maintain a continuous nectar source, which supports butterflies throughout the season.
Planning the layout in advance improves organization and efficiency. Sketching the garden design allows for proper spacing and placement of plants. This step helps avoid overcrowding and ensures that each plant has enough room to grow. A clear plan also supports a smooth step by step process during planting. Proper preparation ensures that the landscaping project remains structured, manageable, and visually balanced.
Idea 1: Central Butterfly Bush Focal Point
How to Create
A central focal point design uses a butterfly bush as the main visual anchor in the garden. This layout is structured around a single plant placed in the center, with surrounding elements arranged to enhance its presence. The butterfly bush provides height and color, making it a natural centerpiece in landscaping. This approach aligns with modern design principles by creating a clear visual hierarchy and organized layout.

The surrounding plants should complement the butterfly bush without overshadowing it. Low-growing flowers and ground cover plants are typically used to frame the central feature. This creates a layered effect that enhances depth while maintaining balance. The design works well in both small and medium gardens because it provides a clear focal structure. This layout is often used in Pinterest inspiration because it creates a clean and visually appealing composition.
To create this design, begin by selecting a central location with adequate sunlight. Prepare the soil and plant the butterfly bush first. Surround it with smaller plants arranged in a circular or symmetrical pattern.
Ensure proper spacing to allow for plant growth. Apply mulch to retain moisture and reduce weeds. Regular watering and pruning help maintain the structure. This step by step method creates a balanced and organized butterfly bush landscaping design.
Idea 2: Butterfly Bush Border Layout
Step-by-Step Guide

A border layout uses butterfly bushes along the edges of a garden to create a defined boundary. This design provides structure and improves organization while enhancing visual flow. The bushes are spaced evenly along fences or pathways, creating a continuous line of color and texture. This layout supports both aesthetic and functional goals by guiding movement and defining space.
The border design is effective for larger gardens but can also be adapted to smaller spaces. It creates a clear separation between different garden areas while maintaining visual consistency. This approach aligns with minimalist style principles by focusing on clean lines and organized placement. The repeated use of butterfly bushes creates rhythm and balance within the landscape.
To implement this layout, start by marking the border area. Prepare the soil and plant butterfly bushes at equal intervals. Add complementary plants between the bushes to create variation.
Maintain consistent spacing and apply mulch to support soil health. Regular trimming keeps the border neat and structured. This method results in a well-defined and visually cohesive butterfly bush landscaping design.
Idea 3: Mixed Flower and Butterfly Bush Garden
How to Make
A mixed garden combines butterfly bushes with a variety of flowering plants to create a diverse and visually rich landscape. This design focuses on blending colors, textures, and plant heights to create depth. The butterfly bush acts as a dominant feature, while surrounding flowers provide contrast and support.

This layout supports biodiversity by attracting different pollinators. It also aligns with creative ideas found in Pinterest inspiration by combining structured planting with natural variation. The mixed design creates a dynamic appearance that changes throughout the growing season.
To create this garden, prepare the soil and plant butterfly bushes as anchor points. Add a mix of flowering plants around them, ensuring variation in height and bloom time.
Maintain proper spacing and water regularly. Mulch helps retain moisture and improve soil quality. This step by step approach creates a balanced and visually engaging garden.
Idea 4: Butterfly Bush Pathway Design

How to Create
This layout integrates butterfly bushes along a walkway to create an immersive garden experience. The bushes are placed on both sides of a path, guiding movement and enhancing visual flow.
Begin by designing the pathway and installing materials such as stones or gravel. Plant butterfly bushes along the edges, ensuring even spacing. Add smaller plants for layering. Maintain the layout through regular pruning and watering.
Idea 5: Raised Butterfly Bush Beds
Execution Process

Raised beds provide structure and improved soil conditions. Butterfly bushes are planted within defined sections, creating a clean and organized layout.
Construct raised beds, fill with nutrient-rich soil, and plant bushes with complementary flowers. Maintain consistent watering and spacing.
Idea 6: Butterfly Bush Corner Garden
How to Create

Corner layouts maximize unused spaces by placing butterfly bushes in strategic positions. This creates depth and improves garden organization.
Prepare the corner area, plant bushes, and layer smaller plants around them. Maintain spacing and soil quality.
Idea 7: Butterfly Bush and Stone Garden
Step-by-Step Guide
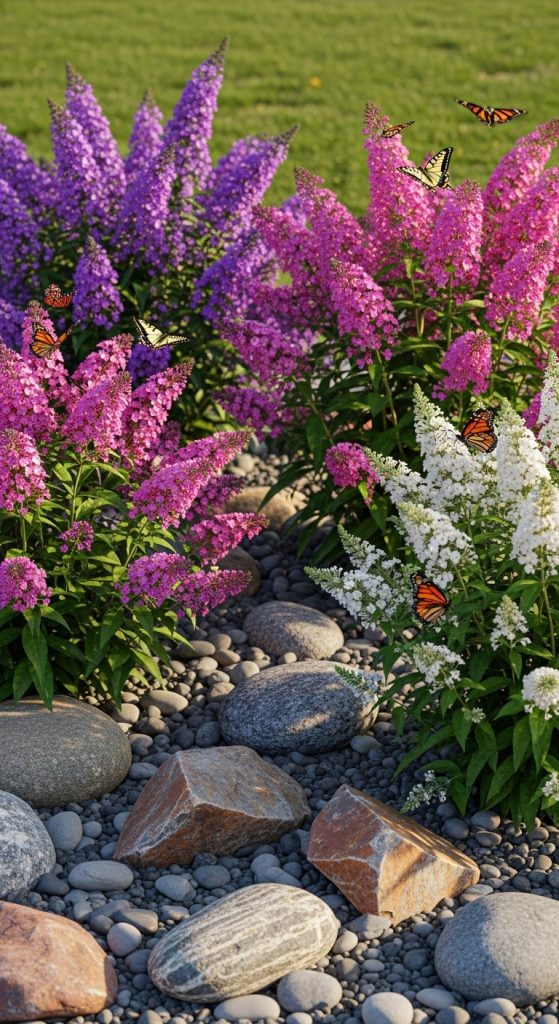
Combining butterfly bushes with stones creates a structured and modern aesthetic. The contrast enhances visual appeal.
Arrange stones first, then plant bushes between them. Add mulch and maintain regularly.
Idea 8: Minimalist Butterfly Bush Layout

How to Make
This design focuses on simplicity, using fewer plants for a clean look. Butterfly bushes act as key elements.
Space bushes evenly and avoid overcrowding. Maintain clean lines and minimal decoration.
Idea 9: Butterfly Bush Patio Garden
Setup Method
This layout integrates butterfly bushes into patio spaces using containers or small beds. It enhances outdoor living areas.

Place containers strategically and ensure proper sunlight and watering.
Idea 10: Butterfly Bush Wildlife Garden
Execution Process
This design supports pollinators by combining butterfly bushes with diverse plants. It creates a functional habitat.

Plant a mix of nectar and host plants. Maintain natural growth patterns.
Common Beginner Mistakes and How to Avoid Them
A common mistake is planting butterfly bushes in shaded areas, which limits blooming. Always select a location with full sunlight. Overcrowding plants reduces airflow and affects growth, so proper spacing is essential. Using poor soil without compost can weaken plants, so soil preparation is necessary. Another issue is inconsistent watering, which can damage roots. Establish a regular watering schedule. Lack of planning often leads to disorganized layouts. Creating a simple plan before starting improves results. Avoiding these mistakes ensures a healthy and visually balanced butterfly bush landscape.
Practical Tips for Better Results
Plant butterfly bushes in clusters to attract more butterflies efficiently. Use mulch to retain moisture and reduce maintenance. Choose plants with staggered blooming periods to maintain continuous color. Regular pruning encourages healthy growth and prevents overcrowding. Monitor plant health and remove damaged parts to maintain a clean garden. These steps improve both functionality and visual appeal.
Styling, Presentation, or Organization Ideas
Use borders or pathways to define garden structure. Arrange plants based on height for better visibility. Maintain color coordination for a cohesive aesthetic. Add simple decorative elements to enhance the layout without overcrowding. Organized designs improve both appearance and maintenance efficiency.
Budget or Time Planning
Start with basic materials and expand gradually. Use seeds or small plants to reduce costs. Divide the project into manageable steps to save time. Focus on essential elements first, such as soil preparation and plant placement. This approach ensures efficient project completion.
Creative Expansion and Advanced Inspiration
Expand the garden by adding vertical elements or combining layouts. Introduce seasonal plants for year-round interest. Experiment with different arrangements to improve design. Gradual expansion allows for better control and long-term improvement of the landscape.