10 Butterfly Bush Landscaping Ideas

Butterfly bush landscaping ideas offer a practical and visually appealing way to transform outdoor spaces using flowering shrubs that naturally attract pollinators. These plants are known for their long, cone-shaped blooms and their ability to support butterflies, bees, and other beneficial insects. On Pinterest, this topic continues to grow because it combines aesthetic garden design with ecological function. Readers exploring these ideas will learn how to design layouts, prepare materials, and create structured planting arrangements that fit different garden sizes and styles.
This article explains step-by-step methods to integrate butterfly bushes into various landscaping concepts. Each idea focuses on clear execution, from planning and soil preparation to placement and maintenance. The content is designed for beginners as well as those looking to refine existing garden layouts. By following these structured creative ideas, readers can develop a cohesive outdoor design that balances beauty, function, and accessibility. These Pinterest ideas emphasize DIY approaches, making them achievable without specialized tools while still delivering a modern design and organized outdoor environment.
Why This Idea Is Trending or Useful
Butterfly bush landscaping is gaining popularity because it combines visual impact with environmental value. These plants produce dense clusters of flowers that create strong focal points in gardens, making them ideal for modern design and minimalist style layouts. At the same time, they support pollinators, which aligns with the growing interest in sustainable home decor and outdoor planning. This dual purpose makes the idea both decorative and functional, which is a key factor in Pinterest inspiration trends.
Another reason for its popularity is accessibility. Butterfly bushes are relatively low maintenance and adaptable to different soil conditions, making them suitable for beginner friendly gardening projects. Many of the designs can be executed as easy DIY projects with basic materials such as soil, mulch, and edging stones. The flexibility in size, color, and arrangement allows homeowners to create personalized layouts without complex landscaping experience. These features make butterfly bush landscaping a practical choice for those seeking budget ideas while still achieving a polished and aesthetic outdoor space.
Materials and Preparation
Before starting a butterfly bush landscaping project, it is important to gather the right materials and plan the layout carefully. Essential materials include butterfly bush plants, nutrient-rich soil, compost, mulch, and basic gardening tools such as a shovel, rake, and watering system. Optional materials like decorative stones, wooden borders, or gravel can enhance organization and improve the visual structure of the space. Selecting a sunny location is critical, as butterfly bushes require full sunlight to grow and bloom effectively.
Preparation begins with clearing the planting area of weeds and debris to ensure healthy root development. The soil should be loosened and enriched with compost to improve drainage and nutrient availability. Planning the spacing between plants is also important, as butterfly bushes can grow large and require room for proper air circulation. Marking the layout before planting helps maintain symmetry and ensures a balanced design. These preparation steps create a strong foundation for the project and make the step by step process more efficient, resulting in a well-organized and long-lasting landscaping setup.
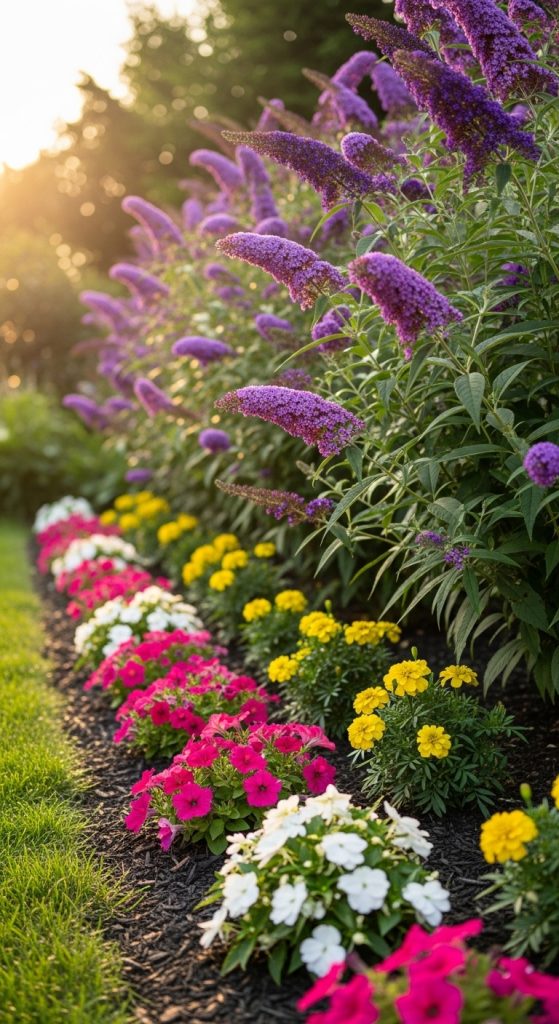
Idea 1: Layered Butterfly Bush Border
How to Create
A layered butterfly bush border uses height variation to create depth along garden edges. This design places taller butterfly bushes at the back and shorter plants in front, forming a structured visual flow. The concept works well along fences, pathways, or property boundaries where a natural yet organized look is desired. By combining butterfly bushes with complementary plants such as low-growing flowers or grasses, the border becomes more dynamic and visually balanced. This approach enhances the aesthetic while maintaining a clean and defined layout, which aligns with modern design principles commonly seen in Pinterest ideas.
To create this border, begin by marking a straight or slightly curved line along the edge of the garden. Plant butterfly bushes at consistent intervals in the back row, ensuring enough space for mature growth. In the front row, add smaller plants that contrast in color and texture. Use mulch to define the area and retain soil moisture. Regular watering and pruning help maintain the layered structure. This step by step method ensures a beginner friendly process that results in a cohesive and attractive border design suitable for various outdoor spaces.
Idea 2: Butterfly Bush Centerpiece Garden
How to Create
A centerpiece garden focuses on placing butterfly bushes as the main attraction in a designated area. This idea works well in circular or square layouts where the central plant becomes the focal point. Surrounding elements are arranged to highlight the bush rather than compete with it. The design creates a balanced and symmetrical look, making it suitable for front yards or open garden spaces. This setup emphasizes simplicity and structure, aligning with minimalist style landscaping while still delivering strong visual impact.
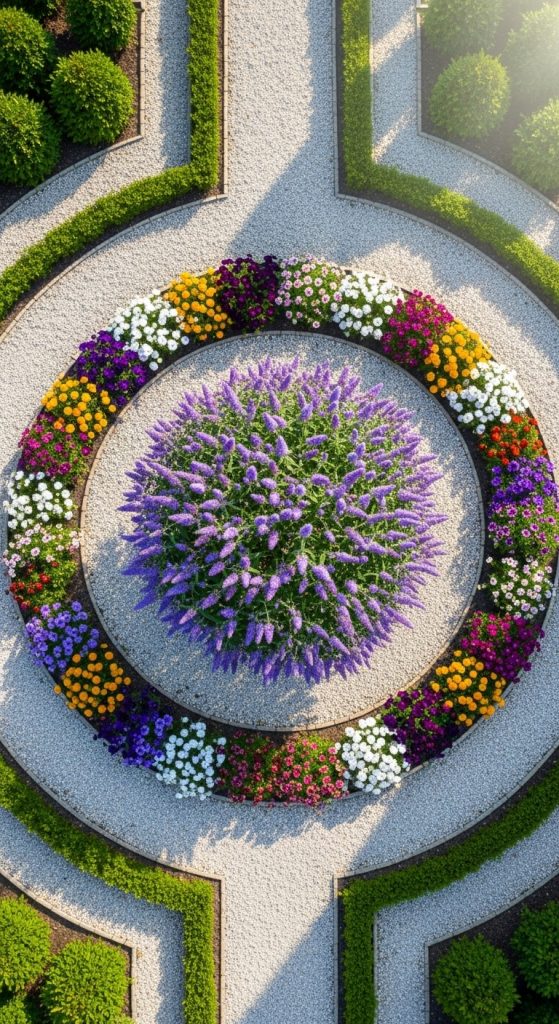
To execute this idea, select a central location with full sunlight and prepare the soil thoroughly. Plant one or more butterfly bushes in the center, depending on the size of the area. Surround the centerpiece with decorative elements such as stones, gravel, or low-growing plants. Maintain equal spacing to preserve symmetry. Water the plants regularly and apply mulch to retain moisture. This easy project provides a clear structure and is ideal for beginners looking to create a defined and organized garden layout using creative ideas.
Idea 3: Butterfly Bush Pathway Accent
How to Create
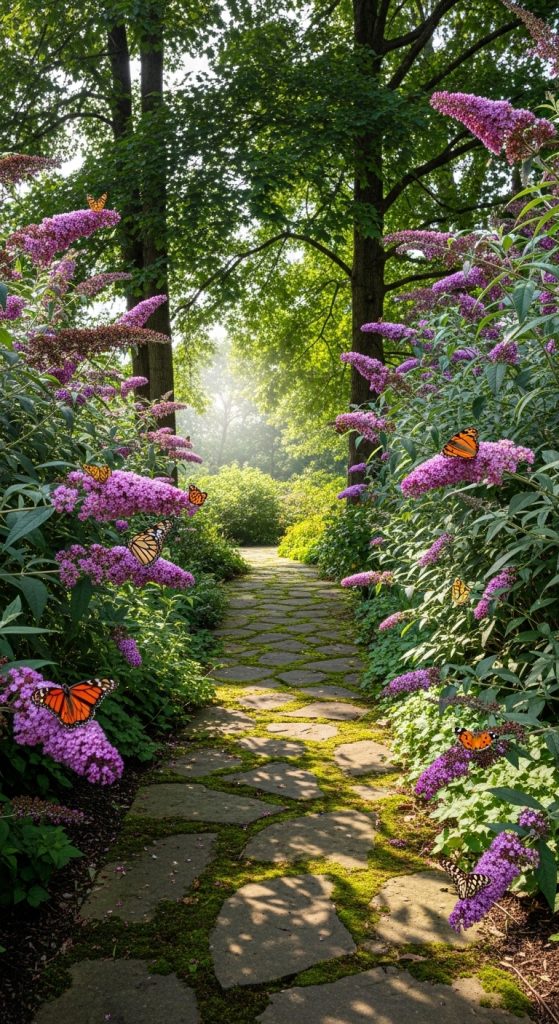
Using butterfly bushes as pathway accents enhances both function and aesthetics. This design involves planting bushes along walkways to create a guided visual experience. The plants frame the path, making it more inviting and structured. This approach is commonly used in Pinterest inspiration because it combines organization with natural beauty. The repetition of plants along the path creates rhythm and consistency, which improves the overall garden design
To implement this idea, first define the pathway using materials such as gravel, stepping stones, or bricks. Plant butterfly bushes at equal intervals along both sides of the path. Ensure proper spacing to allow for growth without overcrowding. Add mulch around the plants to maintain soil health and reduce weeds. Regular pruning keeps the bushes from obstructing the walkway. This step by step method results in a functional and visually appealing pathway that integrates seamlessly into the overall landscape.
Idea 4: Mixed Pollinator Garden
How to Create
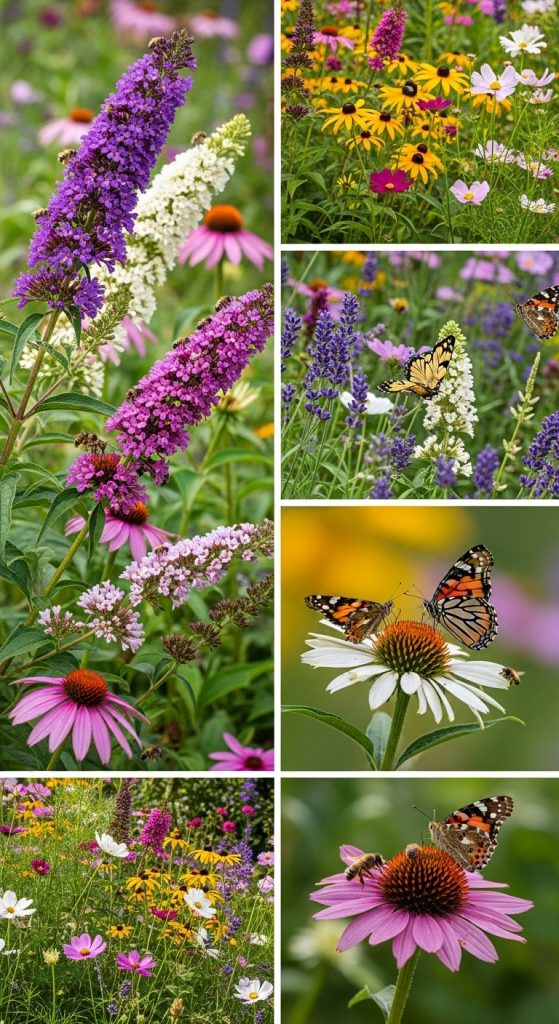
A mixed pollinator garden combines butterfly bushes with other flowering plants to create a diverse and vibrant ecosystem. This idea focuses on supporting various pollinators while enhancing visual variety. The combination of colors, shapes, and bloom times ensures continuous interest throughout the growing season. This approach aligns with sustainable landscaping trends and provides both ecological and decorative benefits.
To create this garden, select a variety of pollinator-friendly plants and arrange them around butterfly bushes. Prepare the soil with compost and ensure proper drainage. Plant taller bushes toward the back and shorter flowers in the front to maintain visibility. Water regularly and remove dead blooms to encourage new growth. This DIY tutorial approach makes it easy to create a thriving and balanced garden that supports biodiversity while maintaining a cohesive design.
Idea 5: Butterfly Bush Corner Feature
How to Create
A corner feature design uses butterfly bushes to highlight unused or empty corners of a yard. This approach transforms overlooked spaces into focal points, improving overall organization and visual balance. The bushes add height and color, making the corner more engaging and integrated into the landscape. This idea is practical for small spaces and aligns with budget ideas for maximizing existing areas.
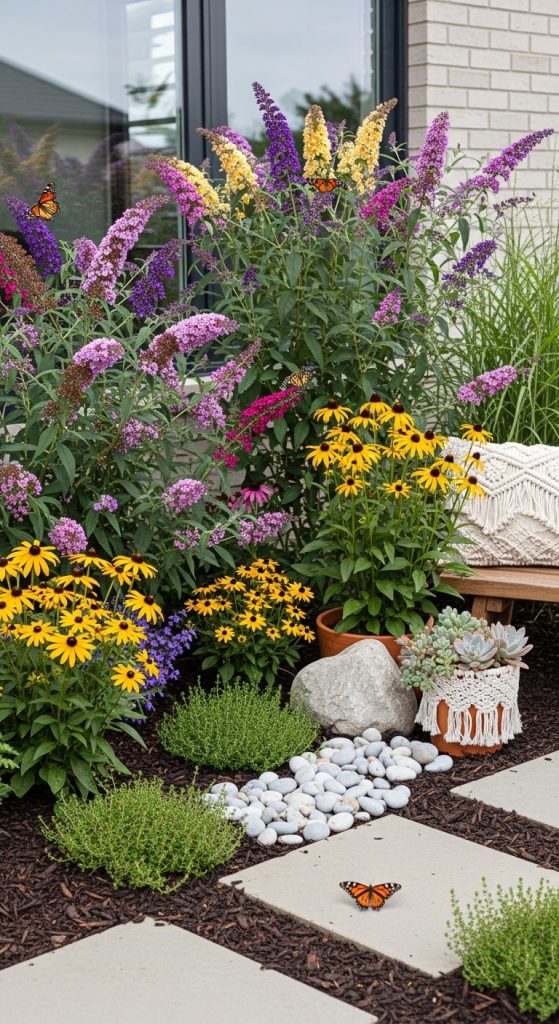
To execute this concept, clear the corner area and prepare the soil. Plant one or two butterfly bushes as the main feature and add smaller plants or decorative elements around them. Use mulch or stones to define the space and prevent weeds. Ensure adequate sunlight and water regularly. This simple setup method creates a polished look while utilizing space efficiently.
Idea 6: Butterfly Bush Hedge Line
How to Create
A hedge line using butterfly bushes creates a natural barrier that combines privacy with aesthetic appeal. Unlike traditional hedges, this option provides seasonal blooms and attracts pollinators. The consistent planting pattern creates a clean and organized appearance, making it suitable for property boundaries or garden divisions.
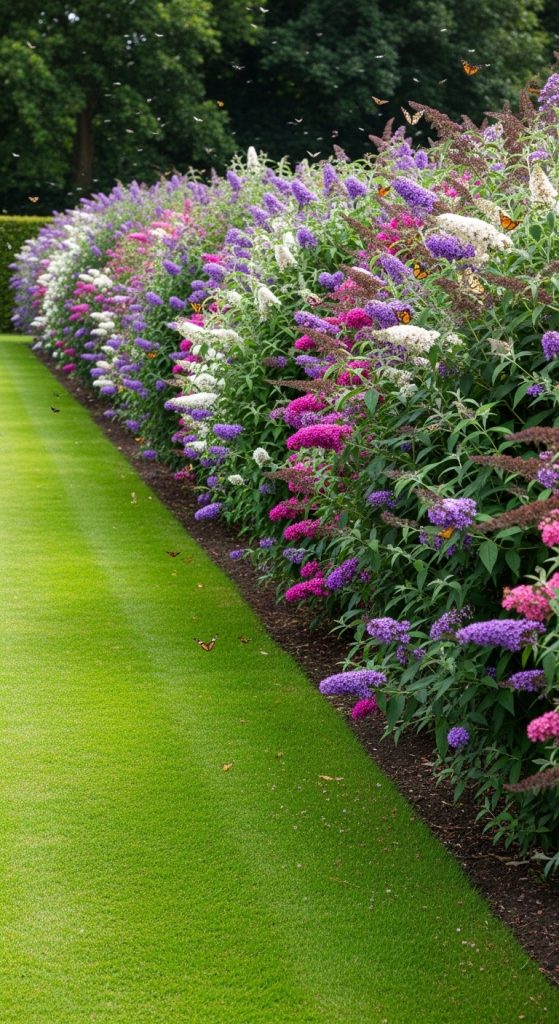
To build this hedge, plant butterfly bushes in a straight line with equal spacing. Prepare the soil and ensure proper drainage. Regular pruning helps maintain shape and height, creating a uniform look. Adding mulch and consistent watering supports healthy growth. This easy project offers both functionality and decorative value.
Idea 7: Raised Bed Butterfly Garden
How to Create
Raised beds provide a controlled environment for butterfly bush landscaping. This design improves soil quality and drainage while creating a defined structure. It is ideal for areas with poor soil or limited space. The elevated design also enhances accessibility and organization.
To create a raised bed, build a frame using wood or stone and fill it with enriched soil. Plant butterfly bushes along with complementary plants, ensuring proper spacing. Water regularly and maintain soil health with compost. This beginner friendly method results in a clean and structured garden layout.
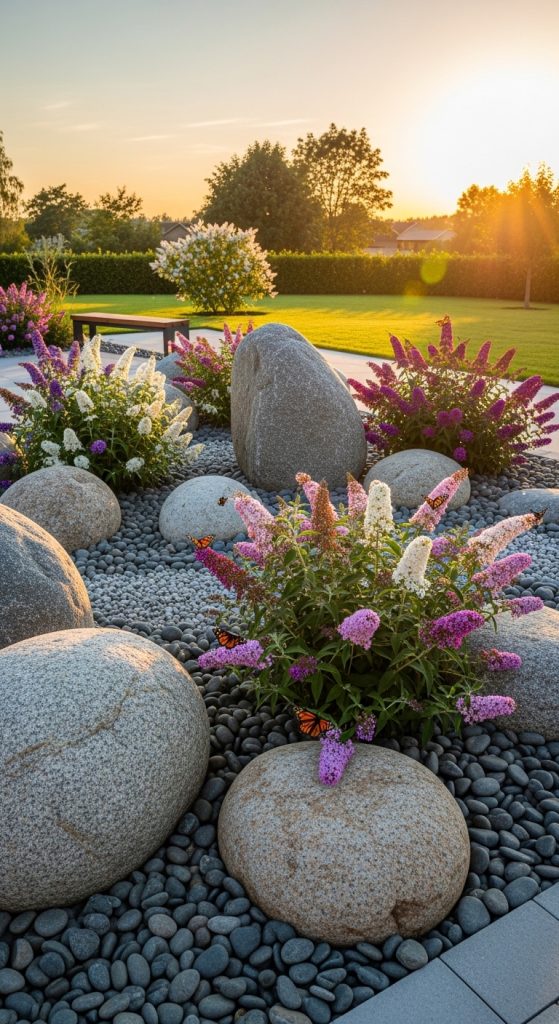
Idea 8: Butterfly Bush Rock Garden
How to Create
A rock garden with butterfly bushes combines natural textures with vibrant blooms. This design uses stones and gravel to create contrast and reduce maintenance. The combination of hard and soft elements enhances visual interest and aligns with modern design trends.

To implement this idea, arrange rocks in a planned layout and fill gaps with soil. Plant butterfly bushes strategically among the stones. Add gravel to reduce weeds and improve drainage. Regular watering and occasional pruning keep the garden healthy. This creative project offers a unique and low-maintenance landscaping option.
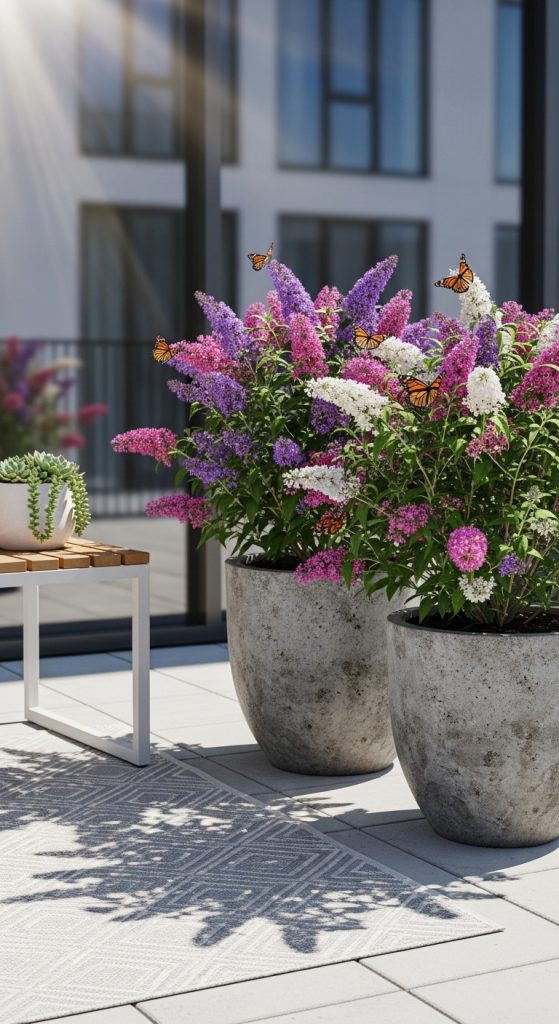
Idea 9: Butterfly Bush Container Display
How to Create
Container displays allow flexibility in butterfly bush landscaping. This idea is suitable for patios, balconies, or small yards where planting in the ground is not possible. Containers provide mobility and control over soil conditions, making them ideal for beginner friendly projects.
To create this display, select large containers with drainage holes and fill them with quality soil. Plant butterfly bushes and place containers in sunny locations. Water regularly and use mulch to retain moisture. This setup method allows easy rearrangement and customization.
Idea 10: Butterfly Bush Garden Arch
How to Create
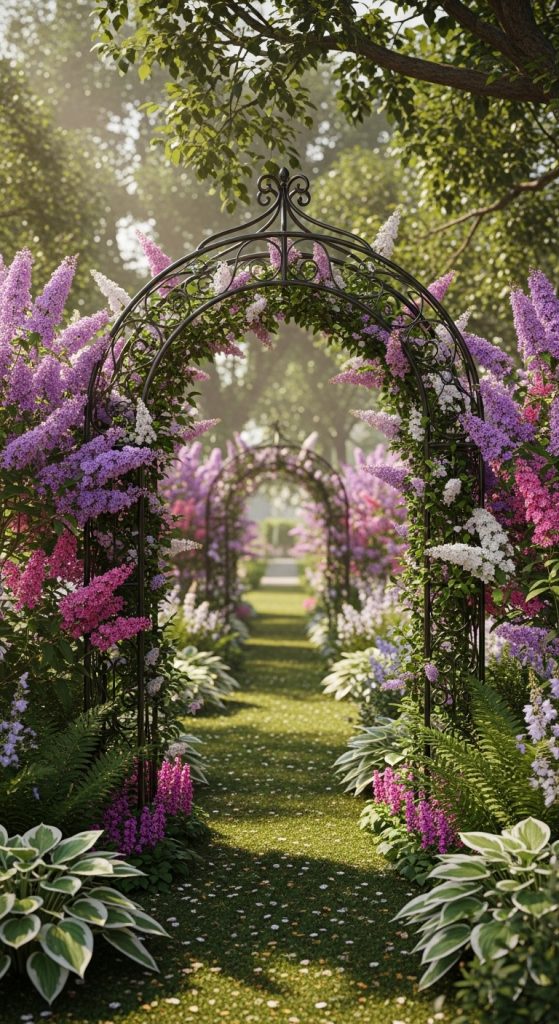
A garden arch with butterfly bushes creates a visually striking entrance or focal point. The design combines vertical structure with flowering plants, enhancing the overall aesthetic. This idea works well for pathways or garden entrances.
To build this feature, install an arch structure and plant butterfly bushes at its base. Train the plants to grow around the structure using supports if necessary. Maintain regular watering and pruning to shape the growth. This step by step approach results in a unique and elegant garden feature.
Common Beginner Mistakes and How to Avoid Them
One common mistake is planting butterfly bushes too close together, which leads to overcrowding and poor air circulation. This can result in weak growth and reduced blooming. Another issue is selecting a location with insufficient sunlight, which limits flower production. Beginners may also overlook soil preparation, leading to poor drainage and root problems. Overwatering or neglecting regular pruning can further affect plant health and structure.
To avoid these issues, ensure proper spacing and choose a sunny location. Prepare the soil with compost and maintain a consistent watering schedule. Prune regularly to encourage healthy growth and remove dead branches. Following these steps improves the success of the project and ensures a well-maintained garden.
Practical Tips for Better Results
For better results, focus on consistent maintenance and thoughtful planning. Use mulch to retain moisture and reduce weed growth. Monitor plant health and adjust watering based on weather conditions. Incorporating a variety of complementary plants enhances visual interest and supports pollinators. Regular pruning helps maintain shape and encourages new blooms.
Planning the layout in advance ensures balanced spacing and a cohesive design. Using simple materials and tools makes the project more accessible. These tips help achieve a professional-looking garden while keeping the process manageable and efficient.
Styling, Presentation, or Organization Ideas
Styling plays a key role in enhancing the visual appeal of butterfly bush landscaping. Using defined borders, pathways, or raised beds improves organization and structure. Combining different textures such as gravel, wood, and plants creates a balanced aesthetic. Consistent spacing and alignment contribute to a clean and modern design.
Presentation can be improved by grouping plants in patterns or layers. Adding subtle decorative elements enhances the overall look without overwhelming the space. These strategies create a polished and cohesive outdoor environment.
Budget or Time Planning
Butterfly bush landscaping can be completed efficiently with proper planning. Start with a clear layout and prioritize essential materials. Using locally available resources reduces costs and simplifies the process. Dividing the project into smaller steps makes it more manageable and less time-consuming.
Allocating time for preparation, planting, and maintenance ensures steady progress. Choosing low-maintenance designs reduces long-term effort. This approach helps complete the project within budget while achieving desired results.
Creative Expansion and Advanced Inspiration
Once the basic design is established, there are many ways to expand the project. Adding lighting elements enhances visibility and creates a different atmosphere at night. Incorporating water features or seating areas increases functionality. Experimenting with different plant combinations adds variety and seasonal interest.
Advanced ideas include creating themed gardens or integrating butterfly bushes into larger landscaping plans. These creative ideas allow for continuous improvement and personalization. By building on the initial setup, the garden can evolve into a more complex and visually engaging space.