10 outdated bathroom makeover
Introduction
An outdated bathroom can affect both functionality and the overall aesthetic of a home. Old fixtures, worn surfaces, and inefficient layouts often make the space feel less practical and visually unappealing. Modern Pinterest ideas focus on transforming these spaces into clean, organized, and efficient environments using structured DIY approaches. This article explains how to upgrade an outdated bathroom through practical and beginner friendly methods that improve usability and design without unnecessary complexity. Readers will learn how to identify outdated elements, select appropriate materials, and apply step by step solutions for a complete makeover. Each idea in this guide focuses on a specific improvement, such as updating fixtures, improving lighting, or enhancing storage. The goal is to provide clear instructions that support both function and modern design. These creative ideas are suitable for various budgets and bathroom sizes, making them accessible for most households. With proper planning, any outdated bathroom can be transformed into a space that reflects current home decor standards while remaining practical and easy to maintain.
Why This Idea Is Trending or Useful
Bathroom makeovers are widely featured in Pinterest inspiration because they provide visible and practical improvements within a relatively small space. Updating an outdated bathroom increases efficiency, improves hygiene, and enhances the overall organization of the home. Modern design trends emphasize simplicity, clean lines, and functional layouts, making bathroom upgrades highly relevant. The DIY appeal of these projects allows homeowners to implement changes gradually without requiring full renovations. This makes the process accessible and beginner friendly. Many trending ideas focus on replacing outdated elements such as old tiles, dim lighting, and inefficient storage with modern alternatives that are easier to maintain. These upgrades also contribute to better space utilization, especially in smaller bathrooms. The ability to achieve noticeable transformation using budget ideas further increases the popularity of these projects. By following structured planning and step by step methods, users can achieve a modern aesthetic that aligns with current home decor trends while maintaining practicality and organization.
Materials and Preparation
Preparing for a bathroom makeover requires careful planning and proper selection of materials. Start by assessing the current condition of the bathroom, including fixtures, walls, flooring, and lighting. Identify areas that need improvement, such as outdated tiles or insufficient storage. Common materials include paint, waterproof coatings, tiles, grout, sealants, and storage units. Tools such as brushes, rollers, measuring tools, and installation kits are essential for completing DIY tasks. Preparation also involves cleaning the space thoroughly to remove dirt, mold, or residue. Ensure that all surfaces are dry before starting any updates. Planning should include creating a layout that improves organization and accessibility. Consider ventilation and lighting adjustments to enhance comfort. It is important to set a clear sequence of tasks to avoid disruption during the process. This step by step preparation ensures that each improvement is applied efficiently. Proper planning reduces errors, saves time, and ensures that the final result meets both functional and aesthetic goals.
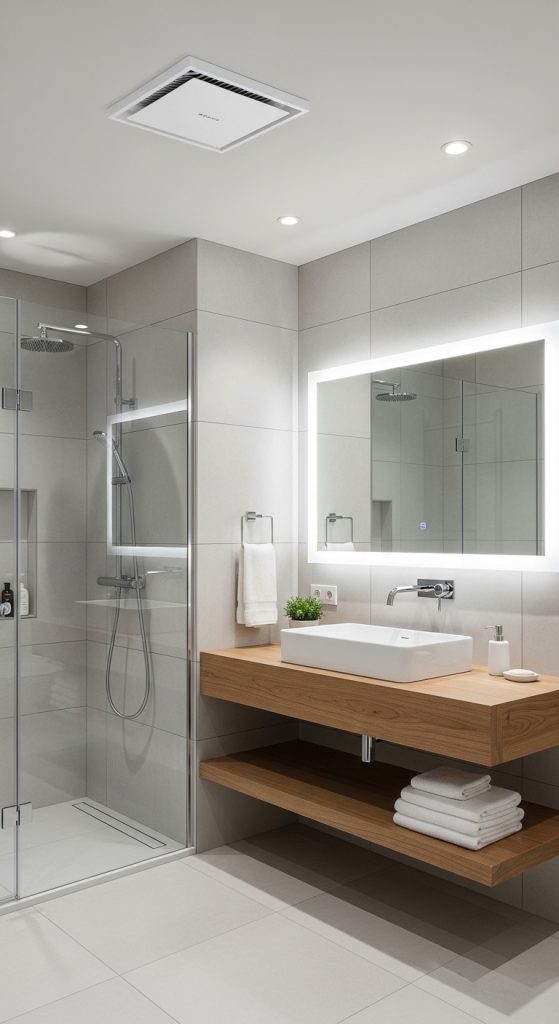
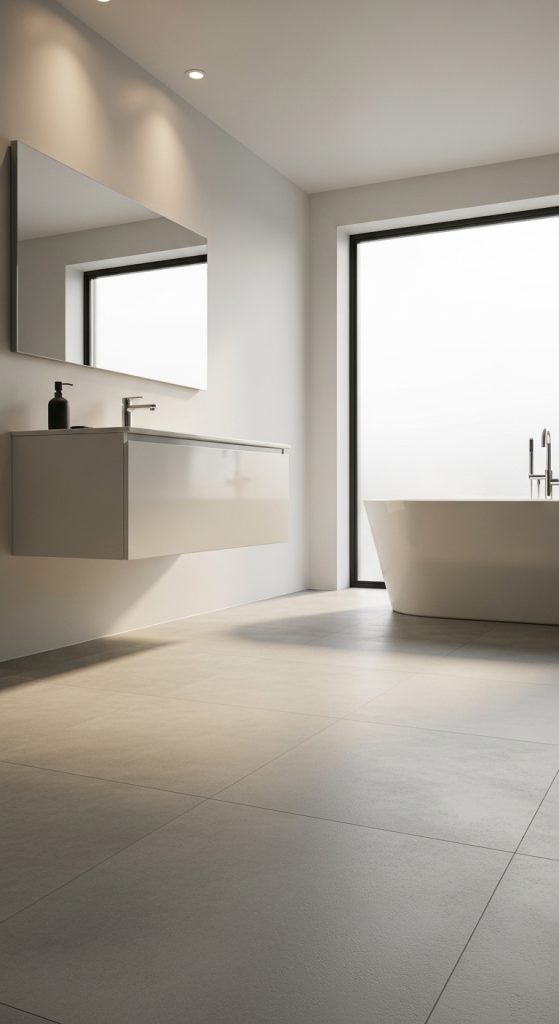
Idea 1: Replace Old Fixtures with Modern Designs
How to Create
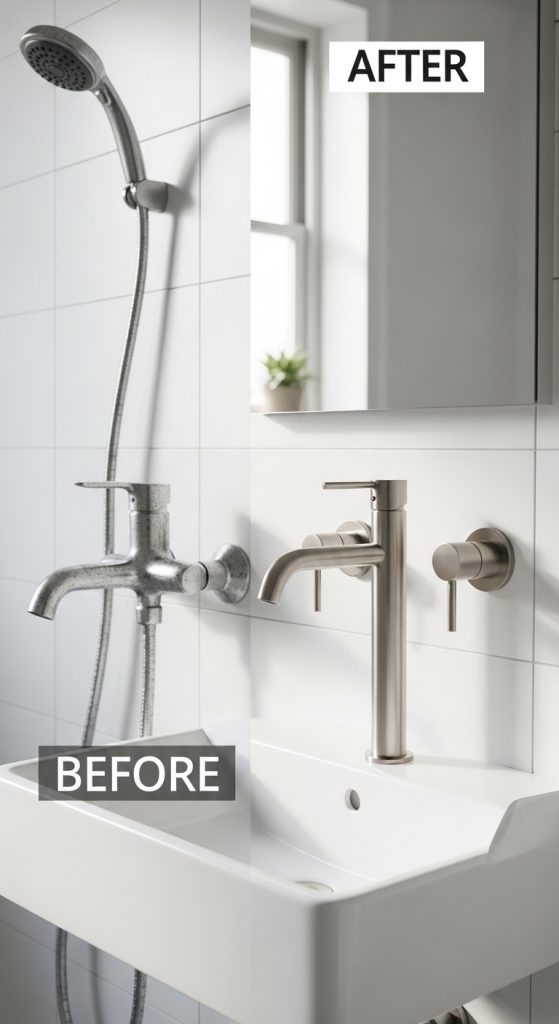
Outdated fixtures such as faucets, showerheads, and handles often reduce both efficiency and visual appeal. Replacing these elements with modern designs improves water flow, enhances usability, and contributes to a cleaner aesthetic. Modern fixtures typically feature simple shapes, smooth finishes, and functional designs that align with minimalist style principles. This change creates a noticeable difference without requiring major renovation. Updating fixtures also supports better hygiene by eliminating worn or corroded components. This idea is a practical starting point for any bathroom makeover because it directly improves daily use. It also aligns with trending ideas that focus on combining functionality with modern design. Choosing consistent finishes for all fixtures helps create a cohesive look throughout the bathroom.
To implement this upgrade, start by removing existing fixtures carefully using basic tools. Ensure that water supply lines are turned off before beginning the process. Clean the installation areas thoroughly to remove any residue. Install new fixtures according to their fitting requirements, ensuring all connections are secure. Use sealants where necessary to prevent leaks. Test each fixture to confirm proper operation. This step by step method ensures a smooth transition from old to new components. Proper installation improves durability and reduces maintenance issues. This easy project provides immediate improvement in both performance and appearance.
Idea 2: Upgrade Lighting for Better Visibility
How to Create
Lighting plays a critical role in bathroom functionality and overall atmosphere. Outdated bathrooms often have dim or uneven lighting that affects usability. Upgrading lighting improves visibility and enhances the aesthetic of the space. Modern lighting solutions focus on even distribution and natural brightness. This approach supports daily tasks such as grooming and cleaning while creating a more comfortable environment. Proper lighting also highlights other design elements, making the entire bathroom appear more organized and visually balanced. This idea aligns with modern home decor trends that prioritize clarity and functionality.
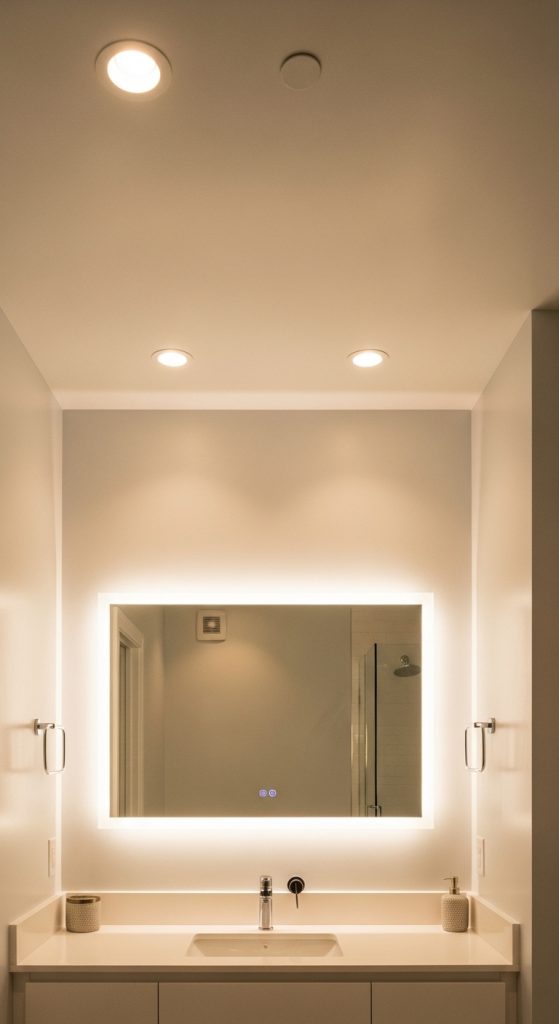
To execute this upgrade, replace old light fixtures with brighter, energy-efficient options. Install overhead lighting to provide general illumination across the room. Add task lighting near mirrors to improve visibility for detailed activities. Ensure that all electrical connections are secure and properly installed. Position lights to minimize shadows and create even brightness. This step by step approach ensures effective lighting coverage. Regular maintenance, such as cleaning fixtures and replacing bulbs, helps maintain performance. Improved lighting transforms the bathroom into a functional and visually appealing space.
Idea 3: Refresh Walls with Waterproof Paint
How to Create
Outdated wall finishes can make a bathroom appear dull and worn. Applying waterproof paint provides a clean and updated look while protecting surfaces from moisture. This method is both practical and beginner friendly, making it suitable for DIY projects. Modern color choices often include neutral tones that create a bright and open atmosphere. Waterproof paint also improves durability, reducing the risk of mold or damage. This idea supports both aesthetic improvement and long-term maintenance.
To apply this update, start by cleaning and sanding the walls to create a smooth surface. Remove any old paint or residue. Apply a primer if necessary to improve paint adhesion. Use waterproof paint designed for bathroom environments and apply it evenly using rollers or brushes. Allow sufficient drying time between coats. This step by step process ensures a consistent and durable finish. Proper preparation and application result in a professional appearance and long-lasting protection.
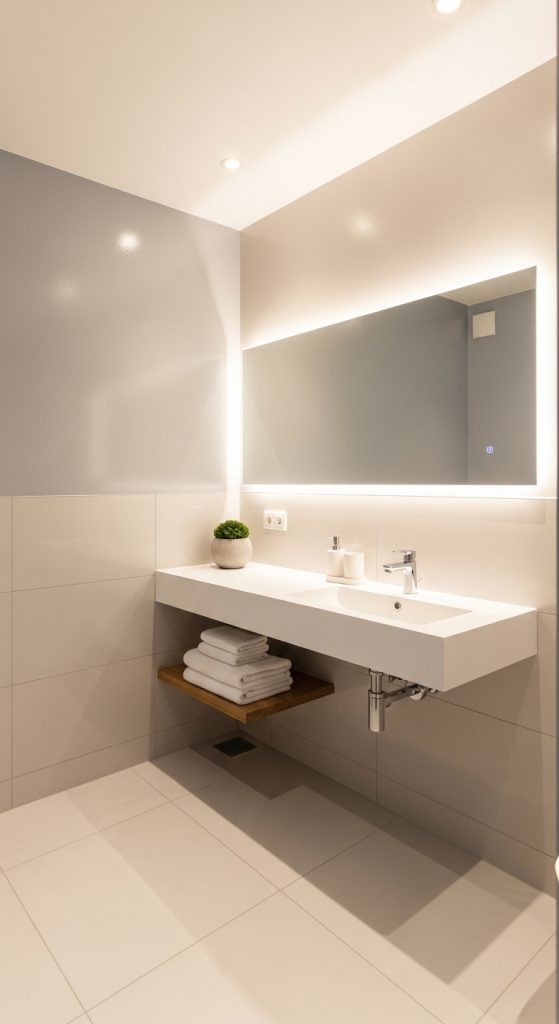
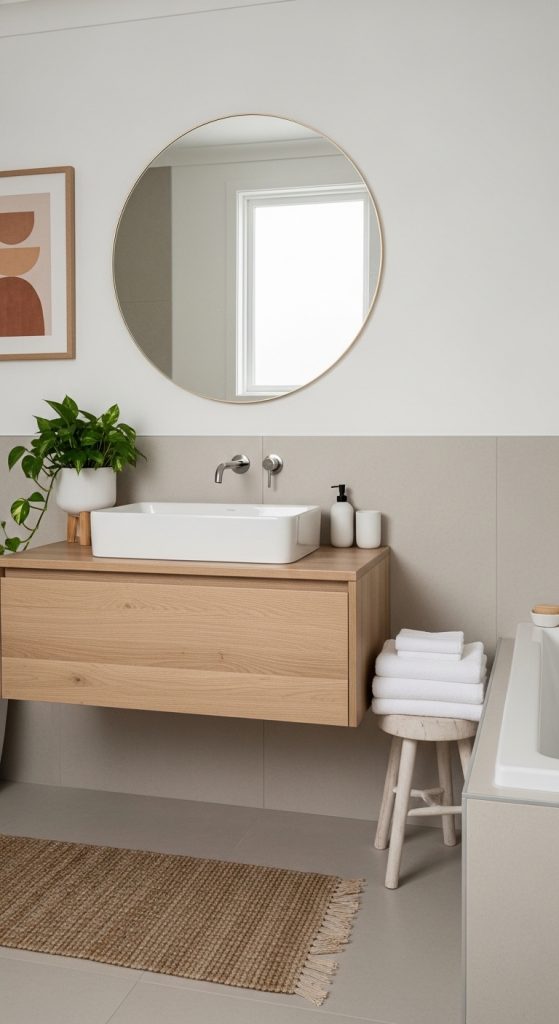
Idea 4: Install Modern Storage Solutions
How to Create
Outdated bathrooms often lack efficient storage, leading to clutter and disorganization. Installing modern storage solutions improves accessibility and maintains a clean environment. Options include wall-mounted shelves, cabinets, and organizers that maximize vertical space. This approach aligns with minimalist style principles and enhances functionality. Organized storage helps keep essential items within reach while reducing visual clutter. This idea is particularly useful for small bathrooms where space optimization is essential.
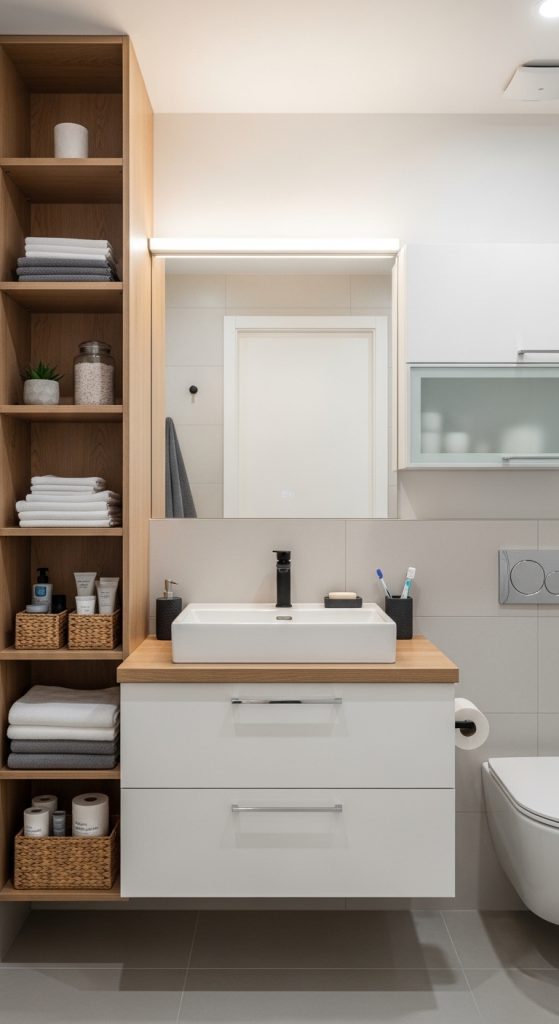
To implement this solution, identify available wall space for installing storage units. Choose designs that match the overall aesthetic of the bathroom. Secure shelves or cabinets firmly to ensure stability. Arrange items in an organized manner, grouping similar materials together. Use containers or dividers to maintain order. This step by step method ensures efficient use of space and improves organization. Regularly review and adjust storage arrangements to maintain functionality. This upgrade enhances both practicality and visual appeal.
Idea 5: Replace Outdated Tiles
How to Create
Old tiles can significantly impact the appearance of a bathroom. Replacing them with modern designs improves both aesthetics and durability. Contemporary tile options focus on clean lines, neutral colors, and easy maintenance. This change creates a fresh and updated look that aligns with current trends. It also improves hygiene by replacing worn or damaged surfaces. Tile replacement is a key step in transforming an outdated bathroom into a modern space.
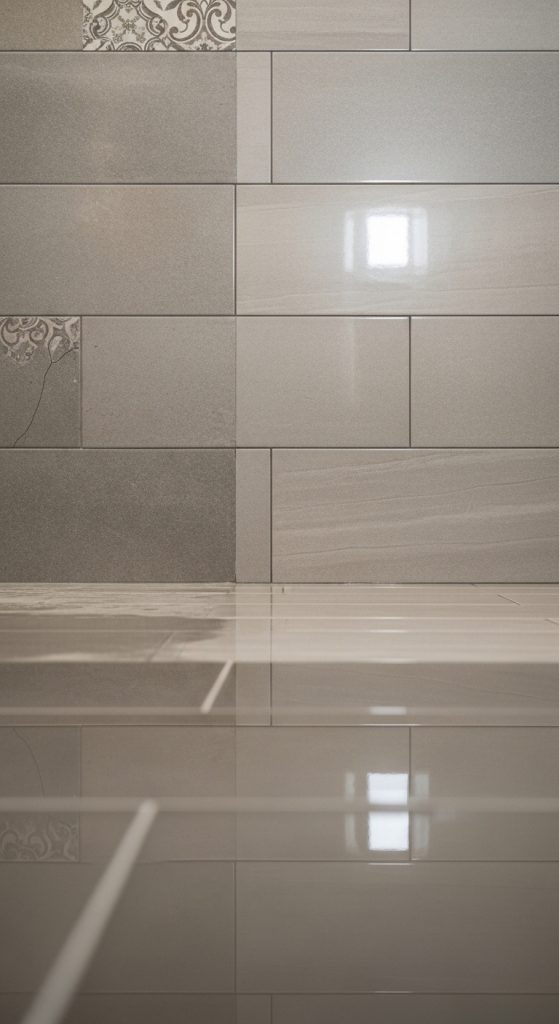
To complete this process, remove existing tiles carefully and prepare the surface by cleaning and leveling it. Apply adhesive evenly before placing new tiles. Ensure consistent spacing using tile spacers. Allow the adhesive to set before applying grout. Seal the grout to protect against moisture. This step by step approach ensures a professional finish. Proper installation enhances durability and simplifies maintenance. This upgrade provides a long-lasting improvement in both function and design.
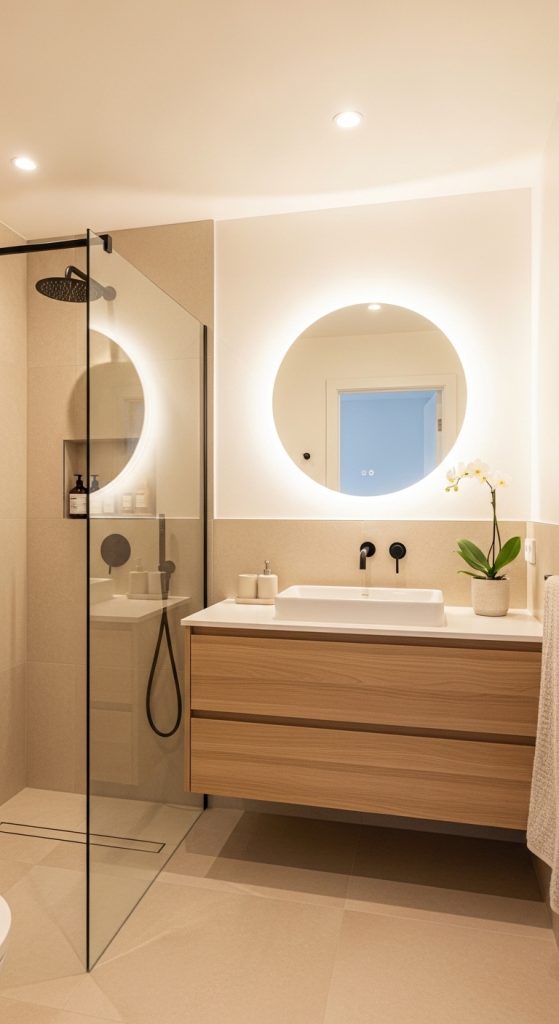
Idea 6: Update Mirror Design
How to Create
An outdated mirror can affect both functionality and visual appeal. Updating the mirror design enhances the overall look of the bathroom while improving usability. Modern mirrors often feature simple shapes and integrated lighting, contributing to a clean and organized appearance. This change aligns with contemporary design trends and supports daily routines. A well-placed mirror also enhances light distribution within the space.
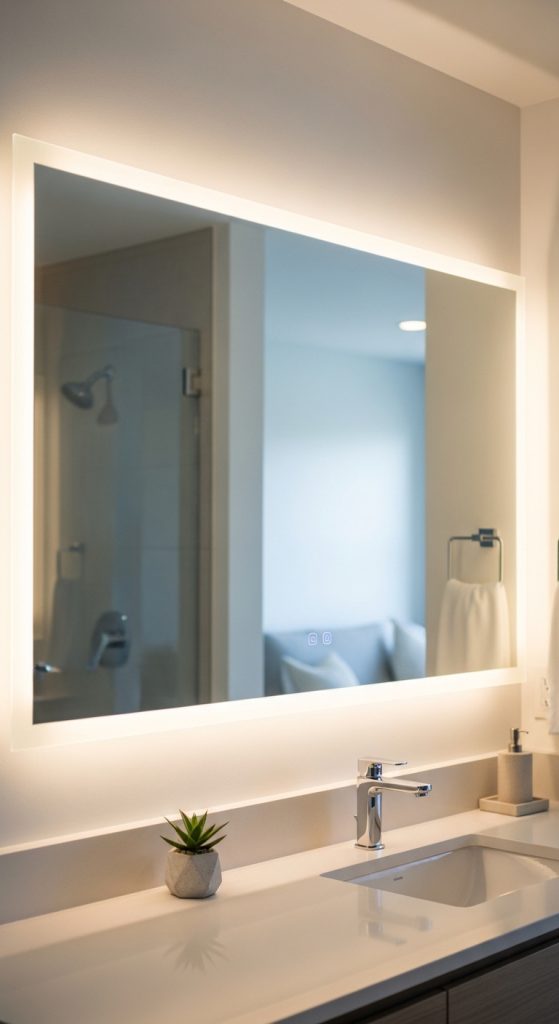
To implement this upgrade, remove the existing mirror carefully. Select a new design that fits the available space and complements other elements. Install the mirror securely using appropriate mounting tools. Ensure proper alignment and stability. This step by step process ensures a safe and effective installation. A modern mirror improves both functionality and aesthetic balance within the bathroom.
Idea 7: Improve Ventilation System
How to Create
Proper ventilation is essential in maintaining a clean and healthy bathroom environment. Outdated ventilation systems can lead to moisture buildup and damage. Improving ventilation reduces humidity and prevents mold growth. This upgrade supports long-term maintenance and enhances comfort. It is a practical improvement that aligns with functional design principles.
To execute this upgrade, inspect the existing ventilation system and identify areas for improvement. Install or replace exhaust fans to improve airflow. Ensure proper placement for effective performance. Regular maintenance, such as cleaning filters, helps maintain efficiency. This step by step method ensures improved air circulation and a healthier environment. Proper ventilation contributes to the durability of bathroom materials.
Idea 8: Add Decorative Elements
How to Create
Decorative elements enhance the visual appeal of a bathroom without affecting functionality. Simple additions such as wall art, plants, or accessories create a balanced and inviting environment. This idea supports personalization while maintaining organization. Decorative elements should complement the overall design and avoid clutter.
To implement this idea, select decorations that match the bathroom’s color scheme and style. Place items strategically to enhance visual balance. Avoid overcrowding surfaces to maintain a clean look. This step by step approach ensures a cohesive and organized presentation. Decorative updates provide a simple yet effective transformation.
Idea 9: Upgrade Flooring
How to Create
Outdated flooring can reduce both safety and visual appeal. Upgrading to modern, water-resistant flooring improves durability and comfort. This change enhances the overall aesthetic and supports long-term maintenance. Modern flooring options focus on slip resistance and easy cleaning.
To complete this upgrade, remove existing flooring and prepare the surface. Install new materials evenly, ensuring proper alignment. Allow sufficient time for setting and sealing. This step by step process ensures a stable and durable finish. Updated flooring improves both functionality and design.
Idea 10: Create a Cohesive Color Scheme
How to Create
A cohesive color scheme unifies all elements of the bathroom, creating a balanced and organized appearance. Outdated bathrooms often have inconsistent colors that disrupt visual harmony. Choosing a consistent palette enhances the aesthetic and supports modern design principles.
To apply this idea, select a base color and complementary tones. Apply the color scheme across walls, fixtures, and accessories. Ensure consistency throughout the space. This step by step approach creates a cohesive and visually appealing environment. A unified color scheme completes the transformation of the bathroom.
Common Beginner Mistakes and How to Avoid Them
Many beginners start a bathroom makeover without proper planning, which leads to disorganized results and unnecessary delays. A common mistake is attempting to change multiple elements at once without a clear sequence. This often causes overlapping tasks and inefficient use of time. Another issue is selecting materials that are not suitable for high-moisture environments, which leads to damage and maintenance problems. Poor measurement is also a frequent problem, resulting in improper fitting of tiles, fixtures, or storage units. To avoid these mistakes, begin with a detailed plan that outlines each step of the project. Focus on one section at a time and complete it before moving to the next. Always choose materials specifically designed for bathroom use to ensure durability. Accurate measurements and proper preparation are essential for successful installation. Regularly reviewing progress helps maintain organization and prevents errors. By following a structured approach, beginners can achieve consistent and reliable results.
Practical Tips for Better Results
Achieving a successful bathroom makeover requires attention to detail and consistent execution. One important tip is to maintain a clean workspace throughout the project, as this improves efficiency and safety. Organize tools and materials before starting each task to avoid interruptions. Use proper lighting to ensure accuracy during installation and finishing processes. Another useful strategy is to test small areas before applying changes across larger surfaces, especially when working with paint or tiles. This helps confirm compatibility and desired results. Maintaining a consistent design approach ensures that all elements work together cohesively. Regular maintenance after completing the project helps preserve the results and extends the lifespan of materials. Following these practical tips improves the overall quality of the makeover and ensures long-term functionality.
Styling, Presentation, or Organization Ideas
Styling a bathroom involves creating a balance between function and visual appeal. A well-organized layout ensures that all elements are easily accessible while maintaining a clean appearance. Use simple decorative elements that complement the overall color scheme. Arrange storage units in a way that supports efficient organization without overcrowding the space. Display essential items neatly to maintain usability while enhancing the aesthetic. Consistent design choices create a cohesive environment that aligns with modern home decor trends. Proper presentation enhances both functionality and visual harmony.
Budget or Time Planning
Effective budget and time planning are essential for completing a bathroom makeover efficiently. Start by identifying priority upgrades and allocating resources accordingly. Focus on essential improvements such as fixtures and lighting before adding decorative elements. Break the project into manageable steps to avoid overwhelming costs and time commitments. Use cost-effective materials that provide durability and functionality. Planning tasks in sequence ensures efficient workflow and minimizes disruptions. This approach allows for gradual progress while maintaining control over expenses.
Creative Expansion and Advanced Inspiration
After completing the basic makeover, additional improvements can enhance the bathroom further. Consider integrating advanced storage solutions or upgrading fixtures for improved efficiency. Experiment with new design elements such as textured surfaces or layered lighting to create depth. Expanding the project gradually allows for continuous improvement without compromising the existing setup. These creative ideas support long-term functionality and keep the space aligned with evolving design trends.