

If you’ve been searching for fabric bunny pattern free ideas that are adorable, beginner-friendly, and totally Pinterest-worthy — you are in the right place. Fabric bunnies are one of the most loved DIY sewing projects, especially during spring and Easter, but honestly, they’re timeless. They work beautifully as nursery décor, baby shower gifts, handmade toys, seasonal table styling, and even sentimental keepsakes made from old clothing.
The beauty of fabric bunnies lies in their versatility. You can make them rustic and farmhouse-inspired using linen and neutral tones. You can create soft pastel nursery bunnies with floral cotton prints. You can design heirloom-style stuffed bunnies using embroidery and lace. Or you can keep it minimal and modern with clean lines and muted fabrics. The options are endless.
Another reason fabric bunny patterns are so popular on Pinterest is because they are incredibly beginner-friendly. Most bunny shapes are simple silhouettes — rounded bodies, long ears, small tails — which makes them perfect for new sewists. Even if you only know basic straight stitching, you can create something absolutely beautiful.
In this detailed, save-worthy guide, you’ll discover 10 deeply explained fabric bunny pattern free ideas, each with step-by-step instructions and full material lists. Every idea is balanced, practical, aesthetic, and easy to customize.
Whether you sew by hand or machine, whether you’re crafting for décor or gifting — there’s a bunny here for you.
Let’s start sewing something adorable.
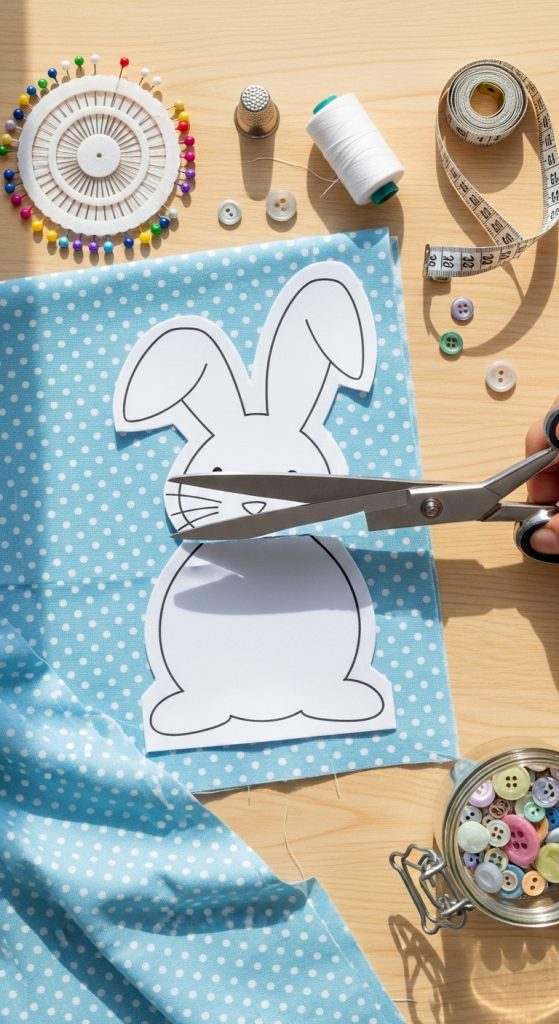
1. Classic Stuffed Fabric Bunny (Beginner Pattern)

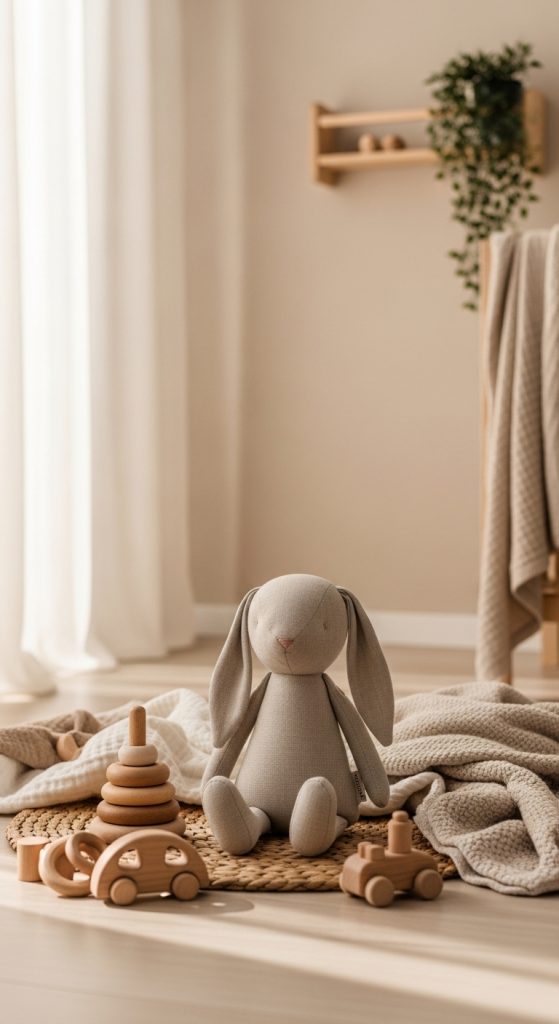
This is the timeless bunny shape everyone loves — rounded body, floppy ears, tiny embroidered face, and soft stuffed form. It’s perfect for beginners because the pattern pieces are simple and symmetrical. You can draw your own bunny outline on paper, cut two mirrored body pieces, sew them together, and stuff.
What makes this style special is how customizable it is. You can use soft cotton for a traditional look, minky fabric for extra plush texture, or even upcycled clothing for a sentimental version. Add a bow around the neck, sew a tiny fabric carrot, or personalize it with a stitched name.
This classic stuffed bunny works beautifully as a child’s toy, nursery shelf décor, or Easter basket addition. It also makes a thoughtful handmade gift that feels heartfelt and special.
How To
Start by drawing a simple bunny silhouette on paper — oval body, rounded head, long ears attached. Cut out your template. Fold your fabric right sides together and trace the template onto the wrong side of the fabric. Cut two identical pieces.
Pin the pieces together with right sides facing inward. Sew around the edges using a ¼ inch seam allowance, leaving a small opening at the bottom. Clip curves carefully to reduce bulk, then turn the bunny right side out.
Stuff evenly using polyester fiberfill, especially in the ears. Once filled, hand-stitch the opening closed with an invisible ladder stitch. Embroider eyes and nose using embroidery thread for a soft handmade look.
Materials Used
- Cotton fabric or minky fabric
- Paper for pattern template
- Fabric scissors
- Sewing machine or needle
- Thread (matching fabric)
- Polyester stuffing
- Embroidery thread
- Pins
2. Flat Silhouette Bunny Pillow
If you prefer décor-style projects over toys, this flat bunny pillow is ideal. Instead of making a 3D stuffed animal, this design creates a plush decorative pillow in a bunny silhouette shape. It looks stunning on sofas, nursery chairs, or seasonal benches.

The silhouette bunny pillow works beautifully in farmhouse homes using linen or burlap. For nurseries, pastel floral fabrics create a soft dreamy look. You can also add lace trim around the edges for a cottagecore vibe.
Because it’s flatter than a traditional stuffed bunny, it’s easier to sew and faster to complete. This makes it perfect for batch sewing multiple pillows for gifts or seasonal displays.
How To
Create a large bunny silhouette template on paper. Cut two fabric pieces using the template. If you want a slightly structured look, cut one piece of lightweight batting in the same shape.
Place fabric pieces right sides together and sandwich the batting inside. Sew around the entire shape, leaving a 3-inch opening at the bottom. Clip curves carefully and turn inside out.
Lightly stuff with fiberfill — keep it flatter than a plush toy. Hand stitch the opening closed. Add a decorative ribbon bow or stitched initials if desired.
Materials Used
- Linen, cotton, or burlap fabric
- Lightweight batting (optional)
- Polyester stuffing
- Thread
- Sewing machine
- Scissors
- Ribbon (optional)
3. Long-Eared Floppy Bunny Doll
This adorable floppy bunny doll features extra-long ears that drape beautifully. It’s charming, whimsical, and perfect for kids or soft nursery styling.
The elongated ears give it personality. You can line the inside of the ears with a contrasting floral print or pastel pattern to create visual interest. Adding a soft blush on the cheeks or stitched eyelashes enhances its sweet appearance.

This bunny design feels heirloom-inspired and makes a beautiful baby shower gift. It’s soft, cuddly, and timeless.
How To
Draw a bunny body with narrower torso and extra-long ears. Cut two body pieces and two inner ear lining pieces. Sew ear lining to ear outer fabric first, right sides together, turn and press.
Attach ears between body pieces at the top before sewing around the body perimeter. Sew body with right sides together, leaving an opening at the bottom.
Turn right side out, stuff firmly in the body but lightly in ears so they remain floppy. Hand stitch opening closed. Embroider facial features for a soft expression.
Materials Used
- Cotton fabric (outer body)
- Coordinating fabric (ear lining)
- Thread
- Polyester stuffing
- Pins
- Needle and embroidery floss
4. Minimalist Scandinavian Bunny
If you love clean lines and neutral tones, this Scandinavian-inspired bunny is perfect. The shape is simple, almost abstract — no detailed face, just subtle stitching and soft neutral fabric.
This bunny works beautifully in beige, ivory, gray, or soft sage. It complements modern nursery décor and minimal interiors.
Its beauty lies in simplicity. Instead of focusing on facial features, the design emphasizes form and texture.
How To
Draw a simple upright bunny shape with minimal curves. Cut two pieces from linen or cotton canvas. Sew right sides together, leaving a small opening.
Turn inside out and lightly stuff for a structured but not overly plush look. Stitch closed carefully. Optionally, add a small stitched “X” for the nose or leave blank.
Press gently with iron for crisp finish.
Materials Used
- Linen or cotton canvas
- Thread
- Polyester stuffing
- Sewing machine
- Iron
5. Patchwork Fabric Bunny
This project is perfect for using fabric scraps. The patchwork bunny combines multiple fabrics stitched together before cutting the bunny shape.
It’s colorful, playful, and full of personality. Each bunny will look completely unique. This makes it ideal for memory bunnies made from baby clothes or old shirts.
Patchwork bunnies feel warm and nostalgic — they tell a story through fabric pieces.
How To
Cut small fabric squares and sew them together into a patchwork panel large enough for your bunny template. Press seams flat.
Place the bunny template over the patchwork fabric and cut two pieces. Sew right sides together, leaving an opening.

Turn inside out, stuff evenly, and stitch closed. Keep face simple to highlight the patchwork pattern.
Materials Used
- Fabric scraps
- Thread
- Sewing machine
- Stuffing
- Iron
6. Fabric Bunny With Dress Outfit
This version includes a removable dress or overalls. It adds charm and character, making the bunny feel like a doll.

You can customize outfits seasonally — floral spring dress, plaid fall outfit, pastel Easter frock.
It’s perfect for kids who love imaginative play.
How To
Sew a basic stuffed bunny first. Then measure its body circumference and draft a simple dress pattern.
Cut fabric pieces, sew side seams, and hem edges. Add elastic or ribbon closure. Dress the bunny once complete.
Keep clothing slightly loose for easy removal.
Materials Used
- Cotton fabric (bunny body)
- Fabric for dress
- Elastic or ribbon
- Thread
- Stuffing
7. Rustic Burlap Bunny
For farmhouse lovers, a burlap bunny creates texture and warmth. It looks beautiful styled in baskets or on tiered trays.
The raw edges give it rustic charm. Pair with twine bows for extra farmhouse aesthetic.
How To
Use burlap fabric and line interior with cotton to prevent shedding. Sew bunny shape with right sides together.
Turn carefully to avoid fraying. Lightly stuff and close opening. Tie twine bow around neck.
Optional: lightly distress edges.
Materials Used
- Burlap fabric
- Cotton lining
- Twine
- Thread
- Stuffing
8. Felt Fabric Bunny (No Machine Needed)
Felt bunnies are beginner-friendly and require no sewing machine. Felt doesn’t fray, making it ideal for hand stitching.
These are perfect for kids’ crafts or quick Easter décor.
How To

Trace bunny template onto felt twice. Cut out shapes. Blanket stitch around edges using embroidery floss, leaving small gap.
Lightly stuff and finish stitching. Add button eyes or stitched details.
Materials Used
- Felt sheets
- Embroidery floss
- Needle
- Stuffing
- Buttons (optional)
9. Embroidered Heirloom Bunny
This elegant bunny includes delicate embroidery details on the body or ears. Floral vines, initials, or small motifs make it special.
It feels heirloom-quality and perfect for keepsake gifts.

How To
Before sewing bunny pieces together, embroider design on one body piece. Once complete, sew bunny normally.
Stuff evenly and close. Keep embroidery soft and minimal.
Materials Used
- Cotton or linen fabric
- Embroidery floss
- Needle
- Stuffing
- Thread
10. Memory Fabric Bunny (Made From Clothing)
This deeply meaningful bunny uses old clothing — baby outfits, loved one’s shirts, or sentimental fabrics.
It transforms memories into something tangible and comforting.
Each bunny becomes one-of-a-kind and emotionally special.
How To

Select clothing with stable fabric areas. Cut bunny template pieces carefully to include meaningful patterns.
Interface lightweight fabrics if needed for stability. Sew as usual, stuff, and close.
Consider adding embroidered name or date.
Materials Used
- Old clothing fabric
- Lightweight interfacing (optional)
- Thread
- Stuffing
- Needle

