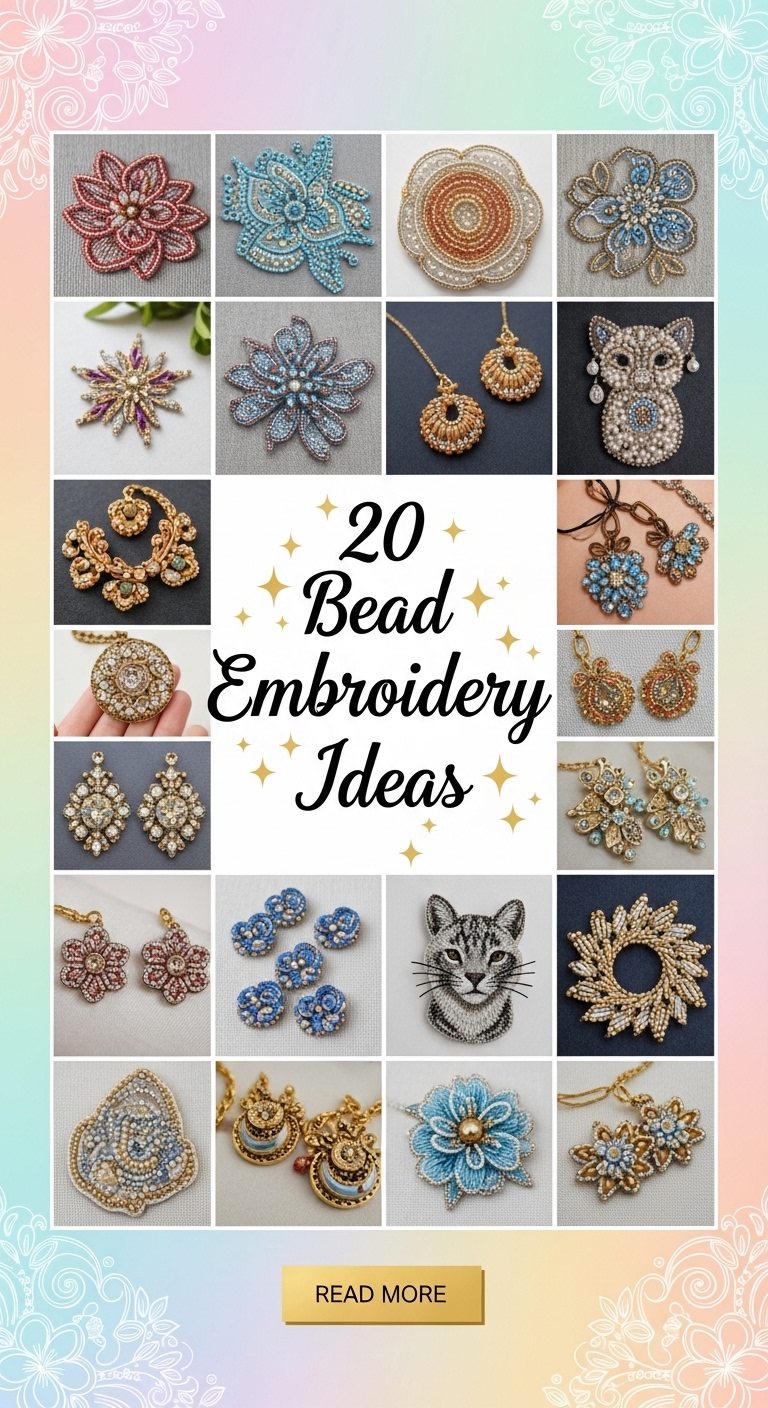
20 Bead Embroidery Ideas
Bead embroidery is one of those timeless crafts that blends texture, color, and artistry into something deeply personal and visually striking. Unlike regular embroidery that relies mostly on thread, bead embroidery introduces dimension. Light reflects off glass, metal, crystal, and acrylic beads, instantly transforming fabric into wearable art or decorative statement pieces. For Pinterest lovers, bead embroidery is especially addictive because it combines creativity with satisfying step-by-step progress — every bead added feels like a tiny victory.

For beginners, bead embroidery may look intimidating at first. The intricate patterns, shimmering surfaces, and detailed textures often seem like something only professionals can achieve. The truth is: bead embroidery is surprisingly beginner-friendly once you understand the core techniques. Most projects rely on repetition, patience, and a few essential stitches. With the right materials and guidance, anyone can create Pinterest-worthy bead embroidery that looks polished and luxurious.
One of the most appealing aspects of bead embroidery is versatility. You can embellish clothing, create wall art, design jewelry, decorate bags, customize shoes, or craft unique gifts. From minimalist bead accents to bold statement pieces, there is no limit to how far your imagination can go. Each idea in this guide is designed to help you build confidence while producing results that look advanced and professional.
This collection focuses on practical, save-worthy bead embroidery ideas that are both beautiful and achievable. Each idea includes a clear concept explanation, step-by-step instructions, and a list of materials so you can start immediately. These projects are intentionally structured to grow your skill level — beginning with approachable designs and gradually introducing more texture and layering.
Whether you’re crafting for relaxation, building a small handmade business, or decorating your home, bead embroidery offers endless creative satisfaction. The rhythmic act of stitching beads can be meditative, while the finished piece becomes a reflection of your style and patience. Every project here is optimized for visual impact, making them ideal for Pinterest sharing, gifting, or displaying proudly.
Now let’s explore the first 10 bead embroidery ideas — each designed to inspire you to pick up a needle and start creating.
1. Floral Bead Embroidery Patch
A floral bead embroidery patch is a perfect entry project because flowers naturally hide small mistakes and allow playful color combinations. This idea focuses on layering beads to create petal depth and texture, resulting in a patch that can decorate jackets, tote bags, or denim.

The beauty of floral bead embroidery lies in its organic shape. Unlike geometric patterns that require precision, flowers embrace irregularity. You can experiment with bead sizes and finishes to simulate natural highlights and shadows. This project teaches bead placement rhythm, spacing, and color blending — foundational skills for advanced designs.
How to Make It
Start by sketching a simple flower shape on felt or sturdy fabric. Secure the fabric in an embroidery hoop to prevent movement. Thread a beading needle and anchor the thread firmly. Begin outlining petals with small seed beads using a backstitch method. Fill the interior with larger beads or sequins layered with seed beads for dimension. Work slowly in sections to maintain even spacing. Add a contrasting bead center to create focus. Once complete, trim excess fabric and seal the back with adhesive felt for durability.
Materials Needed
- Felt or thick embroidery fabric
- Seed beads in multiple colors
- Accent beads or sequins
- Beading needle
- Strong nylon thread
- Embroidery hoop
- Fabric marker
- Scissors
- Craft glue or backing felt
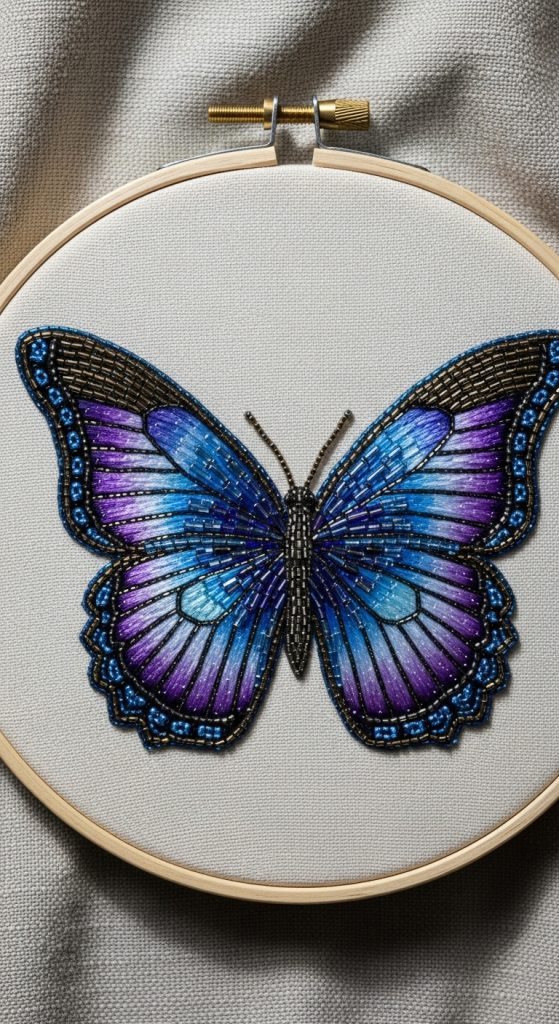
2. Beaded Butterfly Design
A butterfly bead embroidery piece introduces symmetry and controlled detailing. The wings allow gradient color transitions, making it a visually striking beginner-friendly design that looks advanced when finished.
Butterflies are popular in decorative embroidery because they symbolize transformation and beauty. The structured wing sections help you learn consistent bead direction, which is crucial for clean designs. This project is ideal for wall art or framed embroidery.
How to Make It
Draw a butterfly outline on fabric. Divide the wings into sections for color variation. Outline the entire butterfly with darker beads to define shape. Fill wing sections using rows of beads stitched in parallel lines. Use smaller beads near the edges for smoother curves. Add metallic beads in select areas to create shimmer. Finish by reinforcing all stitches and mounting the fabric onto a frame.
Materials Needed
- Cotton embroidery fabric
- Assorted seed beads
- Metallic accent beads
- Beading needle
- Nylon thread
- Hoop
- Fabric pen
- Frame
3. Minimalist Beaded Line Art
Minimalist bead embroidery focuses on clean lines and negative space. This modern approach is Pinterest-perfect and ideal for contemporary décor or clothing accents.
This style teaches control and precision. Instead of filling shapes, you follow continuous lines with evenly spaced beads. The simplicity makes imperfections noticeable, which helps refine your technique quickly.
How to Make It
Sketch a simple abstract line drawing. Secure fabric in a hoop. Stitch beads one by one along the line using a couching stitch, keeping spacing consistent. Maintain gentle tension so the line remains smooth. Reinforce curves carefully by adding extra anchor stitches. Finish by trimming excess thread and pressing lightly.
Materials Needed
- Neutral fabric
- Uniform seed beads
- Beading needle
- Thread
- Hoop
- Fabric pencil
4. Beaded Mandala Pattern
A beaded mandala is meditative to create and visually mesmerizing. Circular symmetry helps beginners practice rhythm and repetition.
Mandalas emphasize balance. The repetitive structure builds patience and accuracy, while bead color variation creates hypnotic effects.

How to Make It
Draw concentric circles. Start from the center and stitch beads outward in rings. Alternate bead colors per layer. Keep spacing uniform. Rotate the hoop frequently to maintain symmetry. Reinforce outer rings for stability.
Materials Needed
- Sturdy fabric
- Colorful seed beads
- Needle
- Thread
- Compass or stencil
- Hoop
5. Beaded Name Monogram
Personalized bead embroidery makes excellent gifts. A beaded monogram combines typography with decorative embellishment.
Letters allow creative interpretation — bold, script, or playful styles. This project strengthens edge control and lettering precision.
How to Make It
Transfer a letter onto fabric. Outline with small beads. Fill interior using tightly packed stitches. Add border beads or sequins. Secure thread ends carefully to prevent loosening.

Materials Needed
- Fabric
- Seed beads
- Needle
- Thread
- Hoop
- Letter stencil
6. Beaded Star Constellation
A constellation design uses beads to mimic stars against dark fabric. It’s elegant and minimalist.
This idea teaches spacing and focal balance. Sparse designs require intentional bead placement.
How to Make It

Use black or navy fabric. Mark constellation dots lightly. Stitch silver beads at each mark. Connect stars with thin thread lines or tiny beads. Reinforce stitches.
Materials Needed
- Dark fabric
- Silver beads
- Needle
- Thread
- Hoop
- Star chart template
7. Beaded Heart Accent
A heart design is simple yet expressive. Perfect for clothing customization.

It teaches filling shapes evenly and layering beads.
How to Make It
Draw a heart outline. Stitch border beads first. Fill interior densely. Add highlight beads for shine. Secure edges tightly.
Materials Needed
- Fabric
- Red/pink beads
- Needle
- Thread
- Hoop
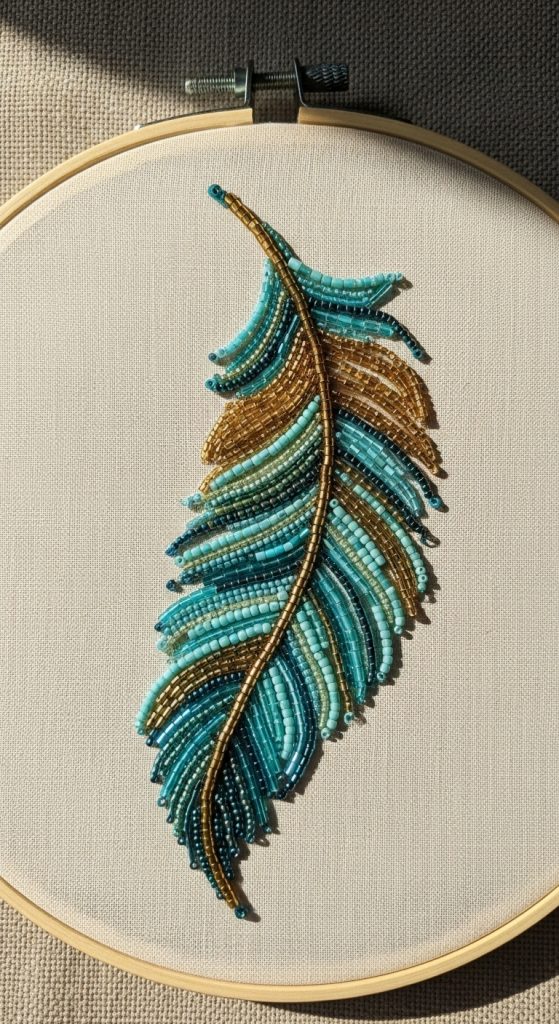
8. Beaded Feather Design
Feathers allow flowing bead lines that mimic natural texture.

This project builds directional stitching skills.
How to Make It
Sketch feather spine. Stitch central line first. Add angled bead rows outward. Use gradient colors. Reinforce spine.
Materials Needed
- Fabric
- Gradient beads
- Needle
- Thread
- Hoop
9. Beaded Sunburst Pattern
A sunburst radiates energy and symmetry.
It strengthens radial spacing technique.
How to Make It
Mark a center point. Stitch bead rays outward evenly. Alternate colors. Add outer ring border.
Materials Needed
- Fabric
- Bright beads
- Needle
- Thread
- Hoop
10. Beaded Abstract Texture Panel
This freeform project encourages experimentation.
It teaches layering and creative freedom.
How to Make It

Fill a small area randomly with mixed beads. Vary sizes. Overlap stitches. Focus on texture, not perfection. Secure thoroughly.
Materials Needed
- Fabric
- Mixed beads
- Needle
- Thread
- Hoop
11. Beaded Crescent Moon Design
A crescent moon bead embroidery piece creates a dreamy, celestial aesthetic that works beautifully for wall art, clothing accents, or hoop décor. This idea combines curved stitching with subtle shading, helping you learn how to control bead direction along arcs. The moon shape is forgiving, yet elegant, making it perfect for beginners who want a polished, Pinterest-worthy finish.
The key to a successful crescent moon design is bead density and color transition. Using multiple tones of white, silver, or pale gold can simulate moonlight and texture. Layering beads toward the inner curve adds depth and creates a sculpted effect. This project also introduces the concept of highlight placement — a technique that makes bead embroidery appear more dimensional.

How to Make It
Sketch a crescent moon on dark fabric. Outline the shape using small uniform beads stitched closely together. Begin filling from the outer edge inward, gradually shifting bead colors to lighter tones. Stitch beads in curved rows that follow the moon’s contour. Add a few metallic beads along the inner edge to mimic reflected light. Reinforce all stitches and press the fabric gently to settle the beads.
Materials Needed
- Dark embroidery fabric
- White, silver, or gold seed beads
- Metallic accent beads
- Beading needle
- Nylon thread
- Hoop
- Fabric marker
12. Beaded Geometric Triangle Pattern
Geometric bead embroidery creates bold, modern visuals that feel clean and intentional. A triangle pattern focuses on sharp angles and consistent spacing, helping you develop precision. This project is ideal for contemporary fashion pieces or minimalist home décor.
The triangle design encourages symmetry and repetition. Alternating bead colors inside each triangle produces striking contrast. Beginners benefit from the structured layout, which makes it easier to maintain consistent tension and bead alignment.

How to Make It
Draw a repeating triangle grid. Outline each triangle with small beads. Fill alternating triangles with different bead colors using parallel rows. Keep stitches tight and uniform. Reinforce corners carefully to preserve shape. Once finished, secure the thread and mount or trim as desired.
Materials Needed
- Sturdy fabric
- Two contrasting bead colors
- Needle
- Thread
- Hoop
- Ruler and fabric pen
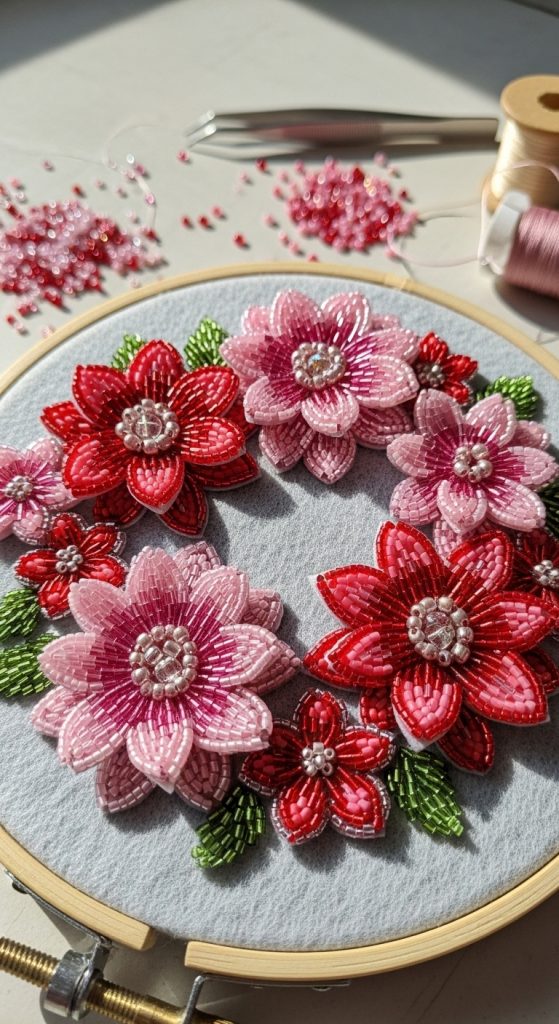
13. Beaded Flower Bouquet Panel
This idea expands on simple floral embroidery by combining multiple flowers into one composition. It teaches layering, spacing, and focal balance while allowing creative color play. A bouquet panel looks stunning framed or sewn onto a bag.

Combining bead sizes gives each flower a unique personality. Larger beads can form centers, while tiny seed beads define petals. Overlapping elements create a lively, natural arrangement.
How to Make It
Sketch several flower shapes clustered together. Start with background flowers and work forward. Outline petals first, then fill them with dense bead rows. Add bead centers last for emphasis. Maintain slight spacing between flowers to avoid crowding. Reinforce all edges.
Materials Needed
- Embroidery fabric
- Assorted colorful beads
- Needle
- Thread
- Hoop
- Fabric pencil
14. Beaded Ocean Wave Motif
A wave motif introduces flowing movement into bead embroidery. Using blue and turquoise tones creates a calming, Pinterest-friendly aesthetic. This project teaches gradient blending and curved stitch direction.

The wave shape encourages experimentation with bead shine. Matte beads can represent deep water, while glossy beads highlight foam and motion.
How to Make It
Sketch a wave curve. Outline with darker beads. Fill the body using rows that follow the wave’s motion. Blend bead shades gradually from dark to light. Add white or clear beads at the crest to simulate foam. Reinforce curves carefully.
Materials Needed
- Blue and turquoise beads
- White accent beads
- Fabric
- Needle
- Thread
- Hoop
15. Beaded Leaf Vine Border
A vine border is ideal for edging clothing or hoop art. This design emphasizes repetition and rhythm, making it relaxing to stitch while producing a professional result.

Leaves allow directional stitching that mimics natural growth. Consistent spacing is essential for a clean border.
How to Make It
Draw a flowing vine line. Stitch the central stem first. Add leaf shapes alternating along the stem. Fill each leaf with angled bead rows. Keep leaves evenly spaced. Reinforce the stem to support weight.
Materials Needed
- Green beads
- Fabric
- Needle
- Thread
- Hoop
- Fabric marker
16. Beaded Eye Symbol
The eye motif is bold and symbolic, popular in modern decorative art. It combines oval shaping with layered bead filling, strengthening control over symmetry.

Contrasting colors enhance visual impact. A dark outline anchors the design.
How to Make It
Sketch an eye shape. Outline with dark beads. Fill the sclera with light beads, the iris with colored beads, and the pupil with black beads. Add highlight beads for shine. Reinforce outer edges.
Materials Needed
- Multicolor beads
- Fabric
- Needle
- Thread
- Hoop
17. Beaded Abstract Color Splash
This freeform project encourages creativity without strict rules. It’s perfect for practicing bead layering and texture mixing.

Random placement builds confidence and reduces fear of mistakes. The final piece becomes expressive and unique.
How to Make It
Choose a color palette. Scatter bead clusters organically. Mix bead sizes for texture. Overlap stitches slightly. Focus on balance rather than symmetry. Secure thoroughly.
Materials Needed
- Mixed beads
- Fabric
- Needle
- Thread
- Hoop
18. Beaded Mandala Sun
This variation of a mandala adds radiating rays for a sunburst effect. It strengthens radial alignment skills.
Bright colors amplify energy and visual appeal.
How to Make It
Create a circular center mandala. Stitch bead rays outward evenly spaced. Alternate colors. Add outer border rings. Reinforce all rays.

Materials Needed
- Bright seed beads
- Fabric
- Needle
- Thread
- Hoop
19. Beaded Star Cluster
A star cluster mimics a galaxy effect with scattered beads. It teaches controlled randomness.
Spacing creates depth and visual flow.

How to Make It
Use dark fabric. Stitch beads in varied sizes. Cluster some tightly, leave others sparse. Add metallic highlights. Reinforce thread ends securely.
Materials Needed
- Dark fabric
- Mixed silver beads
- Needle
- Thread
- Hoop
20. Beaded Decorative Frame Edge
This idea focuses on edging rather than central motifs. A decorative border transforms plain fabric into a finished artwork.

It builds consistency and patience through repetition.
How to Make It
Outline the fabric edge. Stitch beads in a repeating pattern around the border. Maintain equal spacing. Reinforce corners carefully. Secure thread tightly.
Materials Needed
- Uniform beads
- Fabric
- Needle
- Thread
- Hoop