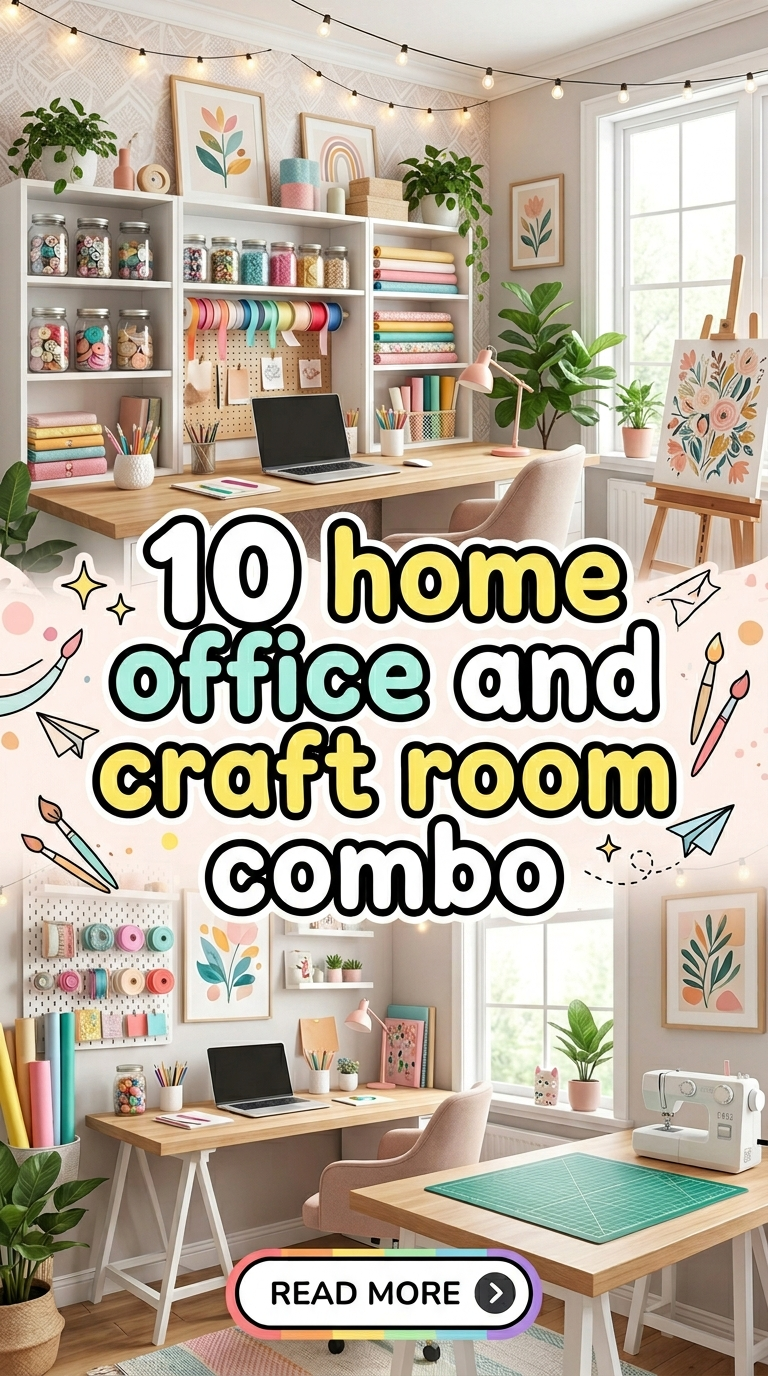
10 home office and craft room combo

A home office and craft room combo combines productivity and creativity in a single organized space. Many people now work from home while also pursuing hobbies such as crafting, sewing, painting, or DIY projects. Combining these functions into one room helps maximize space while maintaining efficiency. This type of room layout supports both professional tasks and creative projects without requiring multiple rooms.
A well-planned home office and craft room focuses on smart organization, flexible furniture, and practical storage systems. Pinterest ideas often highlight creative layouts that allow workstations and craft areas to coexist without clutter. The goal is to create an environment where office work can be completed efficiently while creative projects remain accessible and organized.
Readers will learn how to design a functional dual-purpose room using beginner friendly strategies. The article explains step by step layout concepts, storage solutions, and workspace arrangements. Each idea focuses on practical materials, preparation methods, and organization strategies that help maintain a productive and creative environment. These creative ideas provide inspiration for building a balanced workspace that supports both focus and artistic expression.
Why This Idea Is Trending or Useful
The home office and craft room combination has become one of the most popular Pinterest ideas in modern home decor planning. Many households now require flexible rooms that support remote work while also providing space for hobbies and DIY projects. A multi-purpose room reduces the need for additional square footage and improves space efficiency.
One reason this concept is trending is its practical value. Instead of separating work and creative activities into different rooms, homeowners can create a single well-organized environment that supports both functions. Smart storage systems, modular desks, and vertical organization methods allow tools, materials, and office supplies to remain accessible without cluttering the workspace.
Another reason for its popularity is the growing interest in handmade crafts and creative projects. Social media platforms frequently showcase aesthetic craft stations combined with minimalist office setups. This visual inspiration encourages people to transform spare rooms into creative productivity hubs.
The concept also appeals to beginners because it can be implemented with simple DIY organization solutions. Shelving, drawer units, pegboards, and labeled containers make it possible to manage multiple activities in one room. These solutions support both organization and modern design while maintaining a clean and functional aesthetic.
Materials and Preparation
Before creating a home office and craft room combo, careful planning ensures that both functions operate smoothly within the same space. Preparation begins with identifying the room layout and determining how much space is available for a desk, crafting area, and storage systems. Measuring the room helps guide furniture placement and prevents overcrowding.
Basic materials include a desk for computer work, a crafting surface or worktable, shelving units, storage drawers, and wall-mounted organization systems. Containers, baskets, and labeled boxes help store craft materials such as fabric, paper, tools, or art supplies. Vertical storage solutions are particularly helpful for maximizing wall space without reducing floor space.
Tools for installation may include a measuring tape, level, drill, and mounting hardware for shelves or pegboards. Planning should also consider lighting. Task lighting is important for both computer work and detailed crafting activities. Adjustable desk lamps or overhead lights help illuminate work surfaces clearly.
Preparation also involves organizing materials before arranging the room. Group craft supplies by category and store them in containers that are easy to access. Office documents and electronics should remain separate from craft materials to maintain a clear division between work and creative tasks. Proper planning creates a functional and efficient workspace that supports both productivity and creativity.
MAIN IDEAS
Idea 1: Dual Desk Workstation Layout
How to Create

A dual desk workstation layout separates office work from crafting activities while keeping both areas within the same room. This layout uses two work surfaces positioned along different walls or arranged in an L-shape configuration. One desk serves as the dedicated office workstation with a computer, documents, and office supplies. The second desk functions as the craft table where creative projects such as painting, cutting materials, or assembling handmade decorations can take place.
This setup is common in modern design layouts because it prevents cross-contamination between work tools and craft materials. The office area remains organized and distraction-free while the crafting zone allows space for creative experimentation. Pinterest inspiration often shows minimalist desk setups paired with colorful craft stations to create visual balance within the room.
The layout works well in small or medium-sized rooms because it maximizes corner spaces. Positioning desks along two walls creates a natural workflow path between tasks. This design also supports better organization by keeping digital work separate from physical creative projects. Storage shelves above each desk can hold materials relevant to each activity, ensuring the space remains practical and efficient.
The result is a beginner friendly workspace that supports productivity while encouraging creativity.
The execution process begins by measuring the available wall space and selecting two work surfaces that fit comfortably within the room. Place the primary office desk near electrical outlets to support computer equipment and lighting. Position the crafting desk along another wall or adjacent corner to create a separate work zone.
Install shelves or pegboards above the craft desk to store frequently used tools such as scissors, brushes, and rulers. Use drawer organizers or labeled containers to group materials by category. This method simplifies the process of locating supplies during a creative project.
For the office desk, use vertical organizers to hold documents, notebooks, and planning materials. Cable management systems help keep cords organized and prevent clutter. Lighting should also be adjusted to support both work areas. Desk lamps or adjustable lighting provide clear visibility for detailed tasks.
To maintain organization, create a routine for cleaning the craft table after each project. Store unused materials in labeled containers and keep the office desk reserved for professional tasks. This step by step approach ensures both work zones remain functional while sharing the same room.
Idea 2: Wall-Mounted Craft Storage System
How to Create

A wall-mounted craft storage system is an effective solution for organizing materials while preserving desk space in a home office and craft room combo. This approach uses vertical wall surfaces to store tools, containers, and frequently used craft supplies. By utilizing wall space, the room remains open and uncluttered, which is important for maintaining a productive office environment.
This organization method is frequently featured in Pinterest ideas because it transforms walls into functional storage areas. Pegboards, floating shelves, and mounted racks can hold materials such as thread spools, scissors, brushes, rulers, and cutting tools. Transparent containers allow supplies to remain visible and easy to locate.
A wall-mounted system also supports creative inspiration. Displaying colorful craft materials on the wall can create an aesthetic workspace while encouraging creativity. Many craft enthusiasts prefer this approach because it eliminates the need to search through drawers for supplies.
The system works particularly well in small home offices where floor space is limited. Vertical organization allows the room to accommodate both a computer workstation and a crafting area without overcrowding. The overall result is a clean and efficient workspace that balances organization and accessibility.
To build this system, begin by selecting a wall near the crafting desk where tools can be easily accessed. Measure the available space and mark positions for pegboards or floating shelves. Use a level and drill to mount hardware securely to the wall.
Attach hooks, small baskets, or hanging containers to the pegboard. These accessories allow tools and materials to be arranged based on frequency of use. Frequently used items should be positioned at eye level for quick access.
Clear containers or labeled jars can store small materials such as beads, buttons, or craft fasteners. Shelves above the pegboard can hold larger items such as fabric stacks or project boxes. This layered organization method maximizes vertical space.
Regular maintenance is important to keep the system organized. After completing a creative project, return tools to their designated positions. This habit maintains a tidy environment and ensures the workspace remains efficient for both office tasks and DIY projects.
Idea 3: Foldable Craft Table Station
How to Create

A foldable craft table station provides a flexible workspace that can be expanded during creative projects and stored away when not in use. This solution is ideal for small home office and craft room combinations where permanent furniture may reduce available space. The foldable design allows the room to maintain an organized office appearance while still supporting creative activities.
Many Pinterest inspiration boards feature foldable workstations because they support minimalist style layouts. When the table is folded down, the room functions as a professional home office. When the table is opened, it becomes a full crafting workspace for projects such as sewing, painting, or assembling handmade decorations.
This design also helps control clutter. Craft materials can remain stored in cabinets or containers until the table is unfolded for use. Once the project is completed, the workspace can be cleared and folded back into the wall or cabinet unit.
The flexibility of this setup makes it beginner friendly and practical. It allows homeowners to manage multiple activities within one room without sacrificing comfort or organization. This system is particularly useful for apartments or smaller homes where space efficiency is essential.
Creating a foldable craft station begins by selecting a wall with enough clearance for the table to open fully. Install a wall-mounted folding table bracket or hinge system that supports the weight of crafting materials. A sturdy tabletop surface such as wood or laminated board works well for durability.
Mount the table securely to wall studs to ensure stability during use. Beneath the table, install cabinets or storage bins to hold craft materials. These containers keep supplies organized while remaining accessible when the table is opened.
When preparing for a project, unfold the table and arrange tools, materials, and lighting across the surface. Ensure adequate lighting for detailed crafting tasks. Adjustable desk lamps can improve visibility and reduce eye strain.
After finishing the project, clean the surface and return materials to storage containers. Fold the table upward against the wall and secure it with locking brackets if necessary. This step by step process keeps the room organized while maintaining a flexible and efficient workspace.
Idea 4: Rolling Craft Storage Cart Workspace

How to Create
A rolling craft storage cart workspace introduces mobility into a home office and craft room combo. This design focuses on portable storage that allows materials and tools to move easily between different work areas. A rolling cart functions as both a storage unit and a temporary crafting station. The ability to reposition supplies reduces clutter on desks while keeping materials accessible.
This concept appears frequently in Pinterest ideas because it supports efficient organization in small spaces. A multi-tier rolling cart can store supplies such as paints, brushes, fabrics, paper, glue tools, and cutting instruments. Each tier of the cart can hold a different category of materials, creating a structured system for organization.
The mobile design allows the cart to remain parked beside the craft desk during creative projects. When the workspace transitions back to office tasks, the cart can be rolled into a corner or placed under a desk. This flexibility supports both productivity and creative work without requiring additional furniture.
The rolling cart workspace is also beginner friendly. It does not require wall installation or permanent furniture placement. The portable design makes it easy to reorganize materials as crafting interests change. This practical system encourages creative projects while maintaining a tidy and efficient home office environment.
To set up this system, begin by selecting a sturdy rolling cart with multiple storage tiers. Place containers or small baskets on each level to separate materials by category. For example, one tier can hold painting tools, another can store paper crafting supplies, and another can contain adhesives or cutting tools.
Label each container clearly to simplify organization. This step prevents materials from becoming mixed together during busy creative sessions. Position the cart beside the crafting desk so frequently used tools remain within reach.
During a creative project, move the cart closer to the workspace and place tools on the desk as needed. Once the project is complete, return items to their designated containers. The cart can then be rolled back into a storage corner or under a desk.
Routine organization helps maintain efficiency. Periodically review materials and remove unused supplies. This process ensures the rolling cart continues to function as a practical and organized storage solution within the combined workspace.
Idea 5: Pegboard Craft Command Center
How to Create
A pegboard craft command center transforms an empty wall into a fully organized control hub for crafting tools and materials. This system allows tools to be displayed, stored, and accessed directly above the crafting workspace. Pegboards are widely used in DIY organization because they offer flexibility and adaptability. Hooks, baskets, and small shelves can be rearranged whenever storage needs change.
In a home office and craft room combo, the pegboard system keeps craft supplies visible while preventing clutter on work surfaces. Tools such as scissors, rulers, measuring tape, brushes, and cutting tools can be hung on hooks. Small containers attached to the board can hold markers, pencils, or small crafting accessories.
Pinterest inspiration often highlights pegboard walls because they combine organization with aesthetic appeal. Arranging tools in symmetrical patterns creates a visually balanced workspace while maintaining functionality. Color-coded containers or neatly spaced hooks enhance the minimalist style often seen in modern craft rooms.

This approach also helps maintain workflow efficiency. When tools are displayed openly, users can quickly locate and return items without searching through drawers. The pegboard command center therefore supports both organization and productivity within a shared office and crafting environment.
Creating this system begins by selecting a wall above the craft workstation. Measure the space and mark mounting points for the pegboard panel. Secure the board to the wall using screws and wall anchors or directly into wall studs for stability.
Install a variety of pegboard accessories such as hooks, small baskets, and narrow shelves. These components allow different types of materials to be stored efficiently. Frequently used tools should be positioned within arm’s reach of the work surface.
Small containers can hold materials such as buttons, clips, thread spools, or decorative elements used in creative projects. Larger shelves attached to the pegboard can store cutting mats or project folders.
Maintenance involves returning tools to their designated positions after each project. This habit keeps the pegboard system organized and prevents overcrowding. Periodically rearrange accessories if crafting activities change, ensuring the system continues to meet workspace needs.
Idea 6: Window-Side Creative Workstation
How to Create
A window-side creative workstation uses natural light to improve both office productivity and crafting precision. Positioning a desk or craft table near a window provides consistent lighting throughout the day, which is particularly beneficial for detailed DIY projects such as drawing, sewing, painting, or paper crafting. Natural light reduces shadows and improves color accuracy when working with artistic materials.
In many Pinterest ideas, window workstations create an aesthetic workspace that feels open and inspiring. The view outside the window can contribute to a calm environment while also increasing focus during work sessions. Natural light also reduces the need for constant artificial lighting during daytime hours.
This setup works well in a home office and craft room combo because it supports both digital and manual tasks. The desk near the window can function as a primary workstation where office work and creative projects alternate throughout the day. The open area around the window often becomes a natural focal point in the room.

Designing a window workstation requires careful organization so that sunlight does not cause glare on computer screens. Proper desk orientation and adjustable lighting help maintain comfort while preserving the benefits of natural illumination.
To implement this design, begin by positioning the desk perpendicular to the window. This orientation allows natural light to illuminate the workspace without shining directly into computer screens. Ensure that the desk surface remains large enough to support both office equipment and crafting materials.
Install lightweight shelves or cabinets near the window area to store supplies. These storage solutions should remain compact so they do not block natural light. Transparent containers can help keep materials visible while maintaining organization.
Adjustable blinds or curtains allow control over light intensity throughout the day. When sunlight becomes too strong, partially closing blinds prevents glare while still allowing light into the workspace.
Supplement natural light with an adjustable desk lamp for evening work sessions. Combining natural and artificial lighting ensures the workstation remains functional throughout the day and night. This step by step setup creates a balanced workspace that supports both productivity and creative inspiration.
Idea 7: Closet Craft Studio Conversion
How to Create
A closet craft studio conversion transforms an unused closet into a dedicated crafting area while preserving the main room as an organized home office. This approach is especially effective in small homes where space must be used efficiently. By turning the closet into a craft station, supplies remain hidden when not in use, allowing the room to maintain a professional appearance.

Pinterest inspiration frequently showcases closet craft studios because they combine organization with compact design. Shelves, pegboards, and storage bins can be installed inside the closet to hold craft materials. A small desk or fold-out surface provides a workspace for projects.
The benefit of this layout is its ability to conceal clutter. When crafting activities are finished, the closet doors can be closed, instantly transforming the room back into a clean office environment. This separation between work and creativity helps maintain focus during professional tasks.
Closet studios also encourage efficient organization. Limited space requires thoughtful planning of materials and tools. Supplies must be categorized and stored carefully to maximize storage capacity. The result is a compact yet functional creative project station within the larger home office space.
To create this setup, begin by clearing the closet and measuring the interior space. Install vertical shelving units along the back wall to store containers and craft materials. Small bins or labeled boxes help organize items by category.
Mount a pegboard or magnetic strip on the interior wall to hold frequently used tools. A fold-down desk or narrow table can serve as the main crafting surface. Ensure the surface is stable enough for cutting, painting, or assembling materials.
Lighting is important inside a closet workspace. Install LED strip lights or a small adjustable lamp to illuminate the area clearly. This ensures visibility when working on detailed projects.
When a project is complete, return materials to their storage containers and close the closet doors. This simple routine keeps the room organized while maintaining a fully functional craft station.
Idea 8: L-Shaped Craft and Office Desk
How to Create

An L-shaped desk layout creates a natural division between office tasks and crafting activities while maintaining a single continuous workstation. This design uses a desk that extends across two connected surfaces forming a corner. One side functions as the office desk, while the other serves as the craft workspace.
This layout appears frequently in Pinterest ideas because it maximizes corner areas that are often underutilized in rooms. The corner position allows users to rotate between tasks without leaving the chair. Office work can be completed on one side while creative projects remain arranged on the adjacent surface.
The L-shaped design also provides additional workspace compared to standard desks. The extended surface area allows space for computers, documents, and crafting tools simultaneously. This arrangement reduces the need to constantly clear surfaces when switching between activities.
Storage cabinets or drawer units can be installed beneath each section of the desk. These compartments help separate office supplies from craft materials, maintaining organization throughout the workspace. The overall design supports efficiency while maintaining a clean and modern aesthetic suitable for a productive home office environment.
Setting up this workstation begins by selecting a corner location with adequate space for the L-shaped desk. Position the computer and office equipment on one side of the desk where electrical outlets are available.
Reserve the other side for crafting tasks. Place containers, cutting mats, or crafting tools in organized storage bins beneath the desk. Drawer organizers help keep small items separated and accessible.
Install wall shelves above the crafting side to hold additional materials. These shelves prevent clutter from spreading across the desk surface. Adjustable task lighting can be placed above both sections of the workstation.
Maintain organization by keeping each side dedicated to its specific function. After completing a craft project, clean the workspace and return materials to storage containers. This process keeps the L-shaped workstation efficient and visually organized.
Idea 9: Vertical Shelf Craft Library
How to Create

A vertical shelf craft library focuses on organizing crafting materials in a structured shelving system that resembles a small library. This idea uses tall shelving units to store project supplies, containers, books, and crafting tools in an organized and visually accessible format. The system supports efficient storage while also displaying creative materials as part of the room’s aesthetic design.
Pinterest inspiration frequently features vertical shelving because it maximizes storage capacity without occupying excessive floor space. Each shelf can hold labeled bins, jars, or baskets that store materials such as fabrics, yarn, paper, paint supplies, or decorative elements used in DIY projects.
This setup also encourages better project planning. By keeping materials visible and organized, users can easily assess available supplies before starting a new creative project. The shelving system becomes both a storage solution and a source of creative inspiration.
The craft library concept works particularly well in home office environments because it maintains a clean and structured appearance. Materials remain organized and categorized rather than scattered across desks or drawers. This system therefore supports both organization and creativity within a shared workspace.
To implement this idea, begin by installing tall shelving units along one wall of the room. Measure the wall height to ensure shelves maximize vertical space while remaining accessible. Arrange containers on shelves according to material type.
Use clear bins or labeled boxes to separate categories such as paper crafts, sewing supplies, painting tools, or decorative materials. Placing labels on containers helps maintain organization and simplifies the process of locating supplies.
Heavier materials should be stored on lower shelves to maintain stability. Frequently used supplies can remain on middle shelves for easy access during projects. Less commonly used materials can be stored on upper shelves.
Regular organization helps maintain the system. After completing a project, return supplies to their designated containers. This routine ensures the craft library remains tidy and continues to function as an efficient storage solution.
Idea 10: Multi-Zone Creative Productivity Room
How to Create

A multi-zone creative productivity room organizes a home office and craft space into clearly defined functional areas. Instead of merging all activities into one workstation, the room is divided into zones dedicated to specific tasks. These zones may include an office work area, a crafting station, a storage zone, and a planning or inspiration board area.
This concept is widely shared in Pinterest ideas because it creates an efficient workflow environment. Each zone supports a different stage of the creative process. The office zone handles digital work and planning tasks, while the crafting zone allows hands-on creative activity. Storage zones keep materials organized, and inspiration boards display project ideas.
Dividing the room into zones prevents clutter from spreading across the entire space. Each activity remains contained within its designated area. This structured layout improves productivity while encouraging creative exploration.
The multi-zone concept also supports flexibility. As creative interests change, zones can be adjusted to accommodate new tools or materials. This adaptability makes the system suitable for beginners as well as experienced crafters.
To create this layout, begin by mapping the room into functional sections. Position the office desk in the quietest area of the room to support focused work. Place the craft workstation near storage shelves so materials remain accessible.
Use rugs, lighting, or furniture placement to visually separate each zone. For example, a shelving unit can act as a divider between the office and crafting sections. Wall-mounted boards or pinboards can serve as planning and inspiration areas.
Organize materials within each zone to maintain efficiency. Office documents should remain in the office area, while craft tools remain near the crafting station. This separation simplifies workflow and prevents materials from becoming mixed together.
Regularly review each zone and adjust storage systems as projects evolve. This step ensures the multi-zone room continues to function as a balanced and organized workspace.
Common Beginner Mistakes and How to Avoid Them
A common mistake when designing a home office and craft room combo is attempting to store too many materials in a limited space. Excess supplies quickly lead to cluttered desks and disorganized storage areas. To prevent this problem, categorize materials and keep only the tools and supplies required for active projects. Seasonal or rarely used items should be stored separately to maintain a functional workspace.
Another frequent issue is failing to separate office tasks from crafting activities. When both activities share the same surface without organization, the workspace becomes inefficient. Creating clearly defined work zones or separate desks helps maintain productivity.
Lighting is another factor that beginners often overlook. Crafting tasks require clear illumination for detailed work, while office tasks require balanced lighting that reduces screen glare. Combining natural light with adjustable desk lamps helps solve this issue.
Poor storage planning can also reduce efficiency. Without labeled containers or structured shelving, materials become difficult to locate. Using vertical storage, pegboards, and categorized containers ensures tools remain organized and accessible.
Practical Tips for Better Results
Maintaining organization is essential for a successful home office and craft room combo. One effective strategy is grouping materials by project type. For example, sewing supplies, painting materials, and paper crafting tools should each have their own storage containers. This organization method reduces time spent searching for supplies.
Another helpful tip involves creating a project preparation area. Before starting a creative project, gather all required materials and place them on a tray or container. This approach prevents unnecessary movement across the room during the crafting process.
Routine cleaning also improves workspace efficiency. At the end of each project session, return tools to their storage locations and wipe down work surfaces. This small habit prevents clutter from accumulating.
Using labeled containers is another practical solution. Clear labels simplify the process of locating tools quickly and maintaining consistent organization.
Finally, consider adjusting the workspace over time. As creative interests evolve, storage systems and furniture placement may require updates. Periodically reviewing the layout ensures the room continues to support productivity and creativity.
Styling, Presentation, or Organization Ideas
Styling a home office and craft room combo can improve both functionality and visual appeal. A clean and structured aesthetic helps maintain focus during work sessions while also encouraging creativity during craft projects. Many Pinterest inspiration boards highlight minimalist design combined with organized storage systems.
Neutral wall colors often help maintain a calm workspace environment. Shelving units and storage containers can then introduce subtle color through craft materials or decorative elements. Transparent containers allow supplies to become part of the room’s visual design while still maintaining organization.
Wall-mounted inspiration boards or pinboards can display project ideas, sketches, or color palettes. These boards create a visual reference area that supports creative planning.
Desk surfaces should remain mostly clear to preserve workspace efficiency. Decorative elements such as small plants, framed artwork, or simple organizers can add character without creating clutter.
Maintaining visual consistency across storage containers and shelving units also improves the overall appearance of the room. Matching baskets, jars, or labeled boxes contribute to a cohesive and organized workspace.
Budget or Time Planning
Creating a home office and craft room combo does not require a large budget. Many effective storage solutions can be created using simple DIY organization methods. Reusing containers, baskets, or small drawers helps reduce costs while maintaining functionality.
Planning the project in stages can also improve efficiency. Start by arranging essential furniture such as the desk and crafting surface. Once the main work areas are established, additional storage systems such as shelves or pegboards can be added gradually.
Budget planning should prioritize practical items that improve organization. Storage bins, labeling systems, and wall-mounted shelves often provide the greatest improvement in workspace efficiency.
Time planning is also important when organizing the room. Instead of attempting to complete the entire setup in one day, divide the process into smaller steps. One day can focus on sorting materials, another on installing storage systems, and another on arranging furniture.
This gradual approach reduces stress while ensuring the workspace is arranged thoughtfully.
Creative Expansion and Advanced Inspiration
Once a basic home office and craft room combo is established, additional features can enhance creativity and efficiency. One expansion idea involves adding a dedicated inspiration wall where sketches, design ideas, and project plans can be displayed. This area becomes a visual brainstorming space for future creative projects.
Another advanced concept involves incorporating modular storage systems. Adjustable shelving and movable containers allow the workspace to evolve as crafting interests change. This flexibility supports long-term organization.
Technology can also enhance the creative workspace. Digital planning boards, tablets for design sketches, or computer software for project planning can integrate with traditional crafting activities.
Lighting upgrades are another expansion option. Adjustable overhead lighting or directional lamps improve visibility for detailed work while also enhancing the room’s aesthetic appearance.
Finally, consider rotating creative displays within the workspace. Finished handmade decorations, artwork, or completed projects can be displayed temporarily on shelves. These displays provide motivation and showcase the creative potential of the workspace.