Background wall art plays a central role in shaping the overall appearance of a room. It provides visual structure, supports color balance, and enhances the aesthetic quality of home decor. In many Pinterest ideas, background wall art is used as a foundation that connects furniture, lighting, and decorative elements into a cohesive design. This type of creative project focuses on large-scale visuals that are both functional and decorative. It allows individuals to transform blank walls into structured design features using simple materials and clear techniques. This article presents ten beginner friendly background wall art ideas that are practical and easy to implement. Each idea includes a clear explanation of the concept and a step by step method to create it. The focus remains on modern design, minimalist style, and organized execution. Readers will learn how to plan, prepare, and complete wall art projects that enhance interior spaces while maintaining a clean and balanced look.
Why This Idea Is Trending or Useful
Background wall art is widely recognized in trending ideas because it offers a practical solution for improving interior spaces without major renovation. Many people look for DIY methods to upgrade their home decor, and wall art provides a direct and effective approach. It allows for customization, making it possible to match colors, themes, and room layouts with precision. This type of decoration is useful because it covers large areas, creating a strong visual impact with relatively simple materials. The design relevance is closely linked to modern design trends that emphasize minimalism, balance, and functionality. Background wall art is also accessible for beginners because it often relies on basic techniques such as painting, pattern creation, and color blocking. These projects can be completed step by step without specialized tools. Its combination of affordability, creative control, and immediate visual improvement makes it a valuable option for anyone seeking practical and aesthetic upgrades.
Materials and Preparation
Creating background wall art requires careful preparation to ensure clean and consistent results. Basic materials include acrylic paints, rollers or wide brushes, painter’s tape, measuring tools, and a smooth wall surface. Optional materials such as stencils or sponges can be used to add texture or patterns. Preparation begins by cleaning the wall to remove dust and ensure proper paint adhesion. Planning the design is essential for maintaining organization and balance. This includes selecting a color palette that complements existing home decor and marking guidelines for shapes or sections. Measuring the wall helps determine proportions and spacing, especially for geometric or patterned designs. Protecting surrounding areas with tape or covering materials prevents accidental paint marks. Testing colors on a small section allows adjustments before full application. Keeping tools organized and accessible supports efficient workflow. Proper preparation ensures that the final creative project is neat, structured, and aligned with the intended aesthetic.
Idea 1: Soft Gradient Background Wall
How to Create
A soft gradient background wall uses gradual color transitions to create depth and visual flow. This design is commonly used in Pinterest inspiration because it adds dimension without overwhelming the space. The gradient effect blends two or more colors seamlessly, creating a smooth transition that enhances modern design. This idea works well in living rooms, bedrooms, and creative spaces where a calm and balanced atmosphere is needed. The concept focuses on color harmony and blending techniques rather than complex patterns. It is considered beginner friendly because it requires simple tools and basic painting skills. The design also supports minimalist style by avoiding sharp contrasts and excessive details. A well-executed gradient wall can act as a focal point while still maintaining a clean and organized appearance.


To create a gradient wall, start by selecting two or three complementary colors. Apply the lightest color at the top of the wall using a roller. While the paint is still wet, apply the second color below it. Blend the area where the colors meet using horizontal strokes. Continue blending until the transition appears smooth. If using a third color, repeat the process gradually. Work in sections to maintain control and consistency. Allow the wall to dry completely before applying a second layer if needed. This step by step method ensures a soft and even gradient effect.
Idea 2: Geometric Pattern Wall
How to Make
Geometric pattern walls use structured shapes such as triangles, rectangles, and lines to create a clean and organized design. This style is widely used in modern home decor due to its sharp visual structure and balance. The design relies on precise spacing and alignment, making it suitable for creating a professional appearance with simple materials. It is a practical creative project that allows customization through different color combinations and layouts. The use of geometric shapes supports minimalist style while still adding visual interest. This idea is beginner friendly because it can be planned in advance and executed step by step using clear guidelines.

To create a geometric wall, begin by measuring the surface and marking the pattern layout with a pencil. Use painter’s tape to define the edges of each shape. Apply different colors within each section, ensuring even coverage. Allow each section to dry before removing the tape or painting adjacent areas. Use consistent color combinations to maintain harmony. Remove the tape carefully once the paint is dry to reveal clean edges. This process ensures precise and structured results.
Idea 3: Minimalist Line Art Wall
Step-by-Step Guide
A minimalist line art wall focuses on simple outlines and continuous lines to create an elegant design. This concept is popular in Pinterest ideas because it aligns with modern aesthetic trends and clean interiors. The design often includes abstract shapes, faces, or organic forms drawn with thin lines. It adds visual interest without overwhelming the wall. The simplicity of the design makes it beginner friendly and suitable for various spaces. It also complements neutral color palettes and supports organized decoration.


To create this wall art, start with a plain background color. Lightly sketch the design to guide placement. Use a fine brush to paint the lines with steady strokes. Maintain consistent thickness and spacing. Avoid overworking the design to preserve its simplicity. Allow the paint to dry completely before making adjustments. This method ensures a clean and refined result.
Idea 4: Nature-Inspired Leaf Wall
How to Create
A nature-inspired leaf wall incorporates organic shapes and natural tones to bring a calm and balanced atmosphere into a space. This design reflects natural patterns and is widely used in aesthetic home decor. It focuses on repeated leaf shapes arranged in a structured pattern. The use of earthy colors enhances the overall visual harmony.

To create this design, sketch simple leaf shapes across the wall. Use a medium brush to paint each shape with smooth strokes. Maintain consistent spacing to avoid overcrowding. Add details such as veins once the base layer is dry. This step by step process ensures a cohesive and natural appearance.
Idea 5: Textured Sponge Wall Art
Execution Process
Textured sponge wall art uses sponges to create layered patterns that add depth and variation. This technique is often used in DIY projects because it is simple and produces unique results. The texture enhances the visual appeal of the wall without requiring complex tools.


To execute this idea, apply a base coat and allow it to dry. Dip a sponge into paint and dab it lightly onto the wall. Work in layers to build texture gradually. Use different shades to create depth. Allow each layer to dry before adding more texture. This method ensures a balanced and structured finish.
Idea 6: Color Block Background Wall
How to Create

Color block walls use large sections of solid colors to create bold and modern compositions. This design emphasizes contrast and simplicity, making it a popular choice for minimalist style interiors.
To create this wall, divide the surface into sections using tape. Apply different colors within each section. Ensure even coverage and allow layers to dry before removing the tape. This step by step approach results in clean and defined sections.
Idea 7: Abstract Brush Stroke Wall
Step-by-Step Guide
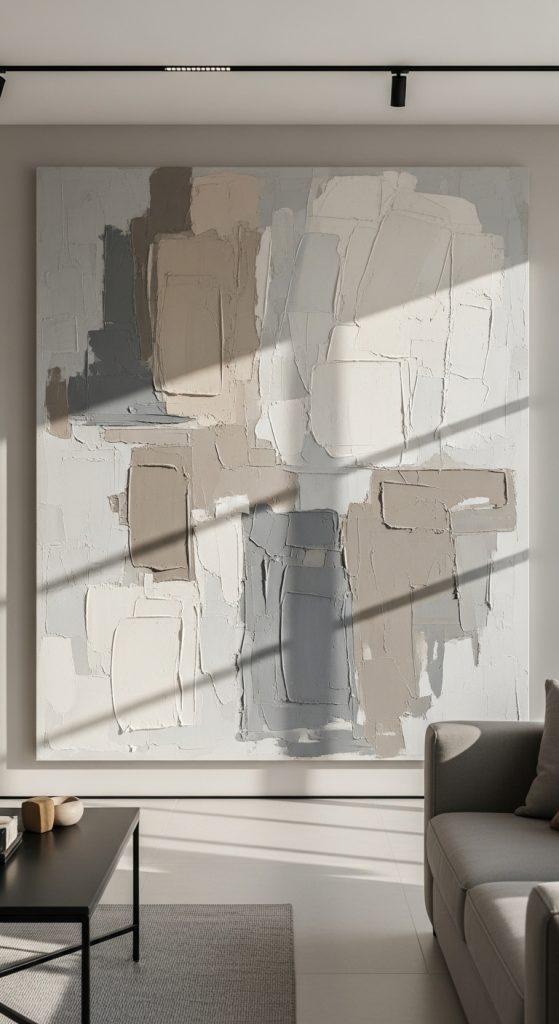
Abstract brush stroke walls focus on expressive movement and layered strokes. This design allows flexibility and creativity while maintaining a structured composition. It is widely used in creative ideas for modern decor.

To create this design, start with a neutral base. Use large brushes to apply strokes in different directions. Layer colors gradually to build depth. Maintain balance by leaving some areas empty. This process ensures a dynamic yet controlled result.
Idea 8: Arch Accent Wall Design
How to Create
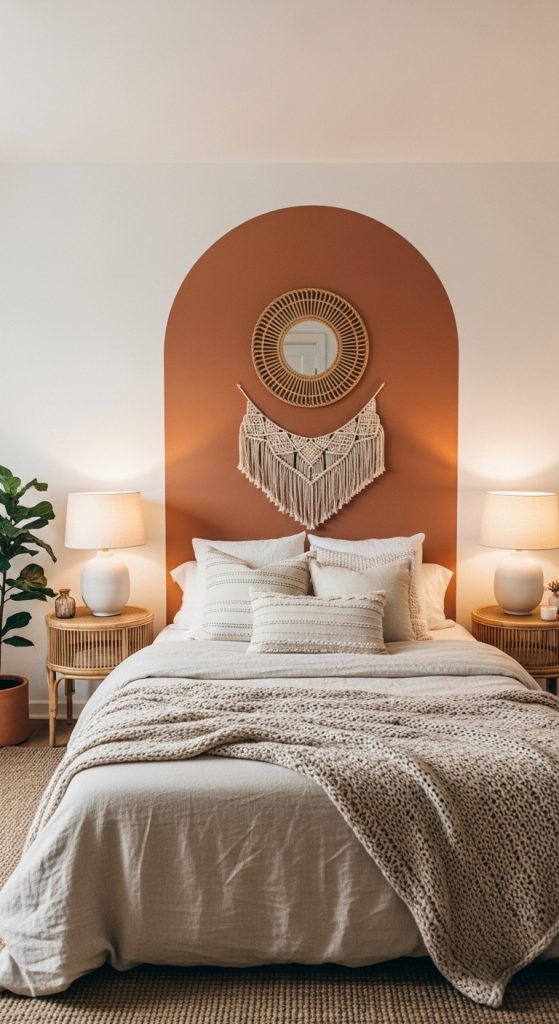
Arch accent walls use curved shapes to create a focal point within a room. This design is commonly used in modern interiors to highlight specific areas such as seating or beds.
To create this design, sketch a large arch shape on the wall. Use a roller to fill the shape with a chosen color. Keep edges clean for a polished look. Allow the paint to dry before adding additional details. This method ensures a smooth and balanced design.
Idea 9: Patterned Dot Wall
Setup Method

A patterned dot wall uses evenly spaced dots to create a playful and organized design. This idea is simple and suitable for beginner friendly projects.

To create this wall, mark a grid to guide dot placement. Use a round tool to apply paint evenly. Maintain consistent spacing and size. Allow layers to dry before adding more details. This ensures a clean and structured pattern.
Idea 10: Layered Landscape Wall Art
How to Make
Layered landscape wall art uses overlapping shapes to represent natural scenes. This design focuses on color layering and smooth transitions.
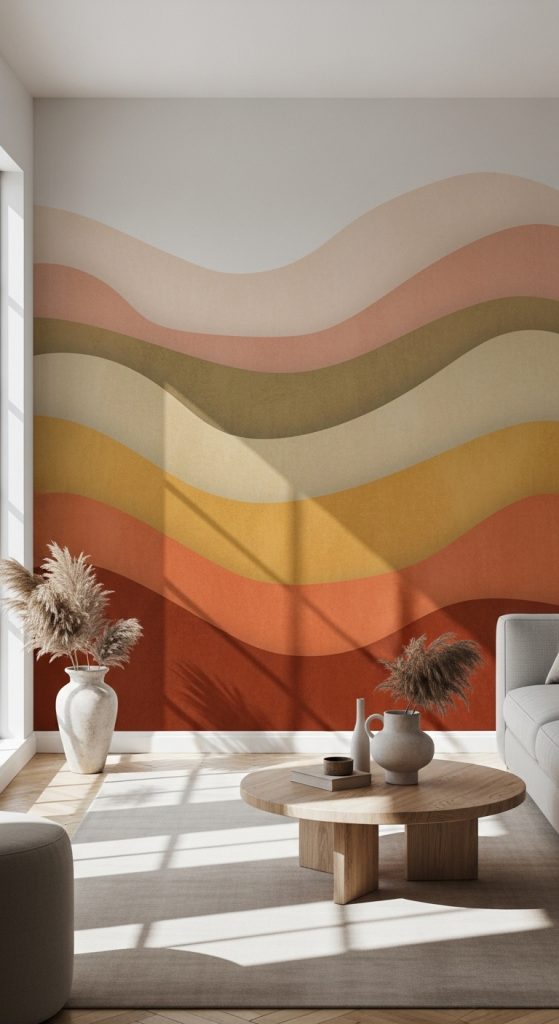
To create this design, sketch simple landscape shapes and fill them with coordinated colors. Blend edges slightly to create depth. Allow each layer to dry before adding the next. This step by step process ensures a cohesive and calming result.
Common Beginner Mistakes and How to Avoid Them
A frequent mistake in background wall art projects is inadequate surface preparation, which leads to uneven paint application and reduced durability. Skipping cleaning steps can prevent proper paint adhesion, resulting in patchy areas. Another common issue is poor planning of the design layout, which causes misalignment and imbalance. Beginners often underestimate the importance of measuring and marking guidelines before starting. Using too much paint or applying thick layers can also create visible streaks and extended drying times. To avoid these problems, clean the wall thoroughly, plan the design in advance, and use thin, even layers of paint. Working in sections and allowing each layer to dry properly helps maintain consistency. Careful preparation and controlled execution ensure a more professional and long-lasting result.

Practical Tips for Better Results
Improving the outcome of wall art projects requires consistent technique and attention to detail. Use high-quality brushes or rollers that match the scale of the design. Keep paint layers thin and build color gradually to achieve smooth coverage. Test colors before full application to ensure they match the intended palette. Work in a well-lit environment to maintain accuracy in color and alignment. Take breaks to step back and evaluate the design from a distance. This helps identify areas that need adjustment. Keeping tools organized improves efficiency and reduces interruptions. These practical steps enhance both the process and the final result.
Styling, Presentation, or Organization Ideas
Effective styling of background wall art enhances its integration into the overall space. Align the design with existing furniture and color schemes to create a cohesive look. Use complementary decor elements such as cushions or rugs to reinforce the theme. Keep surrounding areas uncluttered to highlight the wall art as a focal point. Organizing tools and materials after completion ensures readiness for future projects. Proper presentation transforms the wall into a central design feature that supports the room’s overall aesthetic.
Budget or Time Planning
Efficient planning allows wall art projects to be completed within a manageable budget and timeframe. Use reusable materials and avoid unnecessary purchases. Start with smaller sections to practice techniques before covering larger areas. Allocate time for preparation, painting, and drying to prevent rushing. Working in stages improves accuracy and reduces errors. Planning color schemes and layouts in advance helps minimize material waste and ensures a smoother workflow.
Creative Expansion and Advanced Inspiration
Expanding background wall art projects involves combining techniques and exploring new design concepts. Try integrating geometric patterns with gradient backgrounds to create layered effects. Experiment with textured tools to add depth and variation. Explore different color palettes to match seasonal or thematic changes. Advanced inspiration includes combining multiple ideas into a single composition to create unique and personalized designs. Continuous experimentation supports skill development and enhances creative outcomes.
