
Mushroom villages in Minecraft represent a creative building concept that combines fantasy architecture with natural biome inspiration. These villages use mushroom shapes, red and brown textures, and organic layouts to create unique settlements that feel different from traditional Minecraft towns.
On Pinterest, this concept appears frequently as builders search for creative ideas that combine nature themes with imaginative design. Mushroom villages often appear in survival bases, fantasy maps, and decorative Minecraft worlds. The rounded forms and bright colors create a distinctive aesthetic that stands out against standard block structures.
This article presents ten practical mushroom village Minecraft ideas that builders can recreate using a clear step-by-step approach. Each concept focuses on structure layout, design principles, and simple building methods that beginners can follow. The ideas range from small starter houses to larger village features such as markets, farms, and communal buildings.
Each design uses accessible materials and focuses on practical construction techniques. By following these ideas, readers will learn how to plan a mushroom-themed settlement, organize buildings effectively, and create an aesthetic environment that feels cohesive. These concepts provide strong inspiration for players who want to build a complete mushroom village while improving their creative building skills.
Why This Idea Is Trending or Useful
Mushroom village Minecraft builds have become popular because they combine simple materials with visually distinctive shapes. Many Minecraft players search for creative ideas that differ from traditional square houses. Mushroom structures naturally introduce curved silhouettes and organic forms that add variety to village layouts. This style fits well within fantasy-themed worlds and story-driven survival bases. On Pinterest, these builds attract attention because their bright red caps, white stems, and glowing interiors create a visually recognizable design style that works well in screenshots and inspiration boards.
Another reason for the popularity of mushroom villages is their beginner-friendly construction process. Many mushroom structures rely on simple circles, domes, and layered roofs that can be built step by step without advanced redstone or complicated geometry. This makes them accessible for players who are new to creative building. Mushroom villages also work well for DIY experimentation because builders can easily change cap colors, resize structures, or add decorative elements such as vines, lanterns, and pathways. These creative projects encourage players to explore natural themes while improving layout planning. As a result, mushroom village builds are often shared as trending ideas for aesthetic Minecraft worlds and imaginative home decor environments within the game.
Materials and Preparation
Building a mushroom village requires basic materials that are widely available in Minecraft. The most commonly used blocks include red mushroom blocks, brown mushroom blocks, mushroom stems, oak planks, spruce planks, glass panes, and lanterns. These materials help create the recognizable mushroom appearance while also providing functional interior spaces. Decorative blocks such as moss, leaves, vines, and flowers can add natural detail around the village. Builders often use stone paths, coarse dirt, or rooted dirt to create organic walkways between buildings. These materials support the overall aesthetic while keeping the village visually connected to the surrounding environment.
Preparation begins with selecting a suitable location for the village. Flat areas in plains, forests, or near mushroom islands work well because they provide space for multiple structures. Before starting construction, it helps to sketch a rough layout plan for the village. Decide where houses, farms, storage buildings, and communal areas will be placed. Spacing buildings evenly helps maintain visual balance. Next, gather the required materials in sufficient quantities. Many mushroom structures require circular foundations, so planning the diameter of each building beforehand simplifies the process. This preparation stage ensures the project progresses smoothly and prevents interruptions during construction.
MAIN IDEAS
Idea 1: Classic Mushroom House
How to Create
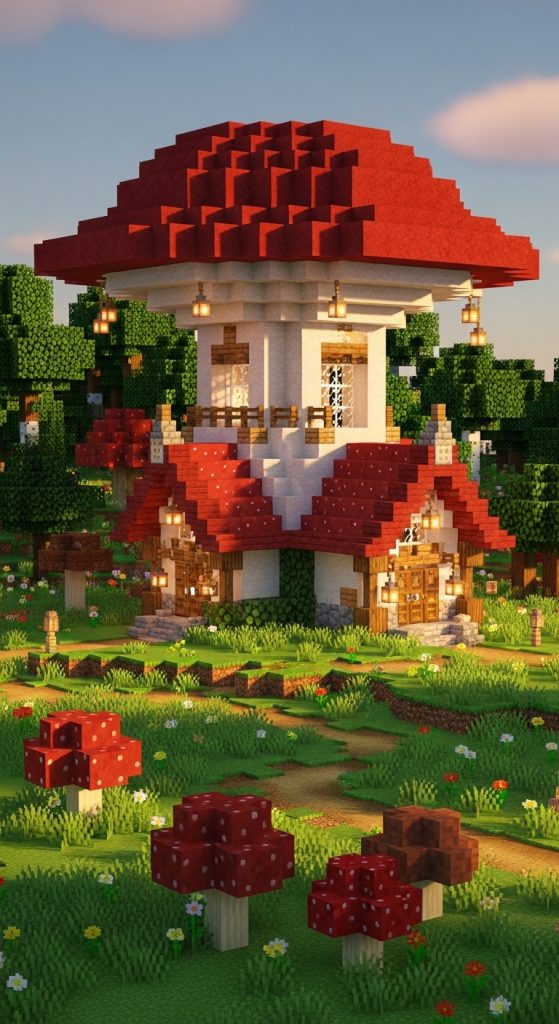
The classic mushroom house serves as the foundation for many mushroom village designs. This structure mimics the natural shape of a large mushroom with a cylindrical stem and a wide domed cap. The stem functions as the living space, while the cap acts as the roof. This design creates a recognizable aesthetic that immediately communicates the mushroom theme. Builders often use mushroom stem blocks or white concrete for the vertical structure, while red mushroom blocks or brown mushroom blocks form the roof. Windows can be placed around the circular wall to allow natural light into the interior. The rounded roof creates a cozy appearance and visually distinguishes the house from traditional square Minecraft homes.
To build this structure, begin by creating a circular base approximately seven blocks in diameter. Construct the vertical stem walls about five blocks high using mushroom stem blocks or light-colored blocks. Leave space for a doorway and add glass panes for windows. After completing the walls, begin shaping the mushroom cap by extending blocks outward one layer beyond the walls. Continue stacking additional layers while gradually expanding the circle to form a dome shape. Use red mushroom blocks to achieve the traditional mushroom appearance. Once the roof is finished, place lanterns or torches inside for lighting. Add wooden flooring and basic furniture to complete the interior space.
Idea 2: Giant Central Mushroom Hall
How to Create
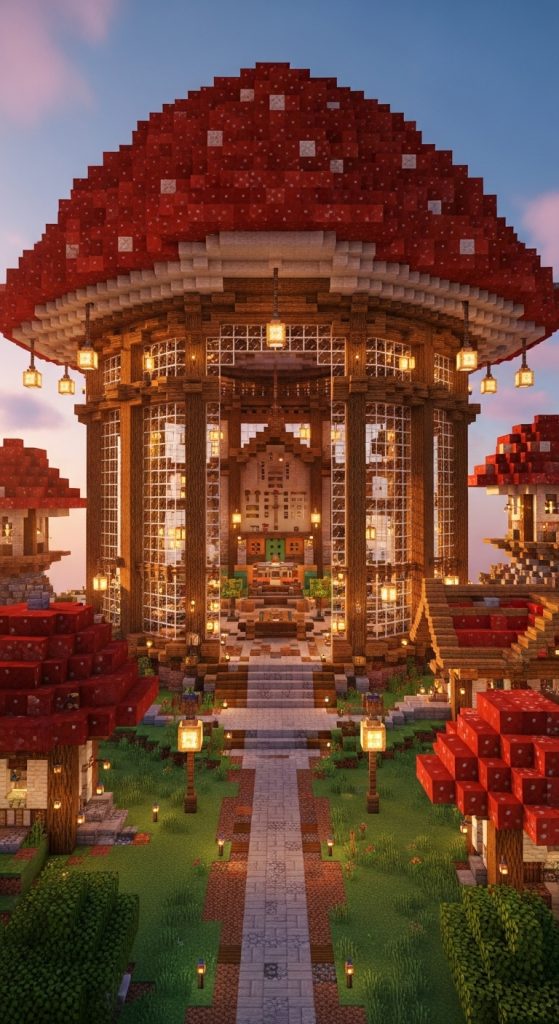
A giant mushroom hall functions as the central gathering point for a mushroom village. This structure is larger than typical houses and serves multiple purposes such as storage, crafting, or social interaction. The design uses the same mushroom-inspired architecture but expands the scale to create a dramatic centerpiece. The tall stem structure forms a spacious interior hall, while the wide mushroom cap acts as a protective roof that covers the entire building. This structure often becomes the visual anchor of the village because its height and color make it visible from a distance.
Start by marking a circular foundation approximately fifteen blocks in diameter. Construct thick walls using mushroom stems or light-colored blocks, raising them about eight to ten blocks high. Leave large openings for doors and windows to create a welcoming atmosphere. Next, build a wide mushroom cap roof using layered red mushroom blocks. Each layer should extend slightly beyond the one below to form a smooth dome shape. Inside the hall, create organized areas for crafting tables, storage chests, and furnaces. Hanging lanterns from the ceiling adds warm lighting that enhances the interior environment. This building becomes a functional hub that supports daily activities within the mushroom village.
Idea 3: Mushroom Farmer Hut
How to Create
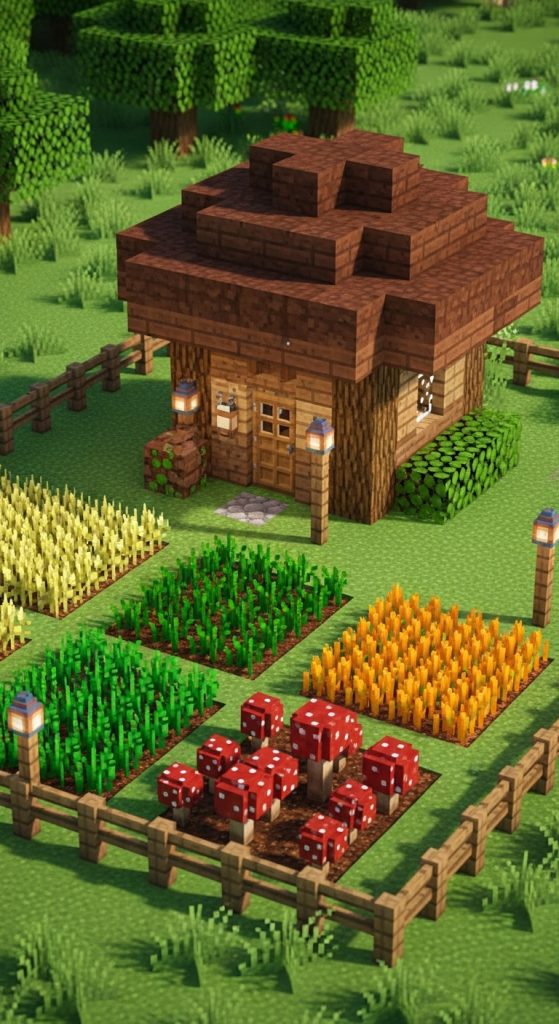
The mushroom farmer hut focuses on agricultural functionality while maintaining the mushroom village aesthetic. This small building supports mushroom farming, crop storage, and food preparation. The structure typically appears near farming plots or natural mushroom growth areas. Its design emphasizes practicality while still following the rounded mushroom architecture used throughout the village. Builders often combine red and brown mushroom blocks to create visual variation, which helps distinguish the farmer hut from other buildings.
To construct this hut, begin with a small circular base about six blocks wide. Build the walls using mushroom stems or wood blocks. Include a door facing the farm area to improve accessibility. The roof can be formed with brown mushroom blocks to create a natural farming theme. Around the hut, place farmland patches for wheat, carrots, or potatoes. A nearby mushroom farm using mycelium blocks supports sustainable food production. Inside the hut, add chests for crop storage and a crafting table for processing materials. Lanterns or glowstone can provide lighting at night. This setup creates a functional farming area that integrates seamlessly into the village layout.
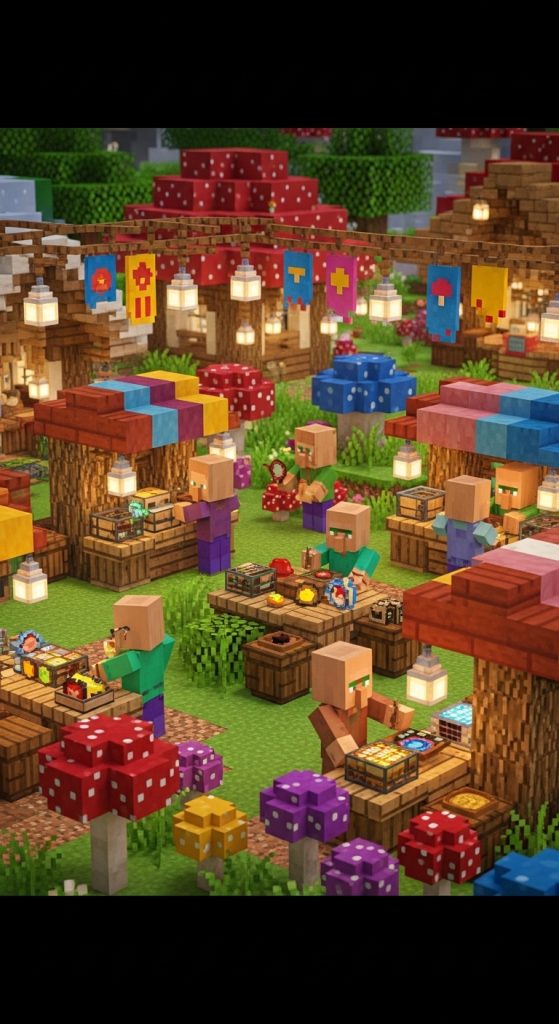
Idea 4: Mushroom Market Stalls

How to Create
Market stalls introduce commercial activity into a mushroom village environment. These small structures create a lively marketplace where villagers or players can exchange items. Instead of full mushroom houses, the stalls use miniature mushroom caps as roofs above wooden counters. This design keeps the mushroom theme consistent while maintaining open space for trading activities. The stalls often appear in clusters around a central plaza or pathway intersection.
Begin by creating small wooden platforms for each stall. Place fence posts or wooden pillars at the corners to support the roof. Build a miniature mushroom cap using red or brown mushroom blocks above the pillars. The cap should extend outward slightly to create shade. Add counters using slabs or trapdoors to form a display area. Around the market space, create stone or dirt pathways to organize foot traffic. Decorative elements such as lanterns, banners, and flower pots can enhance the marketplace aesthetic. Multiple stalls placed together create a dynamic market area that makes the village feel active and populated.
Idea 5: Mushroom Storage Tower
How to Create
A mushroom storage tower provides vertical storage space while maintaining the visual theme of the village. This structure uses stacked mushroom levels that resemble multiple mushrooms growing together. The tower format helps organize large quantities of materials while conserving horizontal space. Each level can contain different storage categories such as food, building blocks, or tools.
Start by constructing a circular base approximately nine blocks in diameter. Build the central tower walls upward using mushroom stem blocks or light-colored blocks. Divide the interior into several floors using wooden slabs or planks. Each floor should contain labeled storage chests for organization. The roof of the tower forms a large mushroom cap that extends outward over the top floor. Adding ladders or spiral staircases allows easy movement between levels. Lanterns placed along the walls provide adequate lighting. This tower becomes an important organization center within the mushroom village.
Idea 6: Mushroom Bridge Gateway
How to Create
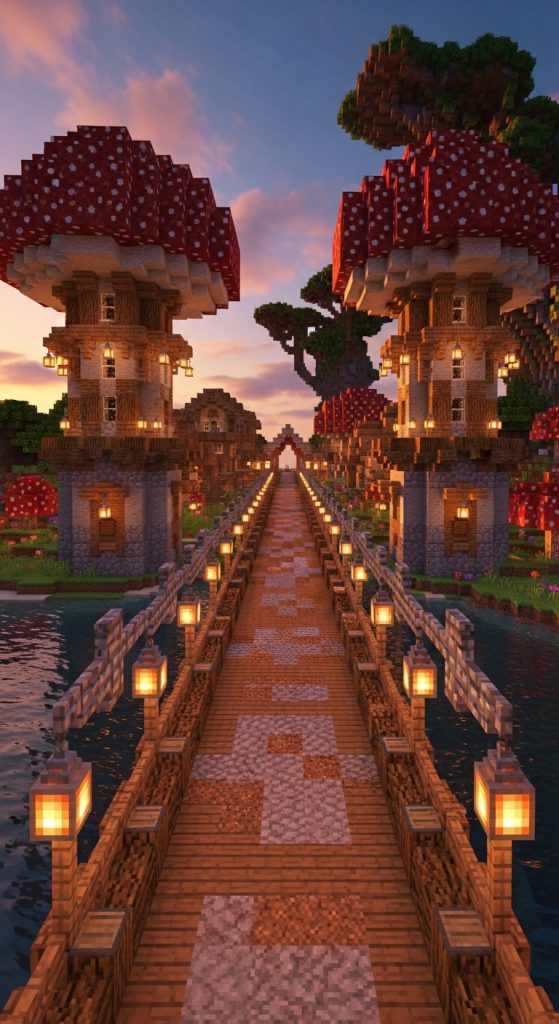
The mushroom bridge gateway serves as an entrance feature for the village. This structure connects pathways across rivers or terrain gaps while incorporating mushroom architecture. Two large mushroom towers can frame the bridge entrance, creating a decorative gateway that marks the boundary of the settlement.
To build this feature, start by constructing a wooden or stone bridge across the terrain gap. At both ends of the bridge, build tall mushroom towers using mushroom stem blocks. Add red mushroom caps on top of each tower to create a symmetrical design. Lanterns or glow blocks can illuminate the bridge at night. Decorative fences along the bridge edges improve safety and visual appeal. This gateway structure provides both functionality and aesthetic character.
Idea 7: Mushroom Garden Pavilion
How to Create
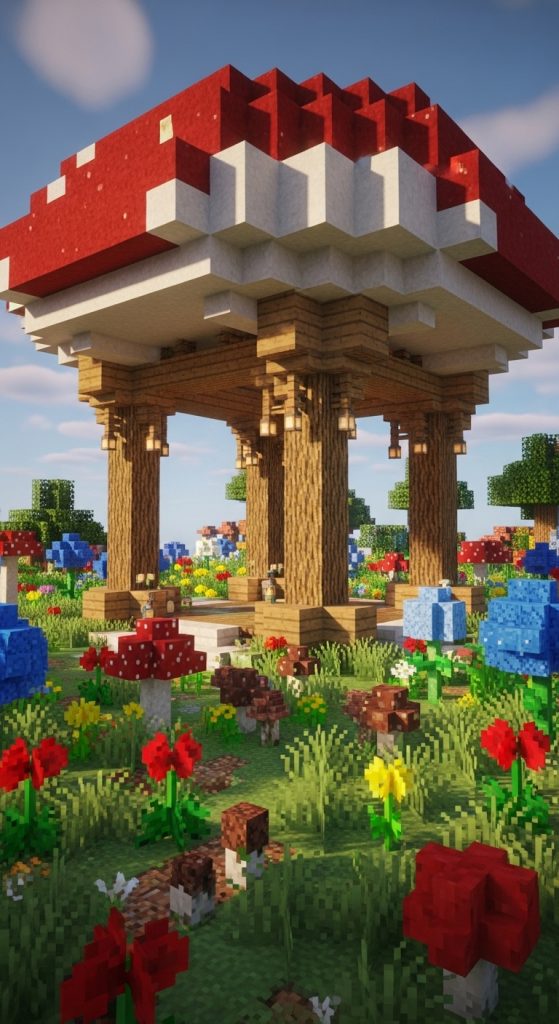
The mushroom garden pavilion acts as a relaxation space within the village. This open structure sits within a garden filled with flowers, mushrooms, and decorative plants. The pavilion roof resembles a mushroom cap supported by wooden pillars. This design provides shade while maintaining an open environment.
Begin by creating a circular stone platform in the garden area. Place wooden pillars evenly around the platform. Build a mushroom cap roof using red mushroom blocks above the pillars. Inside the pavilion, add benches made from slabs or stairs. Surround the pavilion with flowers, grass, and small mushrooms to create a natural environment. Lanterns can hang from the roof to illuminate the area during nighttime.
Idea 8: Mushroom Watchtower
How to Create
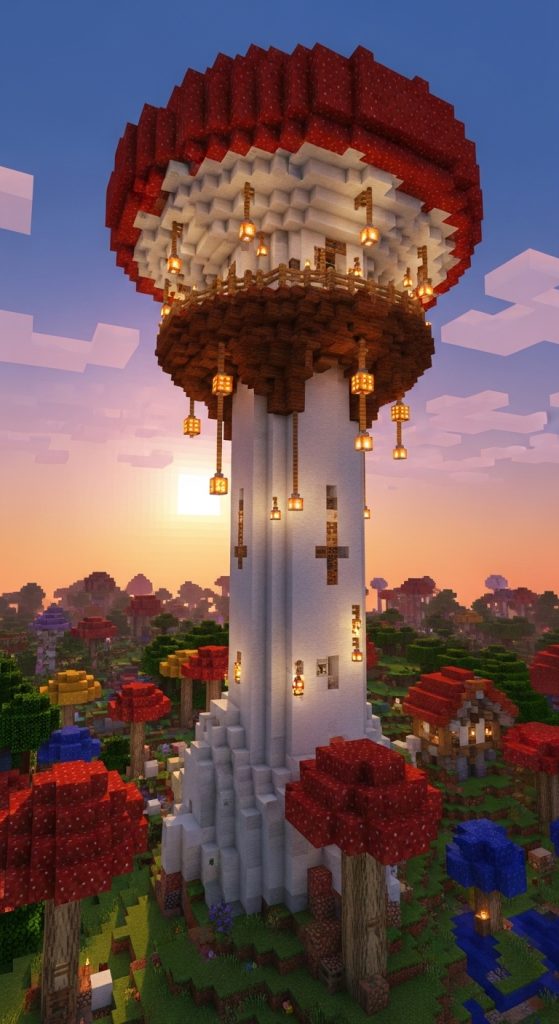
A mushroom watchtower helps protect the village by providing a high vantage point for observing the surrounding terrain. The tower uses a tall mushroom stem base topped with a large mushroom cap that acts as a lookout platform roof. This structure adds vertical variation to the village skyline.
To build the watchtower, create a narrow circular base about five blocks wide. Raise the walls upward using mushroom stem blocks until the tower reaches a significant height. Install ladders or spiral stairs inside for access. At the top, build a wide mushroom cap roof using red mushroom blocks. Add fences around the lookout platform for safety. Lanterns or torches provide nighttime visibility.
Idea 9: Mushroom Library House
How to Create
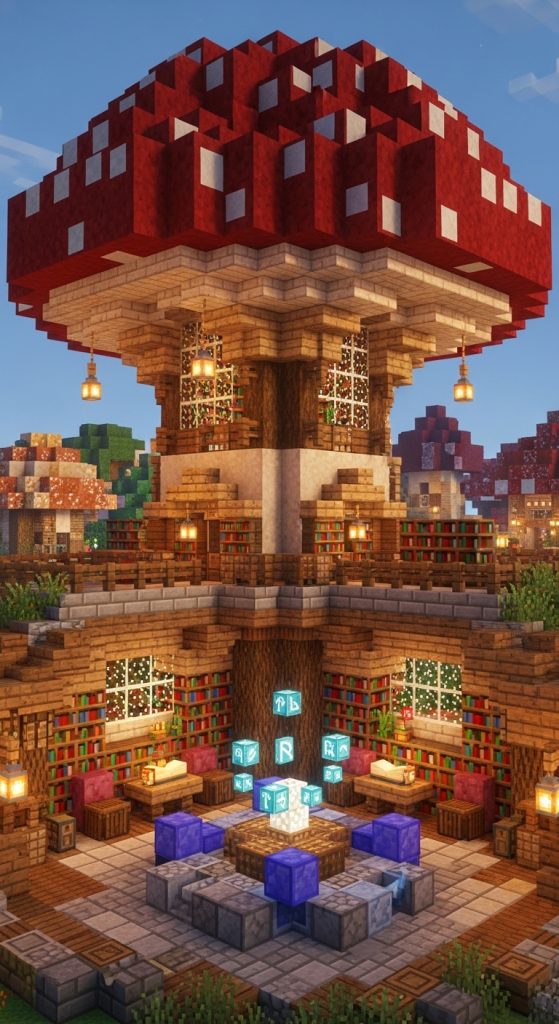
The mushroom library house provides a knowledge center within the village. This building contains bookshelves, enchantment areas, and reading spaces. The mushroom design adds a fantasy atmosphere that suits magical environments.
Construct a medium-sized mushroom house with a circular base about nine blocks wide. Build the walls using mushroom stems and create a large red mushroom cap roof. Inside, arrange bookshelves around the walls. Place an enchantment table in the center. Add wooden tables and chairs to simulate reading desks. Lantern lighting helps create a warm interior atmosphere.
Idea 10: Mushroom Village Fountain
How to Create
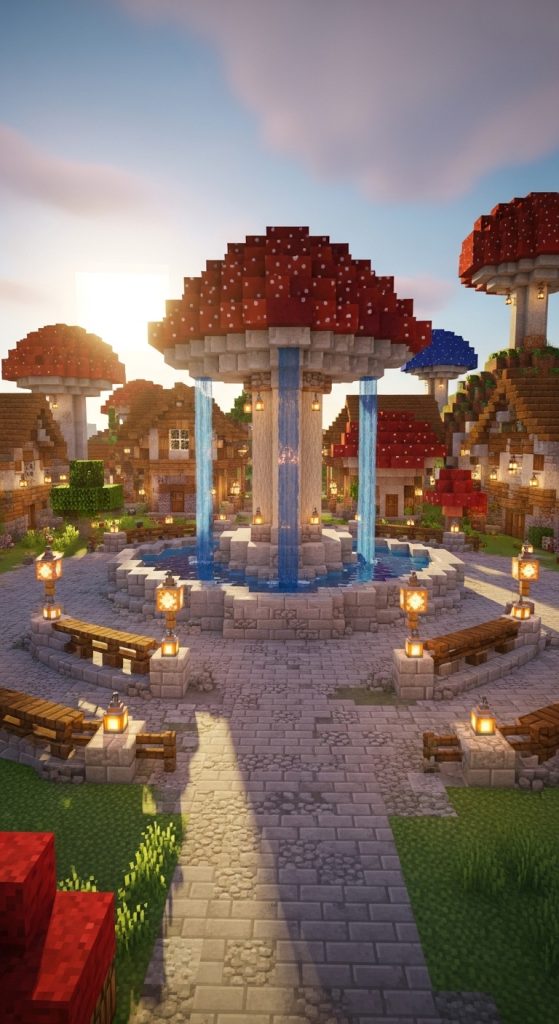
A mushroom fountain creates a decorative centerpiece in the village square. This structure combines water features with mushroom shapes to form a visually interesting landmark. Small mushroom sculptures can surround the fountain basin to reinforce the theme.
Start by digging a circular basin in the center of the plaza. Line the basin with stone or decorative blocks. Build a tall mushroom sculpture in the middle using mushroom stem blocks and a red cap. Water flows from the top into the basin below. Surround the fountain with pathways, lanterns, and benches. This feature becomes a central gathering point for the village.
Common Beginner Mistakes and How to Avoid Them
Many beginners struggle with mushroom village builds because they treat the structures like standard square houses. Mushroom architecture depends heavily on circular layouts and curved roofs. When builders ignore these shapes, the final structure loses the recognizable mushroom appearance. To avoid this mistake, always begin by marking circular foundations before placing walls. Another common mistake involves placing buildings too close together. Mushroom roofs often extend beyond the walls, so crowded layouts can cause overlapping structures. Maintaining consistent spacing between buildings helps preserve the visual balance of the village.
Lighting problems also appear frequently in mushroom villages. Dark interiors or poorly lit pathways reduce functionality and safety. Placing lanterns, glowstone, or torches inside buildings and along pathways ensures the area remains well illuminated. Additionally, beginners sometimes use too many different block types, which disrupts the aesthetic consistency. Limiting materials to mushroom blocks, wood, and natural decorations maintains a unified design style. Careful planning and consistent block choices help prevent these issues.
Practical Tips for Better Results
Successful mushroom village builds rely on strong planning and consistent design choices. One effective tip involves selecting a color theme early in the project. Red mushroom roofs paired with light stems create a classic appearance, while brown mushroom caps create a more natural forest aesthetic. Maintaining a consistent color palette across all buildings ensures visual harmony. Another helpful strategy involves mixing building sizes throughout the village. Combining small huts with larger structures creates depth and variation within the settlement.
Builders can also improve the realism of their village by designing curved pathways rather than straight roads. Organic paths made from dirt, coarse dirt, or stone create a natural environment that matches the mushroom theme. Adding decorative details such as lantern posts, flower beds, and vines enhances the overall atmosphere. These small features help transform simple structures into a cohesive environment. Careful attention to landscaping greatly improves the final appearance of the village.
Styling, Presentation, or Organization Ideas
Styling a mushroom village involves arranging buildings and decorations in ways that reinforce the fantasy aesthetic. Grouping structures into functional districts improves organization. For example, housing areas can remain separate from farming zones or marketplaces. This layout helps players navigate the village more easily. Pathways connecting these districts should follow gentle curves to maintain an organic appearance. Decorative lantern posts placed along these paths provide both lighting and visual structure.
The surrounding landscape also plays an important role in presentation. Adding mushrooms, flowers, and grass patches around buildings creates a natural forest environment. Water features such as ponds or fountains introduce visual contrast while enhancing the atmosphere. Elevation changes using small hills or terraces add depth to the village layout. When these styling techniques combine with consistent mushroom architecture, the entire village feels like a unified creative project rather than a collection of separate buildings.
Budget or Time Planning
Building a mushroom village can be completed efficiently when the project is divided into manageable phases. The first phase involves gathering essential materials such as mushroom blocks, wood, and lighting elements. Collecting these materials in advance prevents construction delays later. The second phase focuses on building core structures such as houses and the central hall. These buildings provide functional spaces for storage and crafting.
After completing the essential structures, builders can move to decorative elements such as gardens, fountains, and market stalls. This phased approach helps maintain steady progress without overwhelming the builder. Working on one structure at a time also ensures each building receives proper attention to detail. Even large villages can be completed gradually using this planning method. Time management becomes easier when the project is organized into smaller construction steps.
Creative Expansion and Advanced Inspiration
Once the basic mushroom village is complete, builders can expand the concept into larger creative projects. Underground tunnels connecting buildings can create hidden pathways beneath the village. Additional structures such as mushroom windmills, treehouses, or fantasy towers can introduce new architectural styles while maintaining the overall theme. Expanding the village across hills or cliffs adds visual complexity and dramatic landscapes.
Advanced builders may experiment with biome integration by placing the village within lush forests or near mushroom island terrain. Custom terrain shaping using dirt and stone can help create natural-looking hills that support the buildings. Decorative lighting patterns using lantern chains or glowing mushrooms add nighttime ambiance. These advanced ideas transform the village into a large creative world that continues evolving over time.


