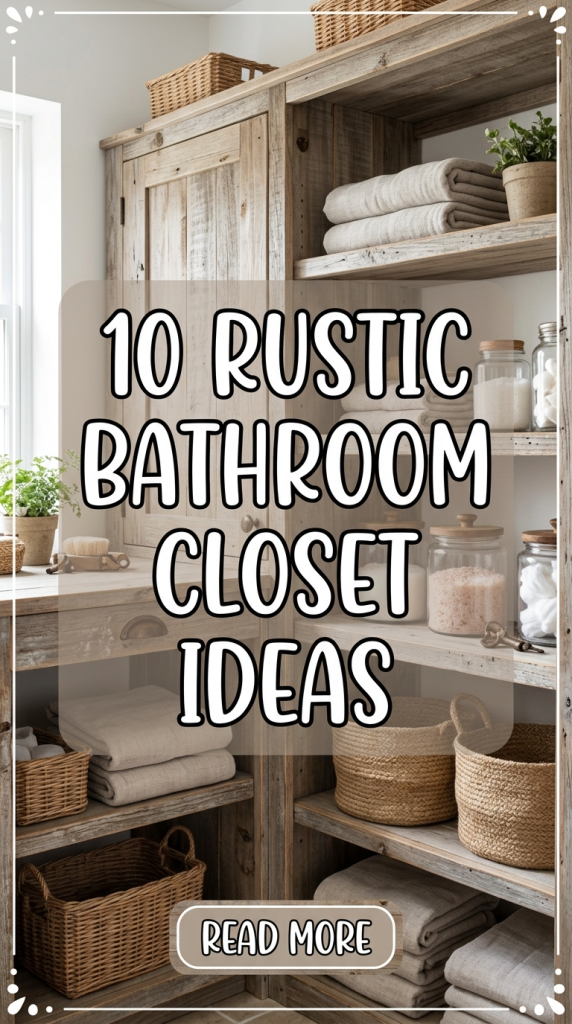
Rustic bathroom closet ideas combine natural textures, practical storage, and warm visual balance. A rustic design style is defined by raw materials, visible grain patterns, aged finishes, and functional craftsmanship. In a bathroom setting, this approach creates a grounded atmosphere while maintaining efficient organization. On Pinterest, this concept continues trending because homeowners seek both aesthetic charm and practical storage solutions. A bathroom closet is not only a utility zone; it supports daily routines, hygiene storage, towel organization, and cleaning supply management. When designed with rustic elements, the space becomes visually cohesive with farmhouse, cabin, modern rustic, or minimalist interiors. The goal is to blend structure with warmth. Open wood shelving, distressed finishes, woven textures, and metal accents often define this look. These elements work together to produce an organized yet inviting environment. This article provides ten detailed rustic bathroom closet ideas with clear step by step guidance, materials preparation, and practical execution methods. Each idea focuses on usability, durability, and visual harmony. Whether updating a small linen closet or building a new storage solution, these creative ideas offer beginner friendly, realistic direction suitable for DIY planning and long term home organization.
Why Rustic Bathroom Storage Is a Trending Pinterest Idea
Rustic bathroom closet design remains popular because it combines simplicity with authenticity. Many Pinterest users search for storage inspiration that feels natural and achievable without overly complex construction. Rustic decor emphasizes raw wood, matte finishes, and handcrafted details, which are accessible through budget friendly DIY methods. Unlike ultra-modern cabinetry that requires precise finishing, rustic materials allow for slight imperfections that add character. This makes the style beginner friendly and forgiving during installation. Additionally, homeowners increasingly prioritize organization and functional layouts. A rustic bathroom closet addresses both aesthetic and practical needs by incorporating open shelving, labeled bins, vertical storage, and flexible layouts. The style also supports sustainability by encouraging reclaimed wood and natural fibers. Warm wood tones soften the typical hard surfaces found in bathrooms, such as tile and porcelain. This balance enhances visual comfort. On Pinterest boards focused on home decor and organization, rustic bathroom closet ideas appear frequently because they photograph well, show texture clearly, and offer step by step transformation potential. The combination of structure, natural material, and visible craftsmanship makes this design category highly adaptable for both small apartments and larger homes.
Materials and Preparation for a Rustic Bathroom Closet Project
Before starting any rustic bathroom closet project, proper material planning ensures durability and moisture resistance. Bathrooms are humid environments, so wood must be sealed appropriately. Common materials include solid wood boards, plywood with wood veneer, reclaimed planks, black metal brackets, galvanized hardware, woven baskets, glass jars, and matte-finish screws. Sandpaper, wood stain, protective sealant, measuring tape, drill, wall anchors, and a level are essential tools for most DIY installations. If using reclaimed wood, inspect each piece for stability and remove old nails or debris. Preparation also involves measuring closet dimensions accurately. Note wall height, depth, and width to determine shelf spacing and storage capacity. Planning shelf spacing based on towel size, toiletry bins, and cleaning supplies improves organization. Moisture-resistant finishes are critical. Apply a waterproof sealant after staining to prevent warping. For metal components, choose powder-coated or rust-resistant materials. Ventilation within the closet should be considered as well. Adding small airflow gaps between shelves helps reduce trapped humidity. Preparing materials carefully ensures that the rustic aesthetic does not compromise long term functionality. Thoughtful planning transforms the project from a decorative update into a reliable and organized storage solution.
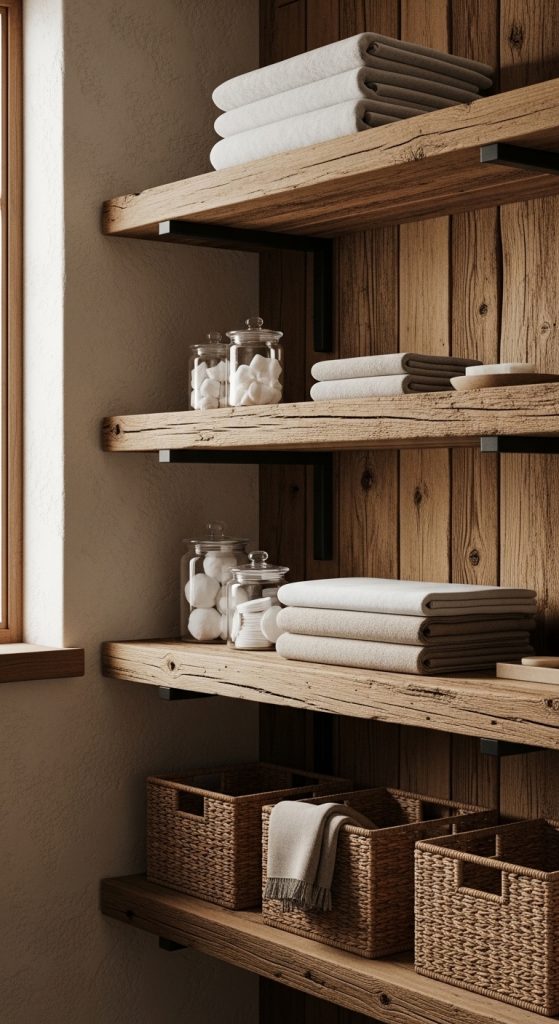
Reclaimed Wood Open Shelving for Linen Storage
How to Create Functional Rustic Wall Shelves

Reclaimed wood open shelving offers a balanced mix of storage and rustic charm. This design uses thick wooden planks mounted on visible metal brackets to create strong, durable shelves for towels and toiletries. The texture of aged wood introduces character while maintaining structural integrity. Begin by selecting planks that are at least one inch thick to support weight. Sand the surface lightly to remove splinters while preserving natural grain. Apply a medium-tone stain to enhance warmth, then seal with moisture-resistant polyurethane. Use a stud finder to secure brackets into wall studs for maximum stability. Position shelves with consistent vertical spacing, allowing enough clearance for folded bath towels and storage baskets. This setup supports both open display and organized containment. Woven baskets can hold smaller items such as skincare products or cleaning cloths. Clear glass jars may store cotton pads or bath salts. The open concept ensures quick access and visual order. This rustic bathroom closet idea is beginner friendly and adaptable for narrow closets. The combination of visible hardware and natural wood texture aligns with trending Pinterest home decor boards while offering a practical, easy project suitable for step by step installation.
Sliding Barn Door Closet Conversion
Execution Process for a Rustic Closet Entrance
A sliding barn door transforms a standard bathroom closet into a statement feature. This method replaces traditional hinged doors with a horizontal sliding system mounted above the closet opening. The rustic style relies on solid wood panels, visible metal track hardware, and matte finishes. Begin by measuring the closet opening and selecting a wood panel that extends slightly beyond the frame for full coverage. Sand and stain the surface to match surrounding decor. Attach metal rollers to the top edge according to manufacturer spacing guidelines. Install the track securely into wall studs, ensuring it is level for smooth movement. The sliding function saves space in compact bathrooms while introducing farmhouse character. Inside the closet, maintain organized shelving to complement the exterior design. This setup works particularly well in minimalist or modern rustic interiors where texture becomes the focal point. The barn door not only conceals storage but also enhances visual interest. Proper installation ensures quiet operation and long term durability. This Pinterest inspired project merges decorative design with structural practicality, making it an efficient upgrade for bathrooms needing both aesthetic enhancement and functional improvement.
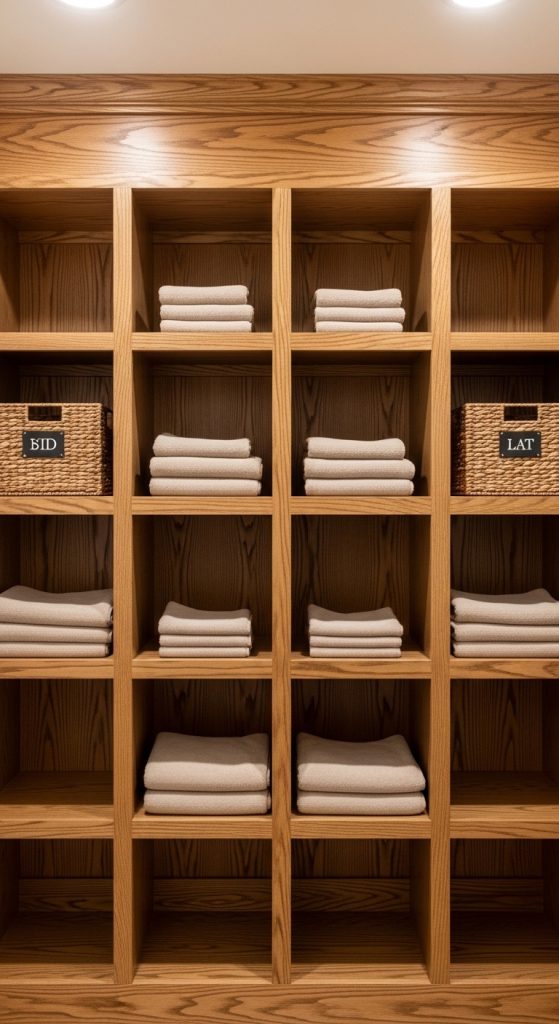
Built-In Wooden Cubby System
Step-by-Step Guide to Structured Organization

A built-in wooden cubby system maximizes vertical storage while maintaining rustic aesthetics. Cubby units divide the closet into equal sections, making it easier to categorize towels, toilet paper, and daily essentials. Begin by measuring the interior dimensions of the closet carefully. Cut plywood panels to form vertical dividers and horizontal shelves. Secure each piece with wood screws and brackets for structural stability. Sand all surfaces to ensure smooth edges and apply a stain that highlights the wood grain. Seal with moisture-resistant coating to prevent humidity damage. Each cubby can be customized to specific storage needs. Larger compartments accommodate folded bath sheets, while smaller sections store toiletries in baskets. The defined grid layout reduces clutter by assigning clear zones for every item. This organization method is particularly helpful for shared bathrooms. Labeling baskets within cubbies improves accessibility. The symmetrical arrangement supports minimalist style while preserving rustic warmth through visible wood texture. This design works well for DIY enthusiasts seeking an easy project with measurable results. The structured approach enhances both functionality and visual balance, aligning with trending Pinterest ideas focused on organization and practical home improvement.
Rustic Ladder Shelf Closet Insert
How to Make a Leaning Shelf System
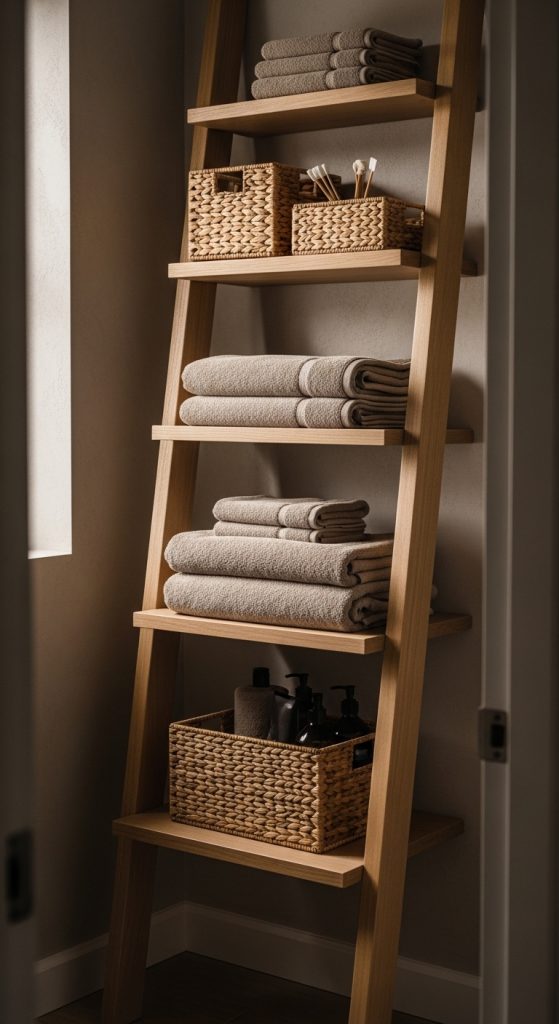
A ladder shelf insert introduces a flexible storage solution without permanent installation. This design features a leaning wooden ladder frame with gradually widening shelves toward the bottom. To create this structure, cut two long wooden boards for side supports and attach horizontal planks at angled positions. Secure joints with wood glue and screws. Sand thoroughly and apply a natural stain for warmth. Place the ladder inside the closet, leaning it securely against the back wall. The open design allows airflow, reducing moisture buildup. Upper shelves store lightweight items such as rolled towels, while lower levels support heavier baskets. This system works well in rental spaces because it does not require wall drilling. The tapered shelf spacing creates visual depth and layered organization. Adding woven bins enhances texture while maintaining a cohesive rustic aesthetic. This creative project balances storage with decorative appeal. It provides flexibility in arrangement and can be repositioned easily. As a beginner friendly tutorial idea, the ladder shelf supports modern design preferences while remaining grounded in natural materials. Its simple structure and adaptable layout make it a practical addition to many bathroom closet configurations.
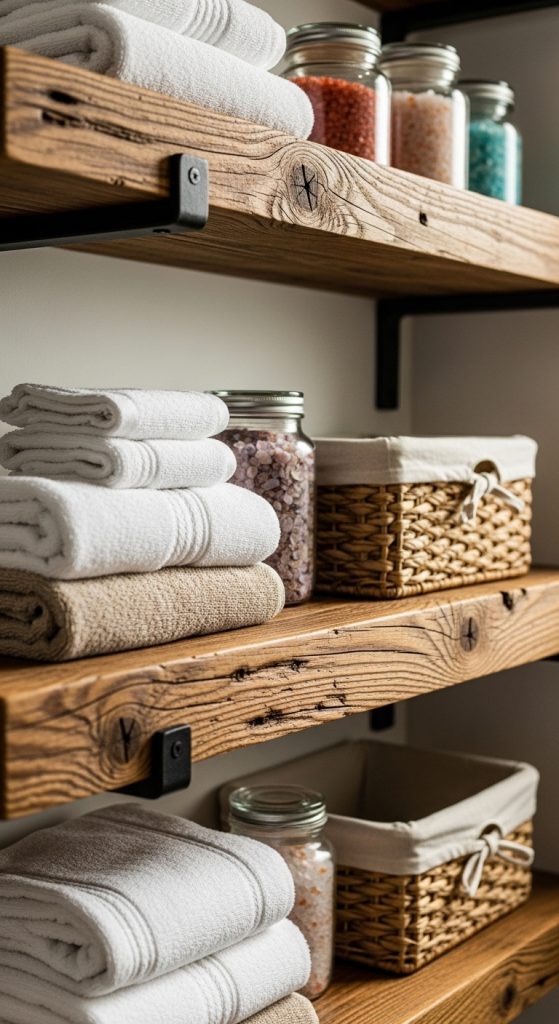
Wire Basket and Wood Shelf Combination
Setup Method for Balanced Storage
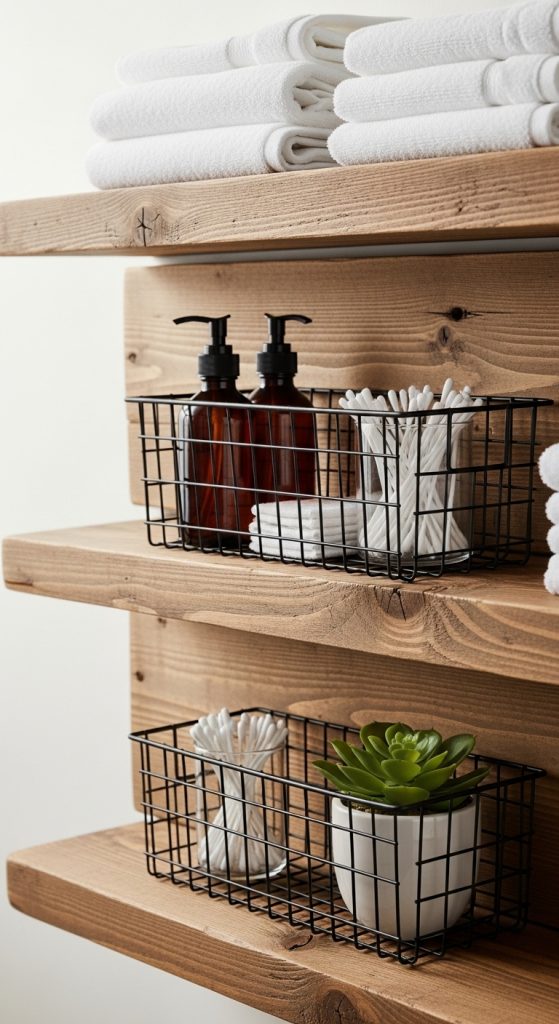
Combining wood shelves with black wire baskets introduces texture contrast while maintaining rustic cohesion. Install sturdy wooden shelves using metal brackets for support. Position wire baskets directly on the shelves to contain smaller bathroom essentials. This design improves visibility and prevents clutter from spreading across flat surfaces. Choose baskets with open grid patterns for easy identification of contents. Line baskets with fabric inserts to prevent smaller items from slipping through gaps. This setup method supports both airflow and accessibility. Wire elements add an industrial edge while wood maintains warmth. Organize items by category within each basket to streamline daily routines. Towels can remain folded on open shelf space above or below baskets. The mix of materials produces visual interest without overwhelming the closet interior. The structure remains simple and beginner friendly, requiring only accurate measurements and secure mounting. This approach aligns with Pinterest trends focused on organization and aesthetic balance. It demonstrates how combining two contrasting materials can elevate a practical storage solution into a cohesive rustic design feature.
Distressed Cabinet with Open Upper Shelves
How to Create a Two-Zone Storage Layout
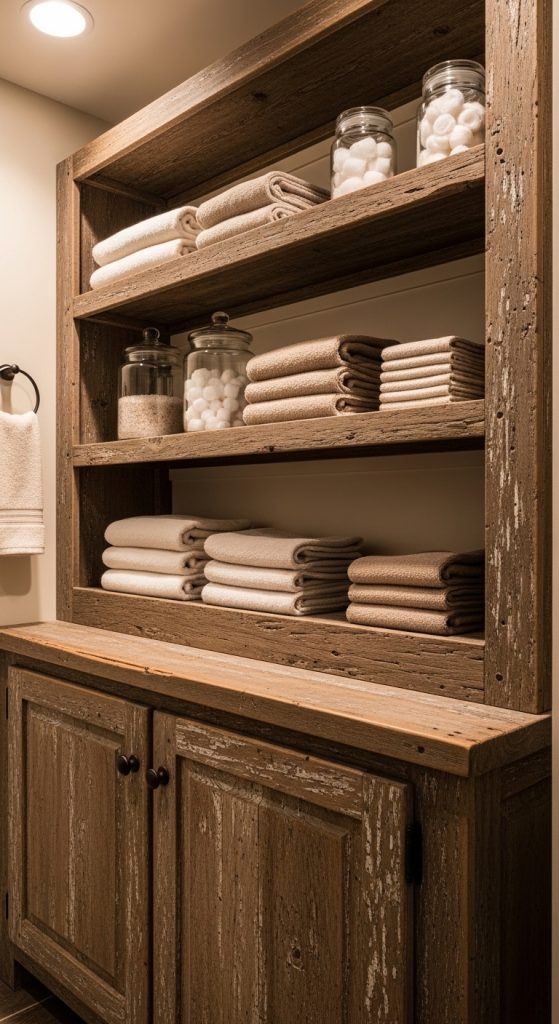
A distressed cabinet paired with open upper shelving provides concealed and visible storage in one cohesive unit. Begin by installing a small wooden cabinet at the lower section of the closet. Sand edges lightly to create a distressed effect, then apply a muted stain. Above the cabinet, mount two or three open wood shelves using sturdy brackets. The lower cabinet hides cleaning supplies and bulk items, while upper shelves display folded towels or decorative jars. This dual-zone design increases efficiency by separating private storage from frequently accessed items. Ensure cabinet doors align properly and use moisture-resistant finishes. This layout maintains visual order while preserving rustic texture. The contrast between closed and open storage areas improves organization flow. It also supports minimalist design by limiting visible clutter. The structured yet warm appearance makes it suitable for farmhouse and cabin inspired interiors. This method emphasizes both practicality and layered design. It serves as an effective Pinterest inspired solution for small bathrooms requiring balanced storage capacity.
Floating Wood Shelf Stack with Vertical Spacing
Execution Process for Space Optimization
Floating shelves create a streamlined rustic bathroom closet with clean lines and open visibility. Install thick wooden planks directly onto hidden wall brackets for a seamless appearance. Measure vertical spacing carefully to accommodate towel stacks and storage containers. Secure brackets into studs for weight support. Sand and stain wood surfaces to highlight grain texture. Apply a waterproof sealant to protect against humidity. The floating design reduces visual heaviness while maximizing usable height. Arrange items evenly to maintain balance. Keep heavier objects on lower shelves to prevent strain. The absence of visible supports creates a minimalist yet rustic look. This approach works well in narrow closets where depth is limited. It allows clear organization and easy cleaning access. The layered shelf stack transforms unused vertical wall space into functional storage. As a beginner friendly DIY project, it requires precision but remains achievable with basic tools. This structure blends aesthetic simplicity with efficient organization.
Wooden Crate Modular Storage Units
Step-by-Step Guide to Customizable Compartments
Wooden crates offer modular flexibility for rustic bathroom closet organization. Select sturdy crates with solid bases. Sand edges and apply stain to achieve consistent color. Stack crates vertically or horizontally depending on closet width. Secure them together using screws for stability. This modular method allows rearrangement as storage needs change. Each crate functions as an independent compartment. Use larger crates for towels and smaller ones for toiletries. The open front design ensures easy access. Lining crates with fabric softens appearance while protecting contents. The stacked configuration maximizes space without permanent installation. This DIY tutorial supports creativity while maintaining order. The raw wood texture enhances rustic character. This approach is budget conscious and adaptable for various closet sizes. Its flexibility makes it suitable for evolving household storage requirements. Modular crates align with Pinterest inspiration focused on practical organization and handmade solutions.
Farmhouse Style Closet Rod with Wood Shelf
How to Install a Dual-Purpose Hanging Area

A farmhouse closet rod combined with a wood shelf introduces hanging storage within a bathroom closet. Install a sturdy wooden shelf across the upper interior wall. Beneath it, mount a metal rod secured into studs. This structure allows towels to hang while storing folded items above. Sand and stain the shelf for moisture protection. Ensure the rod is level and capable of supporting damp towels. This design supports airflow, reducing mildew risk. It is especially useful in family bathrooms with multiple users. The combination of vertical hanging space and horizontal shelving improves storage density. This rustic configuration balances practicality with visual warmth. The metal rod contrasts with wood elements, reinforcing farmhouse style. Clear spacing between rod and shelf ensures easy access. This project requires accurate measurement and secure anchoring. It enhances organization without overcrowding the closet interior.
Rustic Corner Shelf Utilization
Setup Method for Unused Space
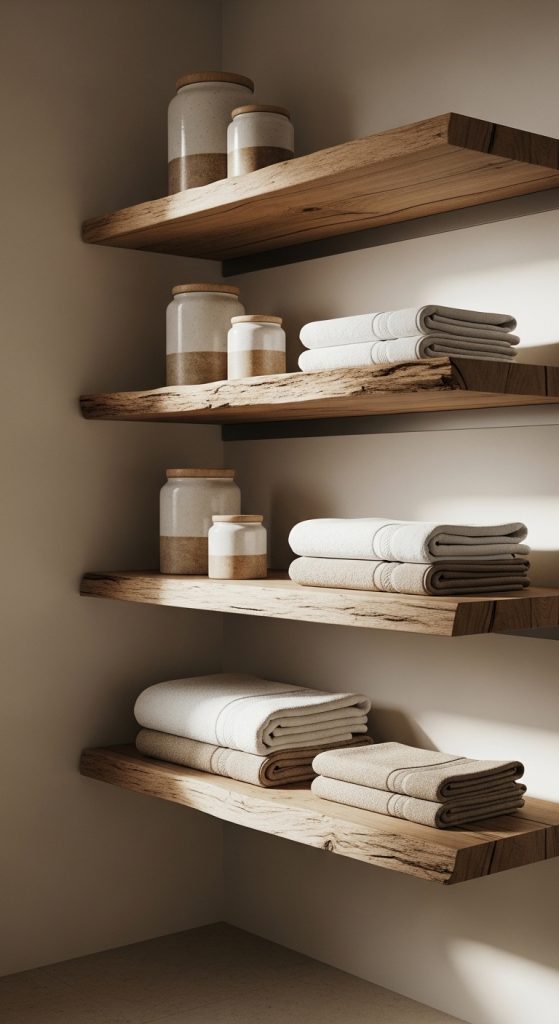
Corner shelves optimize overlooked areas within a bathroom closet. Measure corner angles precisely before cutting triangular wooden shelves. Sand edges and stain to match other wood elements. Install each shelf using strong corner brackets secured into studs. Position shelves evenly for balanced appearance. This design transforms dead space into functional storage. Smaller items such as folded washcloths or decorative containers fit efficiently on triangular surfaces. The layered arrangement increases vertical capacity. Ensure sealant application to protect against humidity. Corner shelving works particularly well in compact closets where width is limited. The angled layout creates depth and architectural interest. This solution supports organization without reducing walking space. It represents a practical and aesthetic rustic bathroom closet idea suitable for step by step DIY execution.
Common Beginner Mistakes and How to Avoid Them
Many beginners underestimate the impact of bathroom humidity on wood materials. Failing to apply moisture-resistant sealant can cause warping or discoloration over time. Another common mistake involves improper measurement before installation. Inaccurate spacing results in shelves that do not accommodate standard towel sizes. Overloading floating shelves without anchoring into studs compromises structural safety. Choosing untreated metal hardware may lead to rust. Avoid overcrowding open shelves, as excessive visible items create visual clutter. Instead, categorize items clearly and use baskets for containment. Skipping ventilation planning also contributes to trapped moisture. Leaving small airflow gaps between shelves reduces this risk. Planning carefully prevents structural issues and extends longevity. Attention to detail during preparation ensures that rustic design elements remain functional and durable.
Practical Tips for Better Results
Maintaining consistency in wood tone creates cohesive visual balance. Test stain samples before full application. Allow sufficient drying time between staining and sealing. Use a level during installation to prevent uneven shelves. Incorporate labeled storage containers for improved organization. Rotate stored items periodically to prevent moisture buildup. Keep heavier items on lower shelves for stability. Clean wood surfaces with mild, non-abrasive solutions to preserve finish. Selecting natural fiber baskets enhances texture without overwhelming the design. Combining open and closed storage zones maintains visual clarity. Careful planning and consistent finishing techniques significantly improve overall results.
Styling and Organization Presentation Ideas
Presentation influences how rustic bathroom closet ideas appear in daily use. Fold towels uniformly to create clean lines. Arrange items symmetrically across shelves. Use neutral colored containers to complement wood tones. Limit decorative accents to prevent distraction from organization. Transparent jars maintain accessibility while adding subtle detail. Place frequently used items at eye level for convenience. Maintain spacing between objects to avoid overcrowding. This styling approach ensures the closet remains both practical and visually aligned with modern rustic home decor themes.
Budget and Time Planning for DIY Execution
Planning costs in advance improves project efficiency. Reclaimed wood reduces material expenses but requires additional preparation time. Basic shelving installations typically require one weekend for completion. More complex builds, such as cubby systems or barn doors, may extend to multiple days. Allocate time for sanding, staining, drying, and sealing. Purchase hardware in appropriate quantities to avoid delays. Reusing existing materials minimizes budget strain. Structured scheduling ensures the project progresses smoothly without rushed decisions.
Expanding Rustic Bathroom Closet Design Further
Once foundational storage is established, additional customization can enhance the design. Integrated lighting improves visibility inside darker closets. Installing battery-powered LED strips along shelves increases functionality. Adding decorative hooks to side walls supports extra hanging space. Introducing small greenery elements in sealed containers softens the interior visually. Combining rustic elements with minimalist layout principles ensures the space remains organized. These expansion ideas allow homeowners to evolve their bathroom closet gradually while maintaining cohesive rustic character.